• Home
  • Blog
  • 2020 Finish - A - Long
  • 2019 Finish - A - Long
  • 2018 Finish - A - Long
  • Contact
  • 2017 Finish - A - Long
  • Shop
Marci Girl Designs

City Sampler Quilt - A Finish

4/9/2018

7 Comments

 
FINALLY, FINALLY we are here today with a finish.  It took a bit of digging on the blog, but I found out that I started this project mid-June 2013, you can see that first post HERE. Four years and nine months to be exact.  That is a long time to work on a project, but I'm happy to report it is finished and on my bed!
Picture
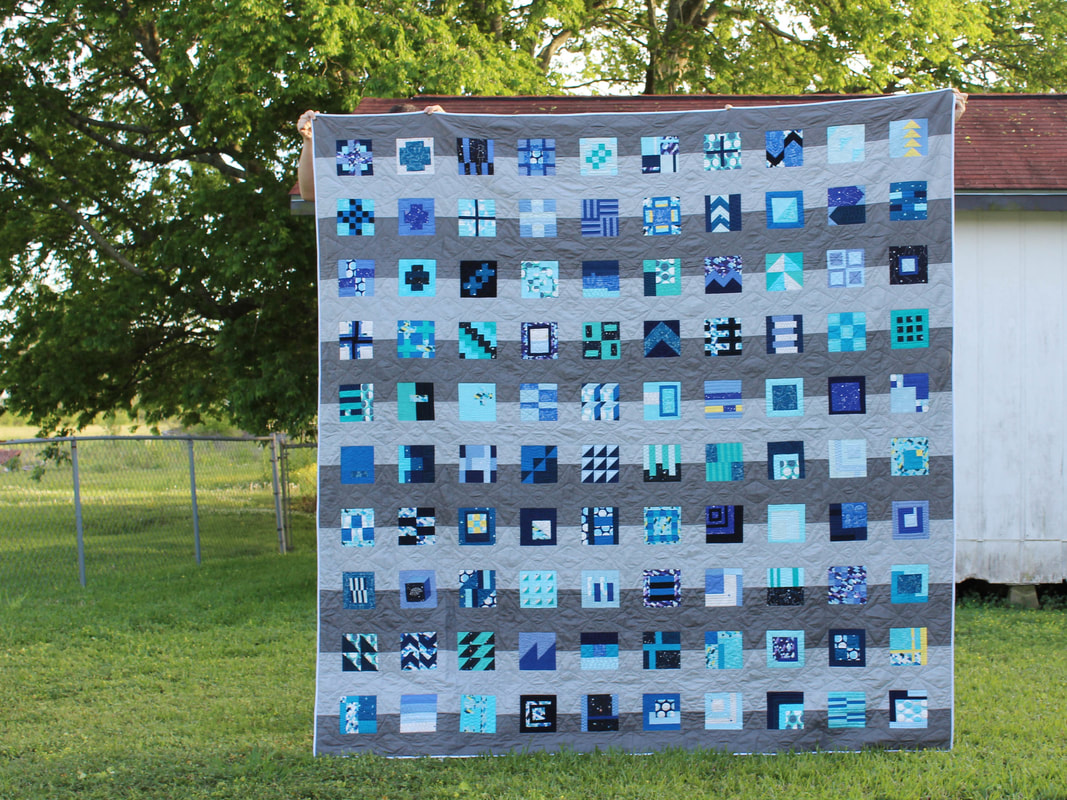
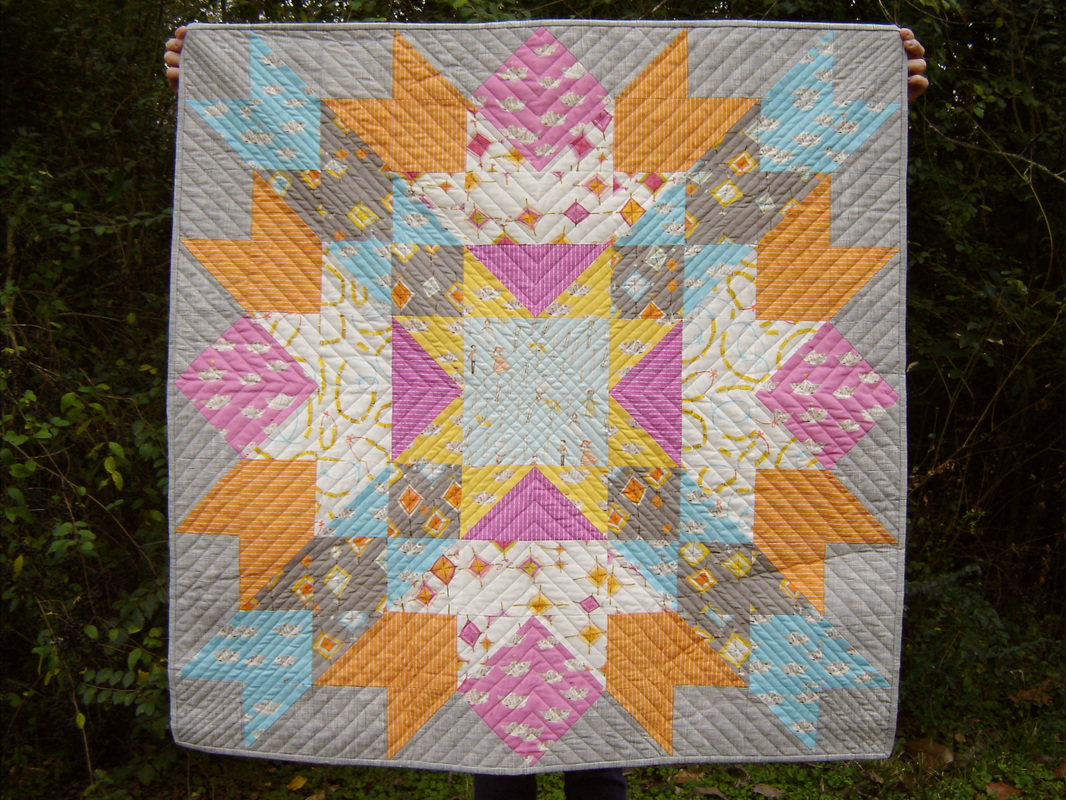
A brief history - This quilt is from the book, Tula Pink's City Sampler, 100 Modern Quilt Blocks.  It was started in 2013 as part of a Sew Sweetness quilt along, if I remember correctly, I finished all the blocks in time to link up at the end of the quilt along.  I used Lizzy House's fabric line Constellations and matching solids to construct the blocks.   I believe the blocks sat for quite some time while I decided on layout and ordered fabric.  I chose one of the finishes from the book and the two gray solids are Hawthorne Threads solids line, Hawthorne Hues.  I constructed the quilt top and ordered backing (a Riley Blake wide back) as I didn't want to have to piece it.  My mom helped me baste this monster on my kitchen floor and then the quilt sat for quite some time.  In 2016 Gnome Angel hosted an Instagram event, #100days100blocks and instead of making the blocks I decided to quilt the blocks in the same manner in which they were quilted in the book in the 100 day time frame.  I met that deadline and quilted each of the individual blocks.  Then the quilt sat again until the beginning of this year when I decided it was time to get this monster finished (and my husband said he was tired of seeing it folded and full of safety pins.)
Picture
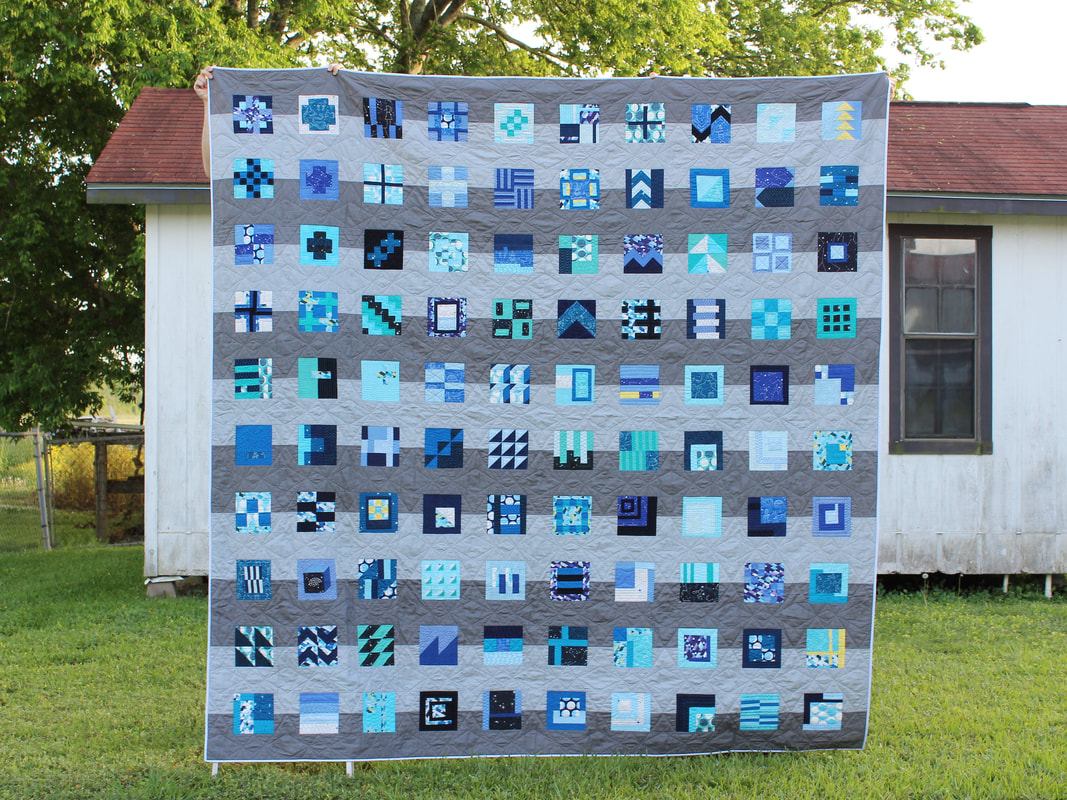
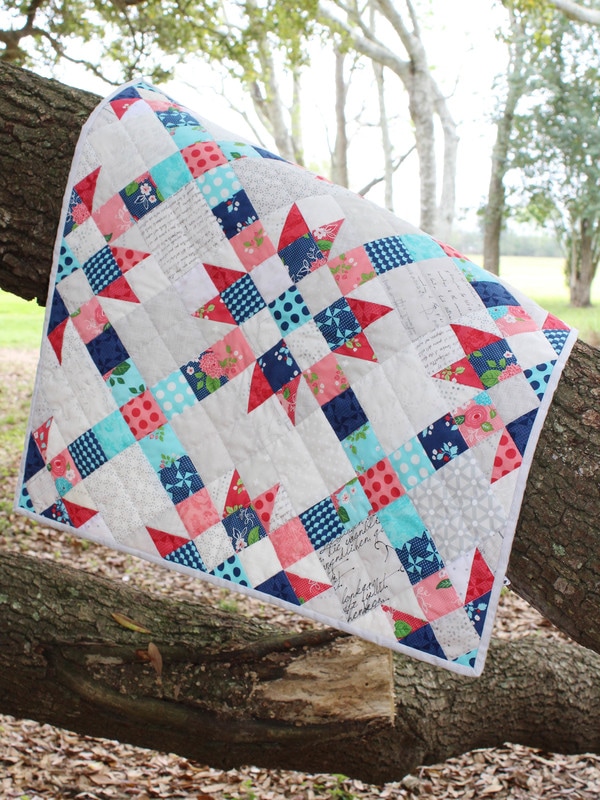
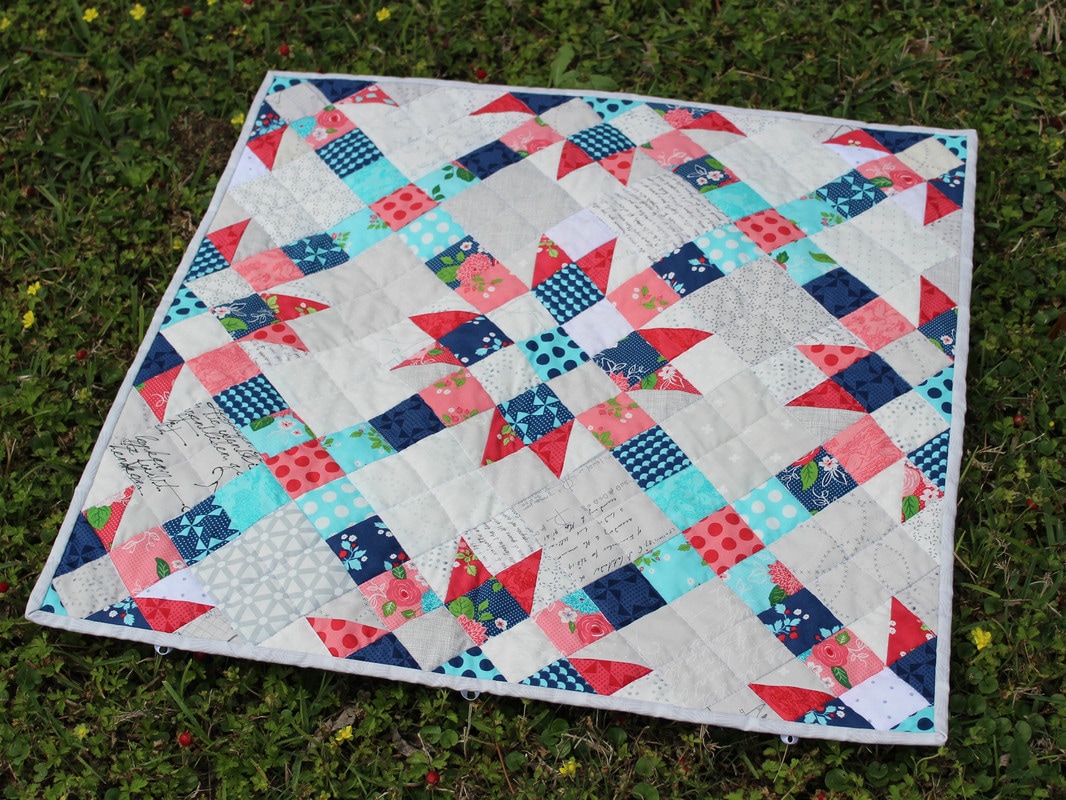
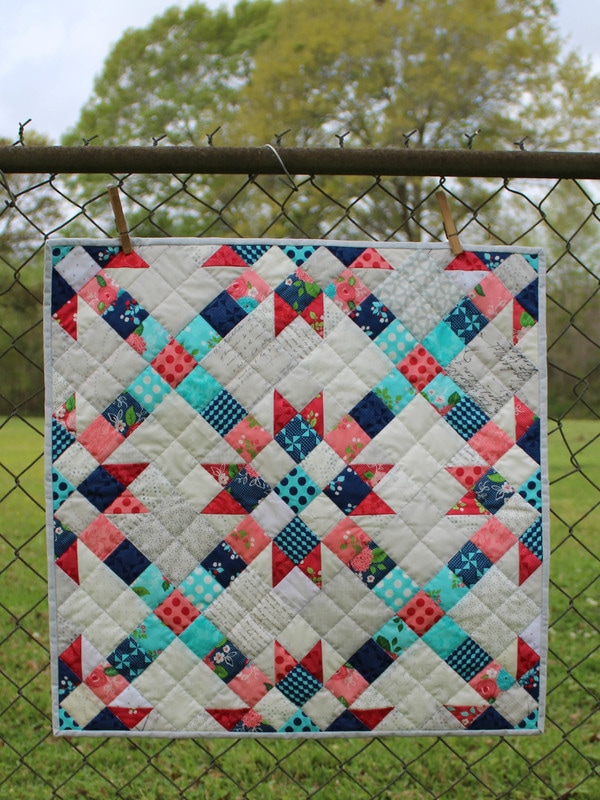
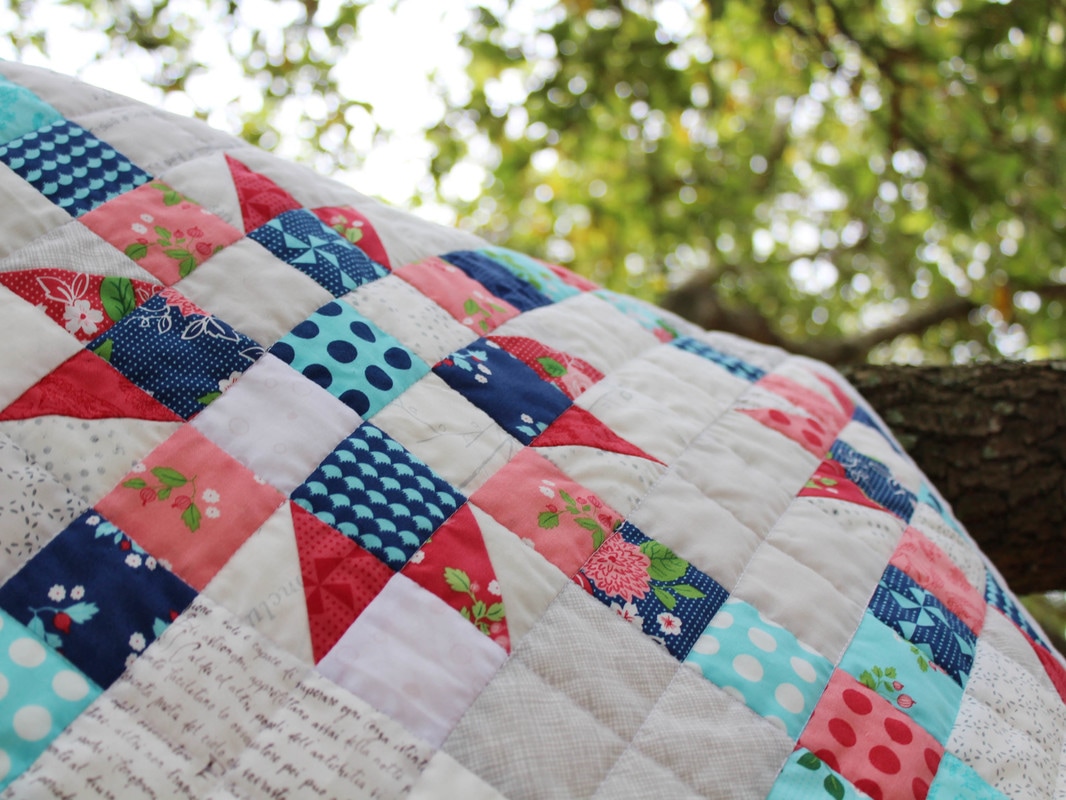
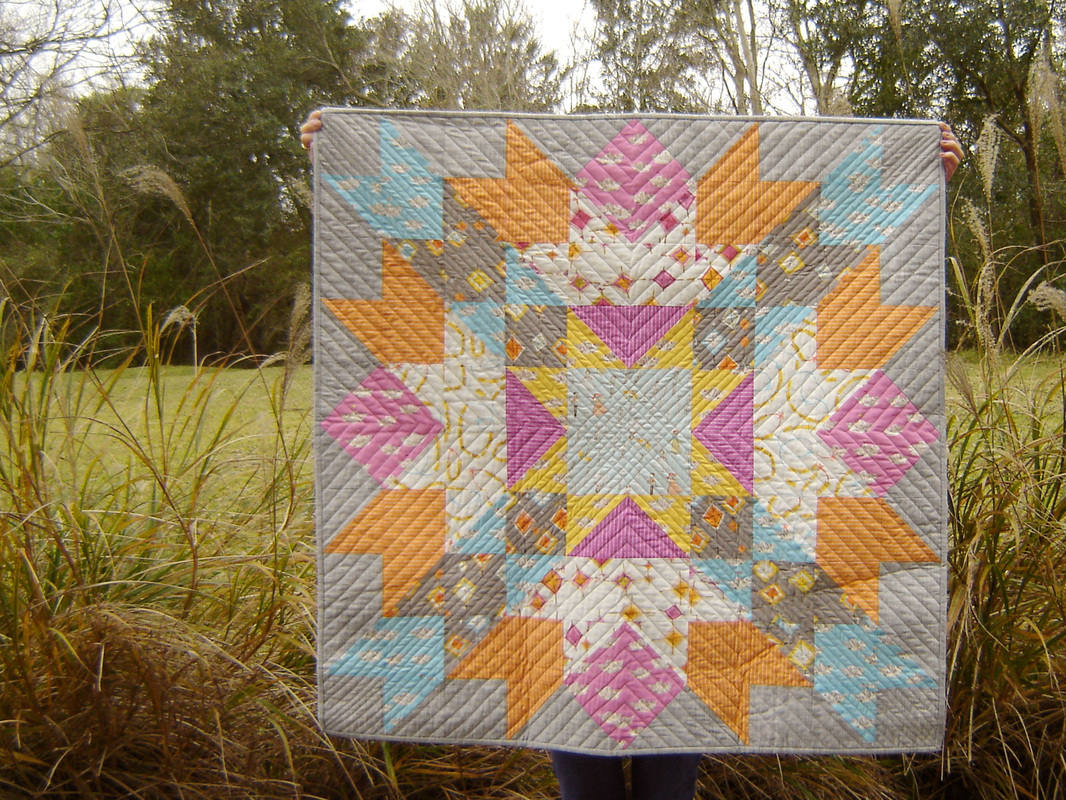
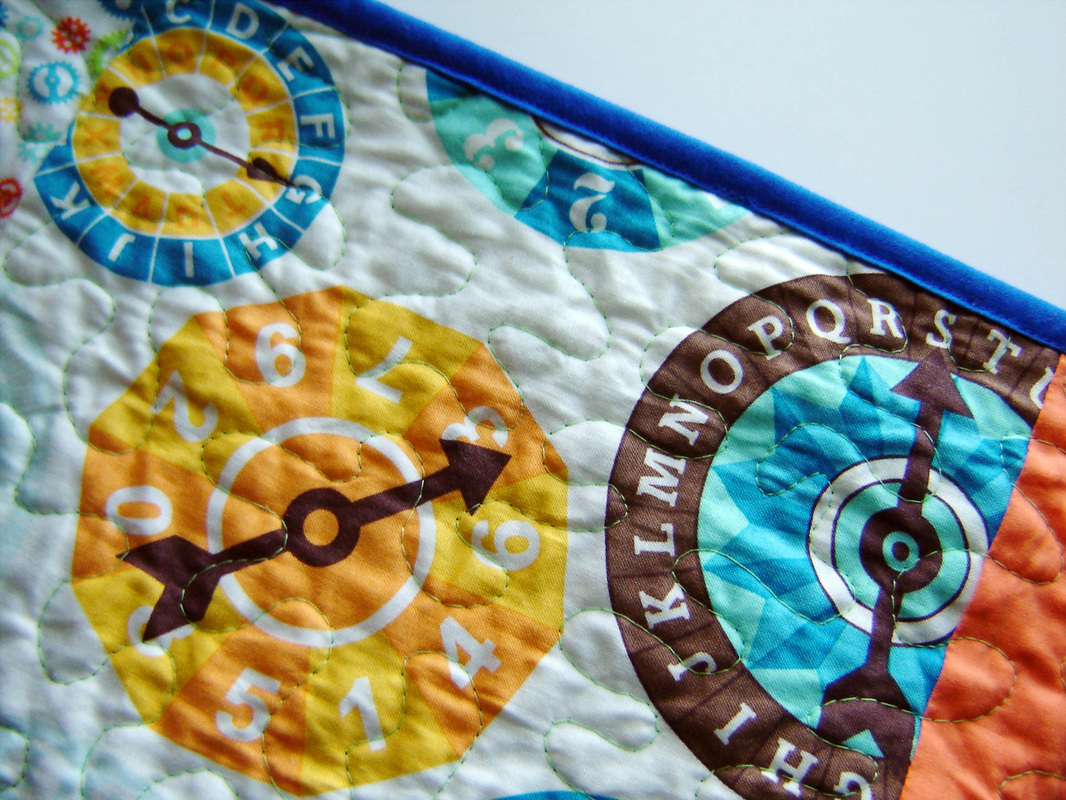
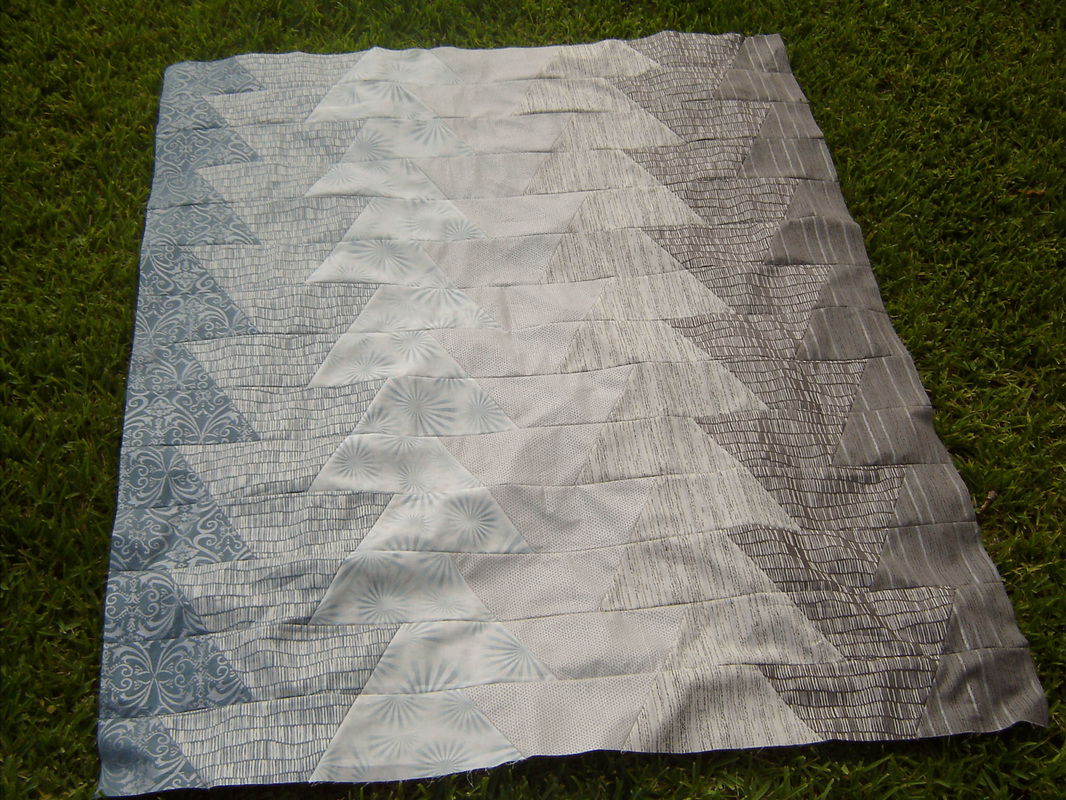
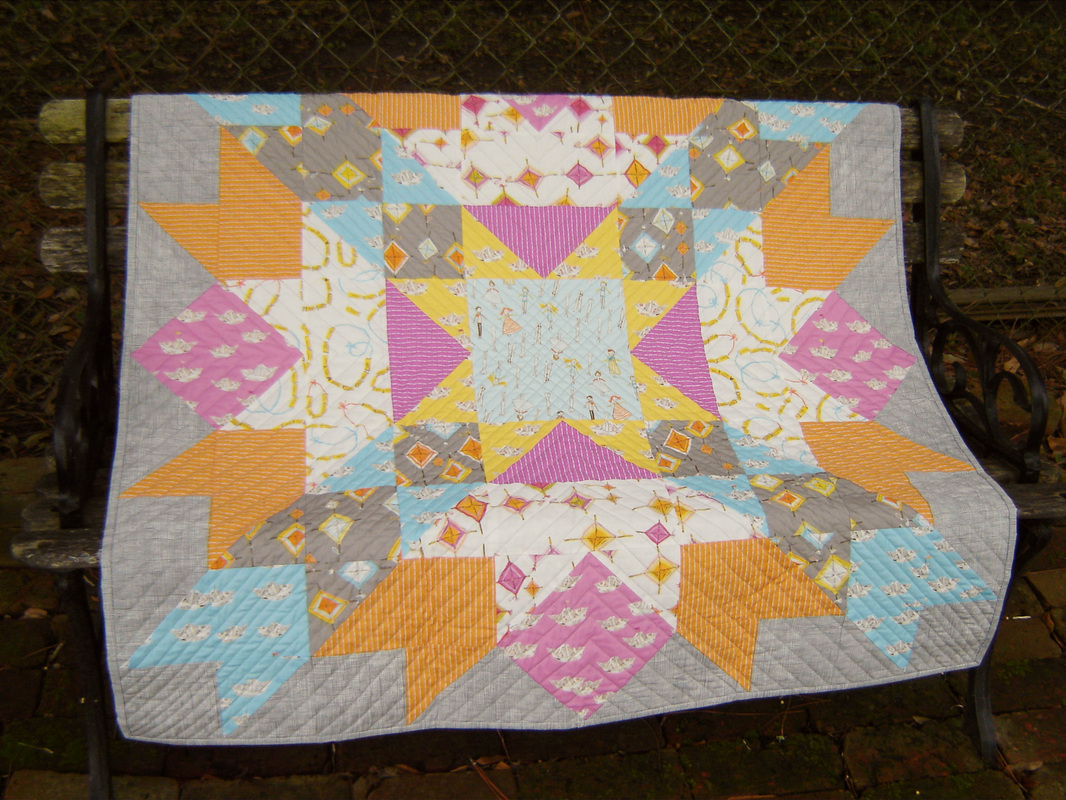
The quilting story - All 100 blocks were quilted using free motion quilting and based on how they were quilted in the book.  The blocks in the book were quilted by Angela Walters and I thought it would be a great learning experience to duplicate how she had quilted each block.  Boy was it a great learning experience and I highly recommend it!  By the time I had finished quilting all 100 blocks I really felt that I had a great grasp on free motion quilting.  This was the easy part, the hard part was deciding on how I was going to quilt the stripes or background and why the project sat for so long. I was so hung up on the idea that it had to be free motion quilted and I kept circling around some kind of "star or celestial" theme.  In the end I just couldn't figure out a way to make it work and I just picked up the quilt.  Fast forward to January of this year, Debbie at A Quilter's Table was working on a table runner for her mom and talked about the book Walk by Jacquie Gering, which I already owned but had yet to read.  I started reading the book and it just hit me!  Why not straight line quilt it using the techniques/designs from this book?  I was overthinking it as usual.  I pulled out the quilt and using the blocks and stripes as a connect the dots of sorts was able to use the Point-To-Point Lines technique in the book and created this really cool diamond pattern seen below.
Picture
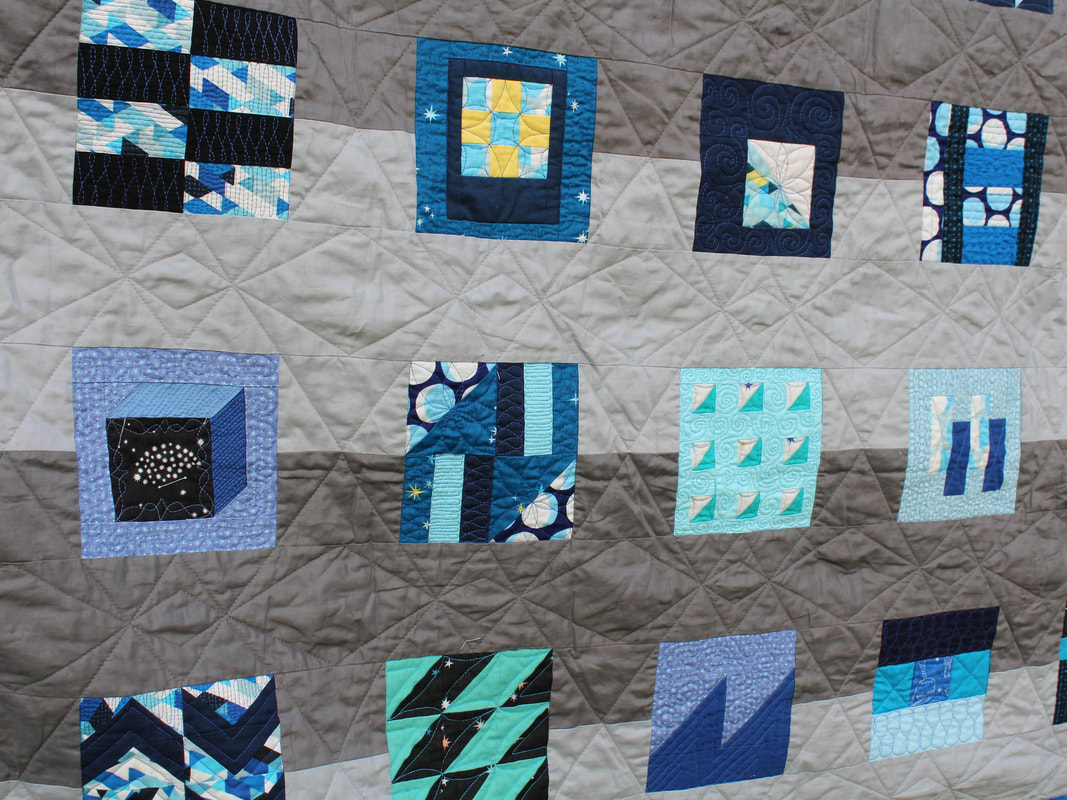
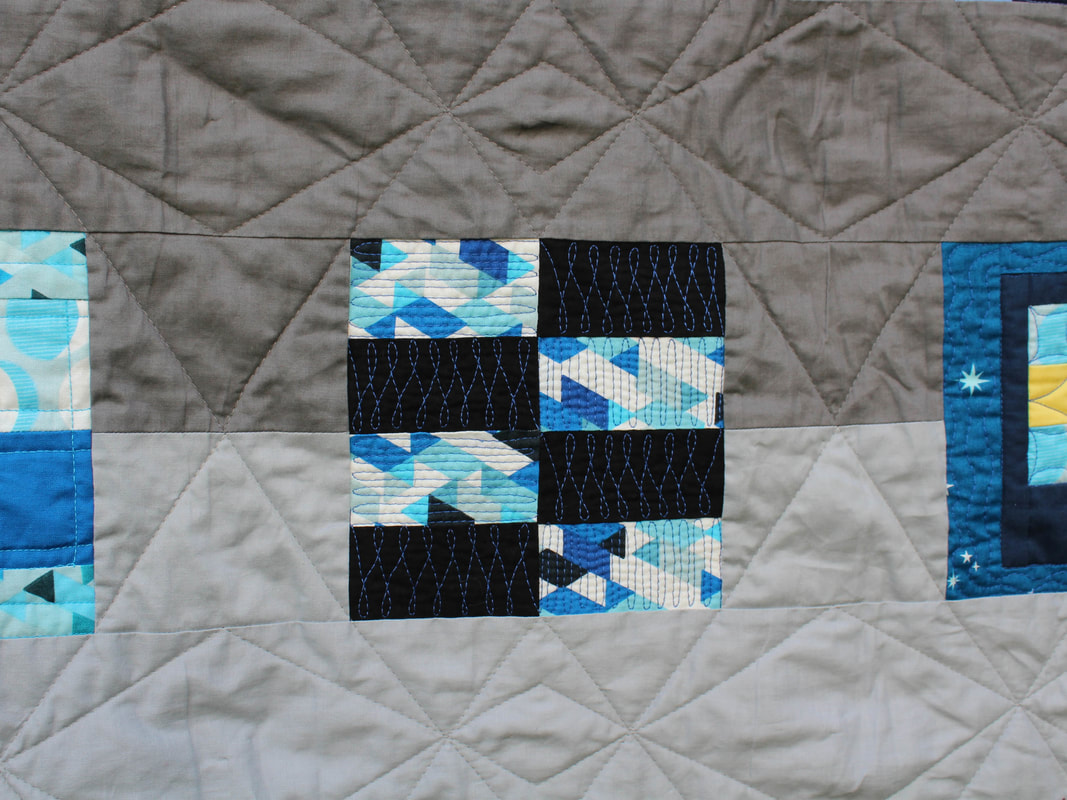
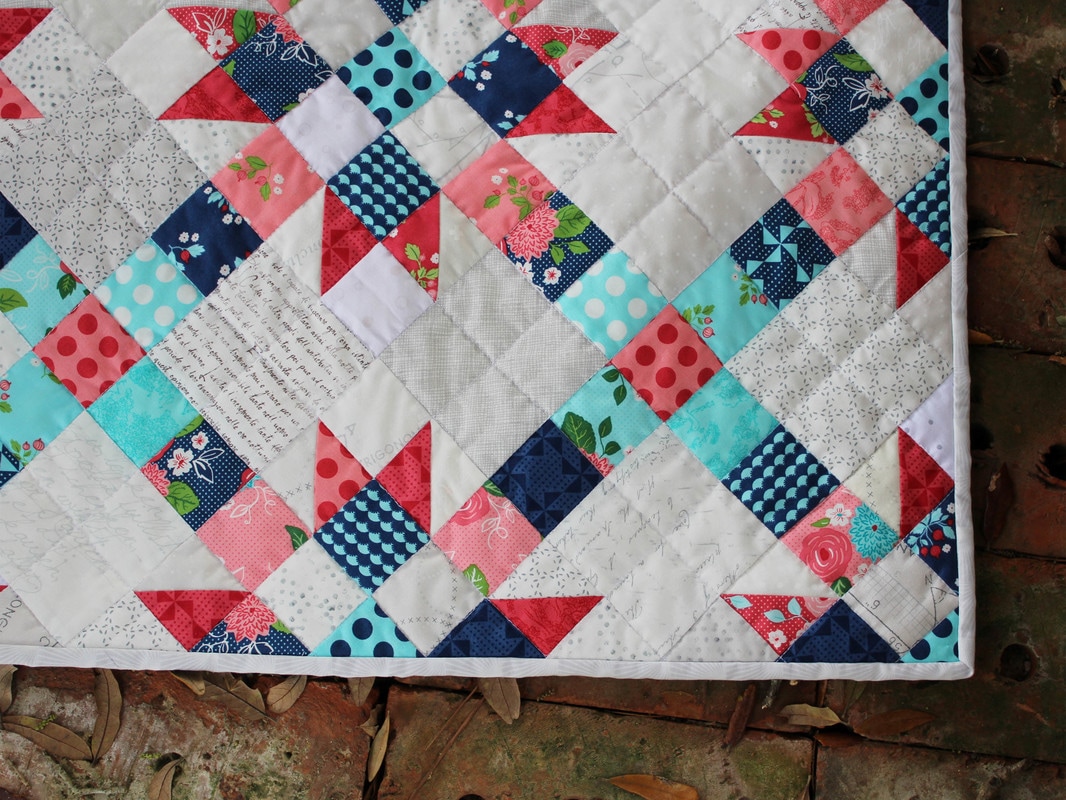
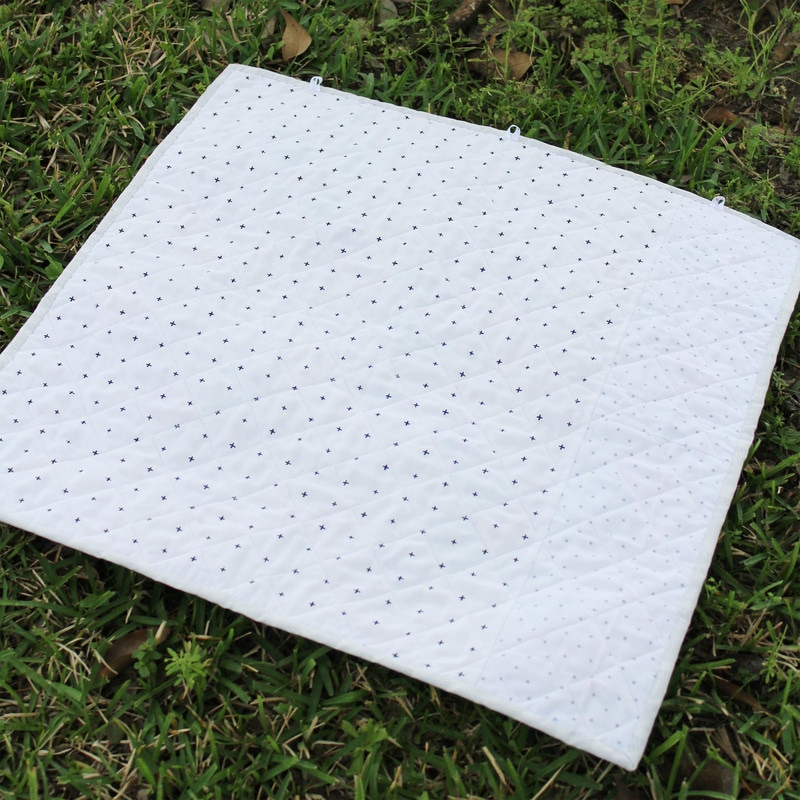
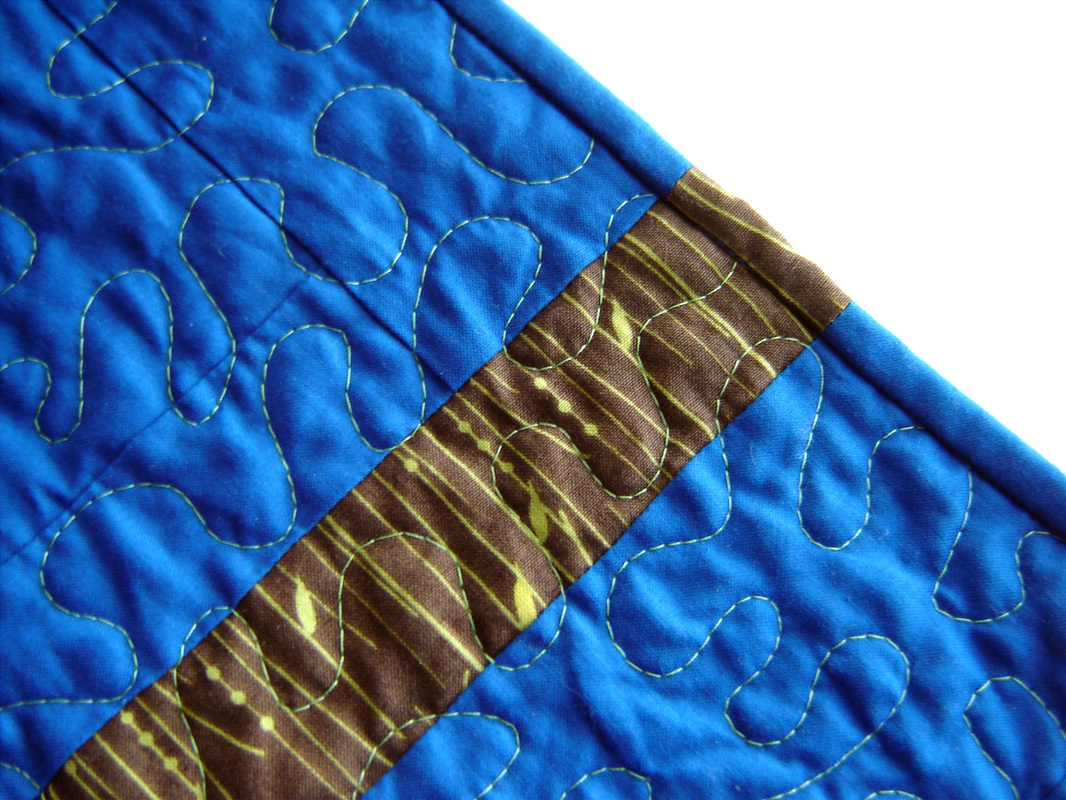
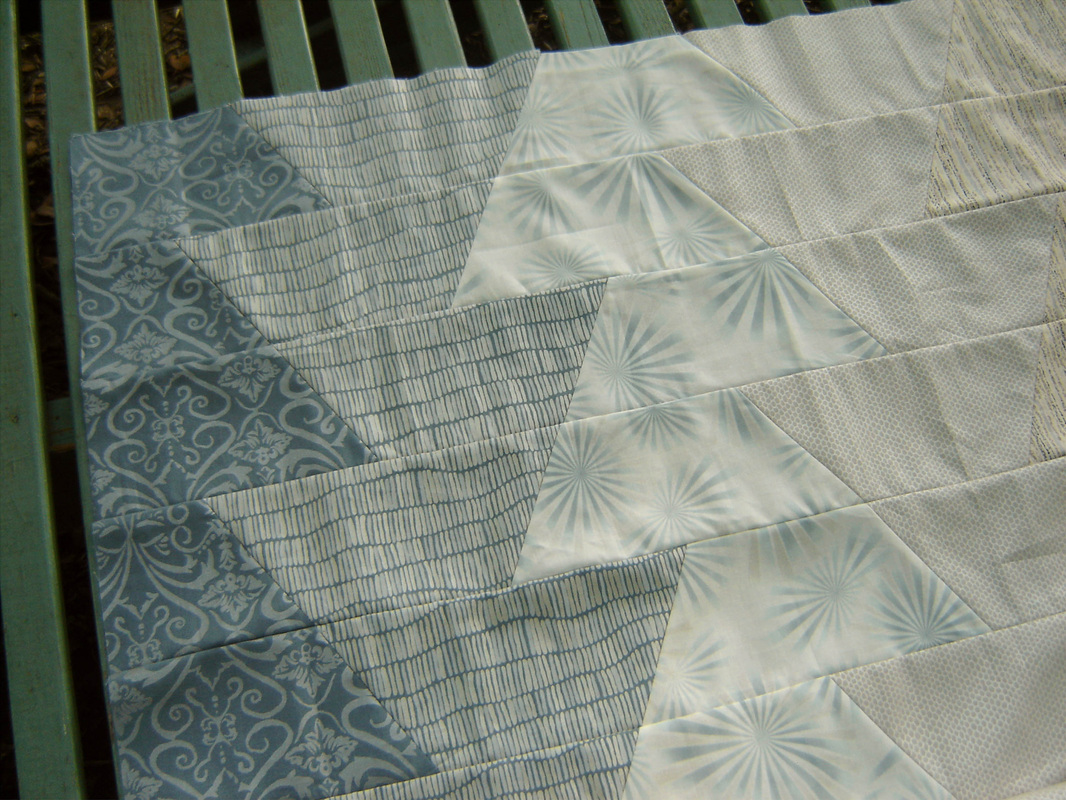
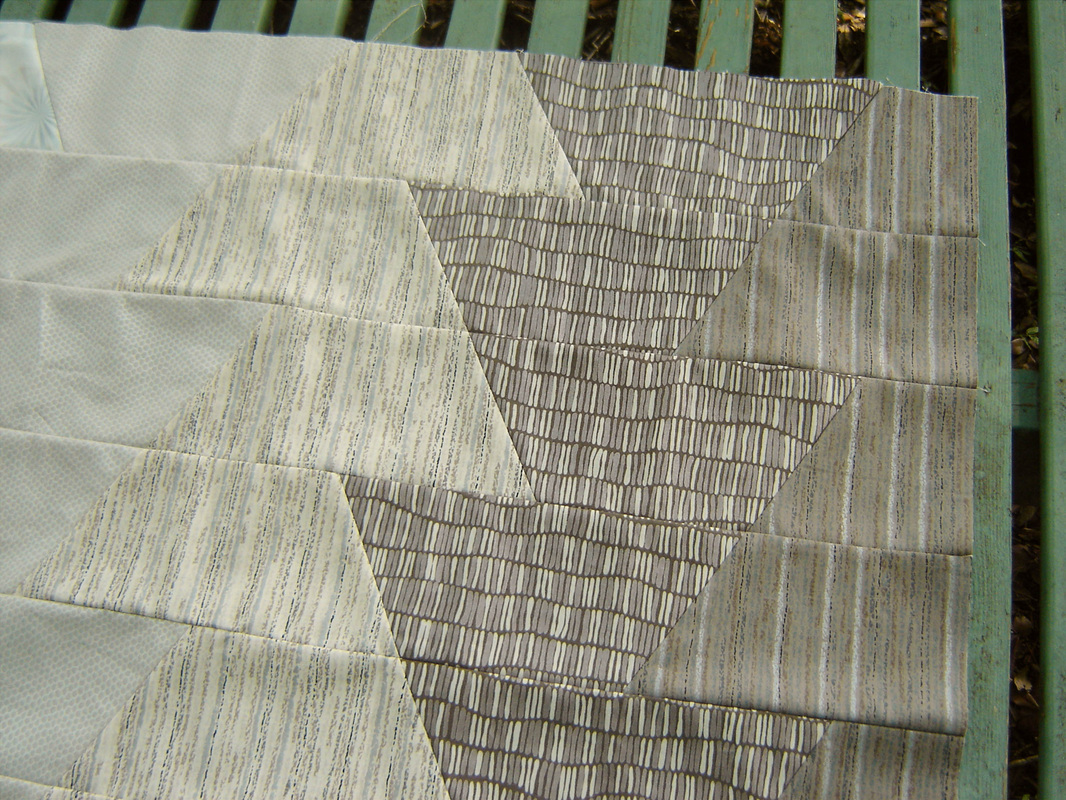
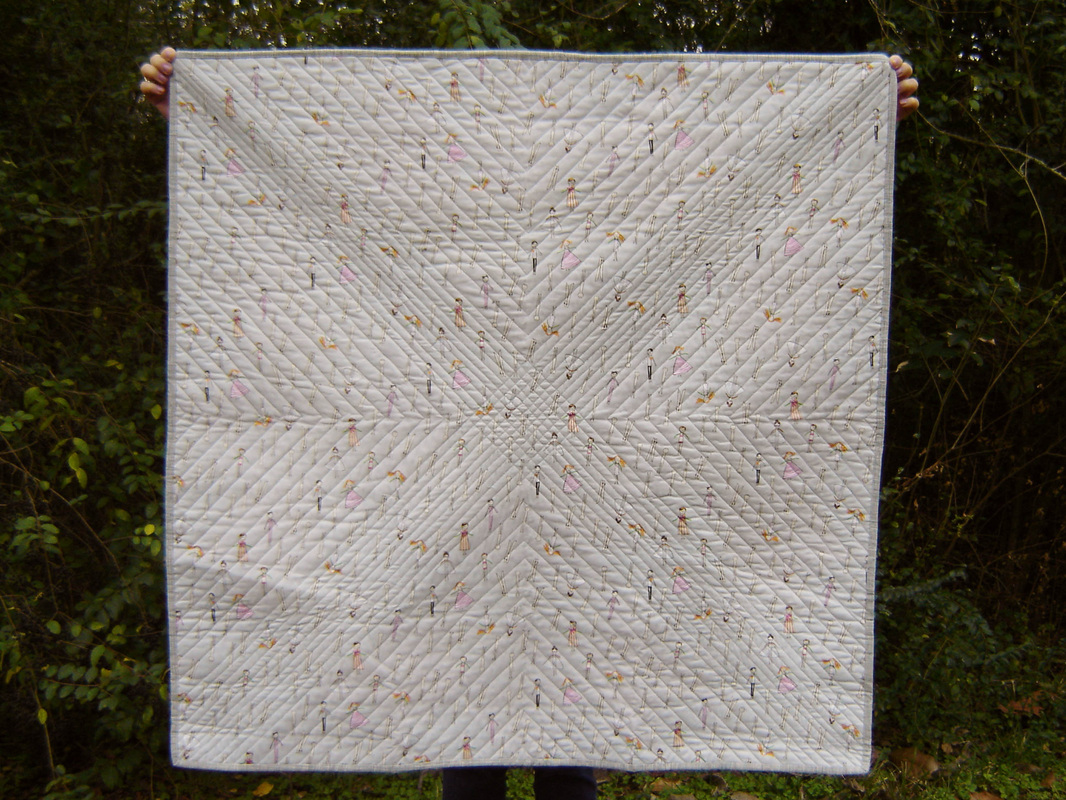
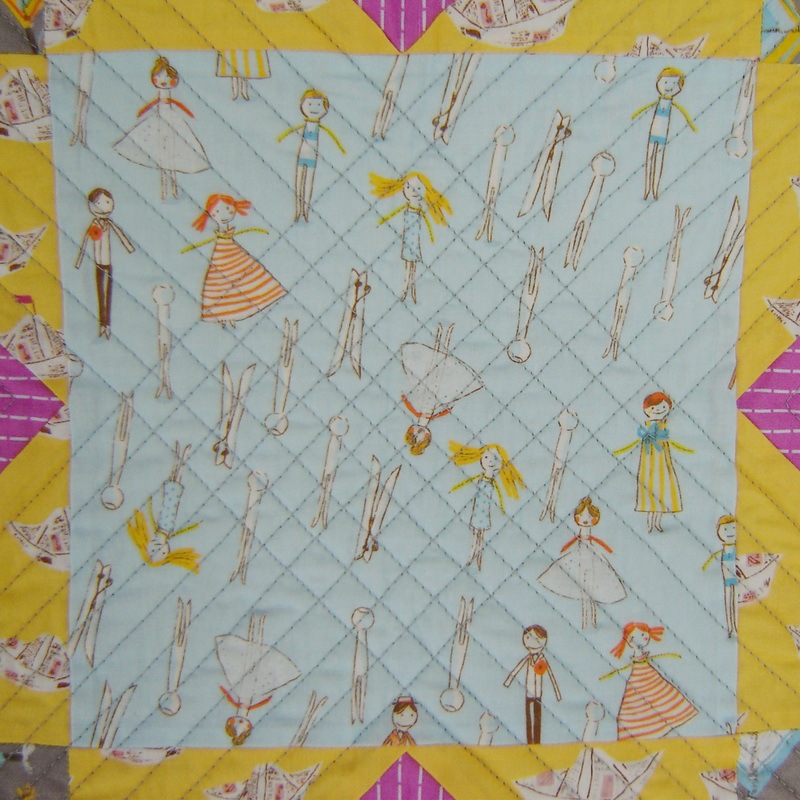
I started with the dark stripes and marked the centers between each block and the centers of each block that extend into the stripe.  Then using my hera marker I "connected" the dots creating large and small diamonds.  I quilted all the dark stripes in this manner.  When that was complete I went back and added in the smaller diamonds that are in the center, once again, marking centers and using my hera marker.  Once all the dark gray lines were complete (half of the quilt finished) I switched to the light stripes.  I had to mark considerably less since I was matching up to the dark stripes.  You can see this below where the diamond points meet from the dark to the light stripes.  I used matching 40 weight Aurifil 100% cotton thread and had no issues from the start.  No breaking, no tension issues, it worked perfectly.  The quilting took me roughly 3 weeks to finish, working a few lines every day until it was done.  I quilted it on my Juki 2010, using a size 14 stretch needle, and I wrestled the hell out of it as it is really heavy.
Picture
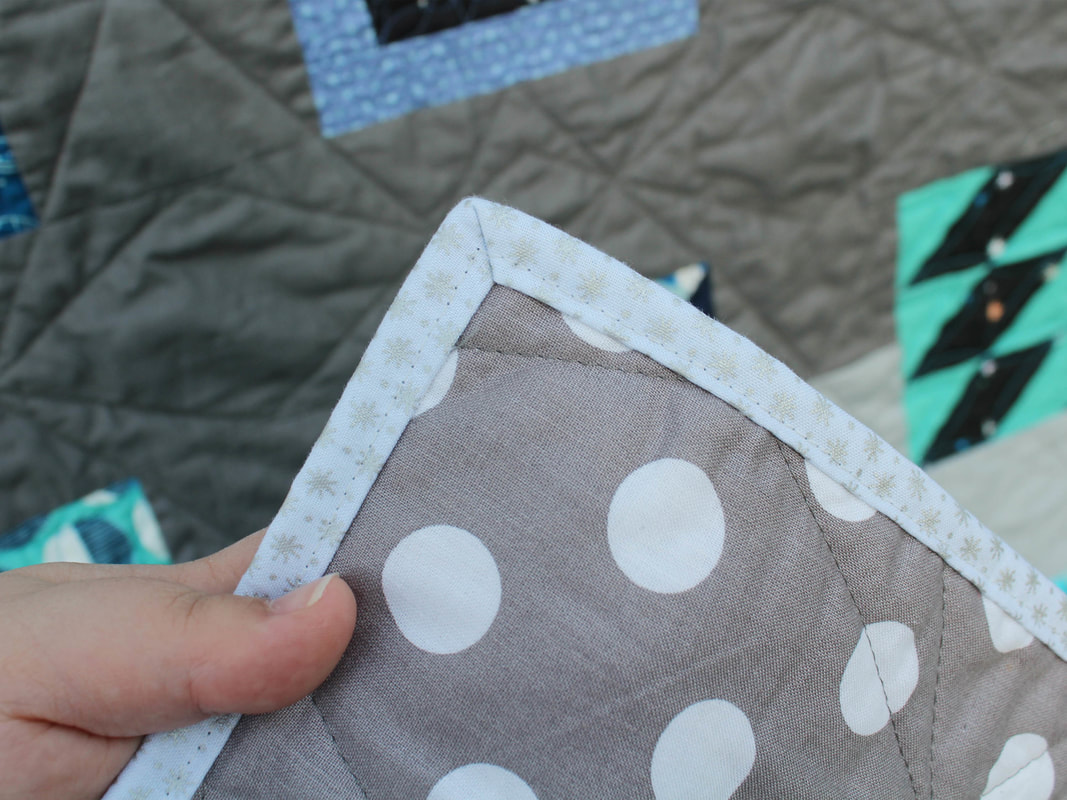
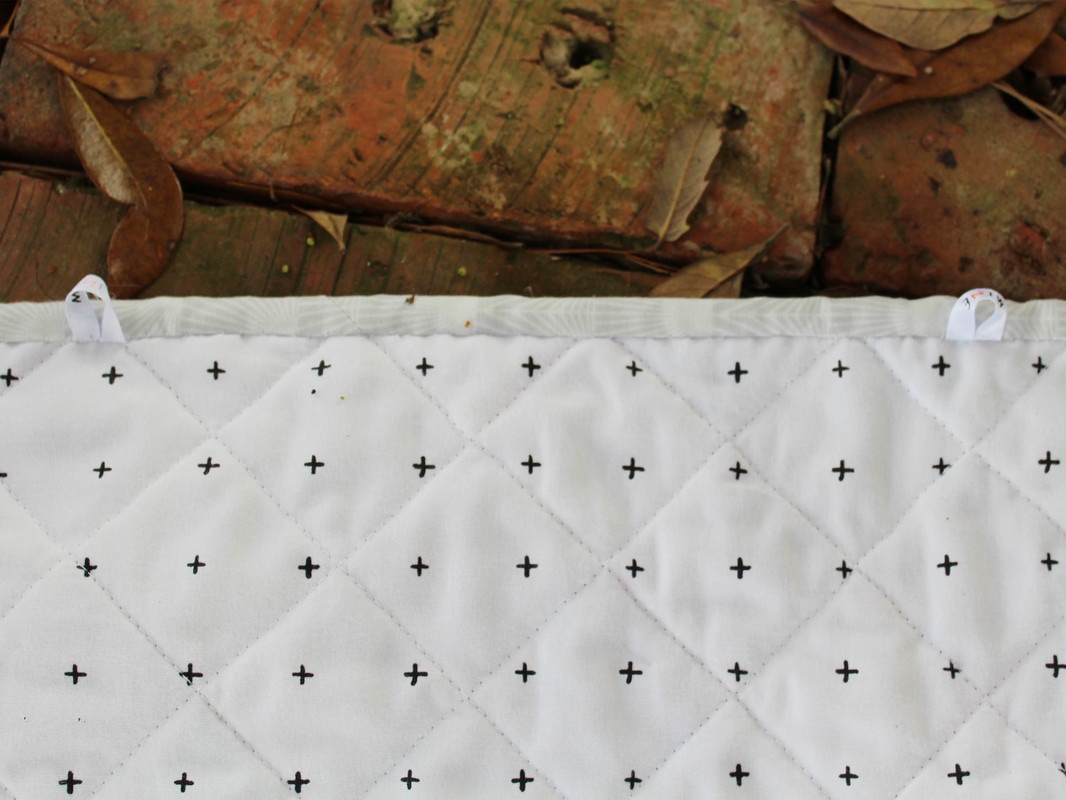
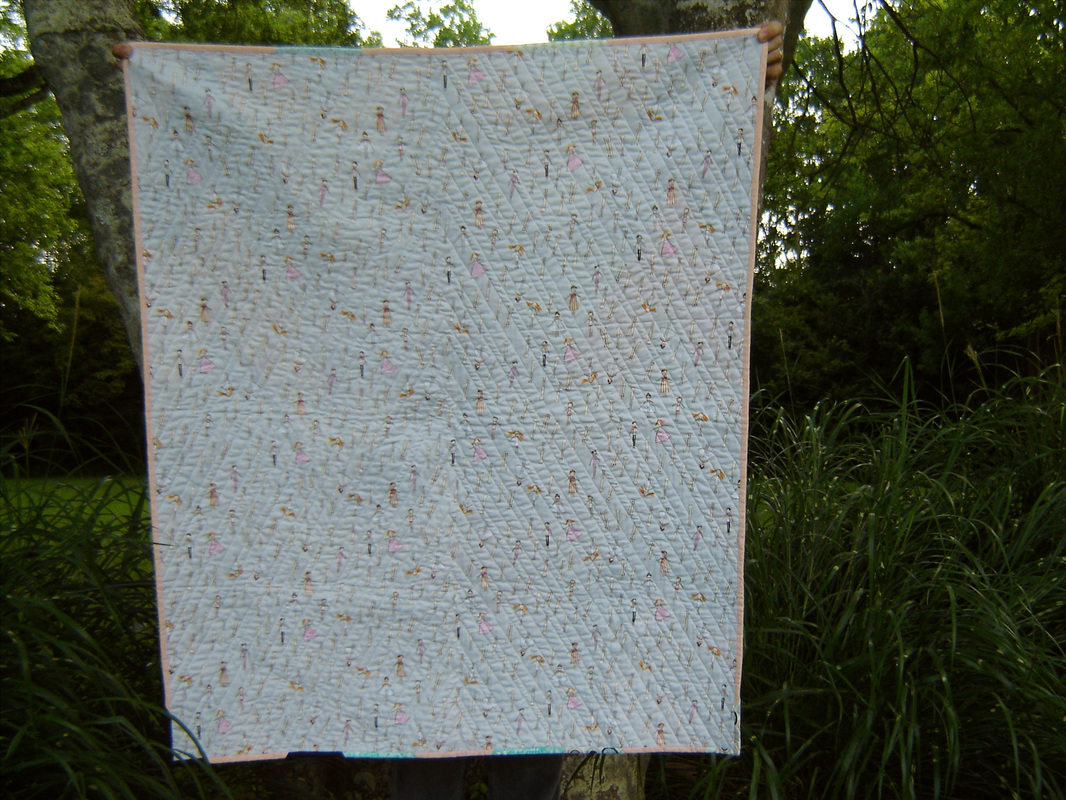
The binding is a Lizzy House asterisk print that I bought specifically to use for this and thank goodness I bought a yard as I used almost all of it.  I decided to machine stitch every bit of the binding as everything else on this quilt was done by machine, so why not.  I did try a new to me technique when binding this quilt and from now on I'll do nothing else as it worked so wonderfully.  I stitched the binding to the front as I normally would and then i took the time to iron the binding to the back and iron the mitered corners.  Then using Elmer's washable school glue, I ran a small bead underneath the binding and ironed it again (to dry the glue almost instantly) thus holding it exactly where I needed it and I used no pins or binding clips.  From the front of the quilt I stitched in the ditch right beside the binding and you can see below exactly how it turned out.  Using this method I didn't have any mess-ups or spots where the binding didn't get stitched, it worked perfectly! Ta-da!  I was finished.
Picture
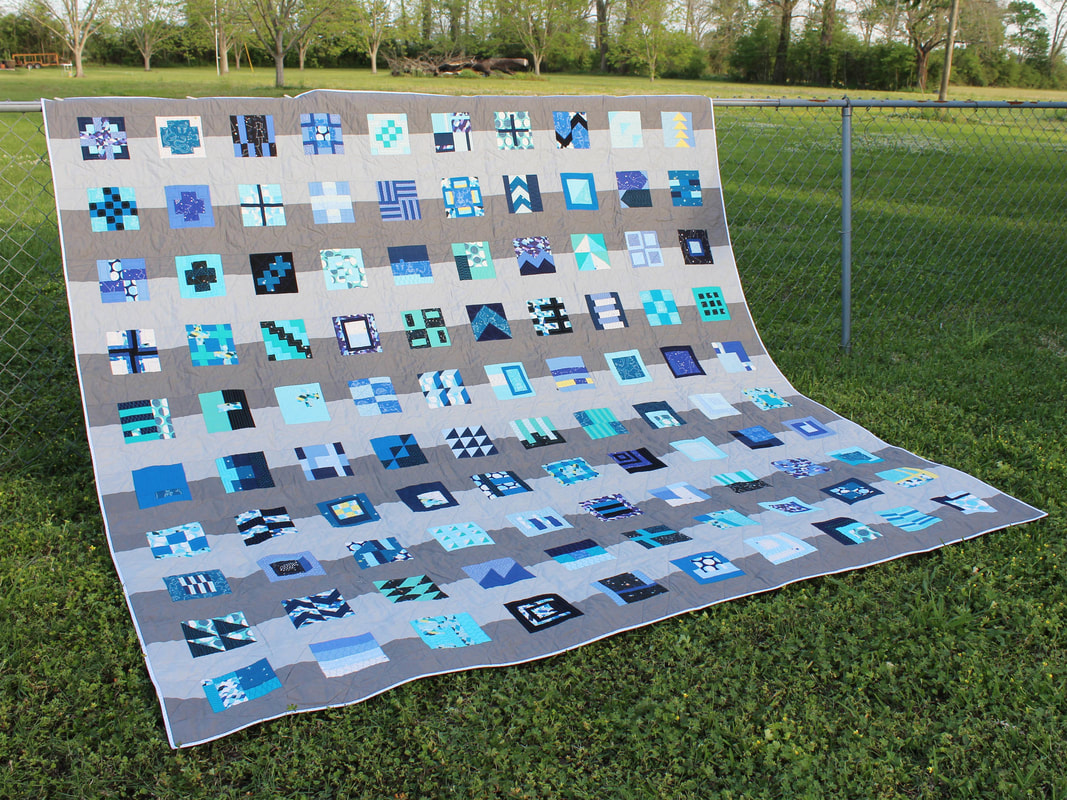
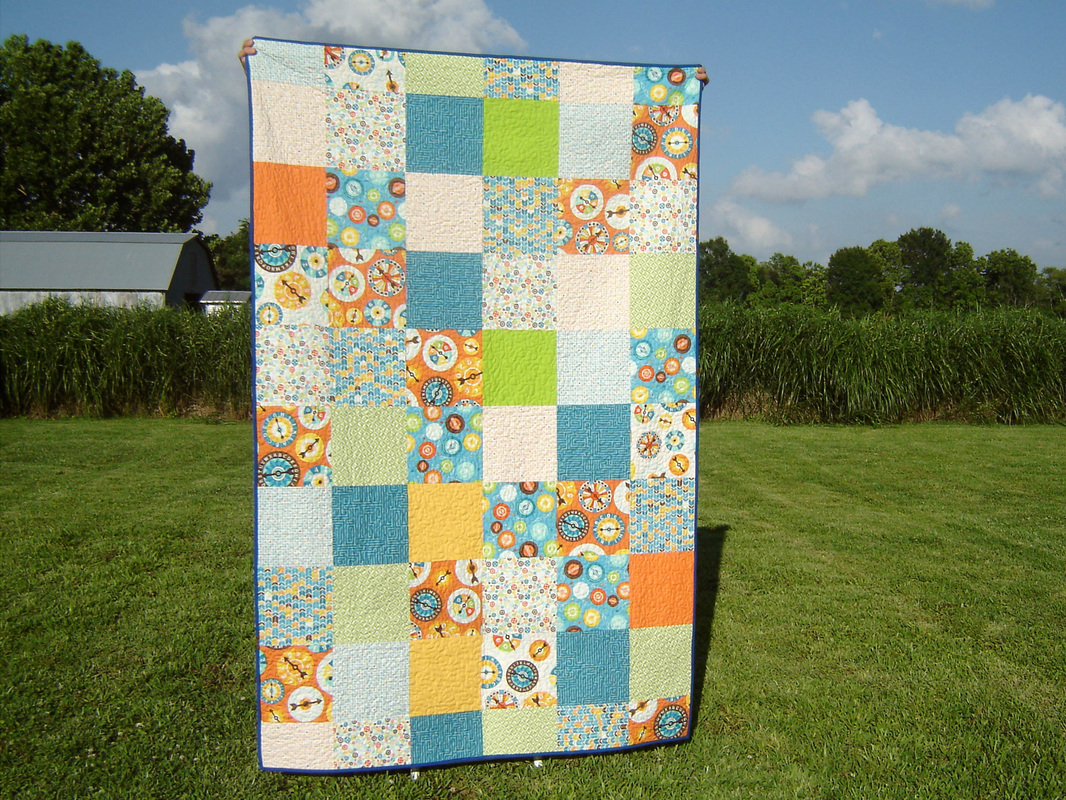
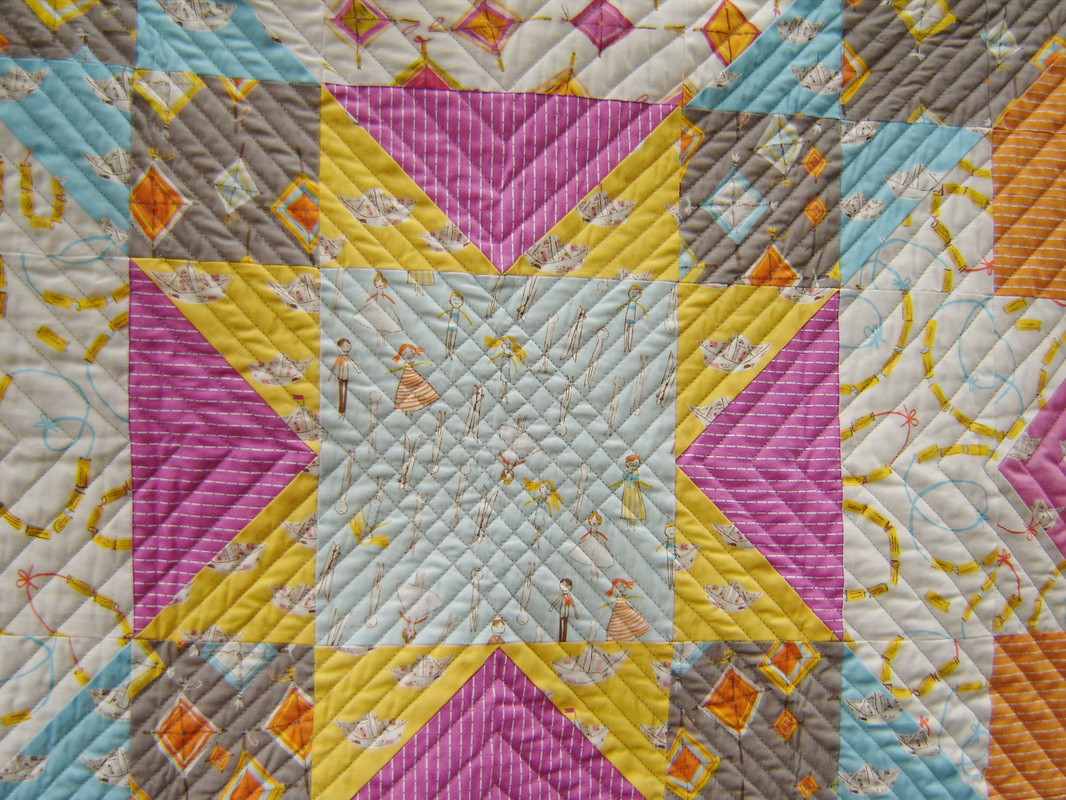
I finished the quilt mid-March and on Easter Sunday with the help of my husband and brother-in-law was able to get photos.  The finished quilt measures 102" x 104" and they are both standing on ladders in order to hold it high enough to get the whole thing off the ground.  You have no idea how thrilled I was to get these photos and this quilt finished.  It really and truly made my Easter day.

This quilt has been on my Finish-A-Long list, on and off for years so I am delighted to say that in the first quarter of 2018 it is officially linked up and off of my list!  The quilt is now on my queen sized bed in our new master bedroom in the addition that we have been working on for the past year.  This quilt is really a king-sized quilt so it hangs generously off the sides and gives us plenty to cover our pillows which is fantastic.
Picture
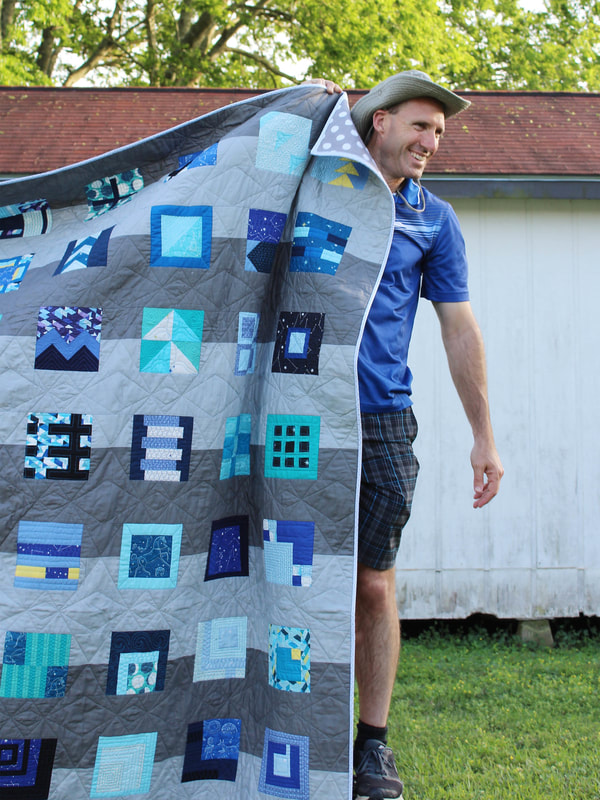
I had to include this outtake of my husband cutting up after we finished taking photos.  It really is like pulling teeth to get help for 5 minutes to take these photos, but he was a big help and without him I wouldn't have been able to get it done.
Picture
I'm linking this finish up with the 2018 Finish-A-Long, even though I'm not eligible for prizes since I'm a host, but that is ok as the ultimate prize is this finish!  My Q1 list can be found HERE.

Though the link-up is closing in a few hours, you do still have time to link-up so go and do it, you can find the Q1 Finishes link-up HERE.  If you didn't join us for Q1, feel free to join Q2, anyone with sewing/quilting/stitching/yarn work projects are welcome to join us and we would love to have you!
Picture
7 Comments

Tipi Quilt Pattern and Tutorial for Sewing 60 Degree Triangles

3/30/2017

7 Comments

 
Picture
This quilt pattern and tutorial are part of the 2017 Finish Along Quarter 1 Tutorials Week.

Find the link up to the Quarter 1 Finish Along HERE or on any of the other hosts blogs.

*Warning this is an extremely long blog post.*

Back in July 2014, so almost three years ago I posted my finished triangle quilt and you can read all about it HERE and see more photos.  Since then I have received several requests for a pattern or a "how to" and I've even seen at least one copy without a tutorial, which would have been cool if I had received credit, but whatever.  Back to the point, today is the day for the FREE pattern.  I've named this quilt the "Tipi Quilt" because of the "tipi" shape created with the triangles and to me this quilt has a real Native American feel to it.

The photo below is the new version (un-quilted) made specifically so I could write up the pattern for you guys.  The fabrics used for this version are by Miriam Bos for Birch fabrics and is named Wild Land.  I also used a variety of solids, mostly Kona.  Are you guys ready?  Below you will find the tutorial on how to make this quilt and if you aren't interested in making the quilt, in the tutorial are detailed instructions on how to sew together 60 degree triangles and that can be used in a variety of applications.  So hopefully you will find something useful.

Picture

Tipi Quilt Specifications and Fabric Requirements


Quilt Size - Wall Hanging or Baby/Toddler Quilt measuring roughly 36" x 42.5"

Fabric Requirements - Fat Quarters or 1/4 Yard Cuts
10 Busy or Focal Prints, if you use less plan to have duplicates.
15 Solids and Less Busy (optimally prints that are not directional), if you use less plan to have duplicates.
1 Background Fabric, either a solid or a blender.

The key step with this quilt pattern is fabric choice and placement.  This quilt pattern was born out of the desire to feature several larger focal prints uninterrupted (not cut up!)  Both of the quilts that I made with this pattern used one fabric line and each of these lines had great focal prints and good smaller prints, thus this quilt pattern was born.  Your very first step is going to be choosing a fabric that will fit the bill appropriately.  I can't tell you what to use, but I can show you what I've chosen and how I went about it.

In the photo below you can see I've separated the prints into two groups, less busy prints and focal/busy prints.  The focal prints will be large triangles that will be fussy cut to feature specific images (like the little Native American girl.)  On the "less busy" side I decided to add in a good handful of solids to break up all the prints (so it isn't crazy time carnival quilt) and by adding solids it gives the eye movement and you can appreciate the designs more.

I didn't separate it from the group below, but you will also need a background fabric.  This print or solid will be used along the edges, top and bottom of the quilt.  It will fill in the gaps created from the "tipi" shape and the large triangles.  In this quilt I chose the dark navy blue solid below as my background print.

Once you have decided on fabrics and divided them into three groups (large triangles, small triangles or tipi shape and the background) you are ready to get started.
Picture

Cutting Instructions


This is a Fat Quarter (FQ) friendly pattern, but you can also use 1/4 yard cuts.  The directions below are for cutting from Fat Quarters.

Large Triangles (that will be fussy cut) - 10 Prints
Cut a 9" strip.

Large Triangle "Tips" - 2 Prints, duplicates of the 10 above.
Cut a 4.75" strip or you can use scraps, you only need one triangle.

Small Triangles - 15 Prints or Solids
Cut 2 - 4.75" strips along the 18" side of the Fat Quarter.  If the print will be duplicated, cut 3 strips.

Background - 1 Print or Solid
Cut 2 - 4.75" strips.

A quick note - these cutting instructions do produce some scraps, it's inevitable, but I have tried to reduce the amount of waste or scraps as much as possible.

Step One - Cutting out the Triangles

Picture
Let's start by talking about rulers.  You don't need a fancy 60 degree triangle ruler to make this quilt, though it does make cutting easier.  All you need is a ruler that has 60 degree lines on it, both the rulers to the left and right above have these markings.
Picture
We are going to start by cutting the small triangles, so using the 2 - 4.75" strips we will cut the triangles.  Using the 60 degree marking on your ruler, line it up along the bottom of the fabric strip and cut.  After this cut, turn your ruler in the opposite direction, but still using the 60 degree marking and cut a triangle.  YOU WANT TO KEEP ALL THE POINTS.  As you can see from my triangles above, keep the points and cut full triangles, this will help with piecing, I promise!
Picture
Continue cutting the whole first strip and then onto the second strip.  You need 8 small triangles for each "tipi."  I was able to cut 6 small triangles from one strip and 2 from the second.  If you look closely on the first row above, the triangle on the left, the first in the series has a point missing.  This is ok, it is less than 1/4" and is where the fabric strip cut off or ended.  If this bothers you, then cut 5 from one strip and 3 from the next.

If you will be duplicating this print, then cut 16 small triangles from the 3 strips of fabric.  Continue cutting all the small triangles from the 15 assorted prints and solids.
Picture
You will cut one large triangle from each strip and I recommend fussy cutting it to feature exactly what you in your quilt.  Yes this produces scraps, but what fussy cutting doesn't.  The important part of this step is the cut triangle needs to have the point on the bottom and the triangle "base" at the top.  So you can see from the large triangle above, I have fussy cut so that the Native American girl is centered and the point is on the bottom.  You want your prints to be in the right direction in your finished quilt.

You also need to cut 2 large triangle "tips" from these busy focal prints.  Using either drop from above or scraps, cut 2 different 4.75" strips and cut a triangle from each, once again maintaining the triangle tip on the bottom and the base on the top of the strip.  These two tips will be on the very top row of your quilt.
Picture
Now we need to cut the background fabric.  Cut 13 small triangles just like above.  Then we need to cut 12 half triangles for the sides of the quilt.  You could just cut more small triangles, but once the quilt is pieced you will cut off this odd triangle scrap that isn't very useful, so I cut these specific side pieces in order to waste less fabric.  If you look at the photo above, you can see I have the bottom of the ruler lined up along the 60 degree line, and then slide it over on the cutting board to exactly 1" from the edge and cut.  It will produce a piece that looks like the shape in the bottom photo to the left.
Picture
Now move your ruler to cut a straight line exactly 1" from the top cut 60 degree angle. Now you have two side half triangles.  Continue cutting in this manner until you have enough.
Picture
Congratulations!  Cutting is finished.  So you can see from the above photo you should have:
10 Large Triangles
2 Large Triangle Tips
15 Sets of 8 Small Triangles
12 Background Edge/Side Triangles
13 Background Triangles

I honestly feel that once I've reached this point, the hardest part is over, so pat yourself on the back and get ready to sew.

Step Two - Basic Assembly and Design Layout

Picture
Now logic would tell you that it is time to move to the design board (or the floor) and play around with fabric placement, but I will tell you WRONG, let's do a wee bit of sewing to get our feet wet sewing triangles and this little bit of sewing will make your layout design of the quilt so much easier and a lot of the work will be done already.  So the next step will be to sew together some of the small triangles to create groupings.  You can see what we will be sewing together above on the right.

First layout the 8 triangles in the formation to the left.  We will be sewing the second row of three triangles together and then the bottom row into two groups of two.  Easy peasy!
Picture
The image above shows step by step how I sew together 60 degree triangles:

1.  Lay two triangles right sides together on top of each other.  Stitch a 1/4" seam.  I find you can use either a scant seam or a full 1/4", it doesn't matter as long as you do the same thing for the entire quilt.
2.  Press the seam open.  PRESS don't iron.  So carefully open the seam with your fingers and place the iron down and don't move it back and forth.  You don't want to stretch these bias seams.
3.  Now take a third triangle and put it right sides together on either side, I did mine to the left.  Because you kept those points, you will see that it is easy to line it up.  Just match both the points at the top and bottom.  Stitch 1/4" seam.  After this seam you will trim that one little point that is sticking out as indicated in the photo.  Trim only this point.
4.  Press this seam open.
5.  This is what the back should look like.  You still have points sticking out on the top and bottom of the grouping and this is good. 

Now repeat this three grouping for all 15 colors/prints of the small triangles and then sew together two groupings of two.  Chain piece all of this and it goes together so quickly.
Picture
One more thing to sew together and then we will get to the design board.  Taking your background pieces, sew some of them together in the above groupings.  So four sets of two and then one side triangle with the straight edge to the left and one side triangle with the straight edge to the right sewn to full triangles.  These two pieces will be the top corners of your quilt.  There will be leftover background pieces that you don't sew right now.
Picture
When you sew together your side triangles to full triangles you will line up the points just like a full triangle grouping.  Once you press the seam open it will look like the shape to the left in the above photo.  You will have some hang over from the side triangle piece.  This is fine.  Just trim it off straight across.  So once it is trimmed it will look like the shape to the right.

Now it's time to play!
Picture
You can see I don't have a design board, so I use my back hallway floor, which can be quite challenging with little kids, but hey if you work on the floor just take a lot of photos to reference in the future in case things get kicked around a bit.

Start by laying out 5 sets of the small triangles in the "tipi" shape, which is dead center above.  See why I had you sew things together, so much easier to move around chunks instead of individual triangles.  Next layout the 10 large triangles with the points at the very bottom of the "tipi."  This will create a missing row at the very top and this is where the 2 large triangle tips come in.  Put those down and then add in the background triangles that you have sewn together.
Picture
Finish laying out the remainder of the "tipi" shapes and then fill in the gaps with background fabric at the bottom and the sides.  You will have to move things around quite a bit to get it perfect but take your time, step back admire your quilt.  Take photos, look at it that way.  Ask opinions, do whatever it takes to get you to your final layout.  I spent a morning rearranging until I settled on the above photo.  For me it is about not having too many same colors or prints next to each other.  Evenly spacing the solids throughout and just overall being pleased with the final look.

Now let's sew this baby together!

Step Three - Quilt Assembly

Picture
We will start the quilt assembly by sewing together all of the small triangle groupings that are contained within two rows of the quilt.  So skip the very first row of the quilt and start with rows 2 and 3.  I have the pieces laid out in the photo above.  So on row 2 stitch the background side triangle to the 3 triangle grouping.  Trim that one point as indicated in the photo.  Press open and trim flush.  Now on row 3 sew the two triangle groupings to the different colored center triangle.  Trim that sticking out point and then press open.  Repeat this same process for all the small triangle sections.  When you are done it will look like the bottom right image above.
Picture
Now it's time to sew that "tipi" together.  This is my method for getting all those points to match on each and every row.  Taking the top three triangle grouping, push your pin from the back to the front of the point, right in the seam.  So your pin should be sticking out just like the top left photo.  Then taking your bottom row of fabric triangles push the pin directly into the right side triangle point (seam.)  So both of these points are now on the pin.  Move them carefully together until they are mated up with one another and using another pin, pin to the left side and then using another pin, pin the right side.  I do it like the bottom right photo.  Then I remove the first pin completely.  Now that the center is pinned, just line up both ends, matching points and pin if you choose to.  I do not.  I just stitch my 1/4" seam and line up as I go, it's a short seam and just saves time.
Picture
Now that the seam is stitched, open it up and make sure you like how your point looks.  If you don't, redo it.  If it looks great, carefully open up the seam and press the seam open.  Remember, press don't iron.  You don't want to stretch anything.  Once you are done pressing, the unit should look like the photo above.

Continue sewing all of your two row "tipi" units together.  Once that is complete it will be time to sew those units to the large triangles.
Picture
Placing the large triangle on the bottom, right side up, I put my "tipi" unit on top and line up the points on both ends.  I find it easier to sew with all those seams on the top.  I put a pin at both ends.  Stitch a 1/4" seam straight across.  If any of those little points are sticking out of the seam you just stitched go ahead and trim them off.  Carefully press this seam open.  Your finished unit should look like the photo below.
Picture
Picture
Sometimes (for a large variety of reasons) the large triangle may extend a wee bit from the edge.  In my case it was 1/4."  I am pointing to it above.  You want that point to end at the bottom, otherwise if you sew it as is you will end up with a blunt triangle and no point.  So we don't want that, we want pretty, perfect triangles.  So if your large triangle ends up being a tad bit too large, take a ruler and carefully trim along the side so the bottom of the triangle meets perfectly with the bottom of the "tipi."   On my example above you can see what I trimmed and that my point is now flush at the bottom.  If you do end up having to trim, you will probably have to trim every large triangle, but it only takes a second and isn't a big deal.
Picture
Keep in mind, before you press a seam open if you have any of those over hanging points, take a moment to trim them off.

Now continue sewing all of your two rows together until you have five large rows.
Picture
You can sew together that top single row at any time.  Just sewing a bunch of small triangles together.

Now let's finish this quilt up!
Picture
Starting with the top row, sew it to the row 2 and 3 grouping.  I push pins in each of my points doing one at a time down the entire row, making sure all those points match up while pinning is much easier than picking out stitches and re-doing it later.  I put row 1 on top because the large triangles will end up on the bottom (less seams) and I prefer to have more seams on top  Stitch 1/4" across the whole row, check your points on the front, if they are good, trim any sticking out points and then press the seam open.  Repeat this procedure until all the rows of your quilt are sewn together and you have a completed quilt top.
Picture
Now that the quilt top is complete, your quilt sides will look like the above left photo.  Take your ruler and line up the 1/4" mark directly on top of the corner triangle seams, as you can see on the above right photo.  Trim both sides.  When you cut 1/4" away from the corner seam, once you add your binding you will maintain those perfect triangle corners and they won't be chopped off.

Congratulations you have a finished Tipi Quilt!
Picture
I would love for you to make one and if you do please tag me in any photos and use the hashtag #TipiQuilt.

If you need any help with the pattern, don't hesitate to contact me.  Thanks for joining me today and I hope you enjoyed the pattern and tutorial.
Picture
Picture
7 Comments

The Mini Carol Quilt

3/28/2017

3 Comments

 
Yay!  I'm here today to share a finish (my only finish from my Finish-A-Long list.)  I actually finished this quilt over a month ago, but being sick (and I still am) and sick kids and everything else in the world seemed to keep me from blogging about this mini quilt.
Picture
I started this mini at some point last year when Erica at Kitchen Table Quilting released the pattern, the Carol Quilt.  I fell in love with the pattern and wanted to make it instantly.  I also didn't want to make a full sized quilt, thus this mini was born.  I had to do some math to figure out how much to cut out, as the pattern doesn't include instructions for a mini.  It wasn't that difficult to figure out, just took a little bit of counting.
Picture
I used a charm pack of Moda Gooseberry by Vanessa Goertzen of Lella Boutique and a charm pack of Moda Modern Background Paper by Zen Chic.  I also threw in a few low volume scraps that I had to round things out for the background.  I love how these fabrics play together.
Picture
This is a two block pattern (only two different blocks make the whole quilt) so it goes together really quickly.  This mini measures 24.5" x 24.5".  Once I had the top together it sat basted for quite a while because I couldn't decide on quilting.  This always seems to be the case with me, held up on the quilting phase.
Picture
Finally I decided to stop over thinking it and just quilt a simple diagonal grid following along in the ditch of the design.  I'm happy that I chose this as I feel it really adds to the design and makes it pop.  Sometimes simpler is better.  I quilted it with a 50 weight Aurifil in white.
Picture
The pieced back is a scrap of low volume that I had (the print to the right) and the small + print is a pillowcase from Target.  Lately I've started to use bed sheets as backing as they are usually big enough to get away from a pieced back and the quality is really nice.  The thread count of these sheets is almost exactly the same as quilting cotton so the sheets play nicely with other fabrics.  The cost of a set of sheets are a lot cheaper too, especially when you buy them on clearance!

Below is an example of how I hang my mini quilts.  I save random bits of scrap ribbon and stitch little loops to the top before I sew on the binding.  When I go to hang these mini quilts I just have to put some nails in the wall and hang these little tabs on the nails.  It works for me and I don't have to figure it out later.
Picture
That's all folks!  I'm glad I at least finished one of my projects this quarter, thank goodness for a mini quilt.  I'll leave you today with an "artsy" photo of my mini.
Picture
Picture
3 Comments

The Bermuda Triangle Quilt

7/24/2014

5 Comments

 
Picture
One of the really fun perks of being a member of the Modern Quilt Guild is the fabric challenges.  I was always so jealous of the members participating in these challenges, so as soon as the MQG offered individual memberships I jumped on the chance and thankfully we were given the opportunity to play along too.  In February of this year the Micheal Miller Fabric Challenge was announced and we got a sneak peak of the fabric, Petal Pinwheels.  All participants were sent 6 fat eighths of this fabric line and were given the freedom to create whatever we wanted, just so long as it was quilted.
Picture
I wasn't really sure what I would create, but I knew that I have enjoyed working with triangles lately, so I decided to create my own thing and see where it ended up.  I started the four triangles in the quilt with the same size center and then cut strips of varying widths and created a "wonky" effect.  I kept sewing rounds until I was at a size I was happy with (all four are different sizes) and on the last round I added in the extra little triangle for a special little touch.  I decided on a simple white background, and in the end I think it made a perfect sized baby quilt.
Picture
I pin basted this quilt (I used a 100% cotton Pellon batting) and then chose to quilt it in straight lines, using my walking foot.  I picked one of the lines in each of the triangles and just quilted straight along that line continuing to the edge of the quilt.  I just continued this method until the majority of the quilt was quilted and there weren't too many big spaces that were un-quilted.  Once the majority of the quilt was finished, I then decided to add in some tight lines of quilting that measure roughly 1/4" apart, you can see examples of this above and below.  It really created a neat texture to the quilt.  It was quilted with a 40 weight white Aurifil thread on my Juki TL-2010.
Picture
I bound the quilt in a Micheal Miller Dumb Dot print and for a little extra touch, I added in four specially made prairie points to the two sides of the quilt.  These are sewn into the binding, but are totally free and since it is a baby quilt, it adds a little something for baby to play with, chew on, you know the normal baby stuff.
Picture
The backing of the quilt is a Heather Ross, Briar Rose print that I felt was a perfect match for this baby quilt.  So bright and sunny, a happy print.  The finished quilt measures 41" x 42" and I washed and machine dried the quilt, so the photos here today are of a washed and ready to gift baby quilt.
Picture
During the quilting process, I decided upon the name of this quilt, The Bermuda Triangle Quilt, for two main reasons.  First, the colors are exactly what I think of when I think of Bermuda.  And second, the triangles are all wonky just like the Bermuda Triangle!  I thought I was clever at the time, not so sure now! HA!

Thank you Michael Miller for supplying the fabric, and thank you to the Modern Quilt Guild for hosting these really fun challenges.  I feel like I learned a lot during this process, and it was really fun designing my own quilt.
5 Comments

Triangle Quilt Along - The Finish

7/23/2014

7 Comments

 
Picture
Finally, I have my triangle quilt photographed and ready to show off!  I finished this one over a month ago, but couldn't bribe anyone to help me take the pictures and finally my husband agreed.  You would think I was asking for a kidney.  Good grief.  This quilt was started as part of The Triangle Quilt along hosted by The Sassy Quilter.  i joined in around mid-March, and followed along pretty well, except when it came time for the final link up.  I didn't have my binding finished, I missed the deadline by one day.  Thankfully, Paula held a special late-finishers link up, and that is what I will be linking up to today.
Picture
This quilt was made with the fabric line, Indian Summer by Sarah Watson for Art Gallery fabrics.  I love this line, it is just "so me!"  I added in various solids and the peach that I used for the "background" was one of the cross-hatching prints from Carolyn Friedlander's Architextures line of fabrics.  I designed a very distinct pattern for my triangles, the smaller measuring around 5" and the large triangles measuring around 10".  You can read more about the process HERE.  The finished quilt measures 40" x 48" a wall hanging that I will hang in my living room.
Picture
I decided early on that I wanted to straight line quilt this one, but I wasn't sure exactly how I wanted the lines to go.  In the end I decided on a "large arrow" quilt pattern and then radiating the lines from there.  I used my Juki TL-2010 with the walking foot and a 40 weight white Aurifil (and a 100% cotton Pellon batting.)  The lines are quilted in a pattern, 2 at 3/4" apart, then a 1/2" space.  The 1/2" space falls in the center of the "arrow" triangles.  I am happy with the simple quilting, it highlights the triangles but doesn't distract.
Picture
I decided to do a matched angled binding per the tutorial found at A Quilter's Table, HERE.  Even though this technique really isn't hard (and creates a fantastic look) I struggled so much with this technique.  I swear I worked on the binding longer than I did the whole quilt process.  In the end I had messed up so much, I only had enough fabric to match the top and bottoms, and just bound the sides with the Architextures print.  I did carry around the matched binding on the bottom corners, which you can see above, and I am really happy that I did, I love that little detail.
Picture
Once again, I used my trusty Heather Ross Crafty Chloe from Hancock Fabrics print as the backing.  I love that print and wished I had bought more, as now I'm running low.  I also am thrilled with quilts that can use a single cut of fabric for the backing, so simple and makes the whole process so much easier.
Picture
This quilt is so soft and has such a nice hand to it, thanks to the Art Gallery prints.  Honestly my kids have been playing with it for the last month, so it might be time to wash it before I hang it up, which I am really eager to do, being that the "Indian Summer" is almost upon us!  Thanks to Paula for hosting such a fun quilt along!

The Sassy Quilter
7 Comments

Sewvivor - Marci Girl Designs - Marci Girl

7/16/2014

12 Comments

 
Picture
I auditioned for Sew-vivor Season 2 last year, and sadly wasn't chosen, but it worked out well because something else came up and I wouldn't have been a very good competitor.  Well this year, Rachel of Family Ever After announced that Season 3 would be dedicated to Quilting!  How perfect is that, I am really into quilting, in case you didn't know.  It is kinda what I live and breathe these days.  I had to give some thought to my audition piece, and after considering it for a while, I decided to enter my Cosmic Burst quilt.  If you are a blog follower, then you saw this finished quilt a few months ago, and if you want to read all the details, you can find that blog post HERE.
Picture
This is one of my favorite quilts to date and it currently hangs proudly in my living room, actually the first thing you see when you walk in my house.  My favorite precious fabrics, a wonderful pattern, I just love every single thing about it, and I hope you do too!
Picture
Quilt Details:
Fabric - Heather Ross Macaroni Love Story (Spoonflower), Patty Young Lush and Alexander Henry Heath
Fabric Backing - Heather Ross Crafty Chloe (Hancock Fabrics)
Quilt Pattern - Cosmic Burst by Julie of Distant Pickles
Size - 40" x 40"
Batting - Cotton Batting
Quilting - Machine Quilted on my domestic Brother Project Runway, straight line quilted with a walking foot using a light gray Coats and Clark Machine Quilting Thread.  All the quilting was done by yours truly.
Binding - Matching Alexander Henry Heath so it would blend into the quilt and not stand out.
Started - Roughly April 2012
Completed - Roughly March 2013
Blogged - May 2014 HERE
Picture
I would really love to be chosen as a finalist for this Season of Sew-vivor!  I just think it will be so fun to compete in a friendly atmosphere that I know the online quilt community to be.  Make sure to head over to the Family Ever After blog to see the other auditions, there are just so many fabulous entries, I'm so glad I'm not a judge!  Thank you Rachel for hosting another Season and for all the hard work you put into these competitions.
Picture
12 Comments

The Graph Paper Quilt

6/17/2014

5 Comments

 
Picture
Well I'm only a day late on a post I said I'd have up yesterday.  Oh well, I blame it on summer!  Friday, I showed you guys my 'Gator Quilt, made using The 'Gator Quilt Pattern by I'm Feelin' Crafty.  Well today I am showing you the back of that quilt, or is it the front?  It is totally reversible!
Picture
I didn't necessarily start out the quilt with the intention of it being reversible, but it ended up that way because I struggled to find a suitable backing for the 'Gator Quilt.  Usually I like to have a solid fabric backing, usually a print that somewhat matches the front, but always something that I get the yardage at a great price.  Once I had the front finished, I started searching for a suitable backing and just didn't run across anything that I was in love with.  Then I started thinking about other options.  What if I found a bundle of fabrics and pieced the backing into something that I actually liked, and better yet, my kids liked.  This is where The Intrepid Thread comes in, because honestly, lately it has been my go to shop!  Julie had these great bundles of Fun and Games by Lori Whitlock on sale, so I ordered a half yard bundle, plus one extra yard of a print in a different colorway.  My basic math calculations were that this should be just enough.  In the end I ended up adding in several solids just to have a bit of variety.  I think it turned out pretty cute!
Picture
In the photo above you can see the all over stipple that I stitched on this quilt.  I used a matching green thread and it matches the other side as well as this one.  The simple stipple worked equally for both sides and doesn't take away from the great prints in this collection of fabrics.
Picture
At about the time I started to look around for backing fabrics, Heidi at Fabric Mutt announced her Graph Paper QAL.  I figured this would work out perfectly for this quilt, a simple use of the fabrics and I could participate in this casual quilt along.  I ended up cutting 9.5" squares, 60 total.  Super simple construction, I didn't worry about fabric placement, my only goal was to not have two prints touching on the sides and with basically no planning, it just happened naturally.  I knew with my 9" finished squares I would be cutting off chunks at the top and bottom, but the sides would fall just about perfect, so this didn't leave any overhang for the quilt backing like you normally need.  So to accommodate, I cut 20 of the squares 9.5" x 11.5" and this allowed me to have 2" of overhang on each side.  Once it was quilted and trimmed, the sides turned out to be perfect squares!
Picture
I chose to totally machine stitch the binding on this one, and you can see that row of stitching above.  I didn't cut my binding quite wide enough, so I admit it was a challenge to catch that edge, but on a whole I did, I only had to go back and fix a few spots (ok maybe 20) that didn't catch and since I used a matching blue thread you can barely see any mistakes anyway.

I'm totally proud of my reversible/double sided quilt and honestly want to do this for every quilt I make now, especially throw quilts and quilts for children.  You can change the look totally just by flipping it over!
Picture
Before I totally forget, one of the things I forgot to mention about the other side of this quilt (The 'Gator Quilt) was that I did a straight matched binding, using a tutorial by A Quilter's Table, found HERE.  I thought the three little ground pieces underneath the alligators would be a perfect use of this technique and I am really happy with the results.  It extended the ground just a tad bit and added a neat little detail to this quilt!  The best part is that on the other side, the brown fell really near other brown patterns and you don't even see it on the other side.  Win win!

Fabric Mutt
5 Comments

The 'Gator Quilt

6/13/2014

6 Comments

 
Picture
Today is my stop in the 'Gator Quilt Blog Hop!  I am showing off my awesome 'Gator Quilt made from the pattern designed by I'm Feelin' Crafty!  I was fortunate enough to be able to test the pattern and now I have this super cute quilt to share with you guys!
Picture
Once I had agreed to be a pattern tester, I knew immediately that I wanted to make the whole quilt, I just knew my kids would love this.  We are in South Louisiana, alligators are a common thing around here in these swamp lands!  My journey started with a fabric pull from my stash, I have a lot of greens, so this wasn't a problem at all.  I decided to make each alligator different, but each out of just one main fabric.  The large polka dot is the medium sized alligator, the little white checks are the large and the green grid fabric is the small guy.  I didn't have enough of any fabric in my stash for the background so I decided on this lovely Kona Ocean.  It is a beautiful dark blue, but unfortunately it doesn't photograph well and honestly I am including the above photo to give you an idea of the true colors of this quilt, because once it was outside, my camera did some funky things with these pictures.  The photos I chose to show today are the "most normal" ones and not the crazy neon blues that my camera created!
Picture
I have a little bit of experience with paper piecing, but honestly not too much, just enough to get me through this without having to look up how to do it again.  I was worried when I first started out that this would be too complicated, but honestly the way the pattern is broken down, it really was simple.  The alligator is made up of lots of smaller sections, each of which are paper pieced.  For example the tail is probably the most complicated part, as it is one large piece that has around 7 sections, but honestly it really isn't that hard.  You then take the multiple sections that you paper pieced and just sew them together like normal blocks.  So it looks really difficult, but it totally doable.  I promise!
Picture
The small alligator.
I started with the largest alligator and since the pieces were larger I found it to be easier to put together.  This also created a lot of smaller scraps that I was able to incorporate into the other two smaller alligators.  I really had only a small pile of scraps leftover once I was done with the quilt, which is really nice.  Once I made the largest, the smaller two went together so quickly.  i think I did all my "learning" with the largest, and then the other two were just smooth sailing, you have learned what color goes where and how to construct the alligators, so the little tiny pieces don't seem daunting, it was fun!
Picture
After the three alligators are pieced, the rest of the quilt is just a series of rectangles to assemble, quick and easy.  Before you know it, you have a finished quilt!  This is my first quilt that I have made that incorporates such a large amount of negative space and I love it!

The finished quilt measures 54" x 70" or at least it did, that is what the pattern's finished dimensions are, but of course I had to change things a bit.  You see once I had the whole top together I quickly realized this thing was way bigger than I thought it would be.  I think in my head I was thinking small baby quilt, but no, this one is a good throw sized quilt.  While staring at the quilt top laying on the floor I had an epiphany!  What about making this quilt fit my youngest bed?  You see earlier this year my husband built my youngest (2.5 years old) a trundle bed that rolls underneath my older son's bed.  This trundle is not intended to lift up, but rather stay low to the ground.  This creates a problem when it comes to comforters and quilts, they generously pile on the ground around the trundle.  Yuck.  So I grabbed my measuring tape and Eureka!  54" wide perfectly covers the mattress, doesn't drag the floor and will work out just fine.  My only problem is the length, it was about a foot shy of being long enough.  Thankfully I had enough background fabric left over and was able to add strips to both the top and bottom, so now my quilt measures 54" x 81."  I have a quilt that is "almost" a twin size.
Picture
The back of this quilt is a story I will share Monday, because I made this a double sided quilt, yes totally reversible.  Because of this decision I limited myself with my quilting options.  Originally I was going to do some really detailed free motion quilting on the alligators themselves, and then some kind of design for the background, think wood-grain or grass.  Well that option is now out, I needed something that will work for both sides.  That is where the simple stipple comes in.  I bought a matching green thread and just went to town.  I focused on getting the stipple very evenly spaced, I worked hard to get the tension perfect on both sides and I really paid attention to what I was doing.  I quilted this baby in 5 hours!  Woo hoo!  So fast and I am really happy with the end result, the texture is great, I feel there is just enough stitching on the alligators to really secure them and their seams for generations to come.  Since I used a green thread, it really stands out on the blue background and creates a nice visual element as well.  I bound the quilt in the same Kona Ocean as the background and ta-da, finished quilt!

Ok enough tooting my own horn, I did have one fail with this quilt.  The pattern calls for embroidered eyes, on each of the alligators, which I did, except I didn't use a dark enough thread and I feel it is really hard to see the eyes.  If I had to do it again I would use either a really dark green, or even a black so the eyes would really show up.
Picture
I know you are ready to make one of these yourself!  If you are, click HERE to purchase the pattern from the I'm Feelin' Crafty Craftsy store.  Thank you so much Louise, for letting me test this pattern for you, it really was a rewarding and a learning experience, and now I have this beautiful quilt to show for it!  Make sure to stop by the other participants in the blog hop next week and if you want more information about the pattern or how to paper piece, stop by I'm Feelin' Crafty for all of the details.

BlogHopButton

6 Comments

Northern Lights Shimmer

6/12/2014

6 Comments

 
A month and a half ago, I had the pleasure to share my Lotus quilt over at Sew Sweetness as part of the Jaybird Quilts Sew Along, it was such a fun quilt to make and after it was finished I was just itching to make another one of Julie's patterns.  They really are great y'all.  Well I quickly figured out the next pattern I wanted to make after seeing Debbie's version of Northern Lights.  Oh so pretty!  So I ordered the Northern Lights pattern (I already had the Hex N More ruler) and I ordered this gorgeous fabric (Shimmer) by Jennifer Sampou.  I quickly got to work!
Picture
I decided to make the Baby sized quilt, I ordered seven different fabrics, so I only had to figure out which one to eliminate.  Well as you can see, in the end I was unable to eliminate one and instead decided to use them all!  So in order to use them all, I added another row to the width, and two extra rows to the length.  Thus my quilt ended up being right in between the Baby size and Lap size, measuring 44" x 56."  The great thing about this pattern is how easy it is to customize to get just the right size. 
Picture
I intend for this quilt to be a wall hanging in my house and honestly this is probably the most elegant thing I have ever sewn.  Very subdued for me, usually I am all bright and crazy, so this is really a step out of my comfort zone.  Now you can't really tell in these photos, but the fabric is named "Shimmer" for a reason, it has just a slight touch of metallic accents or shimmer to them.  They are gorgeous!  Really stunning. and I hate the fact that you just can't appreciate it unless you see these in person.  The print in the very center, the lightest one, is my absolute favorite, in a way it reminds me of a snake skin, but it is just so darn perfect!  I chose to arrange the fabrics from dark to light back to dark and also to separate the two different colorways.  I was hoping for a smooth transition, and I am really pleased with the result.
Picture
This quilt top was cut out and sewn in about a day, which is also one of the things I love about Jaybird Quilts patterns, so fast and it packs such a visual punch.  I had hoped to have it quilted by now (I already have my thread) but am struggling to find the perfect backing and honestly don't want to just settle to have it finished.  So that being said, I took it outside this morning for a quick photo shoot and for now we will have to enjoy it as just a quilt top.  I plan to matchstick quilt this one via She Can Quilt inspiration, but not all over, rather in a very deliberate pattern, I think it will be awesome, or at least I hope it will be!  It looks great in my head!
Picture
I am linking up this quilt with the Jaybird Quilts Sew Along.  It was really fun to be part of the Blog Hop, and then turn around, sew another quilt and be able to link it up!  If you get a chance, head over to the link up and check out the other entries, there are some fabulous projects over there!  Thank you to both Sara at Sew Sweetness for holding such a fun Sew Along and for Julie at Jaybird Quilts for designing such awesome patterns and rulers!

Picture
6 Comments

Cosmic Burst, a Small Quilt entry into the Blogger's Quilt Festival

5/16/2014

20 Comments

 
Picture
Welcome to Marci Girl Designs!  If you are here for the first time from Blogger's Quilt Festival, I would love for you to have a look around.  I am a stay at home mom to two precious boys and I fill all my free time with all forms of sewing, and in the last few years, mostly quilting.  I'm pretty obsessed, but anyways, enough about me, let's talk about this quilt!

This is my Cosmic Burst quilt that was part of two sew alongs that took place a few years ago.  It started with the Cosmic Burst Quilt Along hosted by Distant Pickles and then I chose to use "my precious" fabrics and incorporated the My Precious Quilt Along hosted by Kelby Sews.  Way back in the day when this quilt was started, I worked pretty diligently on it and had the quilt top finished in a semi-timely manner (good for me anyway.)  In typical fashion, once the quilt top was finished, it sat for a long time, probably a year.  Well at the beginning of last year (think last March) I finally basted, quilted and bound it.  I even took pictures back then, but NEVER blogged about it.  I have no idea why I never blogged about it, I ADORE this quilt, it is currently hanging in my living room and I love it, I guess I just never sat down to share this beauty.  Well today is the day and I decided to share it today by participating in the Blogger's Quilt Festival!
Picture
I said before that this quilt started with the Cosmic Burst Quilt Along, so the pattern was chosen from the very beginning, I knew what the overall quilt design was based on this awesome pattern that Julie designed.  I still love it today as much as I did when I started this project.  Such a pretty design.  I then had to choose what fabrics I wanted to use to compliment the pattern.  Well I knew I wanted something pretty special, so i chose to cut up my hoarded, precious Heather Ross, Macaroni Love Story that was printed exclusively for Spoonflower.  I created 3 digital mock-ups of fabric placement (I didn't want to mess this thing up) and after debating for a while, chose the one I liked best.  In the end I added in Patty Young, Lush, Running Stitch (the pink and orange dotted stripes) and then framed the whole thing with a background fabric of Alexander Henry Heath (the gray crosshatch,) still one of my all time favorites.
Picture
I had to do quite a bit of figuring to get all of the directional prints to fall perfectly, especially those blue and yellow sail boats, that was a mental challenge!  But once the cutting was done, the sewing was fast and before I knew it I had a finished quilt top.  And there it sat forever.  Well in the meantime Heather Ross designed fabric for Hancock Fabric stores, one of the prints was a matching clothespin doll print in gray (which worked out PERFECTLY) and I was able to buy enough yardage for the back of this precious quilt that featured all of these much loved and hoarded fabrics.  So I basted it, and then had to decide on quilting.
Picture
I pretty much knew that I would straight line quilt this one, and I wanted to feature the radiance of that center star from which the whole quilt pattern was based.  I started quilting on the diagonal in 1/2" lines from corner to corner and then the opposite direction, this creating the wonderful grid right in the dead center of this quilt, seen below.  I just loved how that turned out.  Oh and I used a nice matching gray quilting thread, to hopefully blend in, but yet be seen just the right amount.
Picture
Once the center sections were quilted, I just echoed the quilting in diagonal "triangles" in the top, bottom and sides.  I chose to do this stitching 3/4" apart, hoping it would make the center section stand out, and I think it did exactly what I was intending!  Once the quilting was complete I decided to bind it in the same Alexander Henry Heath, so that the binding would just blend into the background.  The finished quilt measures 40" x 40", I used a cotton batting (don't remember the details) and it is a perfect wall hanging.

I am so happy to have shared this finished quilt today and thanks so much for reading along!  I also wanted to mention that I am fairly new to Instagram, and I would love it if you would follow along with my daily antics, you can find my Instagram account here, marci_girl.
Picture
Picture
AmysCreativeSide.com
20 Comments
<<Previous

    Marci Girl

    A feisty mom designing, sewing and blogging her way through everyday life!

    Subscribe
    Follow on Bloglovin
    Picture
    Follow on Bloglovin


    Categories

    All
    2017 Finish A Long
    2018 Finish A Long
    2019 Finish A Long
    Bee Sewcial
    Book Reviews
    Clothing
    Everyday Life
    Giveaways
    Handbags
    Handstitched Class
    Inspirational Projects
    Marci Girl Designs
    Projects
    Quilt Along
    Quilting Bees
    Quilts
    Random Thoughts
    Recipes
    Sew Along
    Sewvivor
    Style Stitches
    Swaps
    The Penny Sampler Class
    Tutorials
    Wip Wednesday


    Happily
    Participating In:

    Picture
    Picture
    Picture
    Picture
    Picture
    Picture

    Picture


    Archives

    January 2020
    November 2019
    October 2019
    July 2019
    April 2019
    March 2019
    February 2019
    January 2019
    December 2018
    October 2018
    August 2018
    July 2018
    June 2018
    May 2018
    April 2018
    March 2018
    February 2018
    January 2018
    December 2017
    November 2017
    October 2017
    September 2017
    August 2017
    July 2017
    June 2017
    May 2017
    April 2017
    March 2017
    February 2017
    January 2017
    April 2016
    March 2016
    February 2016
    January 2016
    September 2015
    July 2015
    October 2014
    September 2014
    August 2014
    July 2014
    June 2014
    May 2014
    April 2014
    March 2014
    February 2014
    January 2014
    November 2013
    October 2013
    September 2013
    August 2013
    July 2013
    June 2013
    May 2013
    April 2013
    March 2013
    February 2013
    January 2013
    November 2012
    October 2012
    September 2012
    August 2012
    July 2012
    June 2012
    May 2012
    April 2012
    March 2012
    January 2012
    December 2011
    November 2011
    October 2011
    September 2011
    August 2011
    July 2011
    June 2011
    May 2011
    April 2011
    March 2011
    February 2011
    January 2011
    December 2010
    November 2010
    September 2010
    August 2010
    July 2010
    June 2010
    May 2010
    April 2010
    March 2010
    February 2010

    Picture

    RSS Feed

Powered by Create your own unique website with customizable templates.