|
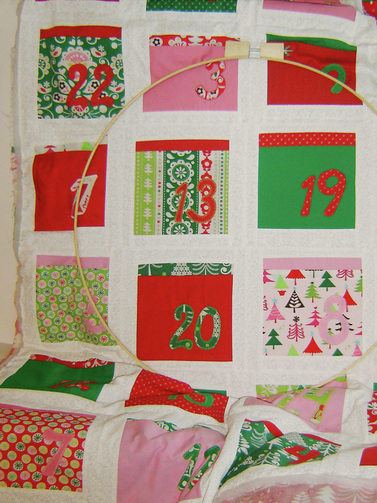
Last week (Monday that is) I signed up again for Amy's One Thing, One Week Challenge. I have done this before, one semi-success, one fail, and now one ultimate success! In case you don't remember the premise behind the challenge, it is to pick just one thing for the week and get it done! Honestly, I have been doing this most weeks, just trying to wrap up those many projects laying around. Well this time, I set my goal really really low (I knew we would be out of town for the majority of the Thanksgiving holiday) and I really wanted to complete this challenge. What was my challenge? Simply to baste together the three layers of my advent calender pocket Christmas quilt. First I had to finish piecing the backing, which I did, then I got down on the floor and hand basted the top, batting, and backing together by hand with a needle and thread and really really big basting stitches! I hate this task and it did take me an entire day, but I finished! What is my next goal? To quilt this baby (by hand) during the Christmas holidays, so that we may actually use the wall hanging next Christmas! Interested in making your own advent calender wall hanging? Then head on over to Sew, Mama, Sew for the great pdf tutorial for this super fun quilt. Thanks Amy for the challenge!
4 Comments
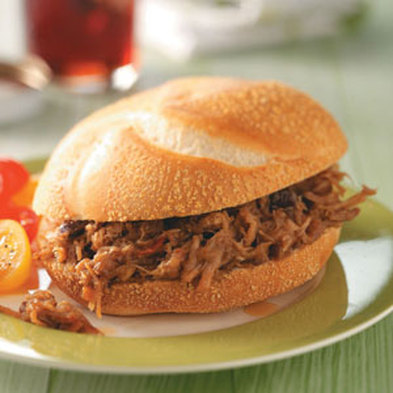
Easy pulled pork sandwiches you say? Yes, easy, super easy, oh and the best part, delicious every single time! Serve Pulled Pork alone, or on a good crusty roll, and if you like pickles, add them on top. So good and easy! Crock Pot Pulled Pork SandwichesIngredients: 1 Package McCormick Slow Cookers BBQ Pulled Pork Seasoning Packet 1 Large Red Onion 3 Pounds Boneless Pork Shoulder, Well Trimmed 1/2 Cup Ketchup 1/2 Cup Firmly Packed Brown Sugar 1/3 Cup Apple Cider Vinegar Crusty Rolls Pickles for Serving (Optional) Directions: Slice Red Onion (medium to small strips) and place the Red Onion in the bottom of the slow cooker. Place trimmed Pork on top of Onions. Mix Seasoning Packet, Ketchup, Brown Sugar, and Vinegar until well blended. Pour over pork and cover. Cook 8-9 Hours on Low, or 4-5 Hours on High. I like to open the slow cooker halfway through and cut pork in half or even fourths. Once the pork is finished cooking, take two forks and shred the meat (which should be really easy because it is so tender and falling apart.) Stir everything together really well and serve on Crusty Rolls. Enjoy! This recipe comes from an issue of Country Living Magazine, and I made it for the baby shower I threw this past summer. It is delicious and really unique! Make sure you cook the bacon extra crispy!
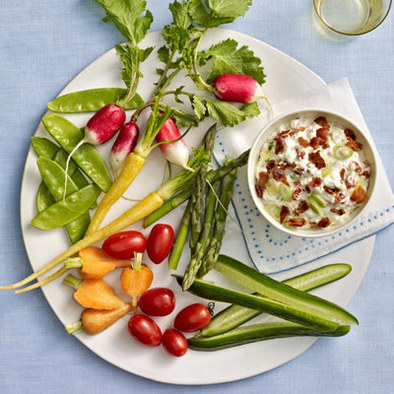
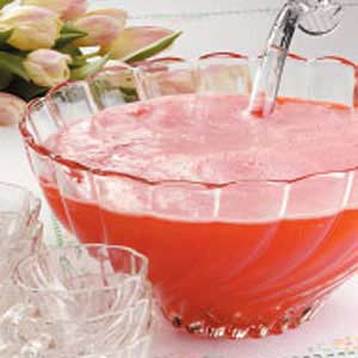
Bacon Dip Recipe Makes 2 Cups, Serve with Crackers or Vegetables Ingredients: 1/2 Pound Bacon 3 Small Thinly Sliced Scallions 3 Finely Chopped Sun-Dried Tomatoes 4 Ounces Softened Cream Cheese 2/3 Cup Ranch Dressing Directions: Cook 1/2 Pound Bacon until crisp. Drain on paper towels, then finely chop/crumble. Reserve 2 Tablespoons Bacon and stir rest together in a medium bowl with the remainder of the ingredients. Transfer to a serving dish and chill for 30 minutes. Garnish with reserved Bacon and additional sliced scallions. Enjoy! I have made this punch quite a few times now, and every single time, everyone loves it, and empties the punch bowl, literally, I am pouring the last cup from the actual punch bowl. It really is that good. Now I wish I can say that I made up this great recipe, but I didn't, I found it online, quite some time ago, and have no idea where it came from, sorry, I would give credit if I knew who was the ingenious person that invented it! But, that being said, I have altered the recipe (the original was WAY to sweet,) and am offering tips to make the process much easier. This punch is great for any type of shower, and would make a great Christmas punch as it is red in color and would look wonderful if the punch bowl was surrounded by Christmas greenery. Slush Punch RecipeThis recipe makes two batches. a.k.a. you can refill the punch bowl after everyone drinks the first batch!
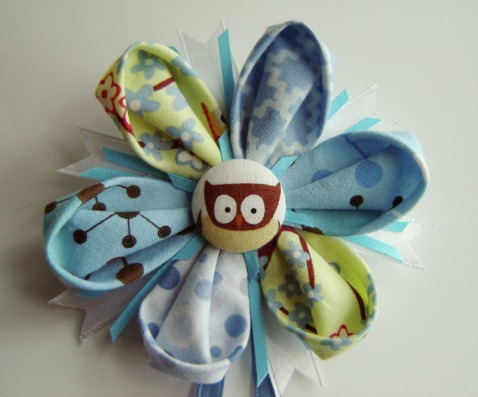
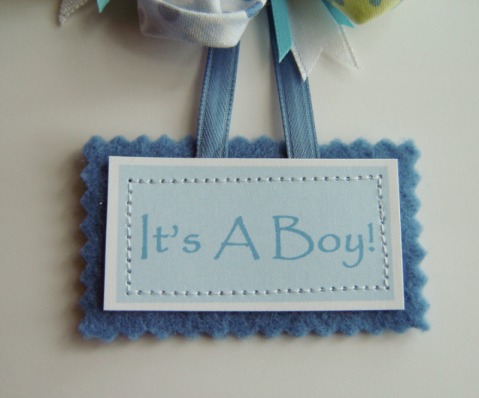
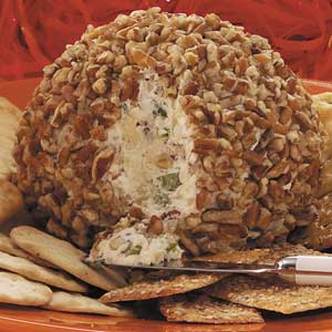
Ingredients: 2 Cups White Sugar 6 Cups Water 2 (3 oz.) packages strawberry flavored gelatin mix 1 (46 oz.) can pineapple juice 2/3 cup lemon juice 1 quart orange juice 2 (2 liters) Sprite or Lemon-Lime flavored Soda Directions: One or two days before the party: In a really large pot, heat the water, add sugar and strawberry gelatin. Boil this mixture for 3 minutes, continually stirring, making sure everything is well dissolved. Remove from heat and stir in pineapple, lemon and orange juices. Evenly divide the mixture into 2 gallon Ziplock bags. Carefully seal the bags, and place them laying down in a high walled container/tray in your freezer, you want a high walled container/tray in case the bags were to leak or break, you don't want to flood your freezer with this solution. The day of the party: Remove at least one of the freezer bags of frozen punch 2-3 hours before the party starts in order to give the solution time enough to soften so that it is easier to work with. Right before the party starts, dump out the contents of the freezer bag into your punch bowl, and using a potato masher, gently mush up the mixture to make it into a slush. Slowly pour one of 2 liters of Sprite into the slush and then stir. Enjoy! Why a Semi-Tutorial you ask? What does it mean? Basically, I am going to walk through what I did to create this item, but I don't have step by step photos, so to me that makes it a semi-tutorial! 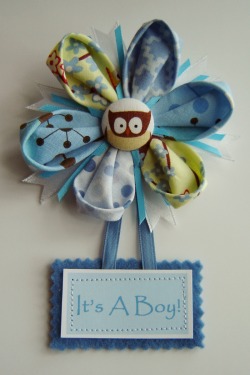 I wanted the mother to be to have a corsage, but wasn't sure real flowers was the route I wanted to take, so after much deliberation I decided to make her corsage. At first I thought about faux flowers, but thought that it wouldn't create the look I wanted, then it dawned on me...fabric, my medium of choice! In the end, I thought it turned out pretty darn cute, and the mother to be can keep her corsage forever! Here is how I created this single flower corsage: Fabric Flower Corsage Tutorial Supplies: 7 (2" x 2") Scraps of Fabric, Assorted Ribbon (Various Sizes and Colors), 2 Scrap Pieces of Felt, 1 (3/4") Fabric Covered Button, Card Stock, Scrap of Cardboard, Metal Pin Back Tools: Hot Glue Gun, Sewing Needle and Thread, Sewing Machine, Fabric Covered Button Tool, Scissors, Pinking Shears, Fray Check, Elmers Glue, Computer and Printer Instructions: I used a book that had instructions on how to make a Kanzashi Flower, and honestly the instructions were not very good at all and I struggled (Big Time.) The good news is, I have found an online tutorial that is GREAT! Just make the petals smaller using the 2" x 2" fabric scraps and make only six petals. I didn't use starch either, didn't feel like I needed it, and hold off on attaching the fabric covered button for now. OK, here is the step-by-step: 1. Go to Bitty Bits and Pieces for directions on how to make the fabric flower itself. This tutorial is great! Use six (2" x 2") fabric scraps, either all one color, or a matching set of scraps. 2. Make the fabric covered button with the last fabric scrap, I used a piece of fabric that had an owl image, and just centered it on the button. Set aside for later. 3. Cut two or three types and colors of ribbon into 2" and 2.5" pieces. Neatly cut one of the ends at either an angle or a "V" shape. Using a tiny amount of fray check, seal the neatly cut edges of the ribbon. Set aside to dry. I used 6 pieces of 1/2" white ribbon that was 2.25" in length and cut in a "V", and around 12 pieces of 1/8" blue ribbon in 2" lengths cut at an angle. I also used 6 short 1/2" lengths of the same blue ribbon around the center button. 4. Cut a 6" - 7" piece of ribbon, I used a 1/4" blue ribbon. The length of this piece can vary depending on how low you want the saying underneath to hang. Play with the length to get it just right for your corsage. 5. Using your computer and printer, create a simple saying (It's A Boy, It's A Girl, or Congratulations) and print it on card stock, then trim it to a rectangle around 2" x 3". I printed the text in blue, and then put a light blue box around it, then when I trimmed the card stock, I left a slight white border around the blue box. 6. Using the cut out card stock as a template, take a piece of felt (in my case blue) and using pinking shears, cut around the felt to have a border all around the card stock, the felt ended up being roughly 2.5" x 3.5". 7. Cut a 2" circle out of the scrap of Cardboard. 8. Take the 6" - 7" piece of ribbon, and fold it in half into a upside down "V". Using Elmers glue, carefully glue the loose ends to the backside of the printed card stock. Let dry. Once dry take the card stock and felt and place the felt on the backside (creating of sandwich of felt, glued ribbon, then printed card stock) and using a sewing machine carefully sewing around the card stock, roughly 1/4" from the edge, this will hold all the layers together. 9. Time for Final Assembly! Preheat the glue gun. Carefully glue the longer ribbon strips (unfinished edges in the center) to the back side of the fabric flower. Glue the little strips (unfinished edges in the center) to the front of the flower and then hot glue the fabric covered button into the very center, covering up all unfinished edges and hot glue. Flip the flower over to the backside and carefully hot glue the 2" piece of cardboard in the center of the flower, covering up all unfinished edges and hot glue. Hot glue the pin back to the top of the cardboard circle, and hot glue the top point of the "V" (of the felt, ribbon, card stock sandwich) to the bottom of the cardboard circle. 10. Almost Done! Carefully cut another scrap of felt (2.5" circle) this piece is to cover the cardboard and any showing hot glue. Once you have the size right, because you don't want the felt to show on the front, cut a slit that the pin back can be pushed through, and using Elmers glue, glue the felt to the cardboard, pushing the metal pin back through the felt, so that the mother to be, can attach it to her clothing. You are now finished and ready to give this lovely corsage to the Mother to be! This recipe comes from a Good Housekeeping (maybe?) and was created by Glenda Burnett, though I have modified it, so it isn't exactly the same, but close, and every bit as delicious. Make sure to put out a small serving knife, otherwise everyone will break their crackers trying to scoop it up! This recipe is also great at any holiday function, I will be making some for Christmas this year for sure. Pecan Cheese Ball RecipeThis recipe makes two cheese balls, you can always freeze one without the pecans, and take it out at your next function for everyone to enjoy! Just remember to roll it in pecans before you serve it. Ingredients: 2 Packages (8 oz. each) Cream Cheese at Room Temperature 2 Cups Shredded Mild Cheddar Cheese 1 Can (7 oz.) Diced Green Chiles, Drained 1/4 Cup Dried Onion Flakes, Softened in 1/4 Cup Water 1 Teaspoon Garlic Powder 1/2 Teaspoon Cayenne Pepper 2 Cups Chopped Pecans Directions: In a large bowl, mix Cream Cheese, Cheddar Cheese, Green Chiles, Softened Onion Flakes (water drained from,) Garlic Powder and Cayenne Pepper. Once thoroughly mixed, place plastic wrap in two round bowls, and scoop mixture into the two bowls evenly. Wrap the plastic wrap around the two balls to seal it, and place into the refrigerator (in the bowls) for at least one hour in order to firm up the cheese balls. Before the party remove cheese balls from plastic wrap and roll them in the chopped pecans. Serve with crackers. Enjoy! Want another great cheese ball recipe? Click on the photo above to get a recipe for a great variation of a pecan cheese ball, this recipe uses pineapple!
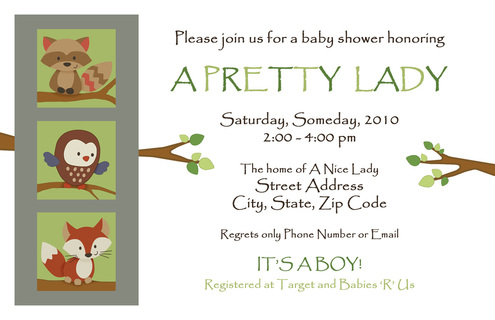
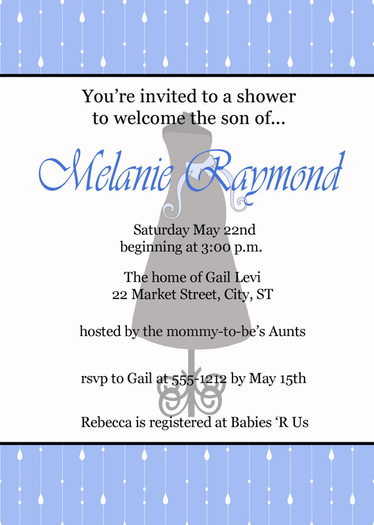
Welcome to Baby Shower Week, here at Marci Girl Designs! This past summer I threw a baby shower for a friend, and thought I would share some recipes, tutorials and projects that I had at her shower. So, make sure to stop back by everyday this week for something new, and all the recipes featured this week will work great at any other function, and would be super tasty at a Thanksgiving or Christmas get together! What is the first step when you throw a party? The invitations of course! The image above is the invitation that I designed based on the mother-to-be bedding choice (her nursery theme.) I digitally created all the images and did all of the card layout in Photoshop. The gray box was a great chunky textured paper that was elevated with thick double stick tape, and then the three animal boxes were printed and cut out individually and elevated on top of the gray box with the same double stick tape, creating a neat 3D effect. It was extra work, but the result was worth it! I printed the invitations at home on card stock, and since I had all of the supplies already from left over projects, the cost was very minimal. After I finished the invitation, I realized that I could make the mother-to-be a gift using the images on the invitation. I took the three animal squares, and printed them 8" x 8". I then created a small complementary colored mat around each one, and framed them all in three brown 10" x 10" frames. Now she has three cute matching images for the nursery. The hardest part was finding three frames that were the right size! Don't have the time or ability to create your own invitations? That is OK, head on over to Etsy to find some great sellers who have already created great invitations...all you have to do is supply them with the information, and then print them yourself! The three images I have shown here, are great examples of some of the awesome invitations you can find on Etsy. Click on the invitation and it will bring you directly to the shop that designed it! Don't forget to stop back by tomorrow for Day 2 of Baby Shower Week, I will have a delicious recipe for you to try!
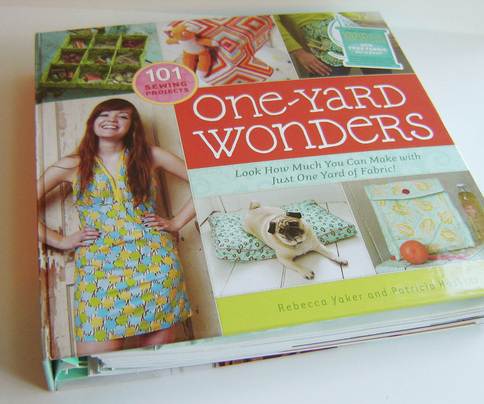
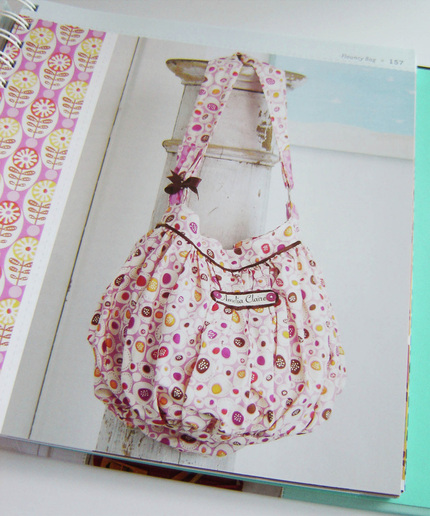
I own a lot of sewing/craft books, A LOT, and I am good at giving decent critiques...well at least I think I am, so I decided to review some of the books that I own in hopes of helping other sewing enthusiasts and or crafters in deciding whether or not it should belong in their own collections. Today is the first review in a series of reviews to come, and first up is "One Yard Wonders" by Rebecca Yaker and Patricia Hoskins. The tag line of this book is "Look How Much You Can Make with Just One Yard of Fabric!" and honestly that about sums it up, there are a ton of projects in this book. You may not like them all, but there is bound to be something in the book that you would actually make and love. I am going to break it down by chapter: Sewing Fundamentals - The first chapter deals with all the fundamentals (duh) and does a really good job of covering everything and has great diagrams, honestly one of the best set of basic instructions I have seen in a while. Dwell Redux - Basically a collections of items for your home, from curtains, pillows, bathroom items and to me one of the neatest a filing cabinet cover (hide that ugly thing!) A well rounded collection, a little something for everyone. Household Affairs - Think of the chores in your life, now think of the items that make chores better! Quite a few apron patterns in this book, which is really cool, and the highlight of this chapter to me is a hot dish caddy or casserole caddy that makes transporting that hot dish oh so fabulous! Craft Organization - Features a sewing kit, sewing machine cover, an organizer and a really cute smock, among quite a few other things, a nice collection. On the Go - This chapter features all the bags that you use to haul stuff when you leave the house, like a laptop sleeve, quilted lunch box (which is a really great project,) and four larger bag patterns. This chapter is great because a lot of the bags can be used for other things, you can easily take "Matt's Map Bag" and convert it into your everyday handbag. The jewelry roll is also a very nice project in this book. From Head to Toe - Clothing for women. Honestly this is my least favorite chapter in this book, think about it though, in order to make women's clothing with one yard of fabric, you have to be a size 2 or wear skimpy clothing, this chapter has patterns for halter tops, short shorts, and a summer nightie that is really cute, but also pretty skimpy...good thing you are only wearing it to bed! One side comment, I honestly did not get the "Spats" project at all, which is a fabric thing you wrap around your leg to turn your shoes into "boots." Maybe I haven't been hanging with the "cool kids" lately, but I have no idea as to whom would actually wear this item? Carry It All - My favorite chapter (but I am biased since I am a handbag designer.) It has nine great handbags, all of which I would make in a heartbeat, and I especially love the "Flouncy Bag," "Folklore Bag," and "Scrunchie Bag." I would buy this book based on this chapter alone. Outfit Your Small Wonder - Clothing for children or should I say girls...would have loved to see a project or two for little boys! Accessorize Your Little One - Cute selection of items for children, a baby gift set, smock, apron, growth chart, mobile, and a great firefighters hat. A great selection of projects (there are a lot more that I didn't list.) Playtime - A bunch of stuffed animals, a cute doll play set, and a kite. The "Peg Bear" is so cute and I can't wait to make one as a baby shower gift. Your Furry Friends - Gee I wonder what this chapter is about? A collection of items for the dog or cat in your life I'm not the type of person who would sew for my pet, so this chapter held no interest for me, but if you would sew for your pet, then you would love this chapter. The two dog/cat beds in this chapter are very nice...and ok, I admit, I might make them... Now that I have gone through each chapter, I have a few more things to say, first off the patterns are in a neat envelope attached to the inside cover of this book, this is awesome, and keeps them all together in one place. The general layout and design of this book is quite stunning, great photography, awesome page layouts, and a great spiral binding allows the book to lay flat. Only two complaints, I do find the "directions" for each project to be really short, and you almost need to have sewing experience to tackle these projects with confidence. I like diagrams, and there aren't that many in this book, I'm not saying that a newbie can't create these projects, because they probably can, I just think they would need a little more direction or help. My other complaint is a trifle one, though the two authors of the book did create a great many projects for this book, (and did a lot of other work, I know) a majority of the other projects are submitted from other people (credit is given to them) which is actually a plus because you get such diversity and range of projects from so many "authors" or "contributors." I guess I just wish these contributors had received more credit or a mention on the front cover.
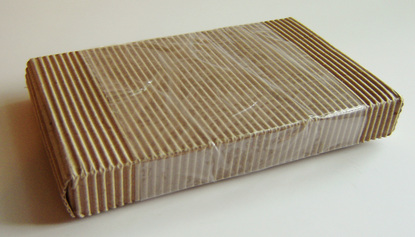
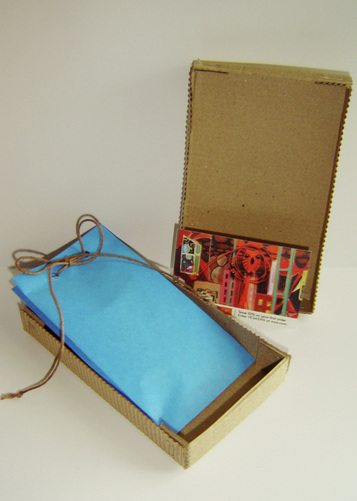
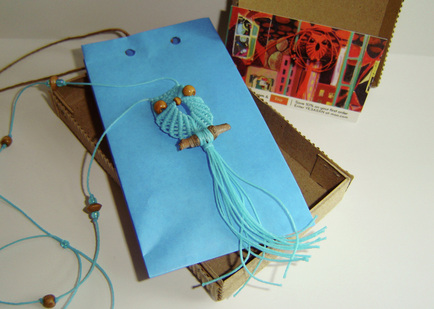
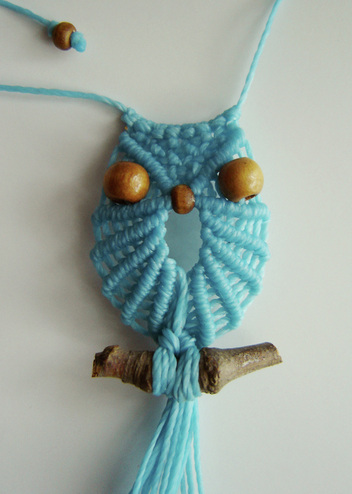
Overall, I would definitely say that this is a "must have" in your collection of sewing/craft books, and it would truly make a great gift for that crafter in your life. Heck, buy it for yourself, I love it, and think it is great...that means a lot, right? Five out of five stars or 10 out of 10 yards of fabric, or whatever method you would choose to judge a sewing book! 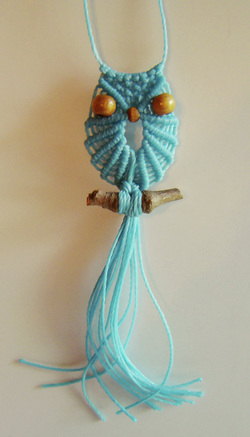 Every now and then something on the front page of Etsy catches my eye (as I am sure happens to everyone at some point) and usually I heart the item, and on rare occasion, I purchase it! Well this item is one of those impulse purchases. It was love at first site, I guess my hippie side was begging to come out that day, I just couldn't resist this macrame owl necklace. It comes from a great Etsy shop, macraMe, and is handmade in Buenos Aires, Argentina. Not only are their products great, but the packaging is great and their listing photographs are great too! Wow that is a lot of greats! The quality of this funky little necklace is impeccable and it honestly had the neatest packaging (see photos below.) Browsing in their shop just now, I discovered another one that I would love to own ... click here to see it! It was also pretty amazing how quickly I received this necklace in the mail considering it came all the way from Argentina! If you are looking for that truly unique Christmas gift for that fashion forward person in your life, check this shop out! |
Marci GirlA feisty mom designing, sewing and blogging her way through everyday life!
|






 RSS Feed
