• Home
  • Blog
  • 2020 Finish - A - Long
  • 2019 Finish - A - Long
  • 2018 Finish - A - Long
  • Contact
  • 2017 Finish - A - Long
  • Shop
Marci Girl Designs

My Fringe Blouse

3/22/2019

3 Comments

 
Picture
Hello!  I had the privilege to test the new extended size and cup range of the Fringe Blouse and Dress pattern by Chalk & Notch Patterns.  I say privilege because Gabriela has the most detailed, well written patterns.  I have made several Waterfall Raglans and a LOT of girls Waterfall Raglans but hadn't tried any of her woven patterns.  When I was offered the opportunity to test I jumped on it.  The testing took place right after Quiltcon so it was nice to get back to sewing immediately once I got home.

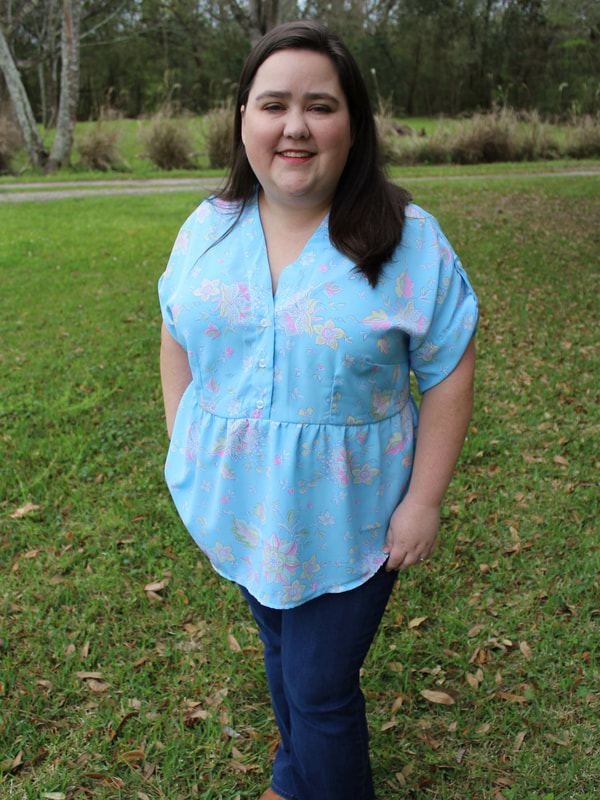
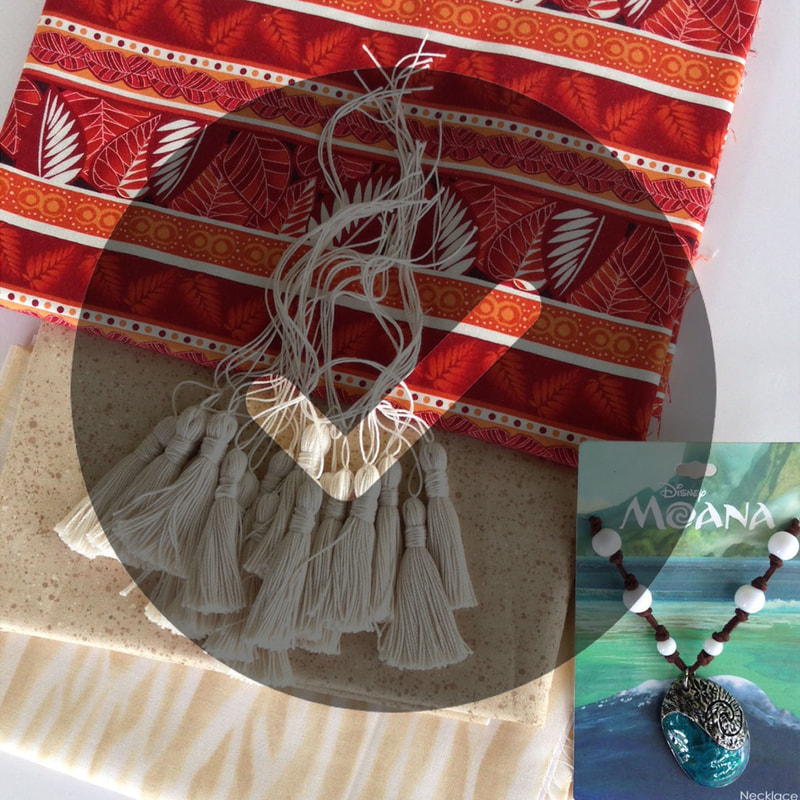
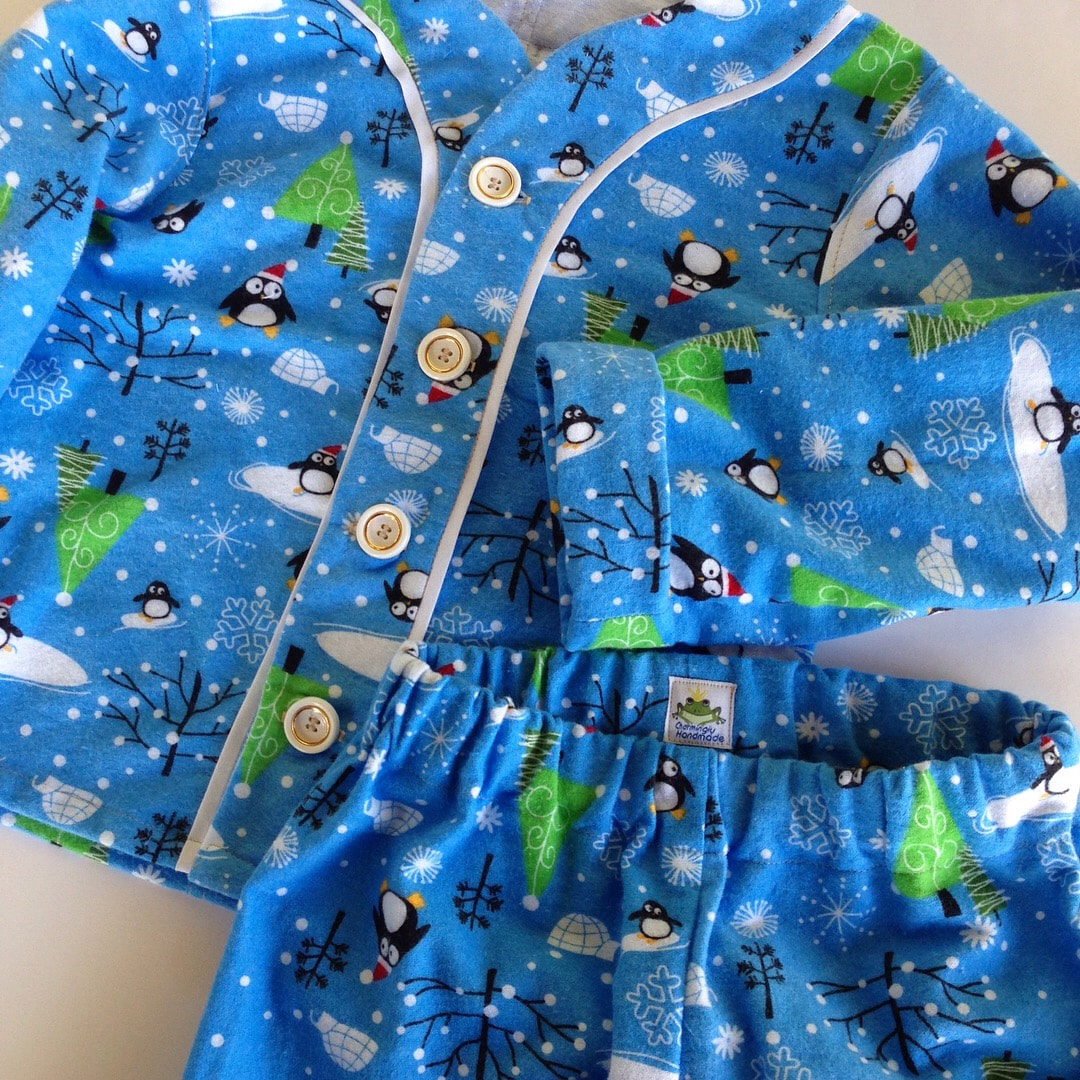
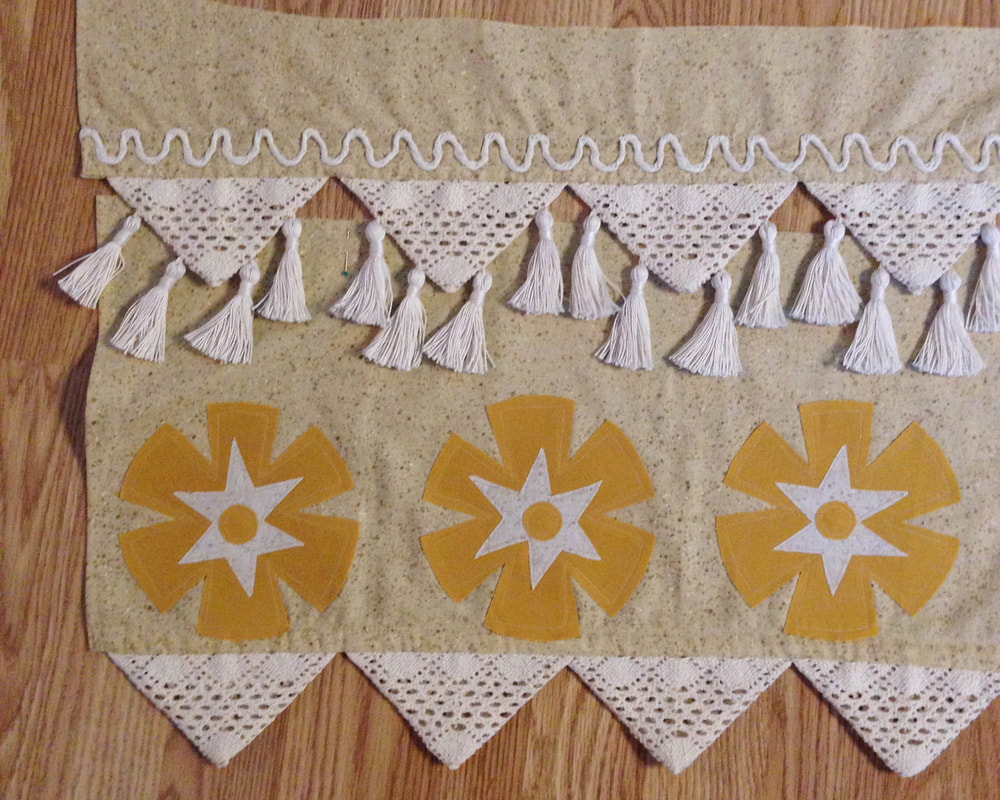
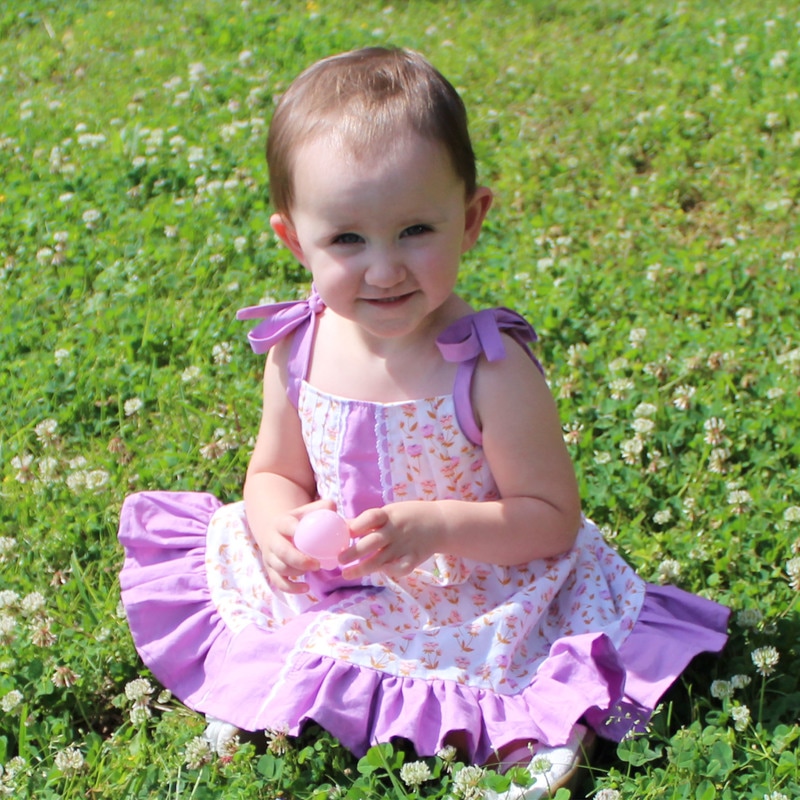
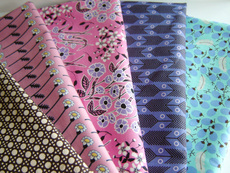
I have a rather large stash of fabrics so I dug deep and found this light blue floral polyester blend that has been in my stash for at least 10 years.  I washed it, hung it to dry and was able to cut the blouse out of 2 yards of 58" wide fabric.
Picture
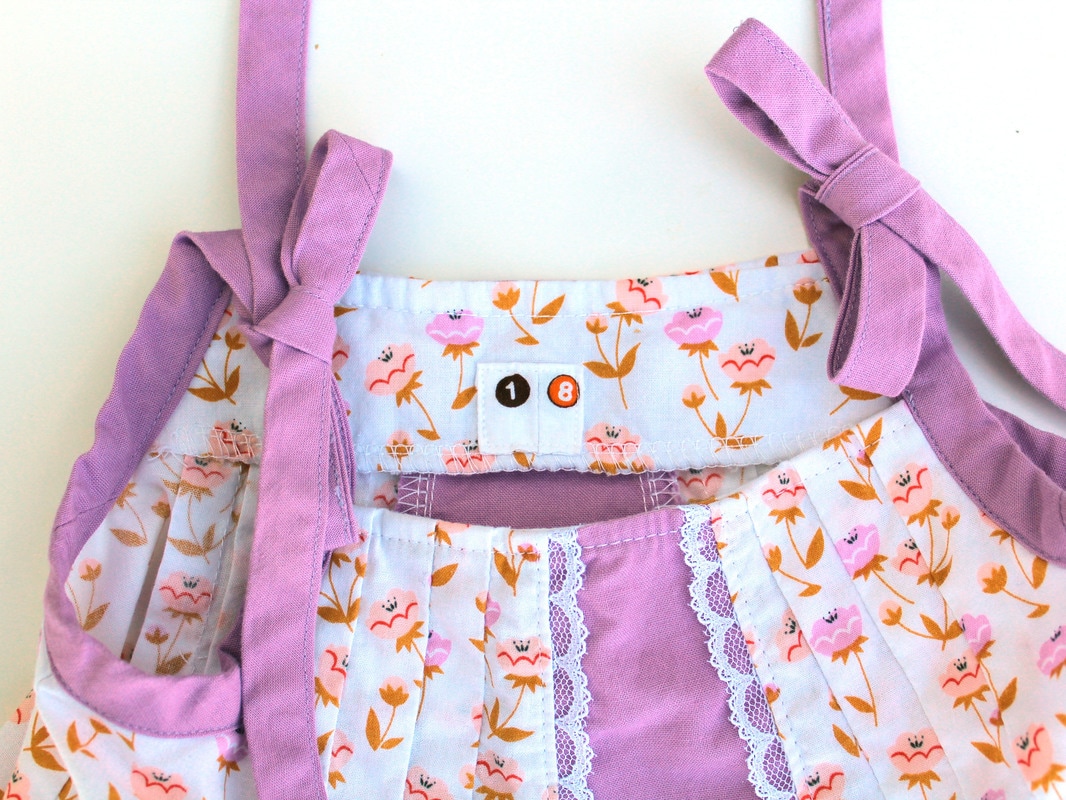
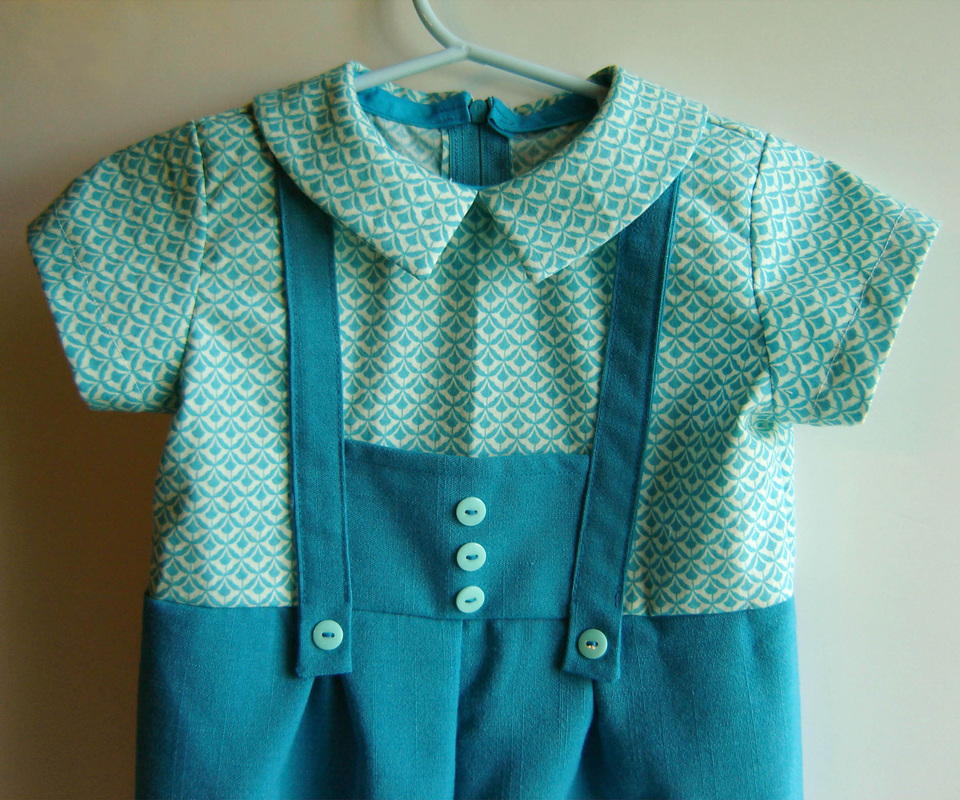
  One of the things I love about Chalk & Notch Patterns are the attention to details in the directions.  They really walk you step by step and you never question what to do at any point, which is really nice when sewing up a style you haven't tried before.  I was afraid this fabric was going to be fussy to work with since it is really slippery but I never had a problem.

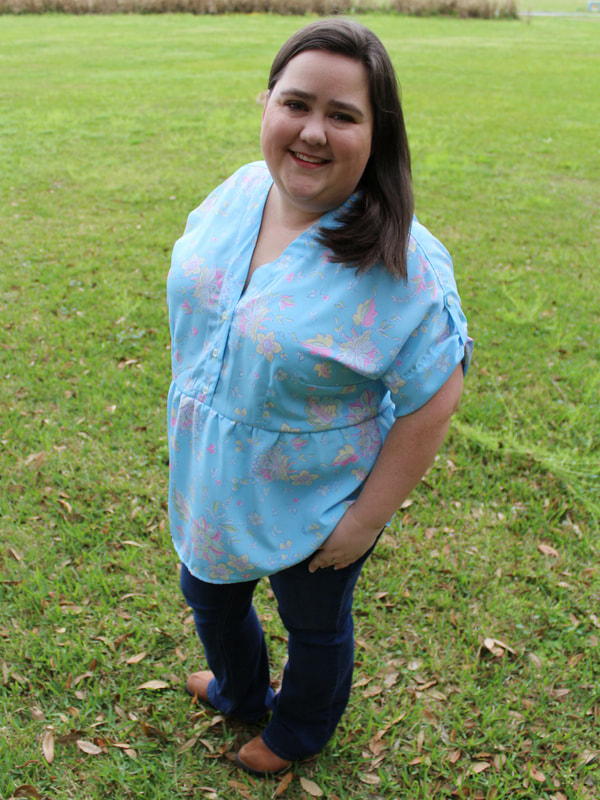
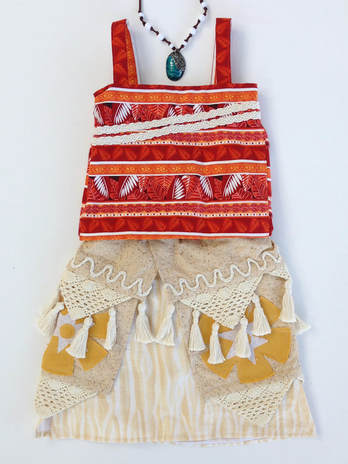
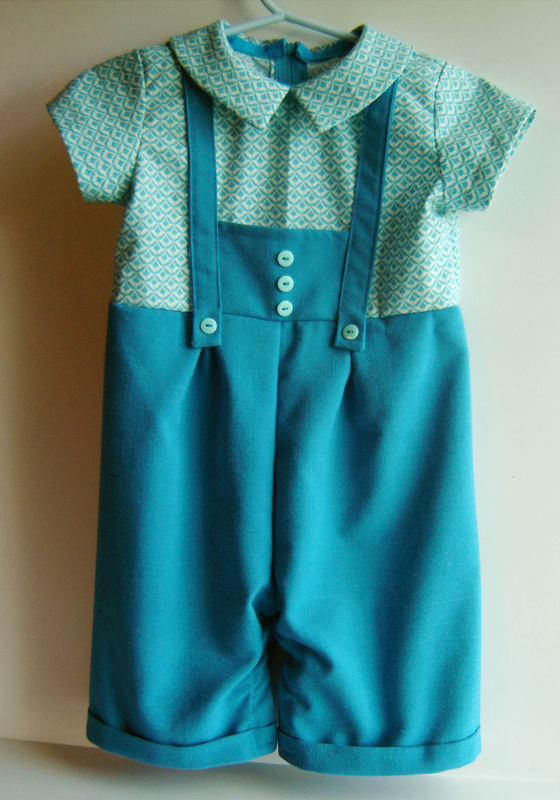
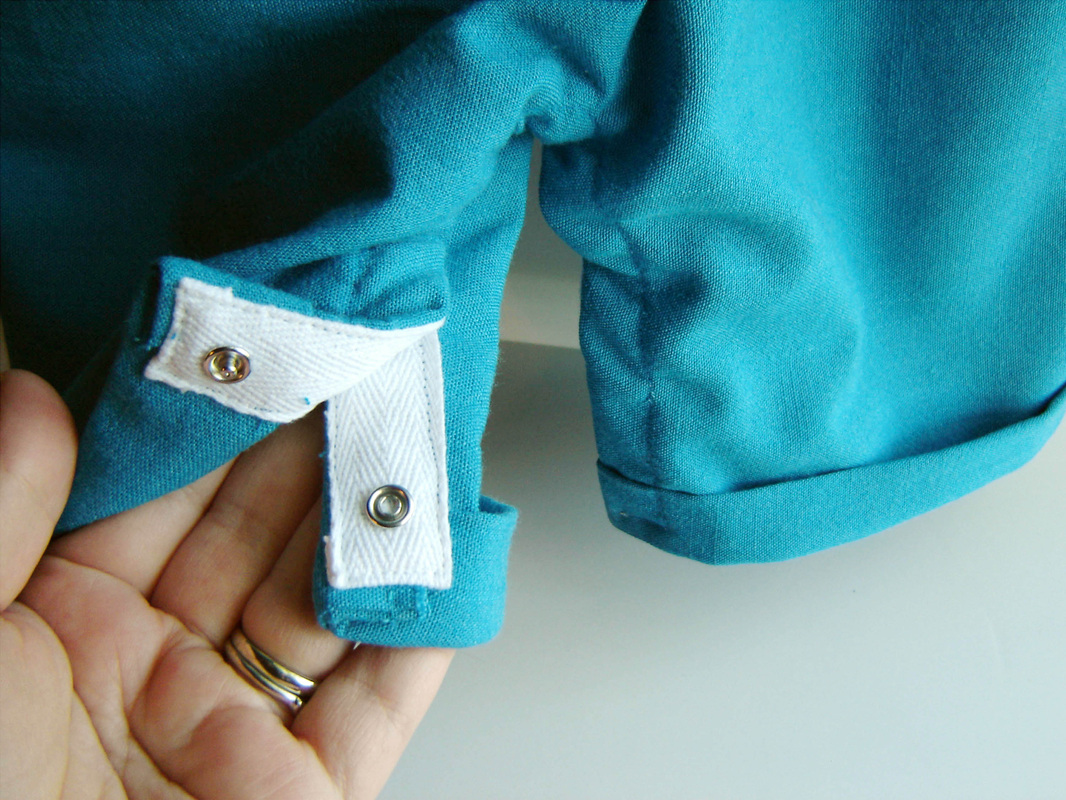
I chose to make View A as I liked the sleeve option and the front having the crossover button detail.  I cut out a size 18 C/D at the top and graded out to a size 20 in the waist.  I cut the bottom "skirt" out as a size 20.  The top portion fit perfectly but the waist was still a bit snug right at the seam line so I ended up letting out the four waistline darts just a tad (2 in the back and 2 in the front.)  Now the fit is more comfortable. Since I'm 5' even and the pattern is drafted for a taller gal, I shortened the upper bodice by 1" and think I could go a little more next time.  The length was perfect as is.  Other than that I changed nothing else with the pattern.

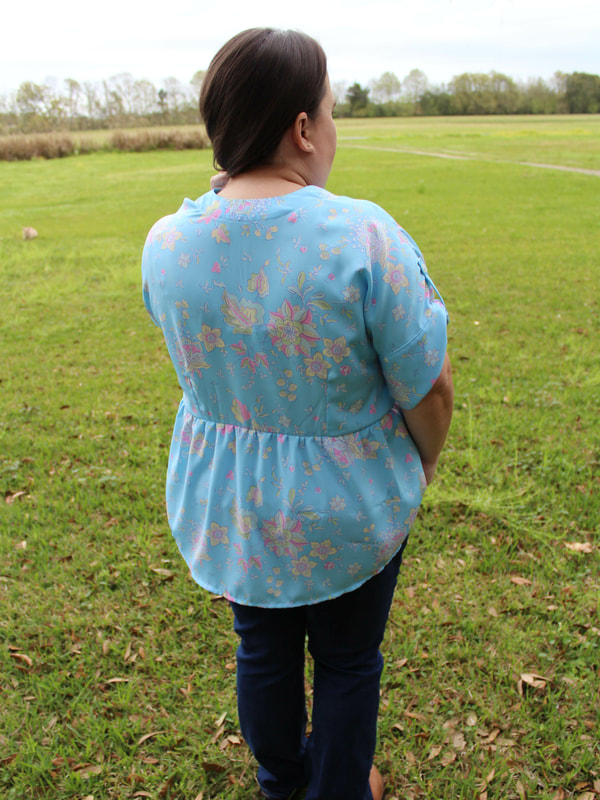
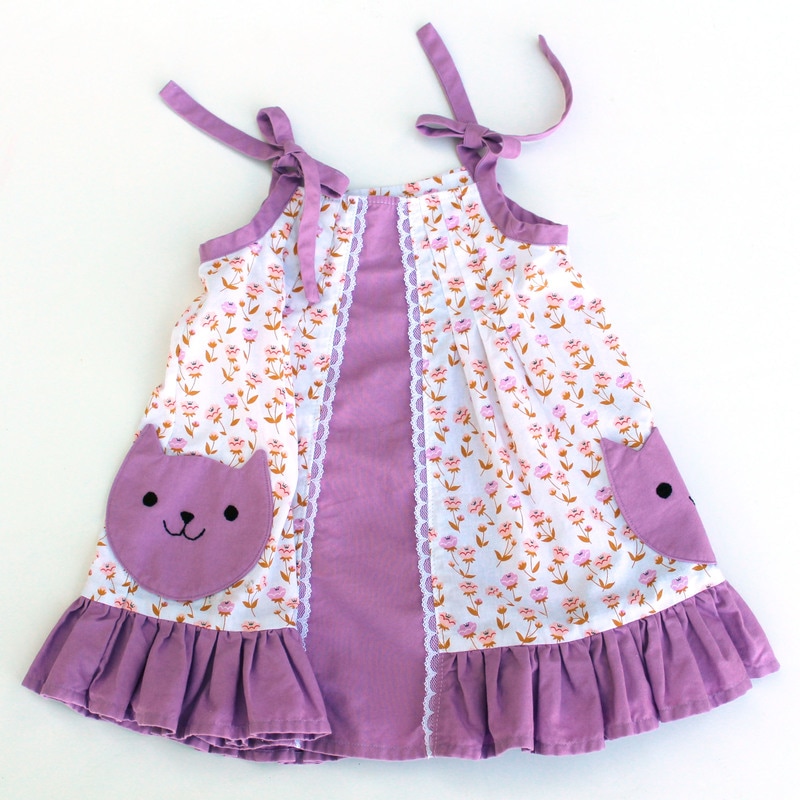
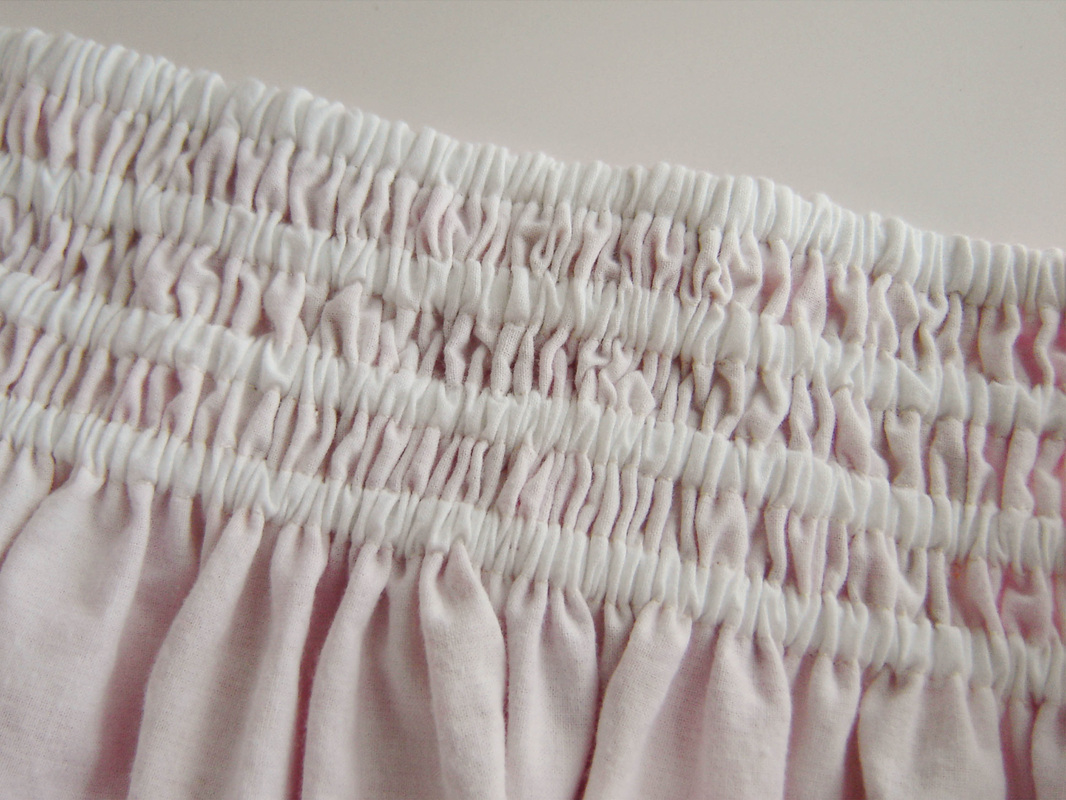
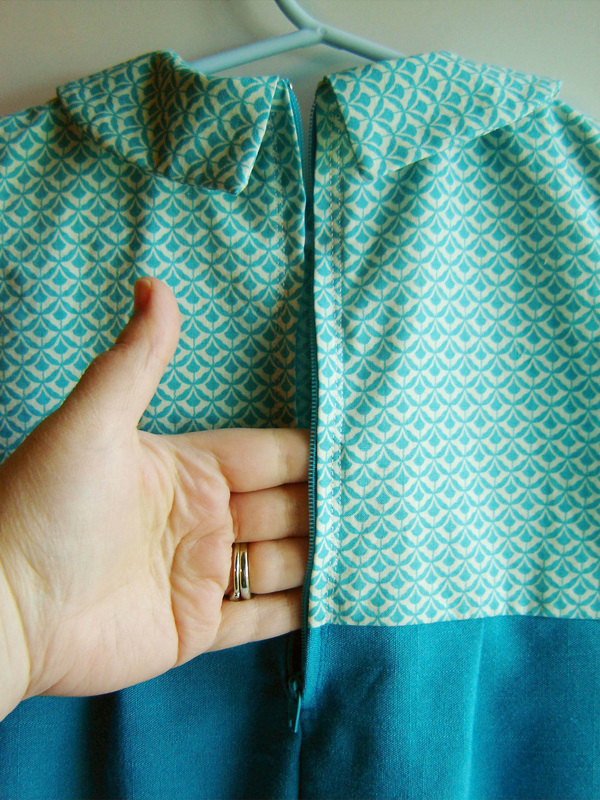
I am thrilled with the back of this garment, no pulling, it looks nice and feminine.  This blouse will be in constant rotation this spring for sure.
Picture
The updated Women's Fringe pattern is available now and on sale for a limited time.  Head over to Chalk & Notch Patterns where you can find the PDF to purchase.  I highly recommend the pattern and can honestly say it is very flattering on a variety of figures and sizes.  Gabriela wrote a very extensive blog post on all the updates and sizing information so if you have any questions you can find all that information HERE.

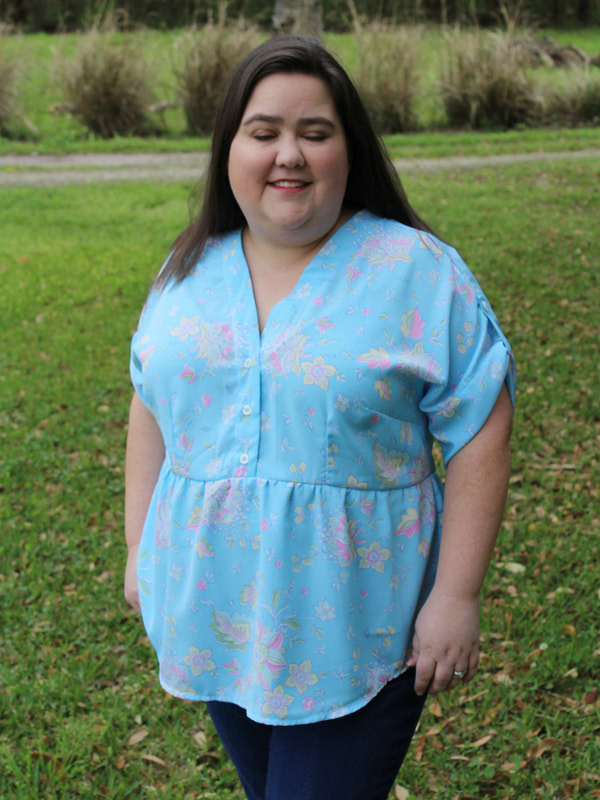
I feel like a clothing blog post can't be complete unless I have an out take.  I don't know if you guys remember the show, "My Name is Earl" but the main character on the show could not take a photograph without his eyes being closed and for some reason as an adult the same applies to me.  This photo shoot was taken by my husband and he took about 75 photos and SO MANY my eyes were closed and of course it is always the photo I love the most. HAHA oh well, so here it is.
Picture
3 Comments

I Made Shoes!

6/28/2018

2 Comments

 
Picture
It's a first for me, but I made real shoes.  I've made baby shoes in the past, yes, but never anything with real soles and now I can check that off my sewing bucket list (I don't really have one of those in case you were wondering.)  These espadrilles were made with Dritz Espadrille kits, which include the soles and pattern for the fabric top.  I was browsing the clearance section of Hobby Lobby one day and they were getting rid of all their kits, so I scooped up several toddler sizes for the bargain $1.99 price tag.  They didn't have my size, but they did have a kids size 5, which SOMETIMES I fit in, so I went ahead and picked up a pair, because why not? 

I knew that I wanted to use some of my canvas Riffle Paper Company fabric for the uppers and I chose a coordinating Cotton + Steel fabric for the interior.  I already had some large upholstery needles and I researched what type of "thread" to use for the blanket stitching and everything I found suggested a 100% cotton, so instead of ordering the overpriced Dritz Espadrille thread I just used some 100% cotton crochet thread that I already owned.  I cut a long piece and pulled on it as hard as I could several times and it was super strong so I figured why not?  See the theme here?  Now I had all my supplies and was ready to sew, so I will talk about the Toddler pair first.
Picture
These are a toddler size 7 soles, which my daughter is currently wearing, and I will start by saying the sizing seems pretty spot on compared to ready to wear shoes in the store.  The pattern was very easy to follow, cut and stitch up the upper parts and if any point you are confused there are plenty of online resources as to how to sew these up.  They are interfaced for extra durability and all of that is included with the instructions as well.  The back and top portion that rest on the top and back of her foot have 1/8" elastic, which you can kind of see on the back of the shoe where it is gathered looking.  This would be the only part I would change in the future as it wasn't gathered enough and these tend to fall off pretty easy.  Next time I would cut the elastic shorter and insert it the same, thus it would be tighter fitting above the heel.
Picture
Once the upper fabric is sewn and complete it is time to pin them to the sole and then stitch the two parts together using a blanket stitch.  This went surprising smooth and easy because I can honestly say I was pretty nervous as to how difficult this step would be.  You start by pinning the center front and back onto the sole and then work your way around the sides, and once again, detailed instructions are included how to do this step.  Once it is pinned you cut a long piece of thread and it is recommended that you wax it for durability and ease of sewing.  I couldn't find my normal thread wax but my husband has some sex wax for surfboards and I just used that, which worked really well.  I ran the thread through the wax around 5-6 times and got a nice smooth coating on the thread.  You start by knotting the thread and burying it into the sole and then you start your blanket stitch.  I was worried it would hurt my hand and be really difficult sewing into the sole and through the multiple layers of fabric, but it really wasn't.  The wax made the thread glide right through and I took my time being careful to not let the thread become knotted.  I worked hard at having nice evenly spaced stitches and sewed one per night, as I felt that if I had done more than that my hand may have started to hurt/cramp.  Voila!  They are finished.
Picture
This pair fit my daughter perfectly, with the exception of the back end being a little too loose, but she can still wear them.  She really likes to wear them because she watched me make them and she knows that these are "special" for just her.  I really liked these soles as they were wider and really accommodating for a toddler foot.  The pattern was clear and easy to follow and I'm so glad I picked up some larger sizes because now I can make her a few more pair in the coming years.
Picture
Now let's talk about the shoes I made for myself, in the kids size 5 that SOMETIMES fit me.  In the store I stood on the sole and my foot fit on it, but filled the whole narrow sole.  Narrow being the key work here.  I never took into account that once you stitch the upper fabric on the sole it "eats" into the sole all the way around and becomes even narrower.  Once I had stitched the upper fabric part, I "tried" it on by placing the fabric over my foot and pushing it onto the floor and instantly could tell that my toes would be too tight (like way too tight.)  I started to research what I could do to fix this and in the end found a pattern to make an open toe version, which i then used to modify what I had already made.  Basically I cut the open toe part and then carefully folded under the raw edge 1/4" and then stitched it closed.  I thought this would fix my problem and went ahead and sewed them onto the soles.  I sewed one of them and then attempted to try it on.  You guessed it, I couldn't even get my foot into the shoe, they were just too tight/small/narrow.  It wasn't happening.
Picture
What to do? What to do?  I had one shoe that didn't fit and one unfinished shoe.  I researched options on how to make it bigger but in the end I knew the sole just wasn't designed for my adult kinda wide foot but rather for a child's size 5 foot.  In the end I forced my self to finish the other shoe and here they are.  Aren't they cute?  I do love them and now I want to purchase my correct sole size and make another pair because honestly mother and daughter matching shoes is just too cute for words, or at least I think so.

At this point I just have to decide what to do with these?  Sell them, maybe?  Or maybe I should save them for my little girl because in 7-8 years she could possibly wear them.  What do you think?

Overall this was a really fun and fairly fast project and if you have the chance and can find some soles then I recommend stitching up a pair and having your own handmade shoes.
Picture
This project was on my quarter 2 Finish-A-Long list, number 6, which can be found HERE.  I'm happy to say that this one is now finished.  On July 1st (Sunday) the Q2 link up opens and I hope you have some finished projects to link up.
Picture
2 Comments

Breaking the Rules - Upcycling Challenge

5/31/2018

11 Comments

 
Picture
I'm breaking one of my own personal rules here today and showing off my child, I felt these photos just turned out too cute not to and she was the perfect model.  This being said, what is going on here you ask?  Well I stumbled across a competition on the Michael Miller Instagram page that was being hosted by Candice Ayala.  The challenge was to recycle/upcycle an existing garment into a new wearable item and to use a new piece of fabric also.  The above photo of my three year old is her standing in a pair of size 14 ladies pants that were given to me by my Sister-In-Law as she no longer wanted them.  Draped around her neck was a 1/3 yard cut of new grey knit fabric that I had in my stash. 

I actually have a bucket of clothing items that are my future "recycle" projects each with a different idea in mind.  These pants weren't really on my radar, but when digging through the bucket an idea popped into my head that just couldn't be quieted down and I ran with it.
Picture
I made my little girl her first pair of bibs!  Starting with a Vintage Simplicity overall pattern that was two sizes too big, I created a pattern based on the vintage pattern and on the overall design of the Burnside Bibs by Sew House Seven Sewing Patterns, just a miniaturized version.
Picture
Look at that sass!  I was able to use the original front pockets of the pants as functional pockets on the bibs.  I used the original waist band as the waist band here and the bib and straps were cut from the legs of the pants.  I reused all of the belt loops from the original pants onto the back to create the look like the Burnside Bibs.
Picture
The new grey knit fabric became a top made from the Melanie Maxi Dress and More Pattern by Peek-A-Boo Pattern Shop.  I made the top with the flutter sleeves and lengthened the top by 2 inches, making it just a shirt and not a dress.   Using the leftover scraps from the knit I created this big bow headband to make my little girl look a little more girly. (It's hard to look girly when you have so little hair!)
Picture
Once I was finished I started picking up my scraps from the pants and realized I still had a pretty good chunk of the legs left and decided to make my little one her own tote bag, perfect for some books and small toys.  I used the back welt pockets on both the front and back of the bag, making two usable outside pockets.  I then lined the tote with Peacock Lane by Violet Craft for Michael Miller Fabrics (an older fabric line that I've been hoarding.)
Picture
Picture
What do you think?  Successful?  I'm thrilled.  They turned out exactly as I had envisioned and the fit is spot on.  The best part of bibs like this is since the waist is so adjustable she will be able to wear these for a few years and there is nothing better than that.  I can pair them with lots of different tops and this color scheme is something we have very little of as my little girl is very girly and very into all things princess.  It's nice to have something so sophisticated.

I could not get over how "into" modeling she really was.  Quite the personality this little girl has.
Picture
This last photo shows the interior of the bibs.  I reused as much as I could from the original pants.  The waist lining was the back waist lining from the original pants. label and all.  You can see the pocket linings as well.  The thing about this upcycling challenge that was really surprising to me is how fast it all came together because I was using elements that were already created.  Didn't have to make pockets, waistbands, waistband linings, belt loops, none of that, recycled it all.  i now have upcycling fever and want to upcycle all the things!!!!

Now I have the fun task of narrowing down these photos so I can enter just FIVE into the challenge.  Wish me luck!
Picture
11 Comments

2017 Finish-A-Long - Quarter 4 My Finishes

1/4/2018

1 Comment

 
You can find the Quarter 4 finishes link up HERE, it is open and you still have time to finish some things and link up!

When it was time to make my fourth quarter list, I decided to have just 4 projects as I knew the holidays were coming and wouldn't have a ton of time to sew, though I did need to finish at least two of the four, which I am happy to say that I did accomplish.
Picture


My first finish this quarter was the Moana costume for my daughter and I blogged all about it HERE.  This was a Halloween costume and play costume for the future so I needed to get it done first.  Happy to report she loved it and it is finished!

My second and third finishes for the quarter were to sew up these flannel and cotton Christmas pajamas for my boys.  Finished the week before Christmas and gifted Christmas day, both boys were thrilled to have new pajamas.  The blue penguin set is long sleeved and long pants, size 4/5 and made entirely from scraps that were gifted to me.  Also everything from buttons to elastic was from my existing stash.  Yippie!  The crazy red/green/every color under the rainbow set is a size 10/12 and long sleeved and long pants.  The pants fabric was also scraps gifted to me that I had to get really creative with cutting out and piecing.  The top was a cotton print I bought on black Friday at JoAnn's.  Now they are on constant rotation at night and I'm thrilled to have finished them in time.

The BeeSewcial Triangle quilt totally got worked on and is a finished top right now.  I just have to finish up the backing, then I can baste and quilt.  I was happy to have at least made progress on it.

The hot pink knit top is still in the state it was when I took that photo.  It would have been made this quarter except for the fact that I somehow misplaced the pattern for it, so now I have to search.  I'm not reprinting it because it was already cut out and taped together and I'm not doing that again.

Statistics:
2 Complete
1 Progress Made
1 Untouched

Two out of four is pretty good for me and seemed to be the theme for this year, which I am happy with.  I'm hoping you all had a great holiday season and are enjoying the new year.  I'm thrilled to say that the Finish-A-Long will be continuing next year, it will remain Global with 7 other hosts plus myself, and the first link up will open right after the Q4 finishes linky closes.  Start working on those lists and I truly hope you will join in this next year.

Picture
1 Comment

Moana Costume

12/20/2017

2 Comments

 
Picture
My little girl is now 2.5 years old and around turning 2 discovered the greatness of movies.  Before 2 she had no interest in anything television, so it took me by surprise when she expressed such a huge interest in the movie Moana by Disney.  Interest turned into obsession (you know, watching it three times a day) and I just knew what she had to be for Halloween.  I thought about buying a costume, but they had nothing in her size, so you know what comes next.  I spent a long time searching for fabric on etsy that "matched" or at least came across as the same as how the outfit looked in the movie.  I actually feel like I really lucked up with my prints.  You can see the three prints below, all purchased on etsy, all designer quilting cotton.  I bought a ball of cotton crochet thread and proceeded to make 20 tassels (my estimate of how many I would need.) 
Picture
This was the stage I was at when I made my fourth quarter Finish-A-Long list.  Fabric purchased and tassels made.  I also had purchased the necklace to make the look complete.

The top was a simple tube top that I wanted to add straps to and I knew I wanted it adjustable so she could wear it as play clothes for years to come.  In the end I used the Made for Mermaids pattern, Alyssa Top, Tunic, Dress & Maxi.  Though I changed a lot, I was able to use the basic pattern/measurements to figure out how big to make this top for my daughter.   I gathered the back with elastic that has button holes in it (what is that stuff called) and added buttons to the sides and now it is completely adjustable and will expand quite large.  I also added buttonholes to the long straps and buttons to the back and now the straps are adjustable too.  I had some trim in my stash that matched the crochet thread perfectly and I sewed it to the front of the top to mimic the detail that was in the outfit from the movie.  I was pleased as punch.
Picture
The skirt however was a different story and was just really a lot of trial and error as I didn't use any sort of pattern.  I measured my little girl's waist and how long the skirt should be.  The top layer or sand colored fabric had to do this funky wrap around effect and then the bottom "straw" layer was more of a traditional skirt.  I used the same technique as the top and had the back gathered using that same elastic with buttonholes, so this skirt expands quite a bit.  I made it longer than I would have liked to accommodate her getting taller throughout the years.

As far as all that trim goes, and I know it looks complicated, it really wasn't.  I went to Hobby Lobby in hopes of finding some sort of pre-made trim that would work and was about to leave empty handed when I walked past the floral ribbon section.  They had this crocheted flat 3" ribbon/trim that I realized I could fold and then sew to create the triangles, which is exactly what I did and it worked even better than I imagined.  I then attached all those tassels I had previously made.  The zig-zag trim on the top layer was some random crochet-like thread that came in a bundle so I just used the entire bundle and pinned and then sewed straight lines right on top of the trim.  I sewed two lines on the top and bottom to hold it in place, it isn't perfect but creates that hand made look.  For the large "flowers" I just drew a design on paper and then used a fusible webbing on the back of a Kona cotton, fused it in place and then stitched 1/4" away from the edge (I wanted fraying) to permanently hold it on.  It took a lot of manipulating and trying to figure it out, but in the end I think it turned out fantastic.
Picture
Here is the finished costume.  What do you think?  I love it and so does my daughter.  I was really happy with how close it looks to the original but without being an exact copy.

Below you can see my little model.  Since my little girl has very little hair we added a "wig" to mimic Moana's flowing locks and she wore it for the photos and then ripped that fake hair off her head.  It totally looked like a rat's nest. HAHA.
Picture
This was my first finish of my fourth quarter list, which can be found HERE.  I'm hoping to have one more finished by Christmas (those Christmas pajamas) so I better get cracking.

You guys still have plenty of time to finish stuff up before the last link up of the year opens December 31st.  I hope you will have some finishes to link up.

Merry Christmas and I hope you all have a wonderful and safe Holiday season!
Marci

Picture
2 Comments

The Persimmon Dress and a Story about PDF Patterns

6/23/2017

3 Comments

 
Picture
My second finish for the second quarter of the 2017 Finish Along was technically finished first, but who is counting (obviously me, haha.)  This was my daughter's Easter dress (though when she wore it for Easter I didn't have the pockets on it yet.)   I used a cut of an Aneela Hoey print for the body of the dress and a Painter's Palette Solid (Orchid) for the trim.  I had that little lace trim in my stash, which I think added a little something extra.  I debated about the pockets that were part of the pattern, and in the end drafted my own little kitty head and hand embroidered the faces.
Picture
You can see the pockets better below.  I think they turned out adorable and totally Kawaii, which I love.  One of the cats is winking because I became tired of doing the satin stitch eyes, great solution wasn't it.  Sometimes I'm so lazy.
Picture
Picture
Picture
The image above is how I finished the seams inside, just serged (or is it surged?) the edges to keep things tidy and from raveling as much.

Below you can see another example of my clothes labeling system with the numbers from the selvedges.  This time I needed an 18, and since most prints don't have 18 colors, I created an 18 by sewing together the one and eight, turning under the edges and then stitching it to the facing.  So this dress is sized 18 months.  My daughter is tall so it is a wee bit short, so now she wears it with shorts underneath.

The straps were created from bias tape that I made from the Painter's Palette Solid, made me wish I had some of those bias tape tools, though it was easy enough to create myself.
Picture
So, I mentioned something about a story about PDF's didn't I?  Well when it was time to pick a pattern for the Easter dress, I knew right away I wanted to make the Persimmon Dress by Mouse House Creations.  I love everything about this pattern, the pleats, the details, all so cute.  Nothing was wrong with the PDF, the instructions were great.

I already owned this pattern so all I had to do was print it out and read the directions.  Here in lies the problem.  Late last year our old computer died on us and as much as that stinks it wasn't a big deal because it was old and I had been regularly backing everything up onto an external hard drive, or so I thought.  I opened up the PDF pattern file on the external hard drive to discover that not only was it not there, neither was 90% of the patterns I had purchased through the past two years.  Yep, what the heck?  I still don't know what happened in regards to that, either the back ups had failed or maybe I forgot to copy that one folder.  Who knows.

So now what, because I don't want to purchase it again.  Some websites let you log in and download it again, thankfully this was the majority of them as I kept all the emails and details of the downloads.  But there were a few that I just couldn't access anymore, either the company wasn't in existence anymore or the download wasn't available.  Insert sad face.  So I decided to just ask the designers flat out if they would send it to me.  What did I have to lose?  I had the receipt in email form and explained what happened.

I contacted Hayley of Mouse House Creations and she was on a trip and replied immediately that when she got home she would email it to me and she did.  How great is that, honestly.  In the end all of those independent designers I have contacted have in fact emailed me the files I had purchased.  Which is pretty great and says a lot about our little sewing/quilting community.

Moral of the story?  Back up your files people, in not just one spot, but two.  It has taken me an entire weekend of emails and sorting and downloading to get back my files and sadly there are about 10% that I won't be able to get back, lost forever on a dead computer.

Second moral of the story?  Not only is our sewing/quilting community awesome, reach out and ask, I have come to realize that all of these designers are super helpful and friendly and they want you to make their patterns just as much as you want to make them.  So I'll end with a big thank you to Hayley of Mouse House Creations, for not only sending me the file but for creating such a great dress pattern. "Insert Smiley Face, Insert Clapping Hands, Insert Fireworks!"
Picture
Picture
You guys are in luck, I've included a rare shot of my daughter in her dress on Easter.  I just had to, it was so cute on her.  I usually don't post photos of my children so I must be in a good mood.

The second quarter link up will open in a few days and when it does I'll be linking up this dress as it was project number five from my list found HERE.  I hope you will be joining us with some of your finished projects.

Picture
3 Comments

Summer Picnic Dress

6/21/2017

2 Comments

 
Picture
The second quarter of the year is quickly coming to a close and I figured I better get to blogging a few of my finishes, and yes I have finishes.  Yippie!  This is the Summer Picnic Dress, a free pattern by The Cottage Mama.  I used some Bonnie and Camille yardage that I had on hand (from Knotted Thread's Etsy shop) though I can't remember which fabric line.  I think it turned out pretty darn sweet.
Picture
Based on my little girl's measurements I decided to make a size 3, which in the end, ended up being a bit too large.  Oh well, I'll save it for next year.  I had a small scrap of that crocheted lace that worked as the perfect little trim between the yolk and body of the dress.  This was a really quick sew and I finished it up in just a few days of sewing on and off.
Picture
I used my serger to finish the seams for a neat and tidy look, except for that one little seam on the ruffle I forgot.  I just used my pinking shears to finish that edge and moved on.  It will hold up just as well in the end.
Picture
I discovered a little trick that I now use in my kids clothes to label the size.  I use the numbers from the selvedge.  I find a number that corresponds to the size, cut it a little larger all the way around, iron in the raw edges and stitch it onto the inside facing.  Yes, it is just a basic number but most people that deal with little kids clothes will be able to figure out it is a 3T or close to it.  I thought this was a clever solution and free.
Picture
This was my first finish of my Quarter 2 Finish Along list, found HERE, it was number six on my list.  The Quarter 2 finishes link up will open next week so you still have time to finish up those projects!

Picture
2 Comments

Cascade Blog Hop - My Stop of the Tour!

10/16/2014

67 Comments

 
Picture
It is time for me to show off my creation with Jessica Levitt's brand new line of fabrics, Cascade by Windham Fabrics.  I was sent these fabrics a few months ago and I decided to create a little outfit for my youngest, which will also be displayed in Jessica's Quilt Market Booth.  I felt the fabrics just seemed perfect for a little boy's outfit, cool and sophisticated blues.
Picture
i chose one pattern that I made lots of times, the hat, which is a free pattern from Oliver + S, the Reversible Bucket Hat, and two patterns for the shirt and pants that I had not sewn from before, both by Blank Slate Patterns.  The shirt is the Prepster Pullover, and the pants are the Coastal Cargos.  Both of these patterns can be purchased HERE.
Picture
I think they turned out really cute on my little guy.  The fabric and fabric print scale suited these patterns perfectly and created a dressy outfit for my little man.  Too bad of the 200+ photos that I took of him at the park, these three were the best of the day.  He just wasn't wanting to pose that day.  Both the pants and shirt have the option to roll up the sleeves and pants hem, which I did for these pictures, isn't that a cute detail.
Picture
If you are interested in reading my thoughts and further details of each of these patterns, then keep on reading below and stick around for a fantastic giveaway at the end of this post.  I took a lot of photos of the outfit itself and have them in slide show style below because there were just so many pictures!
First up is the Prepster Pullover by Blank Slate Patterns.  This pattern is labeled as intermediate and I would say that is exactly right.  The instructions are step by step and very clearly shown with photos, but there are a lot of techniques and some of the steps (like installing the cuffs or collar) would be very difficult for a beginner.  I chose three prints from the Glacier colorway for the shirt, and one of the best things about this fabric line is that Jessica created solids that match perfectly with each of the colorways.  I chose to use one of these solids in the placket and collar of the shirt, which I think creates a really nice contrast.  I also have to say that the placket construction in this pattern is the easiest and best looking that I have ever done.  It really is genius and my favorite detail of the shirt.

This shirt has a lot of buttonholes (7,) which is also not for a beginner because it is nerve wracking to have to stitch all those buttonholes on a finished garment.  Thankfully my machine makes a beautiful buttonhole and I didn't have any problems with getting really nice professional looking buttonholes.  I used simple opalescent white buttons on the shirt, I didn't want to distract from the fabric and I didn't want the buttons to necessarily stand out, but rather blend in.

I originally made a muslin in a size 2T (which is the size I should have made based on my son's measurements) but when I tried it on him, it was a wee bit too tight.  So for the final version here I upped it to a 3T, which was perfect.  I found that it being a pullover shirt the fit was a little tight through the chest and armhole area, so increasing a size fixed this problem.  The only change I made to the pattern was adding the little contrasting loop to the back of the shirt, I thought this was just a nice little extra detail, it doesn't really serve a purpose, it just looks cute.

I had one problem with the pattern when it came time to doing the cuffs, so I emailed Melissa (of Blank Slate Patterns) and she responded within the hour with help, which was really nice.  I didn't expect a response that quickly.  So the problem was solved and I was thoroughly impressed.

Overall it is a great pattern, easily customizable for a ton of different looks.  It comes in a large range of sizes, 18m to 8 years, so it can be used for a long time!  If you are looking for a really classic shirt for a little boy, then I highly recommend this pattern.
The pants are also by Blank Slate Patterns and are the Coastal Cargos.  I adore these pants and plan to make plenty more in the future.  I used two fabrics from the Glacier colorway, and decided to use the solid as the main fabric, it has such a nice soft but sturdy hand to it and in the end I think it made a really classic pair of pants.

This pattern is also labeled as intermediate, and as before I think that is exactly right.  Just difficult enough that a beginner might really struggle.  These pants are really customizable with the option of adding welt pockets to the back, front pockets, side cargo pockets, belt loops and the side and inner seam details.  All of these items can be left off, making for a quicker easier make, but honestly they are just so darn cute why would you want to leave them off.  This pattern also ranges from 18m to 8 years, so you will use it for a long time.

Honestly I had never sewn a welt pocket before and was pleasantly pleased at how easy and professional looking they really came out.  I had no problem installing them and the step by step instructions really were simple and clear to understand.  This pattern does feature an actual zippered fly, but since my little one is still in diapers, I chose to make a faux fly instead, which I think looks just as nice, it just isn't functional.  Every step of the pants is pretty straight forward and just a matter of taking one step at a time.

I made a muslin first in a 2T (which was based on my child's measurements) and I found the fit really spot on, so for these pants I also made a 2T, the overall size and length were perfect.  I love the fact these pants have an elasticized back waist band, which really makes getting the perfect fit so easy.

I used the small raindrop print as the side and inner seam detail and I just love how that turned out, like perfect little raindrops flowing down the sides of the pants.  Once again I would highly recommend this pattern, it is very customizable and creates a really great pair of pants for a little boy.
Last but not least is the matching bucket hat for the outfit.  This is a pattern from the book, Little Things to Sew by Oliver + S, but is offered as a free download as a promotion for the book.  I have made this hat around 7 times before and knew that it was a great pattern and I thought it would just be the perfect addition to this little outfit.

I think this pattern would suit a confident beginner to intermediate only because the entire hat is composed of sewing curves.  If you take your time you can totally do it, but you just have to sew slowly and pin a lot.  This pattern comes in four sizes and you really have to measure your child's head to get the right size, and in my opinion, when in doubt, always go a size up!

It is a great pattern for boys or girls, completely reversible, which is great and you get two fantastic looks instead of one.  It also sews up really quickly, like a 2 hour project start to finish.  I highly recommend it!
Picture

Giveaway closed, thank you to all that entered!

Now it is time for the giveaway!  Windham Fabrics has graciously agreed to giveaway a Fat Quarter Bundle of these not yet released (February 2015 is the estimated release date) fabrics.  To enter my giveaway follow me on Instagram (@Marci_Girl) and come back here and leave me a comment that you are a follower.  My blog followers get the chance for a second entry, so if you are a blog follower leave a second comment letting me know!  Easy enough!  They are giving away a bundle of these fabrics at each stop of the tour, so make sure you visit the other stops, plenty of chances to win!  You have until October 23, 2014 at 11:59 CST to enter so don't delay.

Thanks so much to Jessica for letting me have the chance to create something for her Quilt Market Booth and to have the opportunity to play with these really gorgeous fabrics before anyone else even got to see them.  It was really fun and I hope she liked the finished product as much as I did.  Now I just can't wait to start seeing all the photos from Quilt Market next week!
67 Comments

A New Skirt and a Winner!

5/20/2014

6 Comments

 
Picture
Inspired by Stitched in Color's Flirting the Issue Sew Along, I was excited to quickly whip up a skirt.  The sew along was based on the Flirting the Issue Skirt by Anna Maria Horner, which is a free project download from her (Anna Maria Horner's) website.  I dug through my stash, found the beautiful Anna Maria Horner voile seen above, made a quick trip to the store for some muslin (for the lining) and enough elastic to make that gorgeous waist.  Three supplies, super easy.
Picture
The skirt is very easy to make, two rectangles, mine were cut at 19" tall by the width of fabric twice, which ended up being more than twice my waist measurement, so this skirt is very full.  Once the rectangles are sewn, you stitch the outer fabric to the lining and then create four channels for the elastic.  The most time consuming part is threading all the elastic, but I used my car rider line time effectively, then came home and finished it up.  The hem was super quick and the last step, voila, you have a finished beautiful skirt.

Well beautiful on a hanger and not necessarily on me.  It fits, it is the right length, but honestly I think it is too full for my frame.  I don't necessarily think it is horrible on me, and I definitely need to find the perfect shirt to wear with it (which will help a lot,) it just isn't that flattering.  Oh well, lesson learned, next time I will stick with the straight skirt.  But for now I will enjoy the glorious waist band, which is my favorite part and the main reason I decided to make the skirt, oh I love those gathers!  You can see my lining fabric, or inside of my skirt below.

I'm linking up my finished (in about 3 hours) Flirting the Issue skirt with Stitched in Color's linky party!  Rachel did a great job illustrating the steps and talking your through each section making this skirt even easier to put together.  A great project for a beginner!  Thank you Rachel!
Picture
Lastly I need to take care of a little business, time for me to post the winner of the Juliana Horner fabric bundle below from Sew Mama Sew Giveaway Day!  The Random Number Generator from Random.org chose number 74, which was Beth T.  Congratulations Beth, whom I already contacted, she quickly responded and I already shipped the fabrics to her, enjoy them Beth!  Thanks to all that entered and all my new followers!
Picture
Picture
6 Comments

Shelburne Falls Romper

4/6/2013

8 Comments

 
Picture
A few weeks ago I stumbled across a blog post by Rachel of Stitched in Color announcing a contest using the fabric Shelburne Falls by Denyse Schmidt.  The contest was to use at least one print from the collection and make anything you want.  I took a look at the fabrics, which by the way is a beautiful collection, and chose a print that would easily work for my little baby boy, who isn't really a baby anymore, but rather a big ole' toddler.  Once I ordered and received the fabric, I went to our local fabric store and found a nice linen and a zipper that coordinated beautifully.
Picture
I had a pattern in mind the whole time, one that I have owned for a few years and never used, Simplicity 2264.  Opposite to many in blog land, I am actually a big fan of the major name pattern companies.  I learned and grew up using them, so I never have had a problem with them in general, with the exception of a few over the years, heck, everyone makes mistakes.  Too bad this was one of them.  Nothing was wrong with the pattern itself, but rather the instructions or manner in which they wanted you to construct this fairly straight forward baby romper.  My main complaint being that in the pattern instructions, they had the ends of the zipper tape totally exposed in the back neckline.  Who wants their precious baby to have those darn rough tape ends rubbing on the back of their neck?  Not me!  Thankfully, I have enough sewing experience to know how to remedy that and rather enclosed the zipper tape ends into the bias tape binding that you can see in the above photo.  I wasn't too happy with that treatment either, and would have preferred regular facings, so next time I will probably do that instead.  The zipper installation was odd, doable, but odd, and the leg band installation was far from perfect too, not my fault, but rather the weird instructions.  Even with the faulty instructions, you can totally make a great little romper with the pattern, I just think the pattern could have been written better and with a baby in mind.
Picture
I do think in the end that it turned out pretty precious, and my older son referred to it as a "gentle dandy outfit, that he did not want to wear." Obviously I found this hysterical.  I love the little details of this romper and instead of doing an applique (like the pattern called for) on the front pocket, I used three little simple buttons.  It has a long zipper in the back for easy dressing and snap tape in the crotch for easy access diaper changing.  This was my first time using snap tape, and I will admit it was pretty wonderful.  I might be a convert.  It is rather expensive, but I used my JoAnn coupon and got 50% off, so then it was more reasonably priced.  It was so nice and easy to just stitch on those snaps rather than installing them all afterwards with a hammer.
Picture
I had every intention of this little outfit being for my son to wear on Easter day, but alas it was way too unseasonably chilly, so instead I am saving it for him to wear this summer.  I can't wait to see him running around in it!  It is a little large, but I am happy that he will get quite a bit of use out of it during the year.

This is my entry into the Shelburne Falls Contest hosted by Stitched in Color.  Go visit the entry page and you will see quite a few beautiful projects!
Picture
8 Comments

    Marci Girl

    A feisty mom designing, sewing and blogging her way through everyday life!

    Subscribe
    Follow on Bloglovin
    Picture
    Follow on Bloglovin


    Categories

    All
    2017 Finish A Long
    2018 Finish A Long
    2019 Finish A Long
    Bee Sewcial
    Book Reviews
    Clothing
    Everyday Life
    Giveaways
    Handbags
    Handstitched Class
    Inspirational Projects
    Marci Girl Designs
    Projects
    Quilt Along
    Quilting Bees
    Quilts
    Random Thoughts
    Recipes
    Sew Along
    Sewvivor
    Style Stitches
    Swaps
    The Penny Sampler Class
    Tutorials
    Wip Wednesday


    Happily
    Participating In:

    Picture
    Picture
    Picture
    Picture
    Picture
    Picture

    Picture


    Archives

    January 2020
    November 2019
    October 2019
    July 2019
    April 2019
    March 2019
    February 2019
    January 2019
    December 2018
    October 2018
    August 2018
    July 2018
    June 2018
    May 2018
    April 2018
    March 2018
    February 2018
    January 2018
    December 2017
    November 2017
    October 2017
    September 2017
    August 2017
    July 2017
    June 2017
    May 2017
    April 2017
    March 2017
    February 2017
    January 2017
    April 2016
    March 2016
    February 2016
    January 2016
    September 2015
    July 2015
    October 2014
    September 2014
    August 2014
    July 2014
    June 2014
    May 2014
    April 2014
    March 2014
    February 2014
    January 2014
    November 2013
    October 2013
    September 2013
    August 2013
    July 2013
    June 2013
    May 2013
    April 2013
    March 2013
    February 2013
    January 2013
    November 2012
    October 2012
    September 2012
    August 2012
    July 2012
    June 2012
    May 2012
    April 2012
    March 2012
    January 2012
    December 2011
    November 2011
    October 2011
    September 2011
    August 2011
    July 2011
    June 2011
    May 2011
    April 2011
    March 2011
    February 2011
    January 2011
    December 2010
    November 2010
    September 2010
    August 2010
    July 2010
    June 2010
    May 2010
    April 2010
    March 2010
    February 2010

    Picture

    RSS Feed

Powered by Create your own unique website with customizable templates.