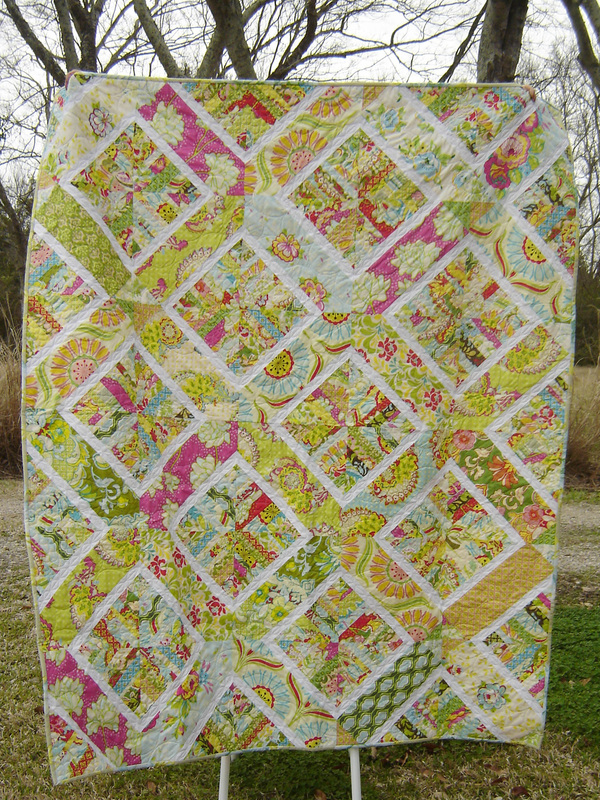
Roughly two and half years after starting this quilt, Latticework is now finished!
|
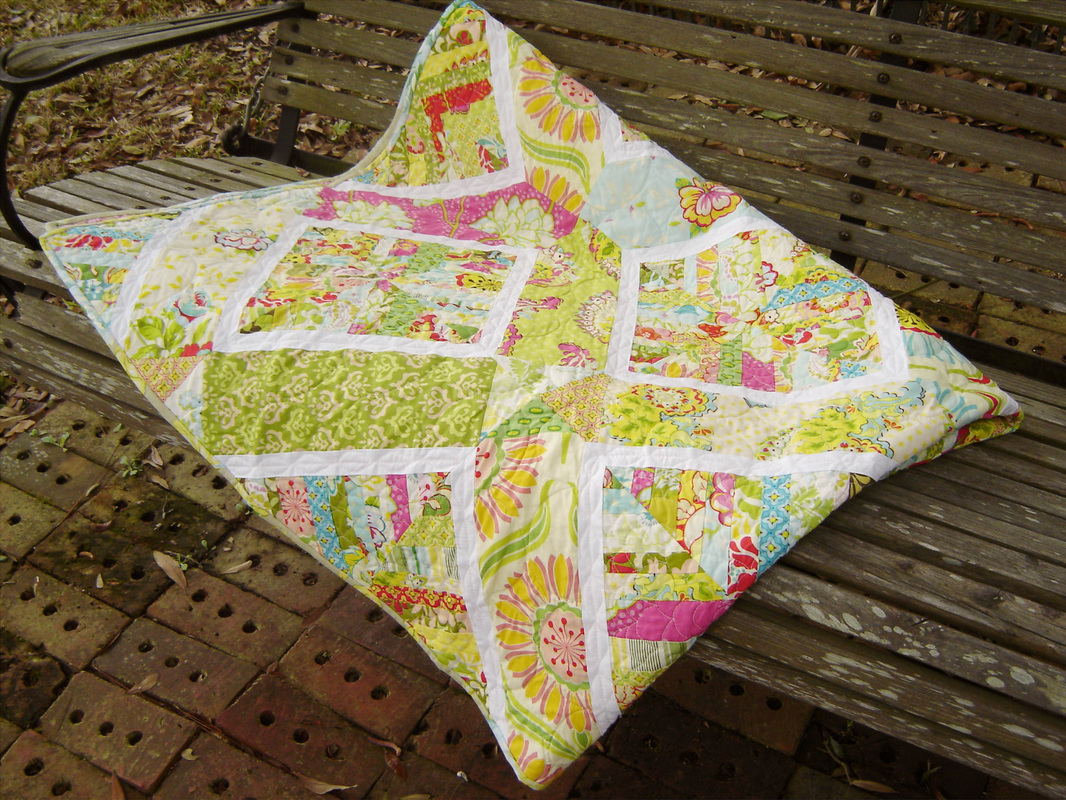
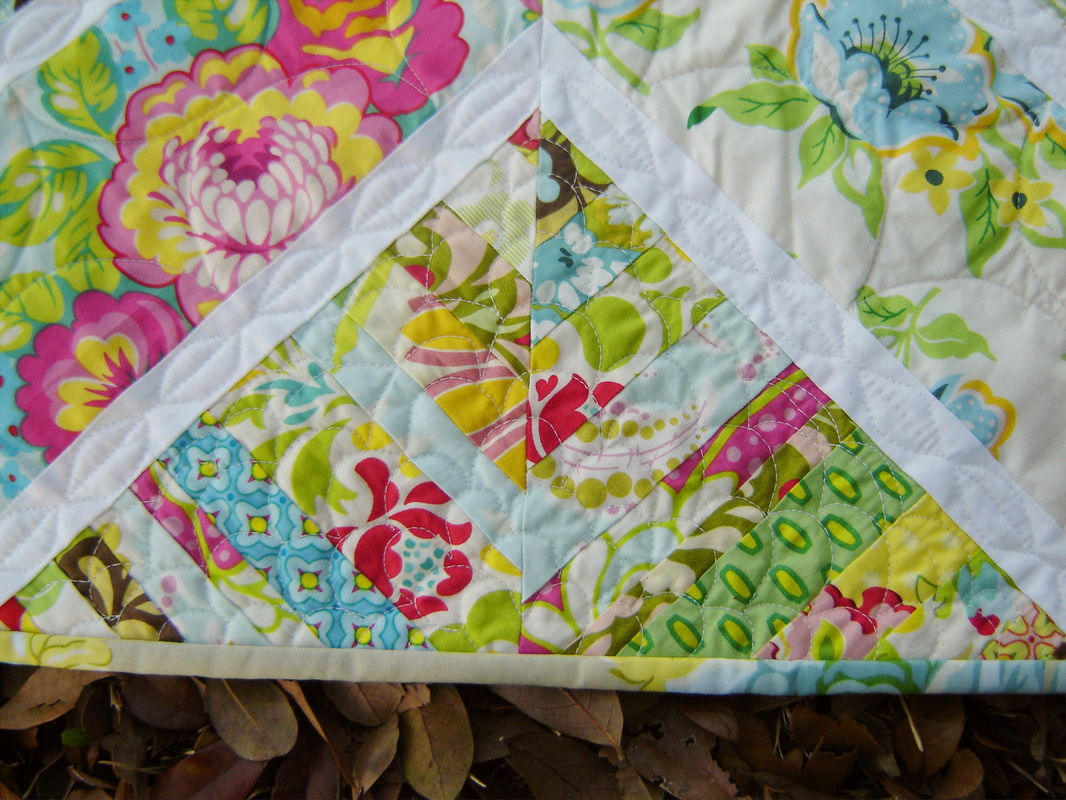
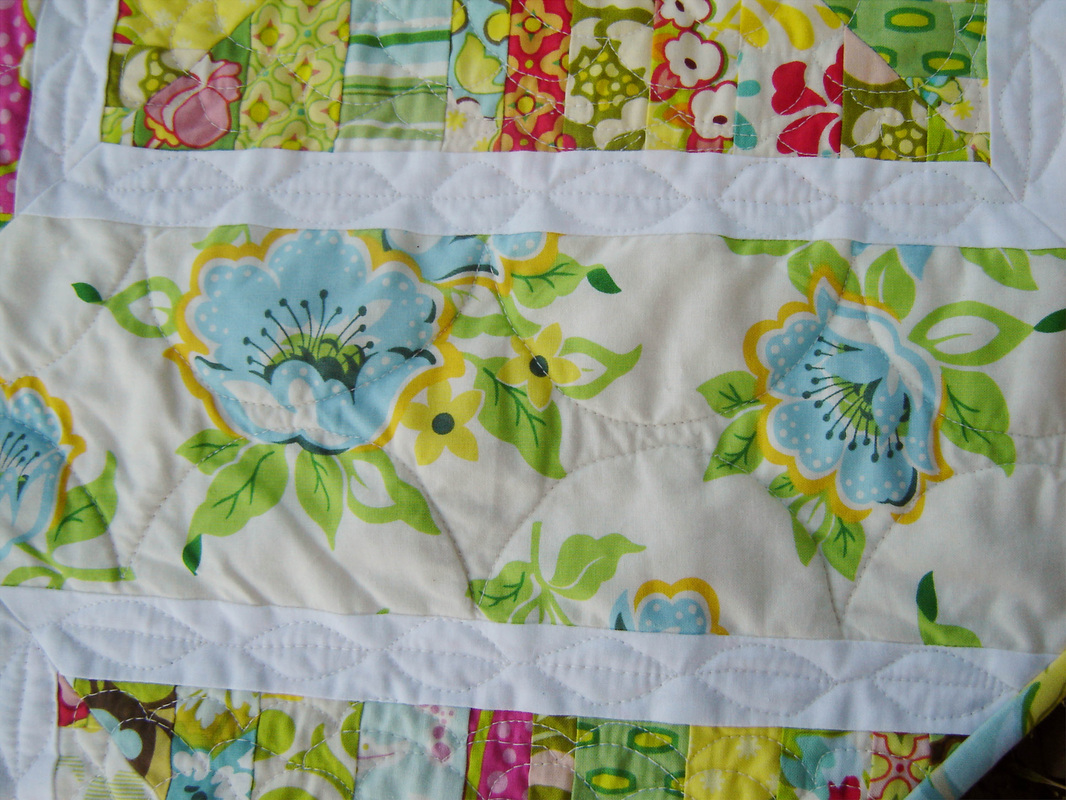
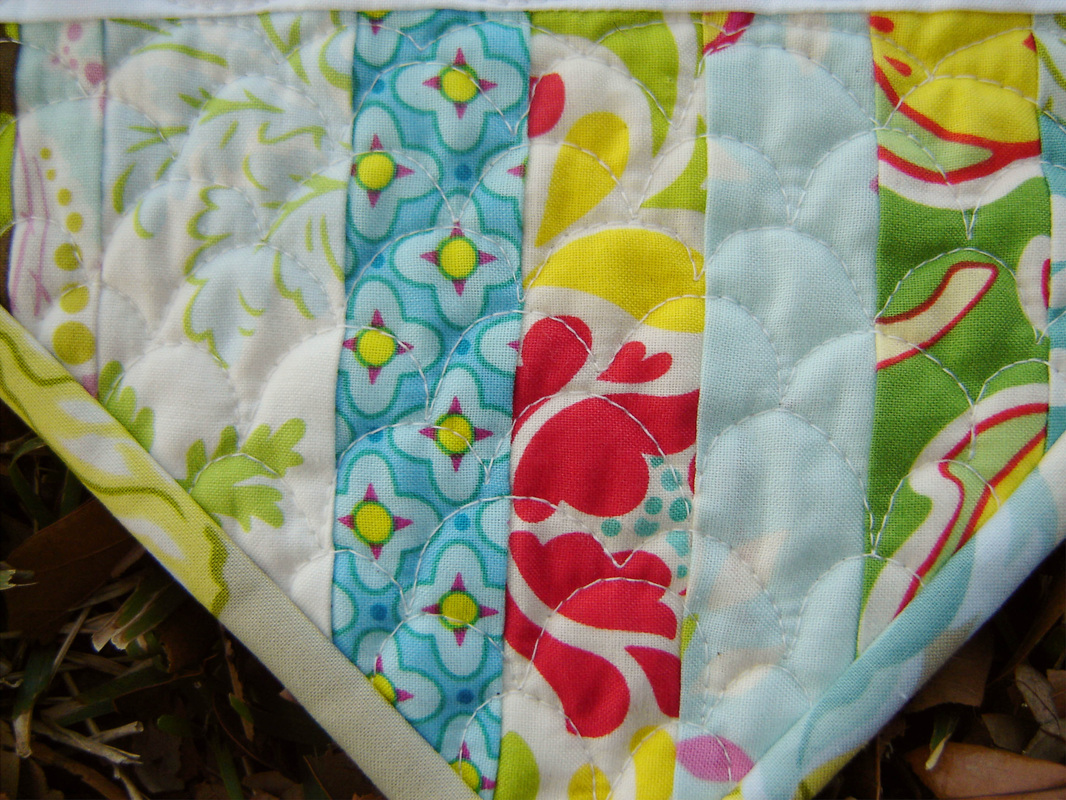
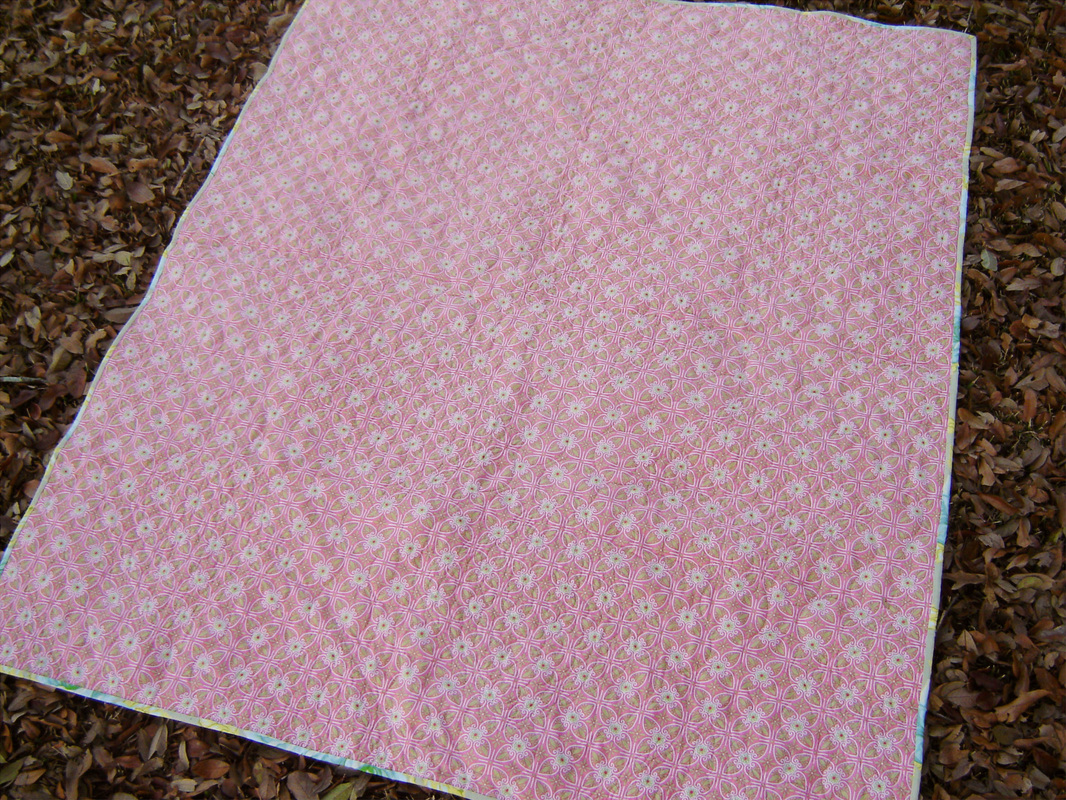
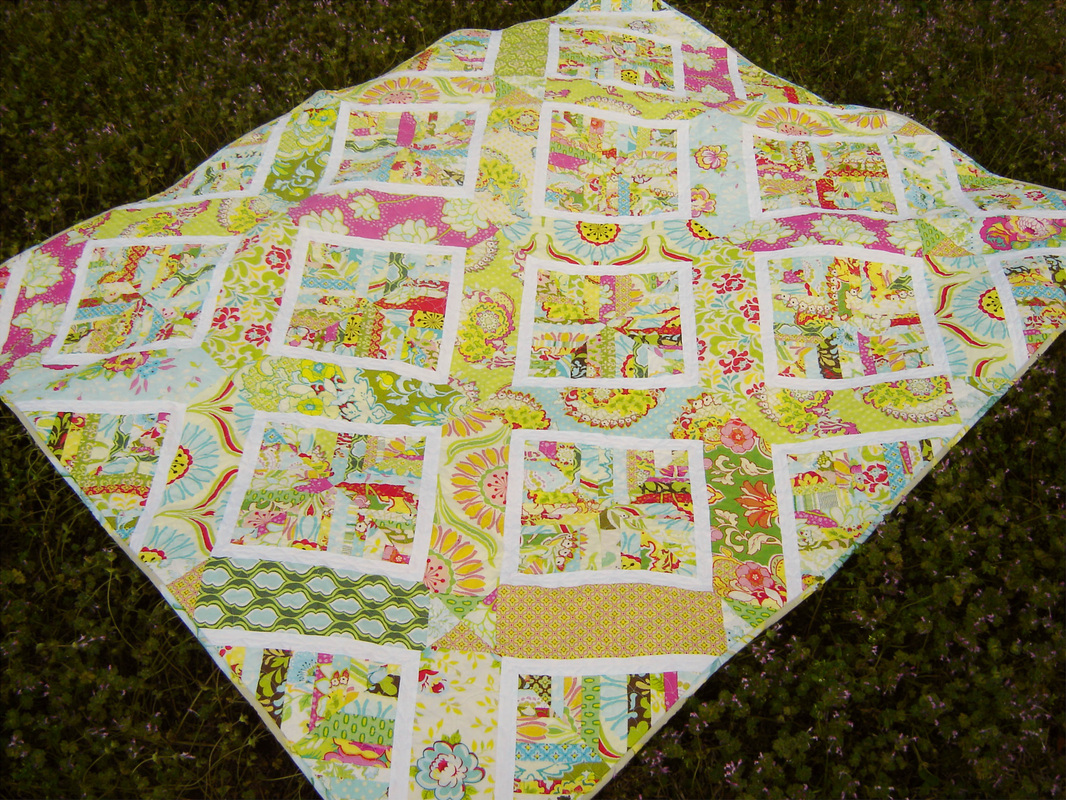
The Latticework quilt is finished! Finally! This quilt has a long history, it took quite a while to get here, finished, but boy I am glad that it is. This quilt started way back in September 2011 where I asked my new at the time Always Bee Learning bee mates to make some 8.5" paper pieced string blocks. You can see my original block HERE. Then after receiving all the blocks, they just sat there FOREVER. Then last year, May 2013 to be exact, these string blocks were transformed into a new quilt block that I designed, and then was turned into a finished quilt top, you can read about it HERE. After the top was finished, I quickly basted it and there it sat until February 2014. Officially 2 years and roughly 5 months later I quilted this quilt. This quilt was quilted with my brand-new-to-me (used) Juki TL 2010q in February of this year. I haven't yet blogged about my new machine, but hope to in the near future, because honestly it has been a game changer for me. This was my first time free motion quilting a quilt this large, and really the first project that I completed with my new machine. I used a 50 weight white thread fromConnecting Threads, only had 3 bobbins, so needless to say I had to stop and load them a lot, and I tried out three different free motion stitches using the 1/5" free motion foot. The first bit of free motion stitching that I tried out was in the "strings" sections of the quilt, where I quilted a large flower, which if you look REAL HARD you can see above. I wanted a fairly dense stitch to really lock down all those strings. It worked, but since the fabric is so busy, I find the quilting really doesn't show up that well. Which is ok, because it is FAR from perfect. The second bit of stitching that I tried was the pretty leaves in the narrow white strips. This shows up fairly well and I was really happy with the result, you can see this above and below. It was so fun stitching those leaves, which is now my favorite part of the quilt. The third stitch can be seen above and I'm not sure what to call it, but it was stitched in the larger expanses. I marked the lines with a washable blue marker and then tried to "trace" those lines. It turned out OK, but honestly this quilt was pretty much entirely on the bias and there was a lot of fullness in these spots, so my quilting was really just to try and ease in the fullness. That worked better in some spots, not so good in others. The above photo is a good example of that "fullness." I am hoping that after I wash this quilt, a lot of those issues will resolve themselves (I hope.) Here is my stitching up close. Not too bad, especially for my first go with a new machine. I had minimal thread breakage, only a few hiccups and overall truly loved quilting this throw quilt. Not once did I ever think that it was hard to fit in the machine, which is such a nice change. The larger harp of the Juki made quilting this a breeze and just so enjoyable. I set my machine up on my dining room table with the extension table attached, and the table supported the weight of the quilt and I really worked on having good posture and staying relaxed while quilting. The backing was pieced from yardage and I took special care to carefully match up the pattern, so it is really hard to find the back seam. I have found that I really like just having a simple one print backing. It is quicker and I don't have to stress about the backing so much. I bound the quilt in another Heather Bailey print, because you have to stick with Heather Bailey, since all the prints on the front of this quilt are her designs! The finished quilt measures 62" x 75" and I used a 80/20 cotton/poly Pellon batting. I haven't washed this quilt yet, but I will before it is given to the intended recipient, I guess I am hesitant to try and wash it in my high efficiency washing machine. Have any of you washed a larger quilt in an high efficiency washing machine with success? Roughly two and half years after starting this quilt, Latticework is now finished! This is officially my last finish of the first quarter 2014 Finish Along hosted by Katy of The Littlest Thistle. You can see my first quarter Finish Along list HERE.
7 Comments
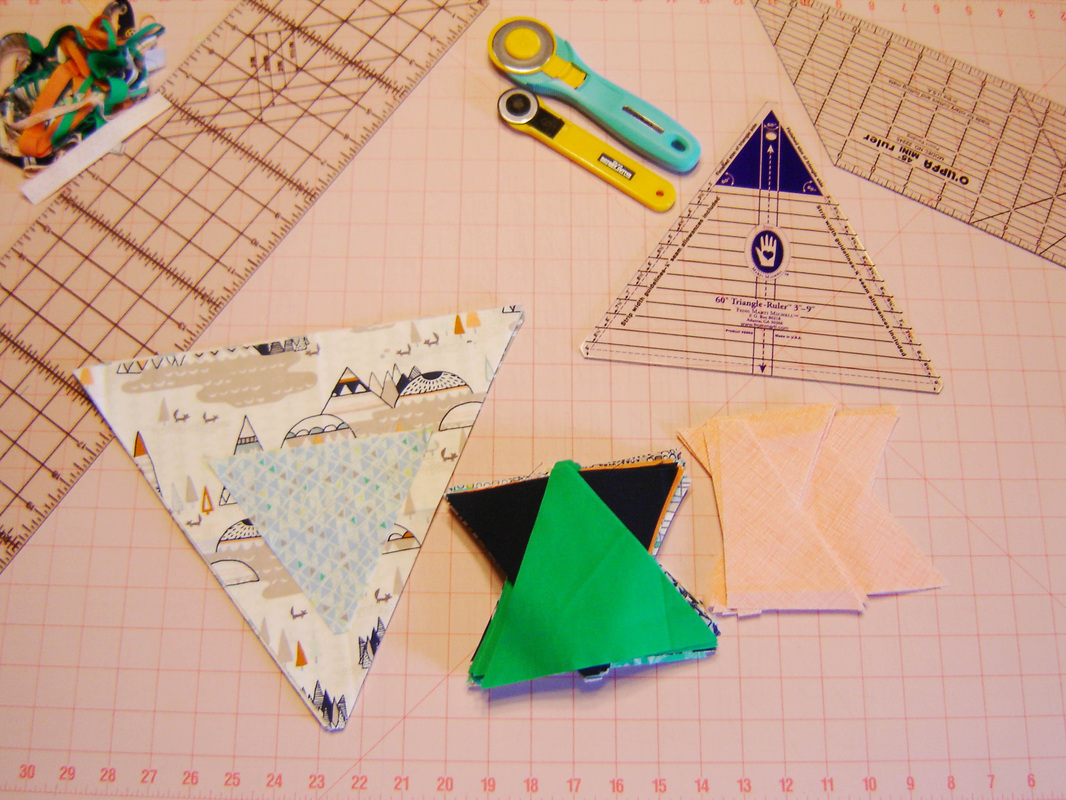
Week two of the Triangle Quilt Along hosted by The Sassy Quilter. I've said it before, but apparently I can not follow directions. I'm changing up the design (big surprise!) Be it that I am using fat eighths, the tutorial called for 6" triangles, I had to reduce that to 5" triangles in order to cut enough from my fabric, so my quilt will be a tad bit smaller. No big deal. Then I decided on a very distinct plan of how I will layout these said triangles, thus I have the larger 10" ones as well that will be worked into the design. Wish me luck! I'm flying by the seat of my pants here! This is the project I have been working on this week, so I'm also linking up to Sewjo Saturday hosted byMy Go-Go Life!
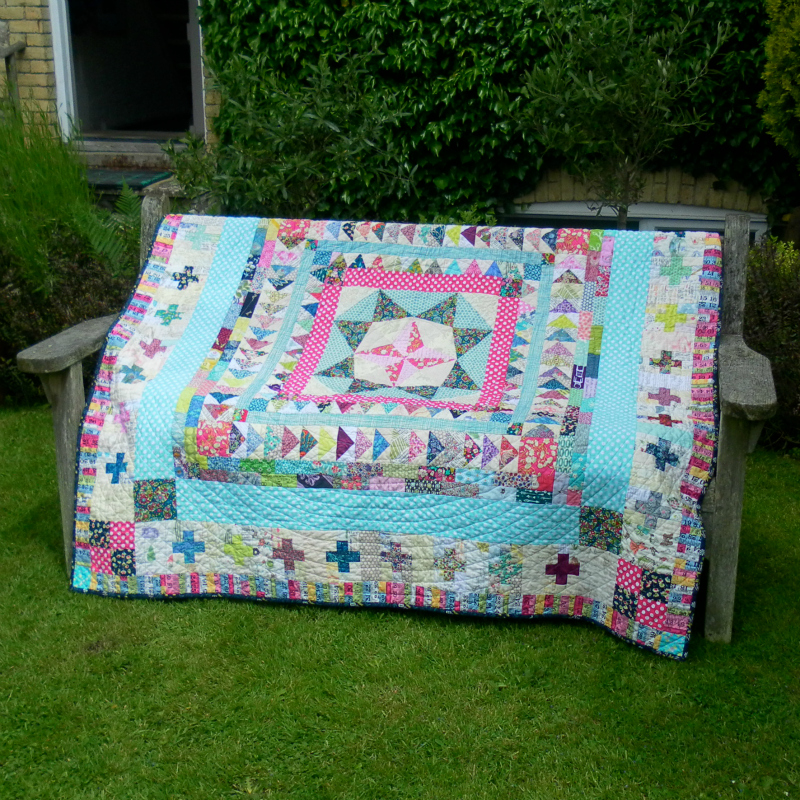
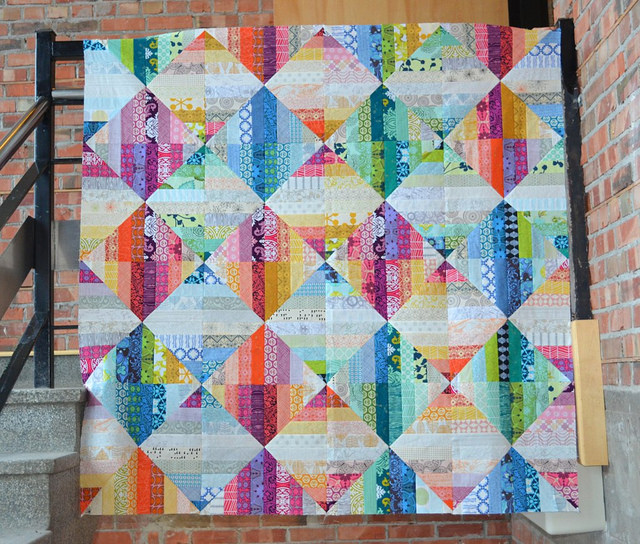
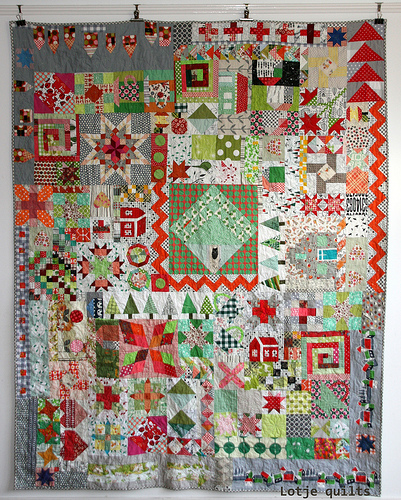
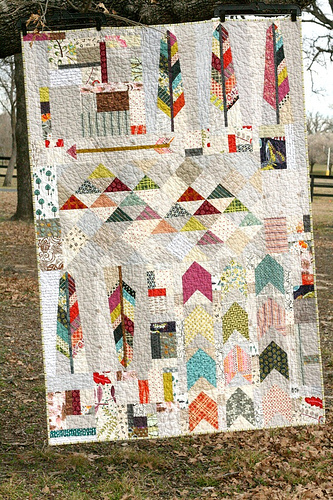
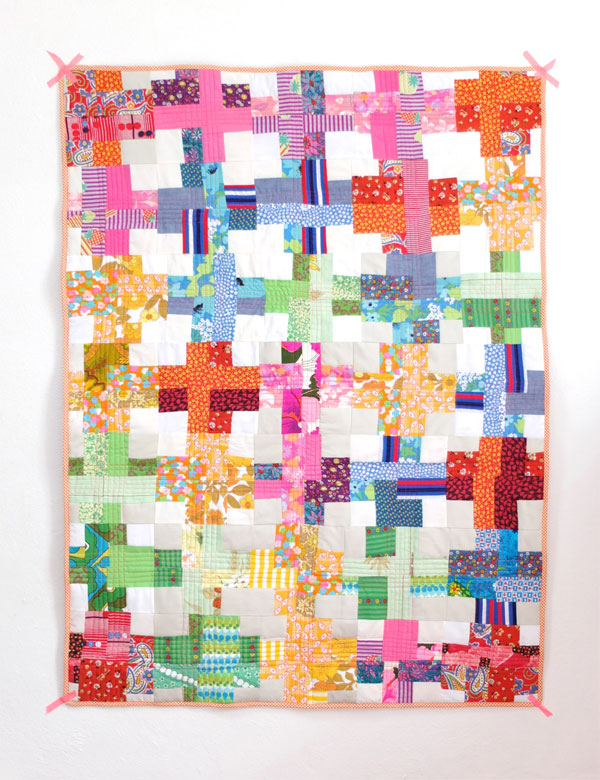
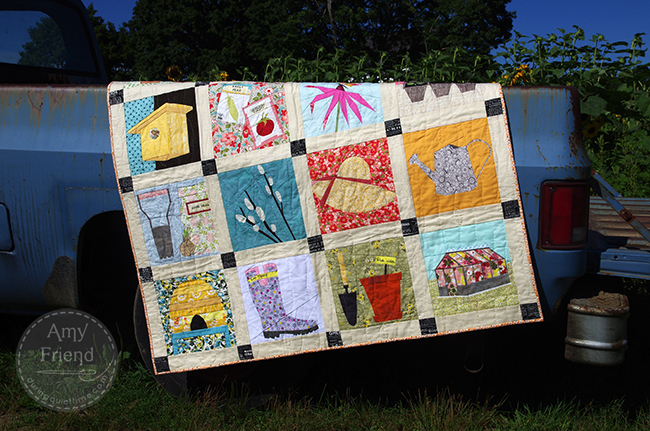
During the month of March, The Tilted Quilt has been hosting the Quilty Bucket List, which is exactly what it sounds like, the quilts that you would want to make in your lifetime. You know, those quilts that you pin on Pinterest and favorite on Flickr and say, "One day I will make that!" Well here is my list! I went through my pins and favorites and compiled a list (in order of to do) of those amazing quilts that I want to make in my lifetime! So join me as I list some amazing quilts and if you click on the photo it will take you to the image source, which in most cases is a blog post about the quilt and maybe even a tutorial of how to make the quilt itself! 1. The Marcelle Medallion Quilt from the book, Liberty Love by Alexia Marcelle Abegg. I've been in love with this quilt since I first saw it, why I haven't already started this one is beyond me, but I think I am just scared I will choose the wrong fabrics. I will make this quilt! There have been many versions of this quilt made already by many others, but I have to say that Hadley's version is my favorite, she nailed it! 2. A Blended Scraps Quilt. Not that long ago, maybe a month or two at most, Leanne blogged about the above quilt and I fell head over heels in love with it! Thankfully for me she just posted the tutorial for Reflection so I can shamelessly copy her version, which I plan to do. There is something about this one that is just so beautiful, great use of color and value, the whole nine yards. 3. A Sampler Quilt. The above is the perfect example of what I am talking about, a quilt that takes a ton of different blocks and fits them all together in one super busy, fun and energetic quilt. I took The Penny Sampler Class by Stitched in Color and plan to combine those blocks with a ton of others to create the perfect sampler quilt. 4. A planned kaleidoscope quilt. In a way sort of like the One Block Wonder Quilt, but instead of just randomly cutting the triangles, you purposely cut them to make very distinct shapes, colors and patterns. The example above is just so beautiful, I mean how could you not want to make this. Oh and be it that I love triangle quilts, this one is right up my alley. 5. An improv quilt. I am going to call this one improv in that I want to make a quilt that starts with a few blocks and then is just randomly built upon until it is done. No real plan, no real structure, something that is totally out of my comfort zone. The quilt above is exactly what I would like to create, a lot of low volume dead space, a few planned blocks, a one of a kind quilt. 6. A modern scrappy crosses quilt. I had pinned a TON of cross quilts, way more than I ever realized, so I went through, picked my favorite image (above) and want to use components of this quilt to create a scrappy cross quilt. There is just something so simplistic about the block itself that lends to so many possibilities. 7. An individual block paper pieced pattern quilt. There are so many out there that I love, The Forest QAL, Sew Out Loud QAL, and pretty much all of the ones by Quiet Play and During Quiet Time. The hard part for me will be choosing which one, heck I spent an hour trying to decide which one I wanted to feature as the photo above. Whew, maybe it is a good thing it is last on my list, I need more time to decide!
Well that is it, I am making myself stop at seven, which is pretty funny since originally I thought my list would only include three. So there it is, my quilty bucket list. You can still link up your list over at The Tilted Quilt, and you can stop by and read many others bucket lists also, and what is so neat to me is how varied these lists really are, so go on over and take a look! I decided to jump into a quilt along today! Yep, just dove right on in there! It is the triangle quilt along hosted by The Sassy Quilter. You see if you really think about the majority of quilts that I have made and actually finished, at least three of them have been triangle quilts. I kinda love making them, actually I think it is my favorite type of quilt to make! This one will be a 60 degree (equilateral) triangle quilt made using the fabric line Indian Summer by Sarah Watson. I am going to add in some solids to break up the prints (probably) but am not certain yet. I guess once I dig through my solids, then I will decide if anything I have matches or not! The quilt along has just started, week one in fact, so if you want to dive in too, go ahead, all you need to do the first week is pick out your fabrics and officially sign up! Click on the button below to get all of the details!
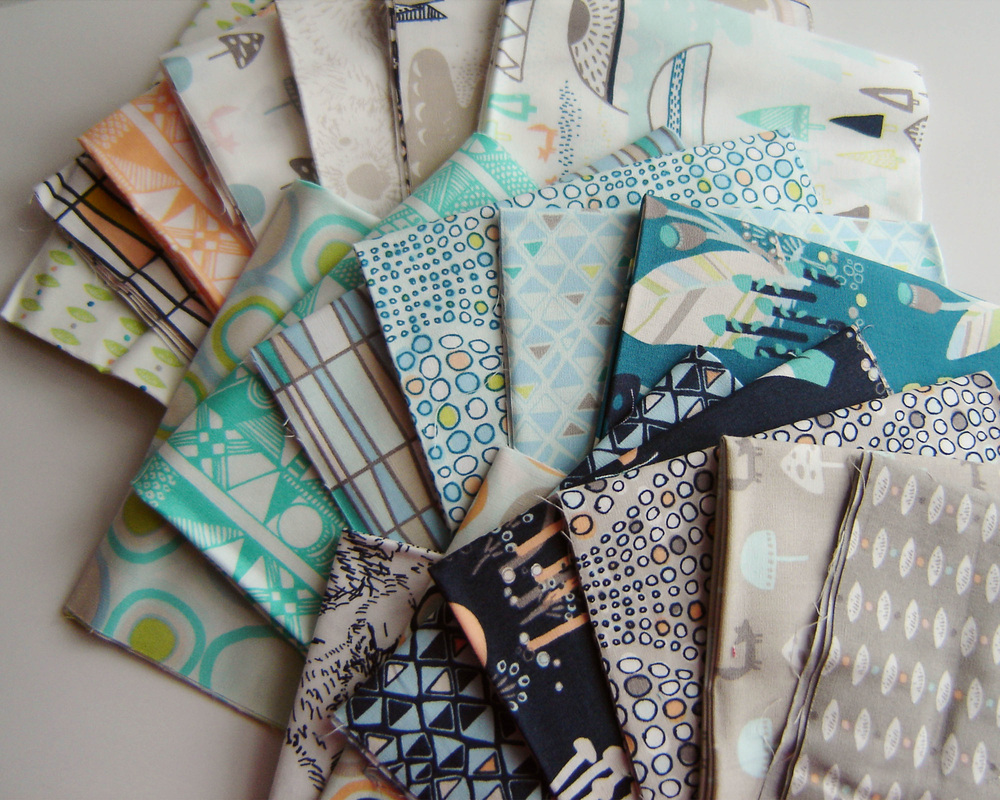
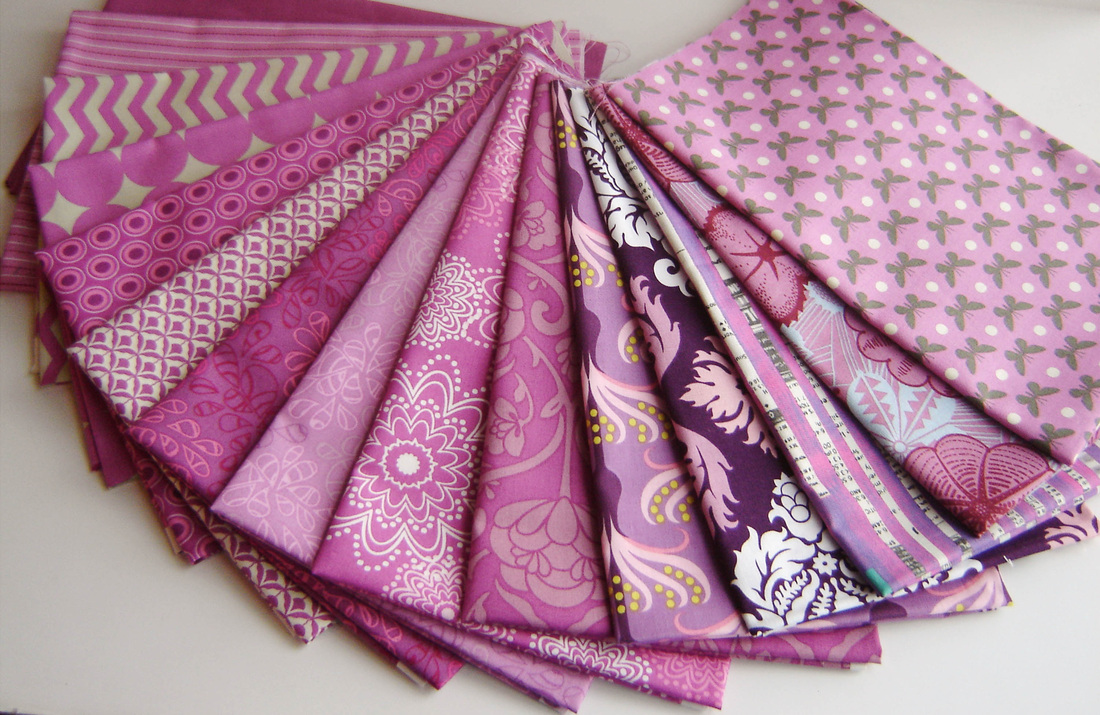
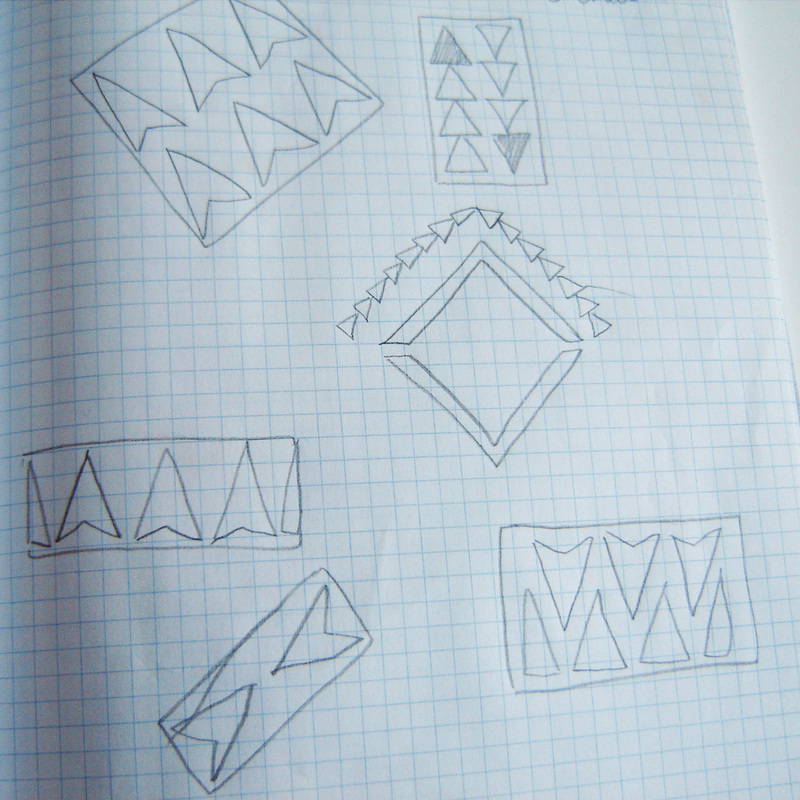
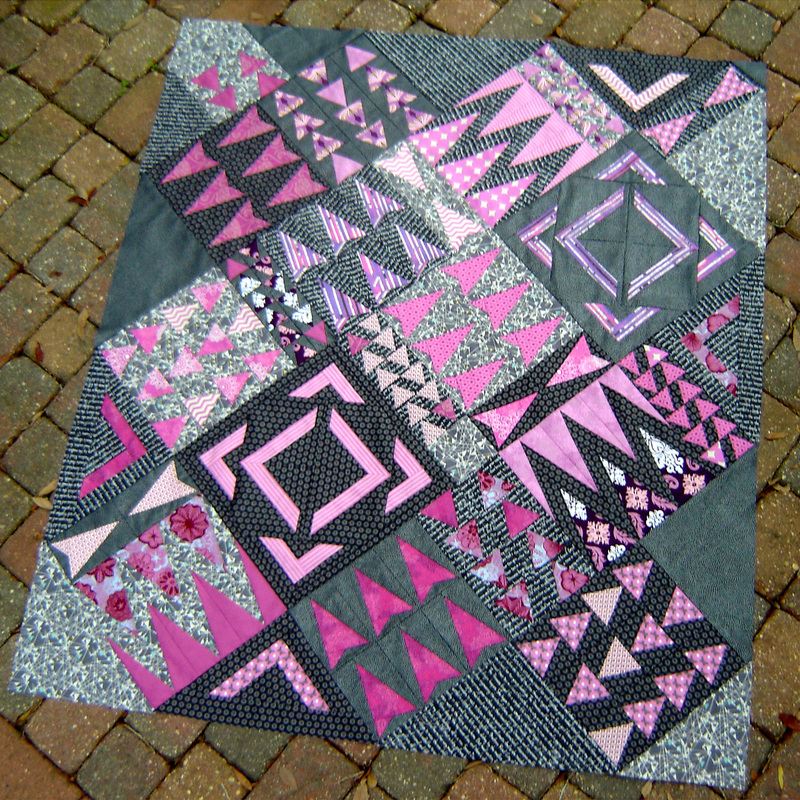
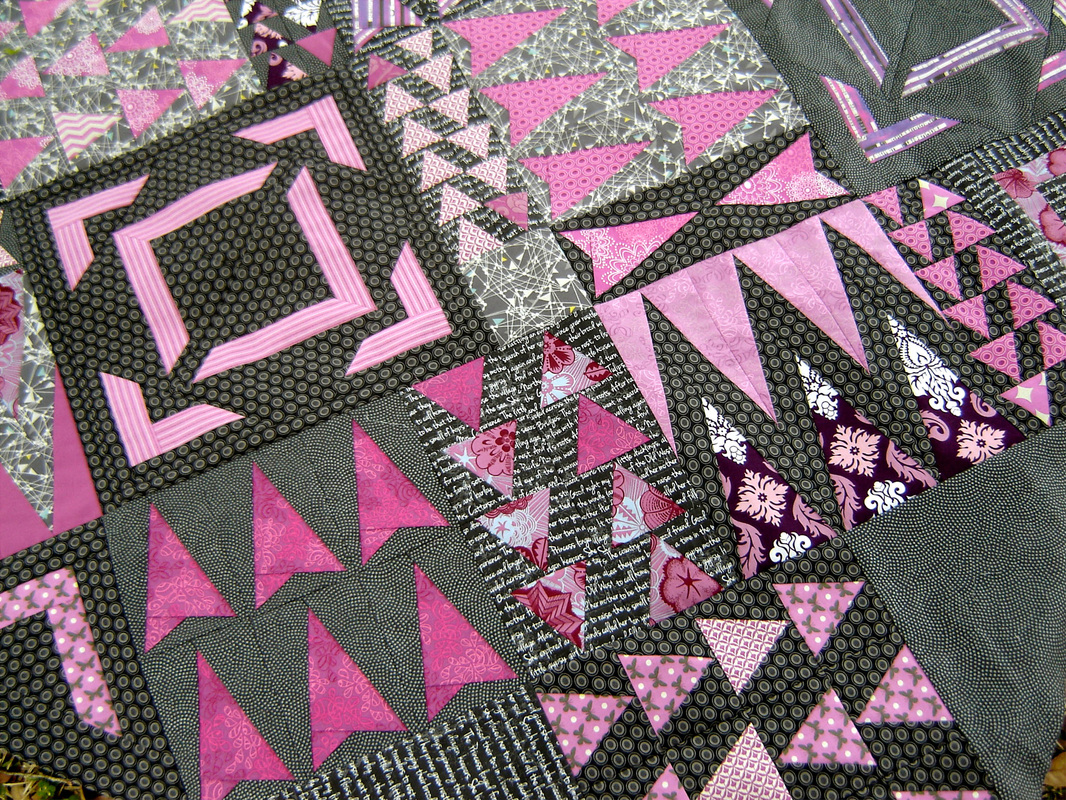
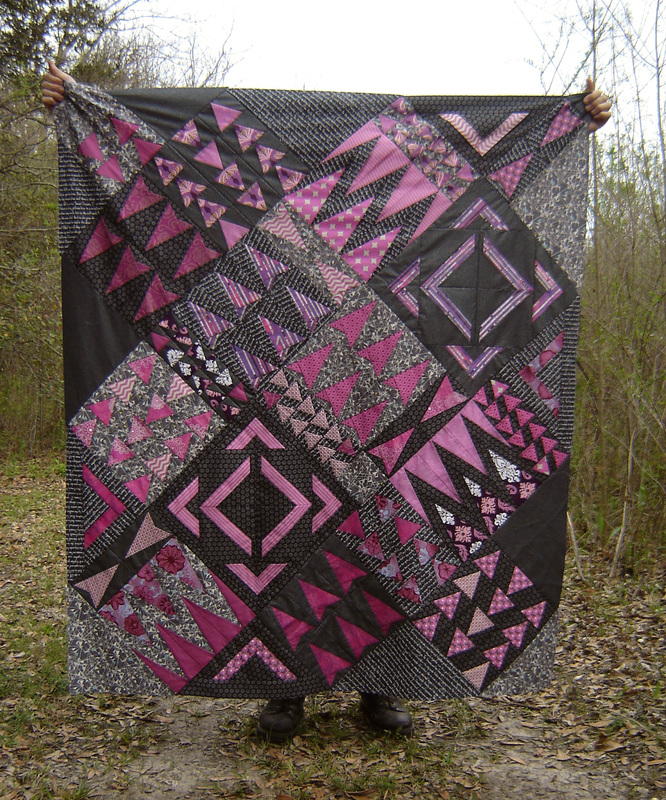
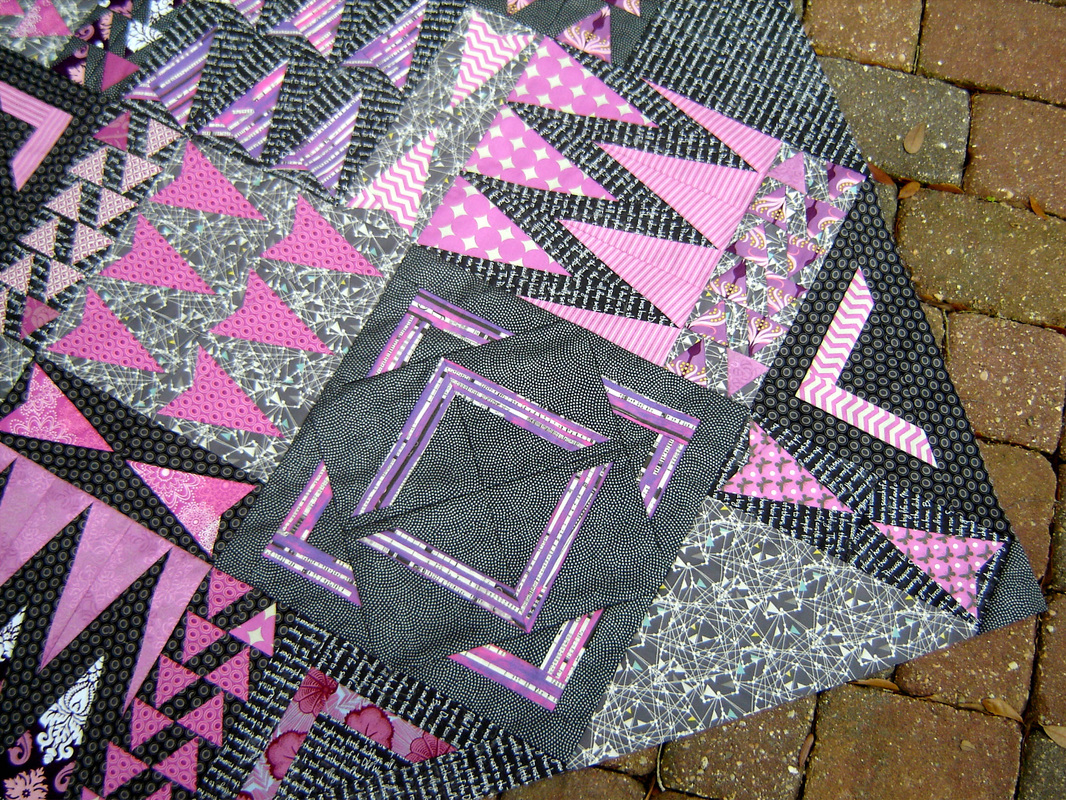
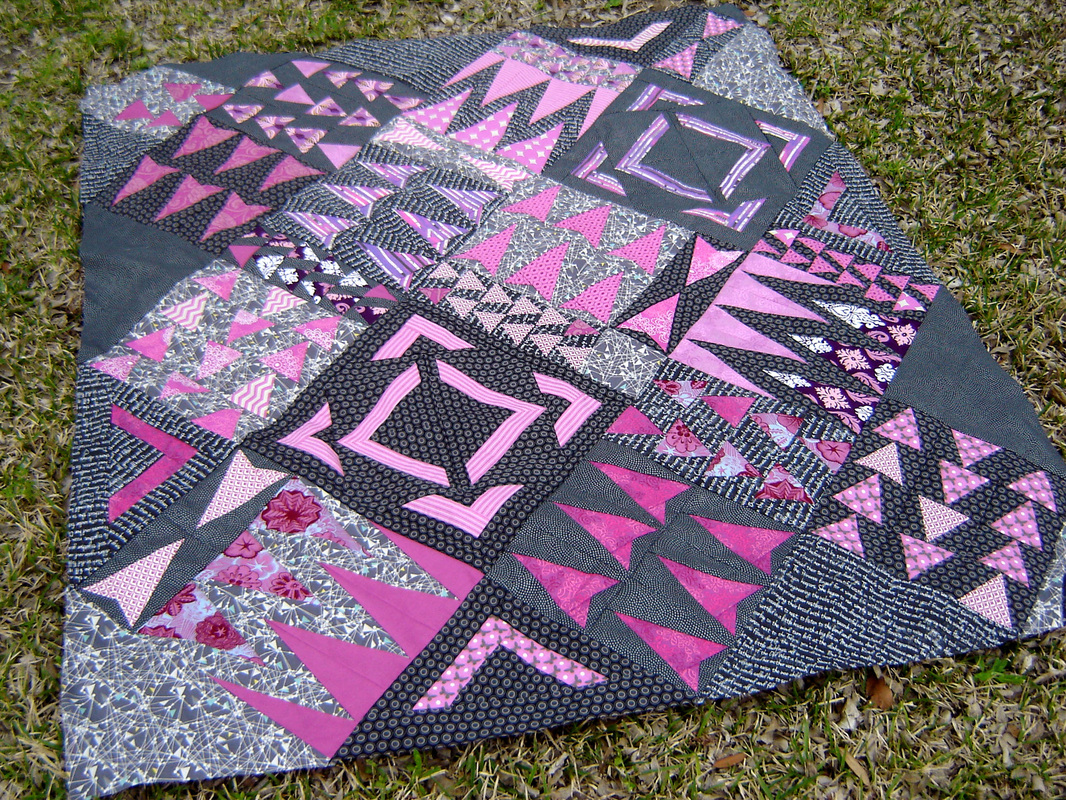
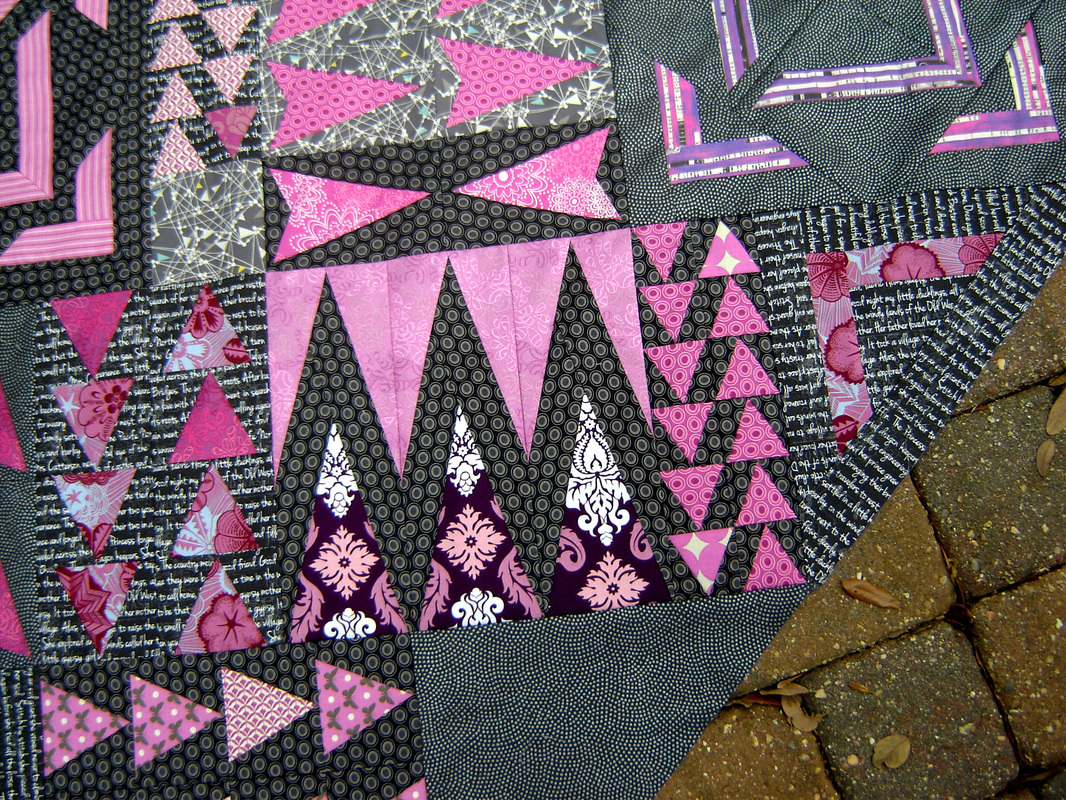
I started the New Year out wonderfully by winning this gorgeous bundle of Radiant Orchid fabrics from Hawthorne Threads. You see I had planned on entering the 2014 Pantone Quilt Challenge hosted by On the Windy Side and Play Crafts, but I had a very different idea in my head, that included only one Radiant Orchid print, because honestly I didn't have any of this color in my stash, which is odd because purple and pink are my favorite colors. Once I won the bundle (thanks so much Hawthorne Threads) a new plan started to form and I immediately ordered three black and gray prints, also from Hawthorne Threads. I started to sketch, form a plan and design some blocks. I knew I really wanted a very graphic modern quilt. One that only featured two colors and a design that was based solely on triangles and arrows. Right away I realized that some of the blocks were not going to be able to be pieced traditionally and I hoped they could be accomplished by paper piecing them. Well it worked! I drafted two different paper pieced blocks for this quilt, totally designed by me! The "arrow" shaped and the large "zig-zag" blocks are paper pieced. The rest of the blocks are traditionally pieced, mostly a lot of triangles. I am so proud of this one. My first original designed quilt! She measures 54" x 63," a good lap quilt. It did take me longer to get the top finished than I originally planned, those paper pieced blocks took a while and then the actual layout of the quilt took longer. I thought I was being clever by having both 16" and 12" blocks, but when it came time to lay them out, it just wasn't what I had pictured in my head. Then I decided to turn the blocks on point and voila, it was perfect, except I had a lot of gaps to fill in. Thus meaning I made a lot of (10 to be exact) 4" x 12" filler blocks. Oh and all those outside triangles to figure out! When I was about 3/4 of the way done with the top I realized I was going to run out of my three background prints. Paper piecing eats through fabric and I had only ordered 1 yard each of the three prints. I started to panic because I realized I now needed to try and buy more of the three or add in another. Late one night I started to dig through my stash and found the perfect fourth print, which I had a little less than a yard of, it was the text print seen above. Actually the four background fabrics are: Art Gallery Chromatics (the lightest gray print) Art Gallery Oval Elements (the black print with large ovals) Timeless Treasures Dream (the black with tiny metallic dots) Michael Miller Madrona Road by Violet Craft (the black with white text, the one I added last minute!) I am really glad that I added in the forth background print and since I still had to make a lot of those 4" blocks, plus the outside edge triangles, I was able to blend in that print without it being noticeable that it was a last minute add in! I used every single print from the Hawthorne Threads bundle, and I tried to scatter the prints throughout the quilt randomly. Some blocks are more successful than others, but the majority have a high contrast, which I really enjoy. Oh and I don't want you to think I am some super math genius to figure out the different sized outside triangles, otherwise known as quarter square triangles or setting triangles. I used a great free app called, The Quilter's Little Helper Essential Quilting Calculators by Robert Kaufman. This app was a lifesaver and I was able to figure out every one of those triangles without any problems. I highly recommend it! Here she is in all her Radiant Orchid beauty! This is my entry into the 2014 Pantone Quilt Challenge - Radiant Orchid hosted by On the Windy Side + Play Crafts. I am entering it into the "Just The Top" category and it measures 54" x 63." Click on the little circle below to go and see all the other entries, trust me, there are some beautiful quilts being entered in this competition! Linking up to My Go-Go Life: Sewjo Saturday! This was my only finish this week, heck this was the only thing I really worked on this week period! Glad to have the quilt top done and looking forward to working on new projects!
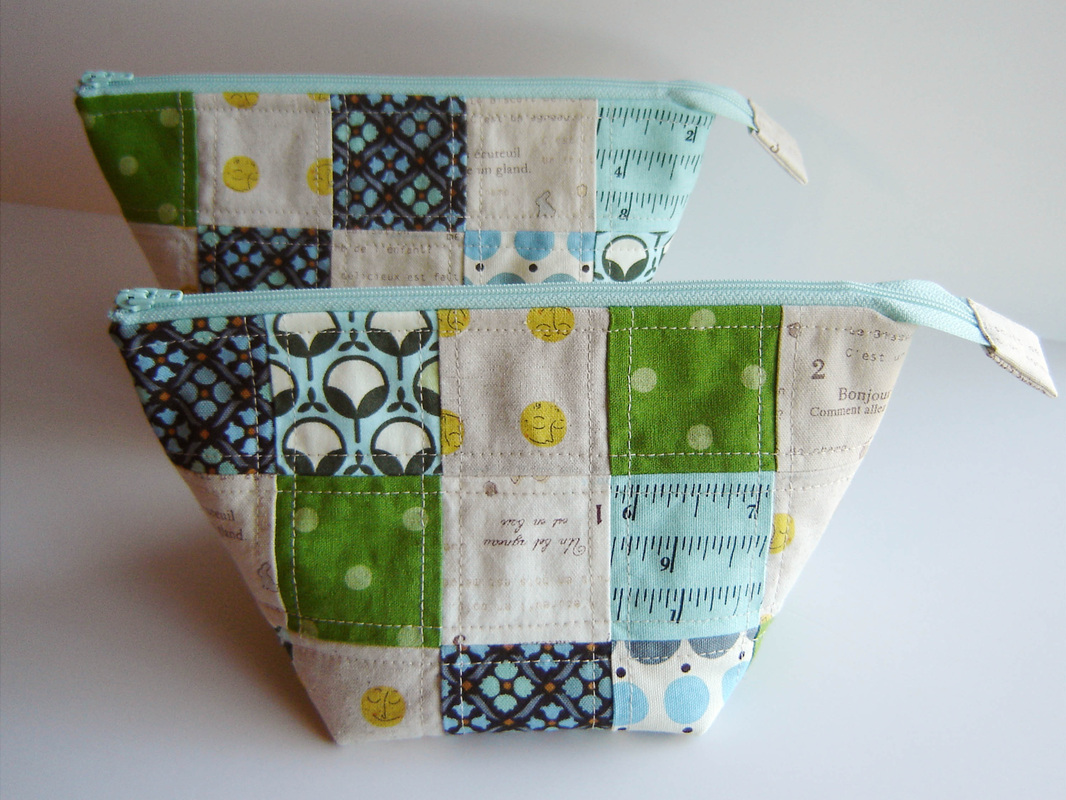
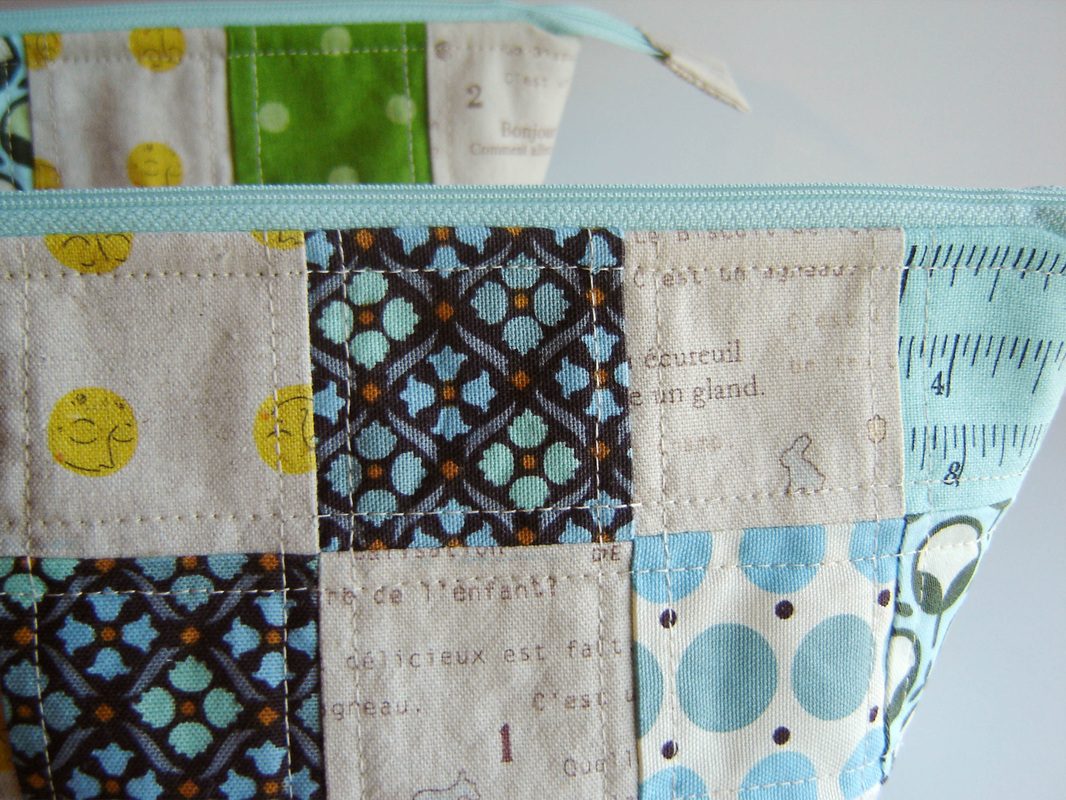
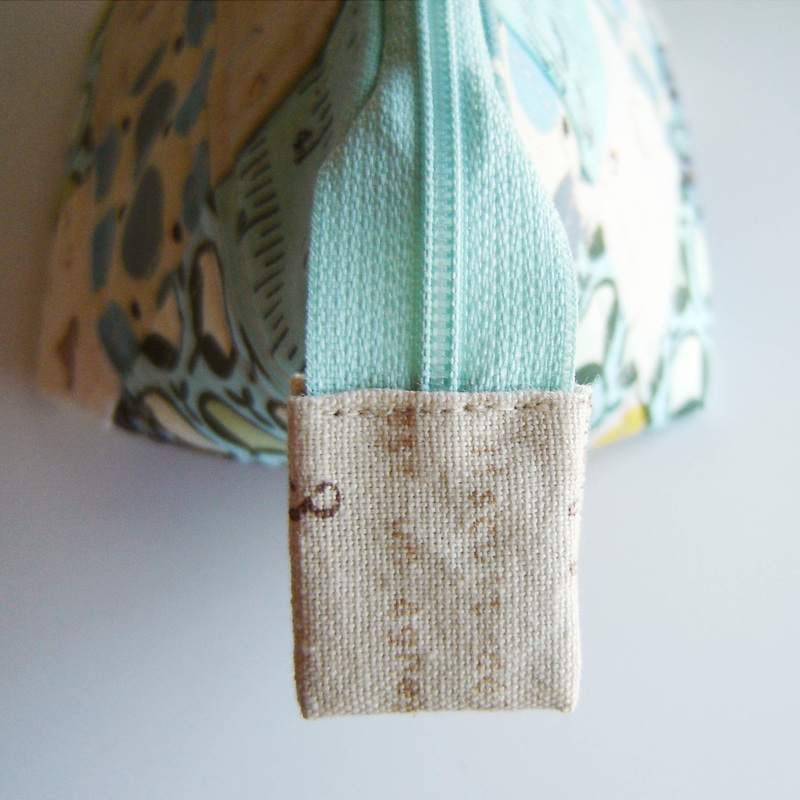
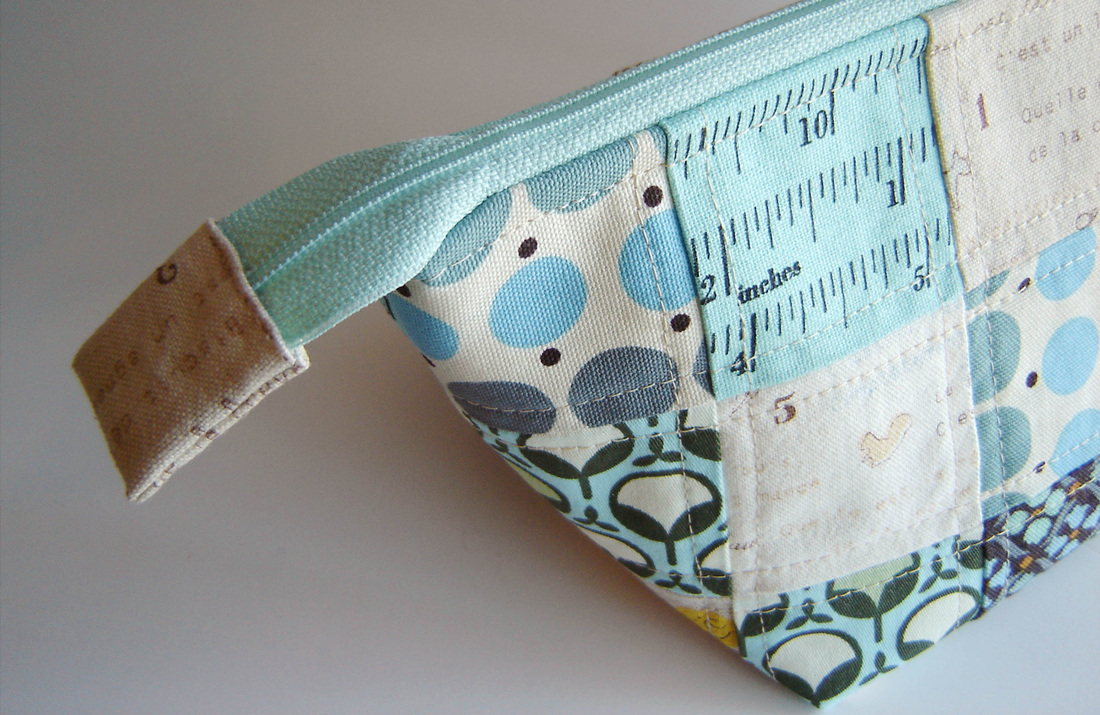
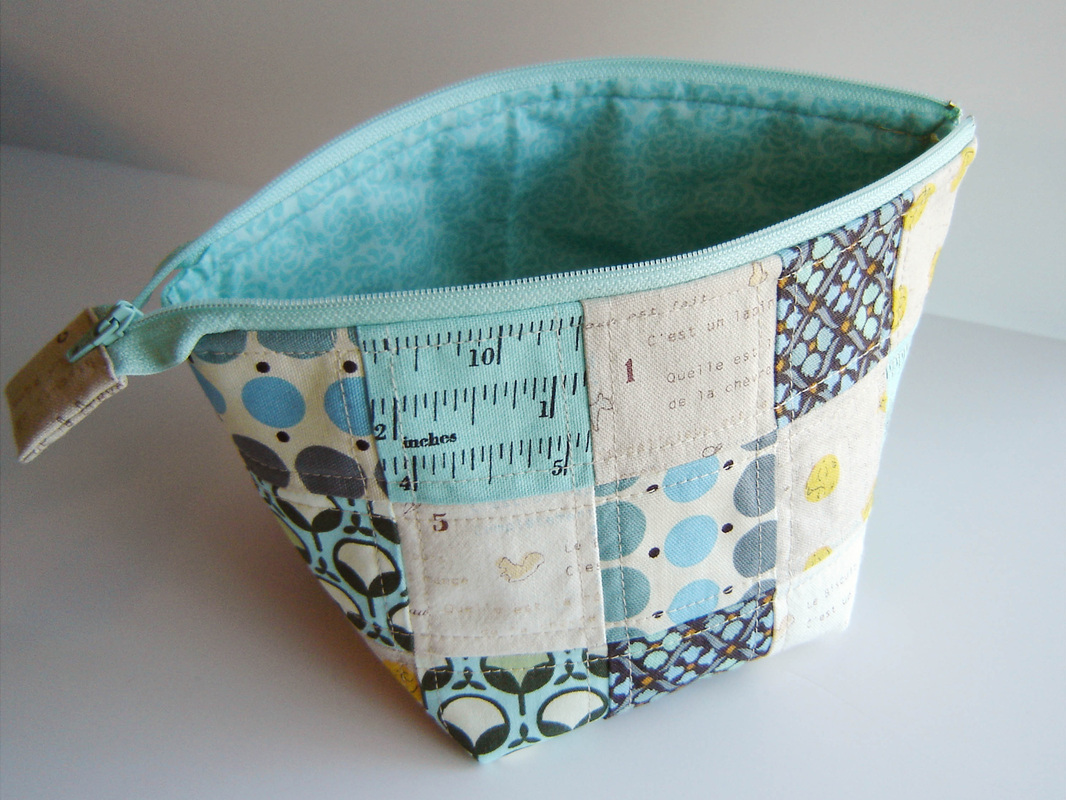
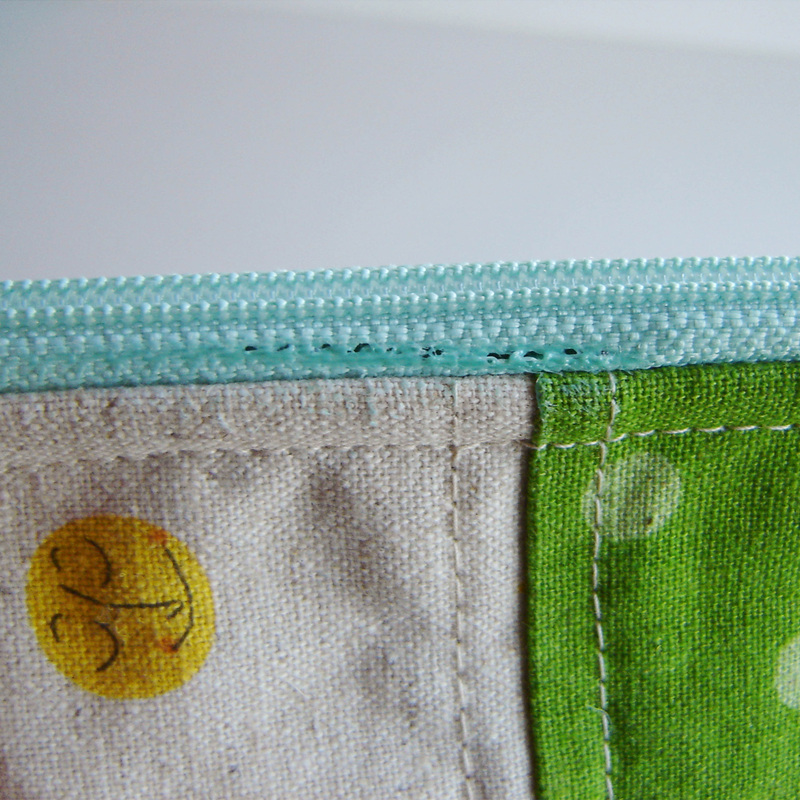
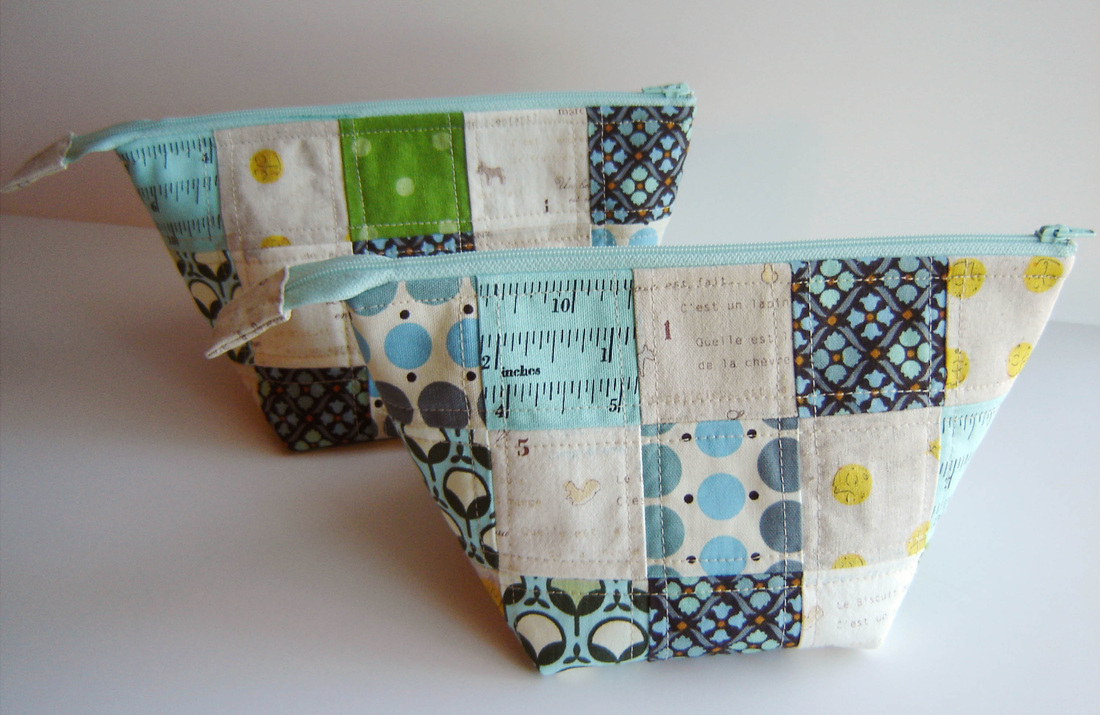
In my last post (Rebecca bag) I mentioned that my mom had picked out a ton of fabrics for me to choose from to make her bag. Well here is what I did with some of the fabrics that didn't make the cut. You see, she also requested a pouch, and I thought it would be the perfect time to make the Open Wide Zippered Pouch from Noodlehead. Oh and why make one when you can make two at the same time! I started with an assortment of home dec fabrics, some from Denyse Schmidt, a touch of Heather Ross and even some cool Japanese prints. I cut them into 2.5" squares and created 2 patchwork panels, one for each side, so I really created 4. My panels ended up being not quite the size that Anna from Noodlehead suggested, but I just rolled with it, it was close enough. Oh and I made the smallest size (the tutorial has 3 sizes, you can find it HERE.) Once the patchwork panels were done, I ironed them onto some fusible fleece, and then proceeded to straight line quilt them with a nice neutral thread. I love patchwork! At this point I just followed the directions and kept on sewing. It really is a great tutorial, very easy to understand and I love the way the zipper is done. I only changed two things from the original tutorial. The first was the little zipper end cover shown above. I put the fabric right sides together and sewed the two sides, then flipped it right side out, thus creating a little envelope of sorts. I just had to turn in the raw edge by 1/4", slide it onto the zipper end and just stitch it onto the zipper, thus the one showing seam. The only other change I made was the gusset or box corner width. The tutorial called for a 3.5" gusset, but I reduced the number to 2.5" so my bag isn't quite as wide and sits a tad bit taller. The 3.5" measurement fell weird with the patchwork, so I just adjusted it to fit better with the patchwork squares. If you look at the photo below you can see the bottom corner falls in the middle of the patchwork and not on a seam. Kinda hard to explain, sorry. I used a simple tone on tone for the lining, making it easier to see your stuff inside the pouch. The only snag I ran into during this entire project was entirely my irons (or my) fault. You see when it came time to iron the exterior and the lining flat after sewing them to the zipper, my iron accidentally touched the POLYESTER zipper and as you can see in the photo below, melted a fine line of holes in it. On the bright side, the holes are small and since the zipper is polyester, it melted and kind of "sealed" it all at the same time, so it isn't going to run or ravel with time. Oh and this is also the great benefit of making 2 at a time, you mess up one, you still have a perfect one to gift! Poor me, I have to now keep the "damaged" one! Here they are all finished! It is really a great tutorial, quick project and honestly fun! So if you are ever in need of a great little gift, go ahead and make one, I know the recipient will love it! These two pouches were my third finish of the first quarter 2014 Finish Along hosted by Katy at The Littlest Thistle.
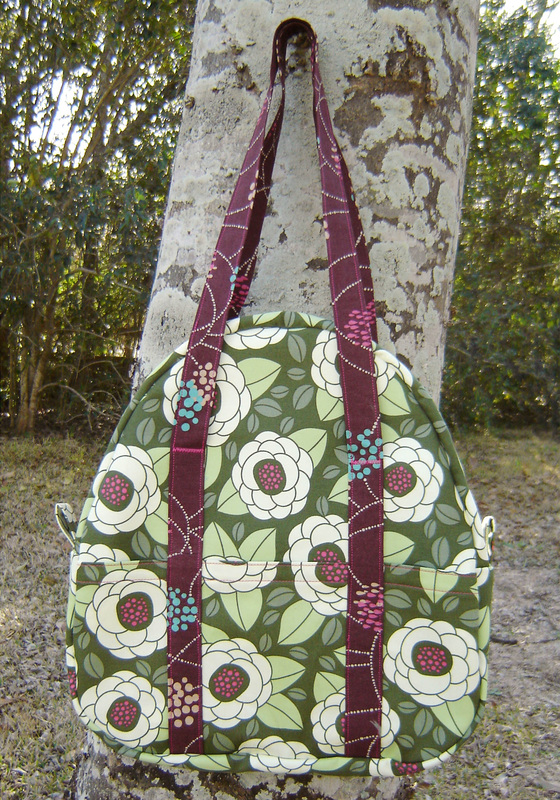
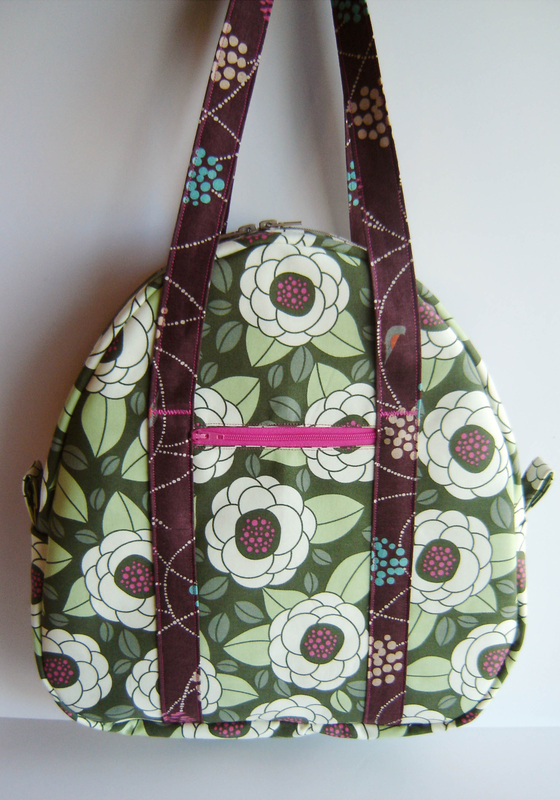
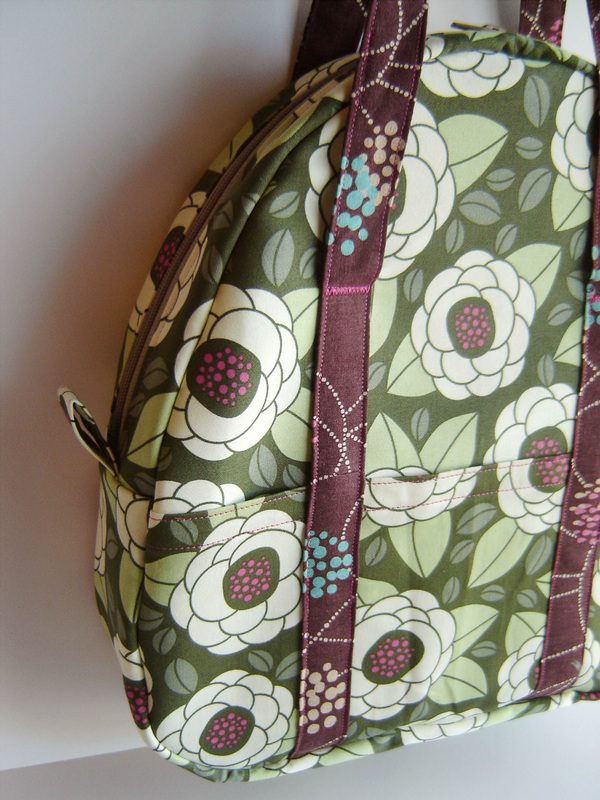
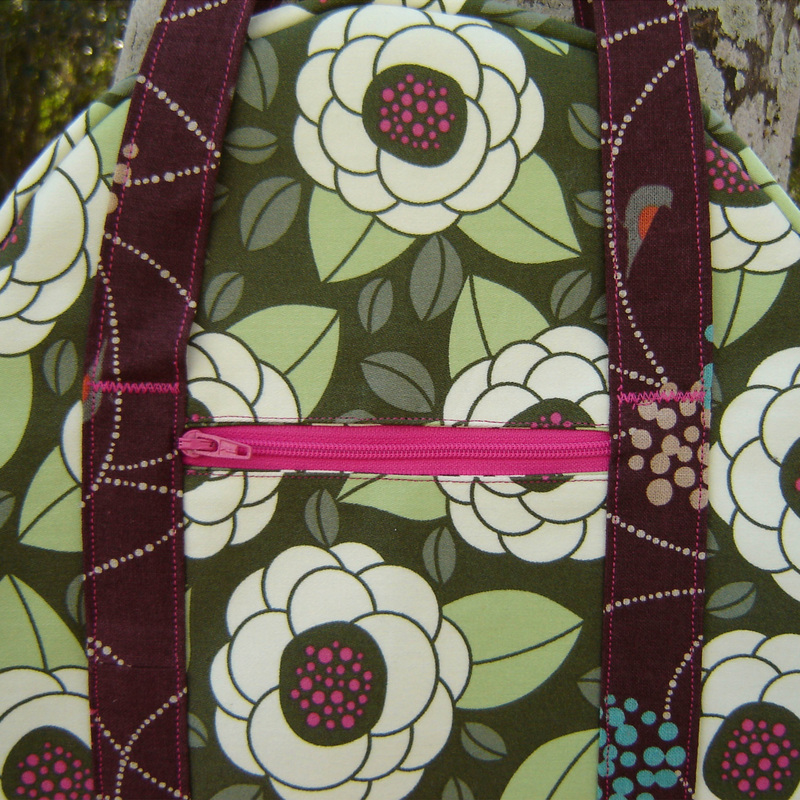
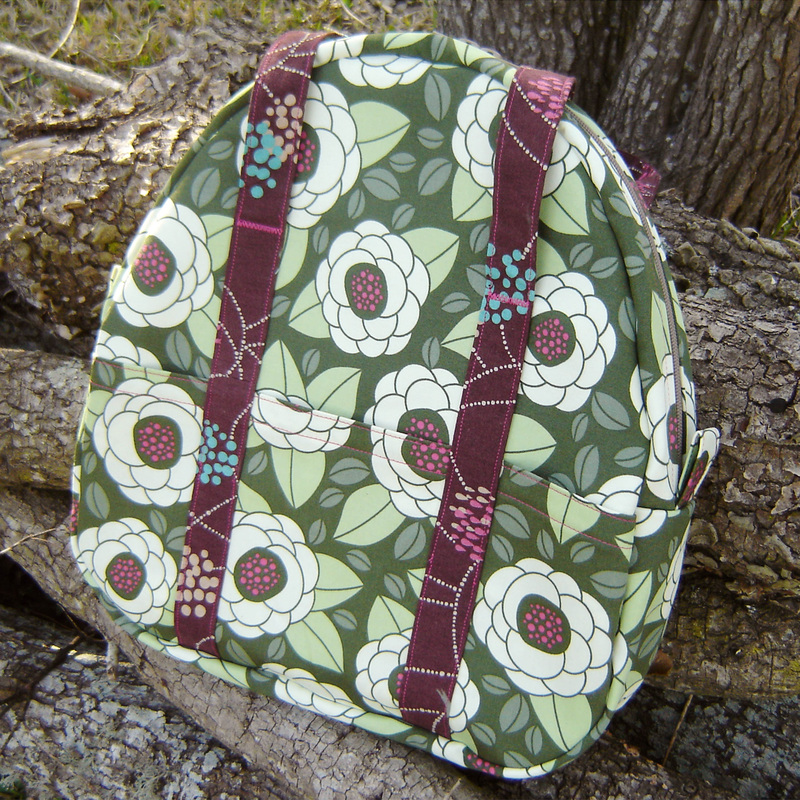
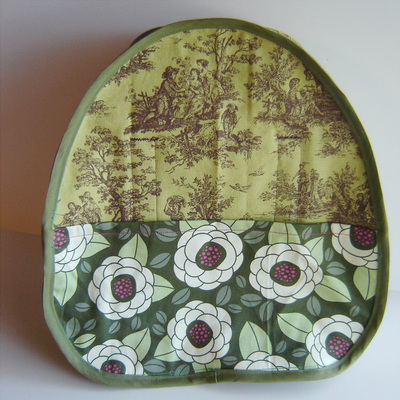
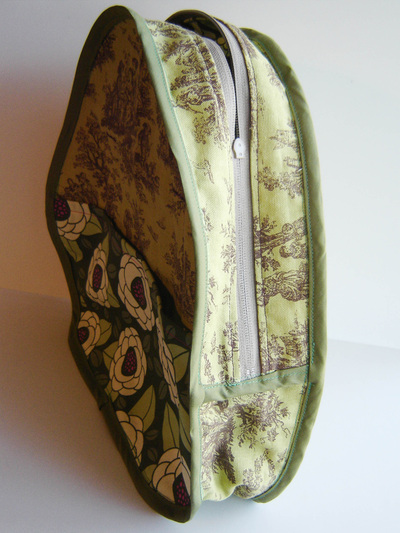
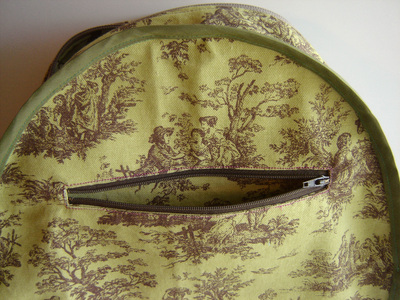
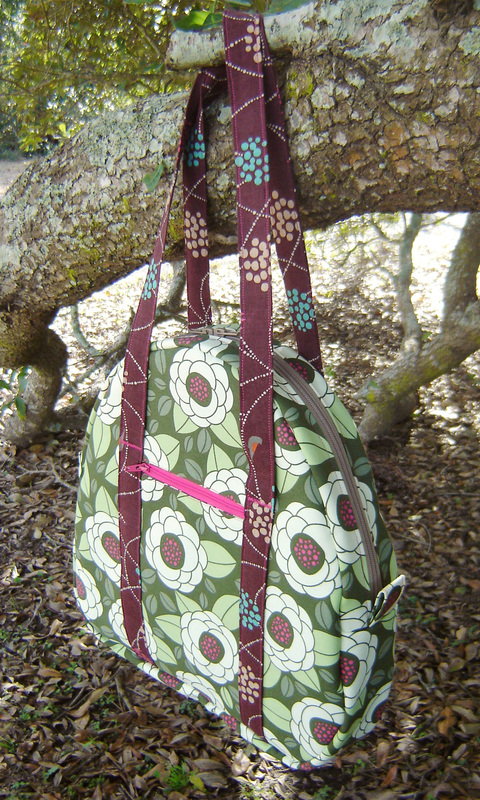
The Rebecca Bag, take two! I usually don't make a purchased pattern twice, if it is my own design I'll make it a lot, but normally with a purchased pattern I will make it once and then I move on. I think for me it is a way to learn techniques and then once I have learned from that project, it is time to move on. Well obviously this wasn't the case here. Case in point is the Rebecca Bag from the book, Bags the Modern Classics - Clutches, Hobos, Satchels & More by Sue Kim. My first time with the pattern was for Craft Book Month at Craft Buds, and you can see the finished bag and review HERE. After the blog hop, I had the bag hanging around in my house and my mom spotted it, she fiddled with it a bit and decided it would be the perfect style for her with a few modifications. She wanted more pockets, inside and out, and she wanted a shorter version, it didn't need to be as tall if she was going to use it as an everyday handbag. So I let her dig through all of my home dec fabrics (more than I care to admit) and she pulled out a mismatched stack of things she liked and gave me the job to surprise her with the final pick. Well little did she know that of the stack she picked, only one or two of the prints actually had enough yardage to make the bag, thus limiting the choices in the end. I think it worked out quite nicely though. The main fabric for the bag is a home dec from Joel Dewberry (a few years old) and the handles are a lovely Echino (also a few years old.) The interior is some random toile print that I had in my stash, whose origins are completely unknown, but works perfectly for a bag interior! Be it that I had made this bag before, it stitched up really quickly and I only referred to the directions once or twice, making the construction that much faster. I do believe that fabric choice, cutting and ironing interfacing took longer than the actual bag construction. The modifications included shortening the overall length of the pattern by around 4", thus shortening the front pocket a bit too. I added quite a bit of length to the handles also, just to make sure they would fit easily over the shoulder. I did not modify the top curve, as I didn't want to have to make changes to the zipper length and I left the depth alone because it is pretty darn perfect. Just like the original that I made, I added a zippered pocket to the back for keys or cell phone and it is nestled neatly in between the two handles (shown below.) I used a hot pink zipper and top-stitched everything with hot pink to accent the center of the flowers in the Joel Dewberry print. The top zipper was a neutral beige, so it would blend in, and is a "purse zipper" which has two toggles and is super thick and sturdy (I bought it at JoAnn fabrics.) I used a short zig-zag stitch to reinforce the handles where they separate from the bag body, I just wanted to have some extra stitching there, just making sure it was secure. I used a size 16 needle for the majority of the construction of this bag as there are many layers of home dec fabric and interfacing. For the final layers of stitching (the bias tape on the interior seams) I switched to a "denim needle" which would be equivalent to a size 18. It worked like a charm. Once I had finished the bag and it was already inside out, I decided to take a few pictures to really show you what the interior looks like. I added in the larger side pocket and another zip pocket for extra storage. You can see that all the layers are sewn together and then to finish the raw edges you attach bias tape to the unfinished seams. It seems like it would be hard, but it really isn't. I used Clover Wonder Clips (which are awesome by the way) to hold the bias tape on the seams and with that denim needle just stitched slowly and carefully around each side. It really isn't that hard, just takes a little patience. Some spots of the interior aren't perfect, and the stitching is a bit messy, mostly at the zipper ends and that short run of bias tape, but honestly what does it matter, it is the interior of the bag and barely visible. In conclusion, I love this pattern, and the book itself is filled with a ton of great projects. I think my mom loved the finished project (at least I hope so) and should be just big enough to hold all of her everyday essentials. The front divided pockets are just large enough to hold a cell phone, sunglasses, keys or anything you would want quick access to. The interior is just the right size to hold a magazine plus all of your normal purse goodies. The pattern really is a keeper! On a side note I normally take my bags outside to photograph them as I have more space and hanging opportunities outside. After I had taken the photos outside and then downloaded them to the computer I noticed that the bag really blended into the background, so I guess my colors were very nature inspired! LOL I ended up taking more photos on the white background so you could really "see" the bag. I am linking up to The Crafty Traveler over at Ellison Lane and the March Craft Book Sew-Along hosted by Live.Love.Create. This project was also my second finish in the first quarter of the 2014 Finish Along hosted by Katy at The Littlest Thistle.
|
Marci GirlA feisty mom designing, sewing and blogging her way through everyday life!
|








 RSS Feed
