• Home
  • Blog
  • 2020 Finish - A - Long
  • 2019 Finish - A - Long
  • 2018 Finish - A - Long
  • Contact
  • 2017 Finish - A - Long
  • Shop
Marci Girl Designs

Style Stitches Cosmo Bag

1/31/2011

5 Comments

 
Picture
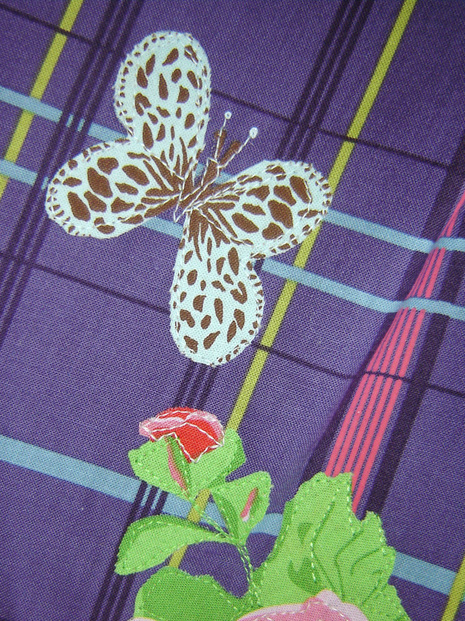
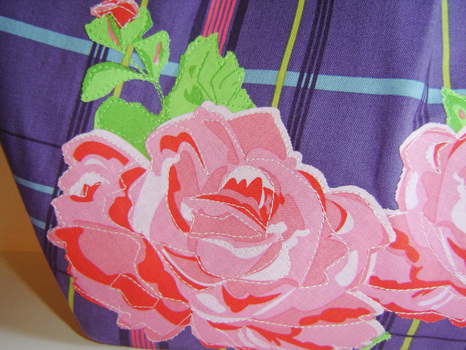
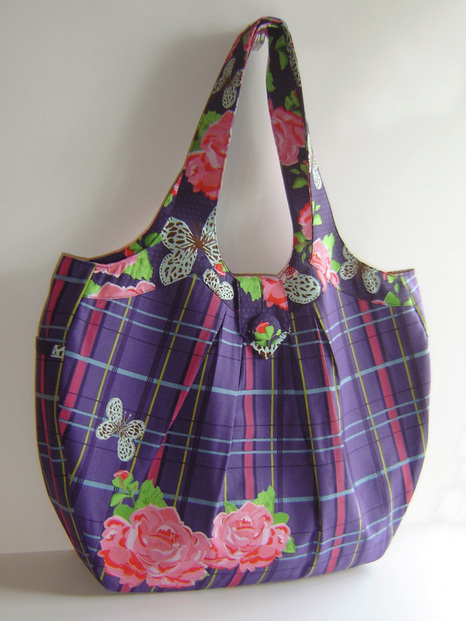
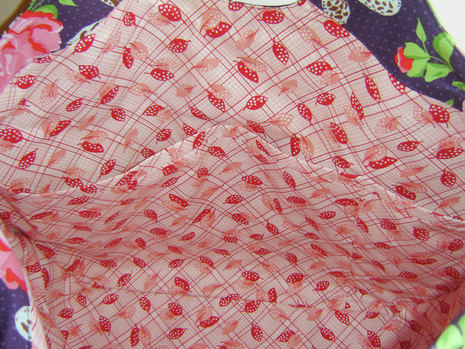
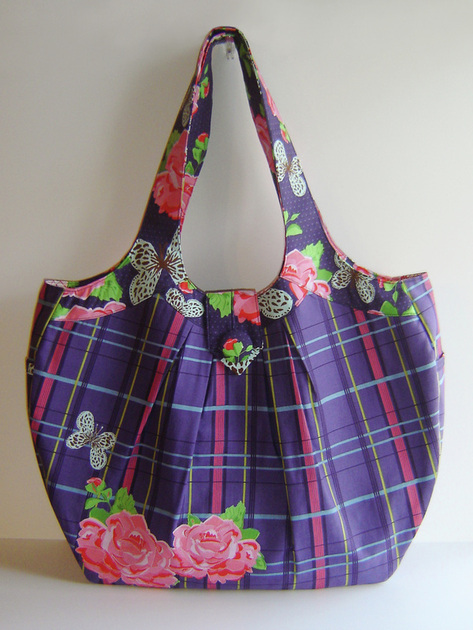
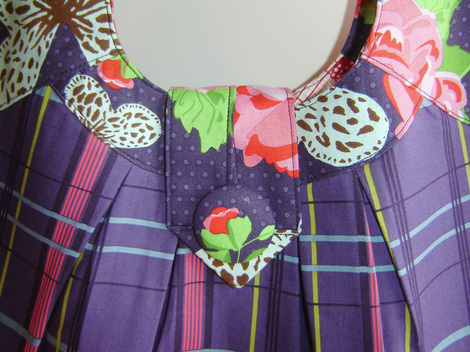
Here it is, my finished Cosmo Bag for January's Style Stitches challenge.  Honestly, I finished this baby about a week ago, but rain and gloom kept me from taking photos of it.  I am really pleased with the finished results, and think she really turned out quite pretty.  I made a few changes to this bag, one being the flower and butterfly applique in the left bottom corner of the bag.  Bari J Ackerman is the designer of the fabric, and I also was inspired by Bari J to create the applique with free form stitching all over the flowers and enhancing the butterfly details.  I think the applique really enhanced this bag and gave it a little something extra!  I had never done anything like this before, and it was hard to "let go" and do something free form, but I think I accomplished the task without being too structured. 

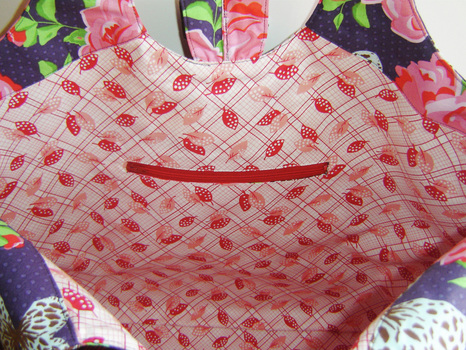
What else did I change on this pattern, you ask?  Well, I didn't want all those floppy interior pockets, so on one side I put in a zippered pocket, and on the other interior side with the pockets, I created three pocket spaces instead of two.  I also changed the side dimensions on this pattern.  It seemed like everyone's complaint was that the bag was too large, so instead of changing the whole bag size, I simply took off some of the width of this bag.  The sides and bottom at the widest point measure (on the pattern) about 6", I knocked off a few inches, so the finished sides and bottom are only about 4" wide.  This decreased the space in the interior of the bag a lot, which is what I wanted.   I also added one layer of plastic canvas to the bottom of the bag for added structure, I slipped it in between the outside and interior of the bag before the two were sewn together.  This gave the bag a little more structure, and it is able to stand on its own, with the exception of the handles!

Amy Butler labeled this project as "easy" in her book, well this wasn't my definition of "easy" at all.  It wasn't hard, but it should have been an intermediate project, I hate to think about a brand new sewer trying a project like this for the first time - scary!  The handles were down right aggravating, and the lack of photos in this book (or diagrams) made it harder than it needs to be.  Now that I have finished one, the second would be easy, I am just not sure if I need to make a second one!  Oh, and next time I would definitely interface the fabric that is used to make the button, so that the "silver" button doesn't show through the fabric, like it does now.  All of that being said, I did enjoy constructing it, and look forward to making the rest of the items in her book!
Picture
Picture
Picture
Picture
Picture
Picture
Picture
5 Comments

Ribbon Embroidery Hoop Love

1/26/2011

18 Comments

 
Picture
Picture
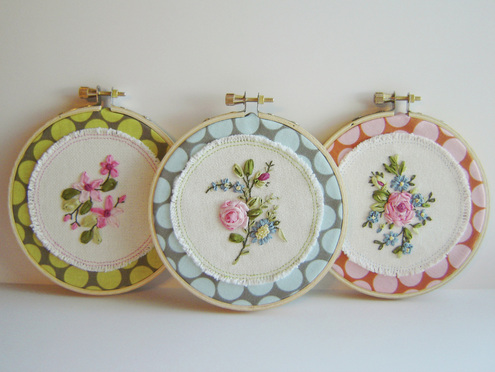
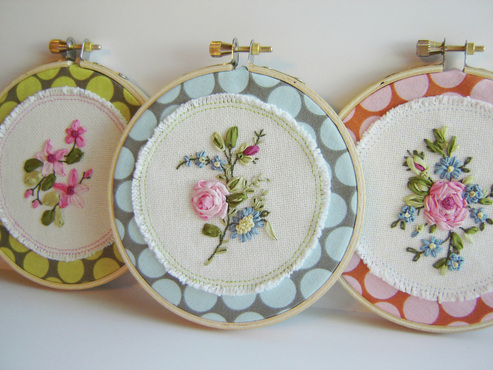
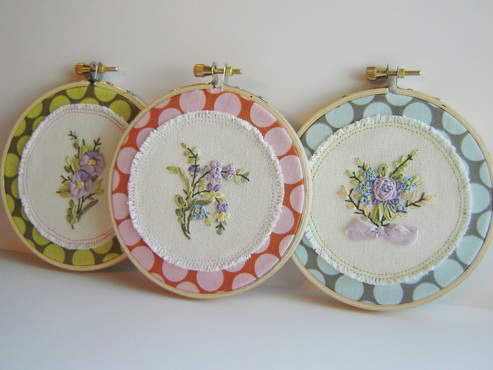
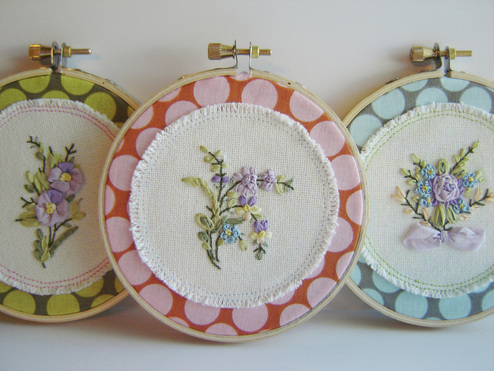
Do you want to know a secret?  I started these little pretties FOUR years ago...yep, you read right, four years.  Pathetic right?  Yes, yes it is.  But, in my defense I had an excuse.  I started these little ribbon embroideries a few months before my son was born, and I got through about five of the six, and got hung up on that pretty pink flower mounted on the blue fabric smack in the middle above this wording.  I got pretty frustrated (a lot frustrated, really) and flat out gave up, and set them aside.....for a while, ok, four years.  This was my first ever attempt at ribbon embroidery and really isn't that much more difficult than regular embroidery, just different.  One of my recent goals has been to finish up those projects just laying around, so I picked this one back up, and finished it!
I was quite pleased with how it turned out, though I had no intention of mounting them on fabric.  I bought the hoops (the smallest the store had, 4" I think) thinking I would just mount them directly in the hoops.  Well.....the fabric wasn't big enough, so after much deliberation, I picked out these three lovely Amy Butler prints, cut out the circles and sewed them directly onto the fabric, then frayed the edges for some added texture.  Now my only problem is where to hang them?
Picture
Picture
18 Comments

One Thing, One Week Challenge - My Minions

1/24/2011

11 Comments

 
Picture
Picture
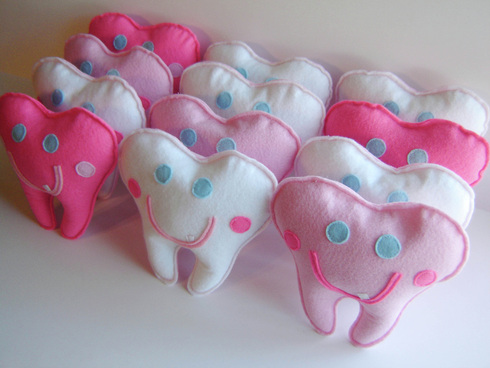
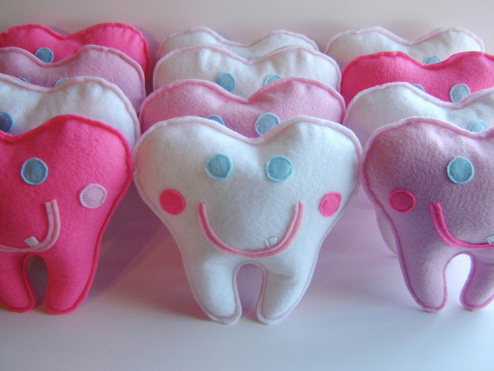
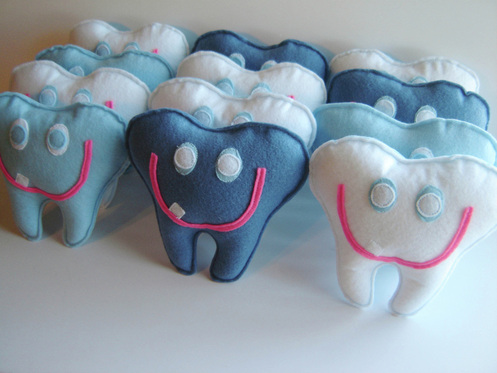
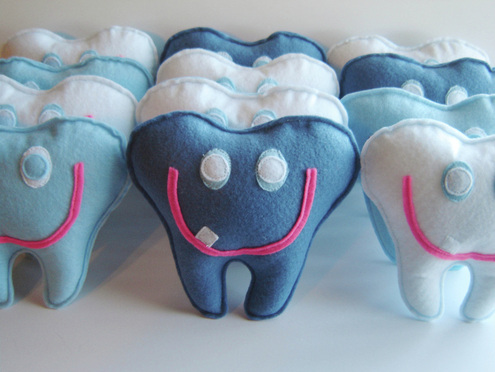
Once again I decided to participate in Amy's One Thing, One Week Challenge.  Well lucky for me, I finished this one up early in the week, and even got the pictures done early!  Woo-Hoo!  My goal this past week was to finish up the two dozen tooth fairy pillows that were a custom order for a boutique in South Carolina.  It is so nice to send these little guys off to other parts of the country for someone else to love!  I think their little pink and blue smiles are pretty darn cute, don't you?  Thanks again Amy, for this little challenge that gives so many people that little kick in the butt to get stuff done!  Now off I go to that next project...

Amy's Creative Side

P.S. In response to one of the comments left on this post asking if the pillows have a pocket on the back for a reward for the children, the answer is Yes!  All of these pillows have a pocket on the back to safely tuck the little tooth and then the tooth fairy can leave her reward!
Picture
Picture
11 Comments

Treasury Love

1/19/2011

0 Comments


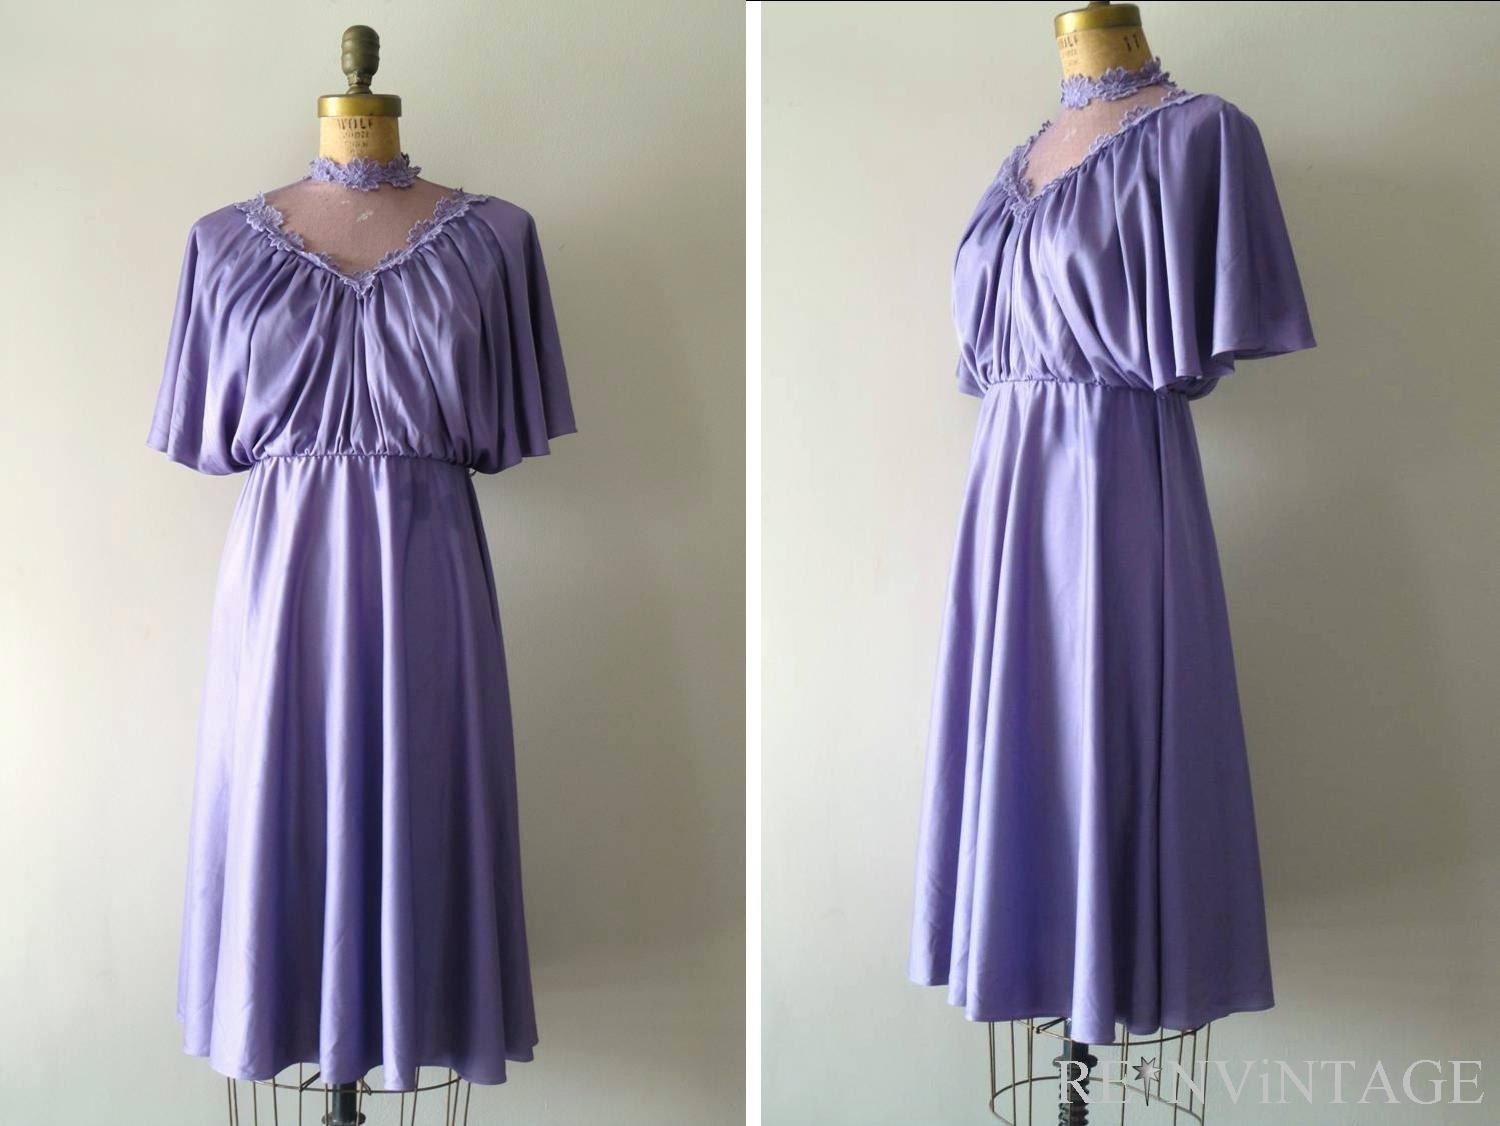
'Lovely Lavender' by MarciGirlDesigns

It has been quite a while since I made a treasury, and I figured I would give it a go!


WhatIfPhotogra...
$30.00

chastina
$22.00

shopREiNViNTAG...
$30.00

CritterJitters
$20.00

lacemonster816
$5.00

dinofleur
$4.00

FerntreeStudio
$19.00

ColorsofRengin
$35.00

MeadowSky
$15.00

iragrant
$160.00

Beaky
$10.00

JewlLi
$20.00

BigHelmetHead
$40.00

paulajeansgard...
$3.00

Misspottery
$20.00

dennisanderson
$5.50

Treasury tool is sponsored by Lazzia.com.

0 Comments

Style Stitches Monthly Bag Challenge - January's Bag

1/4/2011

2 Comments

 
Picture
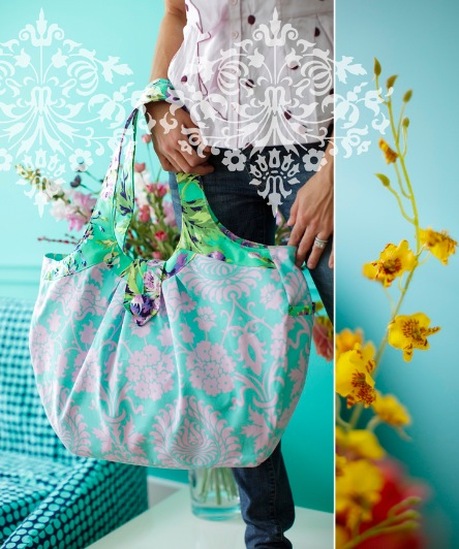
Jemellia at JemJam had a fantastic idea and decided to host a monthly sew along challenge using Amy Butler's newest book, Style Stitches.  There are basically 12 bag styles, one for each month!  I already owned the book, and as soon as I heard about her idea, I decided to jump aboard, something fun for the new year!  The first bag is the Cosmo Bag and is pictured below!
Picture
Amy Butler's Cosmo Bag from Style Stitches
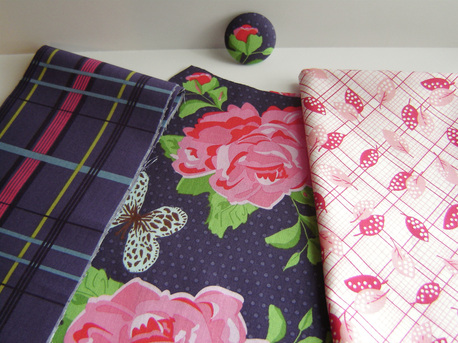
The first step for the month is to pick out your fabrics that you intend to use for the bag, and get all your supplies together!  I have decided to use Bari J Ackerman's Country Lane line of fabrics for the exterior of the bag.  The plaid will be the main body, and the floral will be the trim and handles.  You can already see my big button I have created for the bag too!  For the interior of the bag I will be using Apron Strings by Karen Stephens, Leaves in Red.  Check back towards the end of January to see my finished bag!
Picture
2 Comments

    Marci Girl

    A feisty mom designing, sewing and blogging her way through everyday life!

    Subscribe
    Follow on Bloglovin
    Picture
    Follow on Bloglovin


    Categories

    All
    2017 Finish A Long
    2018 Finish A Long
    2019 Finish A Long
    Bee Sewcial
    Book Reviews
    Clothing
    Everyday Life
    Giveaways
    Handbags
    Handstitched Class
    Inspirational Projects
    Marci Girl Designs
    Projects
    Quilt Along
    Quilting Bees
    Quilts
    Random Thoughts
    Recipes
    Sew Along
    Sewvivor
    Style Stitches
    Swaps
    The Penny Sampler Class
    Tutorials
    Wip Wednesday


    Happily
    Participating In:

    Picture
    Picture
    Picture
    Picture
    Picture
    Picture

    Picture


    Archives

    January 2020
    November 2019
    October 2019
    July 2019
    April 2019
    March 2019
    February 2019
    January 2019
    December 2018
    October 2018
    August 2018
    July 2018
    June 2018
    May 2018
    April 2018
    March 2018
    February 2018
    January 2018
    December 2017
    November 2017
    October 2017
    September 2017
    August 2017
    July 2017
    June 2017
    May 2017
    April 2017
    March 2017
    February 2017
    January 2017
    April 2016
    March 2016
    February 2016
    January 2016
    September 2015
    July 2015
    October 2014
    September 2014
    August 2014
    July 2014
    June 2014
    May 2014
    April 2014
    March 2014
    February 2014
    January 2014
    November 2013
    October 2013
    September 2013
    August 2013
    July 2013
    June 2013
    May 2013
    April 2013
    March 2013
    February 2013
    January 2013
    November 2012
    October 2012
    September 2012
    August 2012
    July 2012
    June 2012
    May 2012
    April 2012
    March 2012
    January 2012
    December 2011
    November 2011
    October 2011
    September 2011
    August 2011
    July 2011
    June 2011
    May 2011
    April 2011
    March 2011
    February 2011
    January 2011
    December 2010
    November 2010
    September 2010
    August 2010
    July 2010
    June 2010
    May 2010
    April 2010
    March 2010
    February 2010

    Picture

    RSS Feed

Powered by Create your own unique website with customizable templates.