|
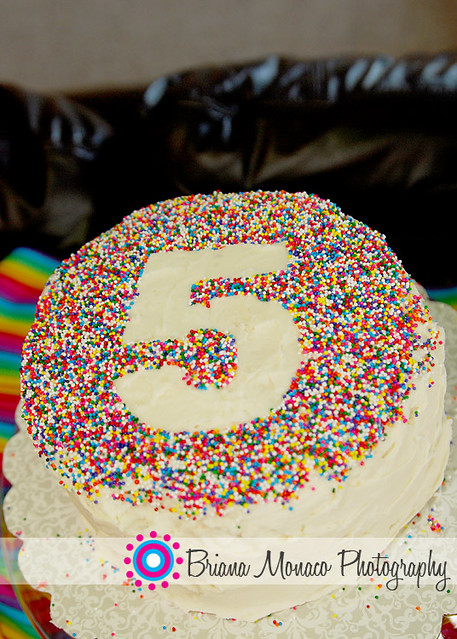
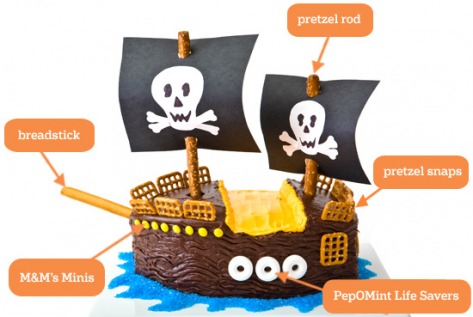
In a mere two days, my little baby boy will be a whole one years old. Hard to believe, oh how the time flies. We had to push back his birthday party a bit because of the never ending illness around our house these days, but that is ok, it gives me more time to plan and prepare. I am thinking about going a simpler route for his cake. One cake for the party goers, and cupcakes for my little man and the kids. I always scheme these elaborate cakes and then end up cursing and swearing I'll never do it again, especially since all my cakes seem to fall into a million pieces every time I have to transfer them. That being said, I am sticking with it, going the easy route, and plan to do a simple cake like the one below. Easy enough right? Maybe I will fancy it up with a pudding layer in the middle. Yum. Speaking of cakes, I realized I never shared the cake I made for my older sons fifth birthday. A pirate cake, yes, he is still obsessed with pirates, which is fine with me! I found this image originally through Pinterest, but have included the direct link here, just in case you attempt to make one yourself. I was pleasantly surprised to find all the supplies needed at Walmart, all those different pretzels and all! The only thing I did differently was to eliminate the breadstick on the front and instead just use another pretzel rod in its place. What do you think? It turned out pretty good, in my opinion. I have a number five candle and 4 pirate themed candles stuck in the center if you were wondering what all that junk was. The only thing I would do differently is to make the sails a tad bit smaller and work at getting more of a "yellow" icing color than the peach that is below. My son was tickled pink and that is all that matters. I had left over icing, so I dyed it blue and made the "ocean" around the ship, which also hid those crumby edges. As good as this looks, the cake fell into a million pieces and is held together by mushing it with my hands and icing. Very frustrating at the time, but at least the end result is good. All this talk of cakes falling apart had me wondering, do you know of a store bought cake mix that holds together well? I know for sure that Pillsbury is just too spongy and soft, it falls apart every time. I used to think that Betty Crocker was perfect, but lately those cakes have fallen apart too? Any ideas or suggestions? Linking up to Tuesday at the Table over at A Quilter's Table. Hop on over and visit all the other wonderful link ups.
6 Comments
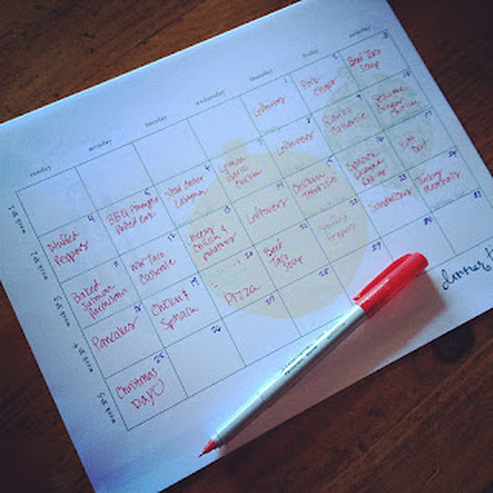
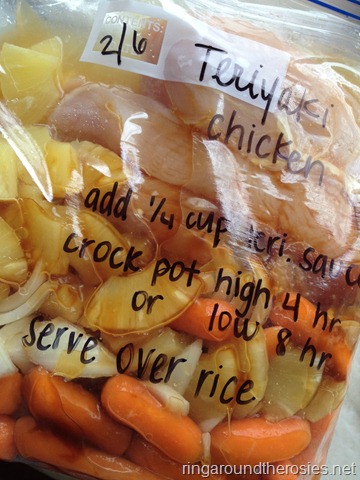
A few random bits today... I recently joined up to the largest time waster of all... Pinterest. Yes, I know I am late to the game, and I tried not to join the band wagon, but alas I caved. I am trying really hard to use this website as efficient as possible and mostly signed up to keep track of the tons of bookmarks that were piling up on my computer, and this site is perfect for that. I also wanted to keep track of great recipes and cooking ideas, especially those that have been tested by others out in blog land and proven delicious! I'll be sure to share those great ones I run across also! If you want to follow me on Pinterest, you can find me HERE. Today I wanted to mention the whole idea/concept of menu planning. I'm not really talking about week to week menu planning but rather doing it monthly and doing some serious planning in hopes of doing some serious time and energy saving. Have you heard of or tried this approach? I am going to write it out this week, gather grocery lists and plan to start with October. Click on the photo below to read this gal's plan and concept. Going hand in hand with the above concept is the idea of preparing a ton of meals at once (raw) and then freezing them for future use. This concept utilizes the Crock Pot and I am really curious to try it out, though I do have some reservations in doing so. For instance, I know a lot of meats actually need to be browned first before they are thrown in the Crock Pot, so I'm thinking of sticking to the recipes that don't need that step. Also, am I crazy in saying this, but I thought some vegetables (like potatoes) don't freeze that well? Or did I dream that? I am really thinking about trying this, but on a smaller scale, like freezing 5 meals, trying them out and seeing what recipes I like and go from there. I'm just trying to stop the "What is for dinner?" debate that rages in our house daily. I'm tired of thinking about it honestly. Maybe a few days worth of planning can provide for a whole month of meals? Click on the photo below to visit this gal's website that includes directions and a ton of recipes for this technique. I lucked up and had one of these babies this weekend (see photo below!) It had been years since I had one and little known to me our local Dairy Queen just started having them on their menu! Yeah! And yes, this Orange Julius was all that and a bag of potato chips! Yum, I see more in my future! Make sure to hop over to A Quilter's Table, visit Debbie and see all of the other delicious link ups and recipes! Last, but not least, time to announce the winner of the Traveling Stash Giveaway! I had 16 entries, and the winner is... Random Integer Generator Here are your random numbers: 6 Timestamp: 2012-09-25 13:20:28 UTC Number 6 is Kathy! Kathy blogs over at Qreative Quilts and Quests and the Traveling Stash will now be traveling to her house! Kathy, look for an email from me in your inbox! Congratulations! Thanks to everyone who entered and visited my little blog!
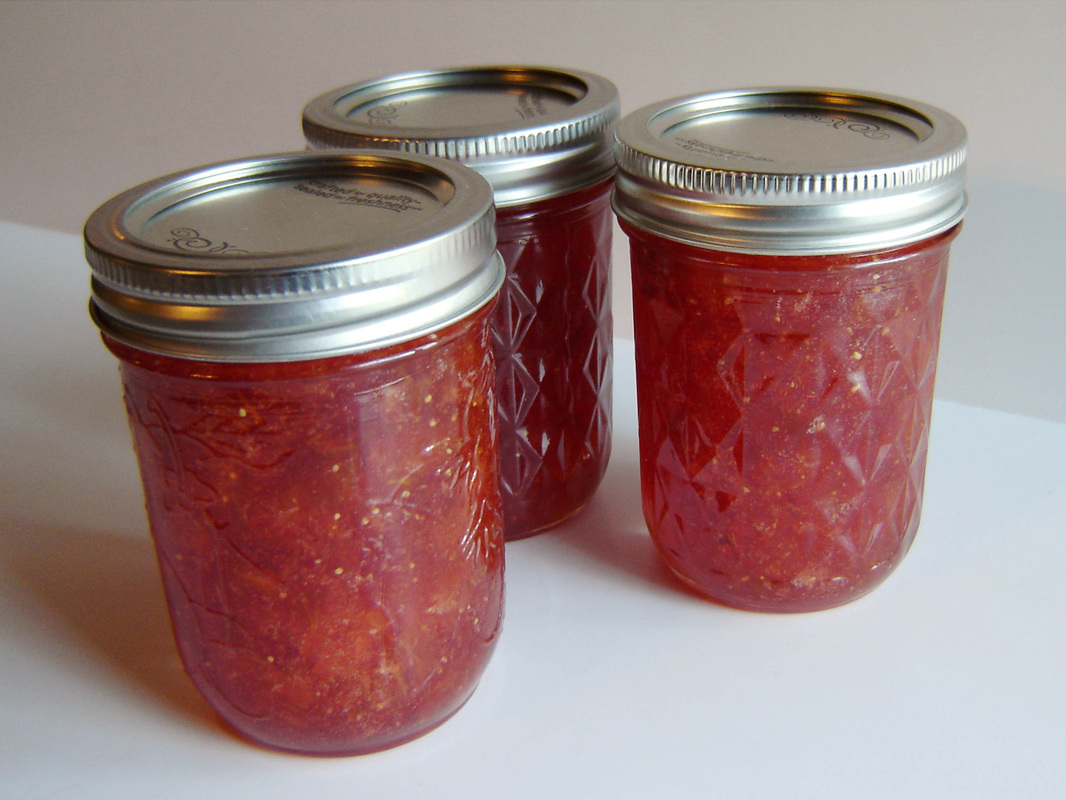
I'm getting Figgy with it! Yes, those lovely jars contain Fig Preserves or Fig Jam as I like to call it, and it is easier to spell. Doesn't really look like figs, and to be honest, it doesn't really taste like figs either, but you won't hear me complaining. I like figs, but they aren't my favorite, and I'm not really sure what I did to create this unique tasting batch, but this jam tastes a lot like strawberries, and the pretty color lets my brain think it is strawberries too. My mom brought over bags and bags of figs this weekend from a neighbor who was swimming in them, and since one batch was really really ripe, I decided to go ahead and cook them, thus the canned jam you are looking at here. I jumped online, looked up this RECIPE, and got to chopping, then cooking, and finally canning. I did not want to leave the figs whole, so I quartered them, and then in the cooking process used a potato masher and mashed the heck out of them. I left the skins on and just cut off the stem and the very bottom of the fig. Below are the ingredients and measurements that I used, and I am putting it here more as a reference for myself later, like I said earlier the full recipe is available at the link above or below. Fig Jam (or Preserves) Ingredients: 5 1/2 cups of quartered figs, stems and bottoms removed. 7 cups of sugar 1/4 cup fresh lemon juice 1/2 cup water 1 box of regular pectin Directions: Step by step directions can be found HERE. I found this site to be very easy to follow and understand. The longest part is cleaning the figs, the rest goes really quickly! My mom and husband seem to think that the lemon juice is what created or preserved the pretty pinkish red color, but I'm not sure. Any ideas? Maybe it was just this variety of figs, the inside was very pink/red and the outside was not very brown, but rather more of a light green/brown color. I'm rather ignorant on the matter, but was quite pleased that it turned out so pretty.
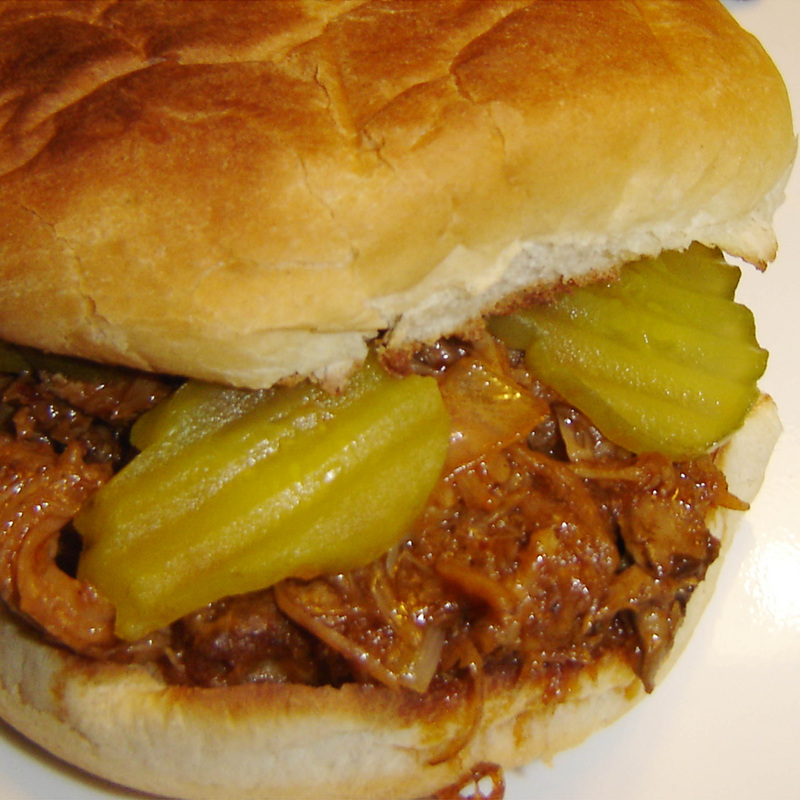
Make sure to hop on over to A Quilter's Table and visit Debbie and all the other entries this week at Tuesday a the (summer} Table! We visited the in-laws for Father's Day this year and my mother-in-law treated everyone to BBQ ribs and a host of other sides and deserts. Aside from being delicious, we also got to bring home leftovers. Score! Nothing better than having a bunch of home cooked food that I didn't have to cook! Last night was time to eat the leftovers, and rather than just reheat them, I created what I am now calling "Lazy Pulled Pork." The meat from the ribs was already falling off the bone, so I just finished pulling it off the bone and created this super easy, quick dish. Lazy Pulled Pork Ingredients: Left over rib meat. I used the equivalent of one rack of ribs. Meat pulled off the bone. 1/2 red onion, chopped into thin strips. Your favorite BBQ Sauce, preferably one made with Sugar and not High Fructose Corn Syrup. (I used Bull's-Eye Memphis Style) I have found that BBQ sauce made with real sugar tastes better and caramelizes better too! 1 Tbsp Oil (your choice) Hamburger buns, pickles and anything else you would like to top it with. Directions: Heat 1 Tbsp Oil over medium heat in a large pan. Add red onions and cook until nice and soft. Add rib meat and heat through. Add BBQ Sauce, enough to make everything nice and covered and saucy, I used around 1/2 cup, but it is totally up to you. Simmer for about 10 minutes, until everything is nice and hot and bubbly. Toast buns, and serve topped with pickles. Enjoy! I am linking up to Tuesday at the {Summer} Table over at A Quilter's Table, make sure to head over and visit Debbie and all of the other delicious recipes and link-ups.
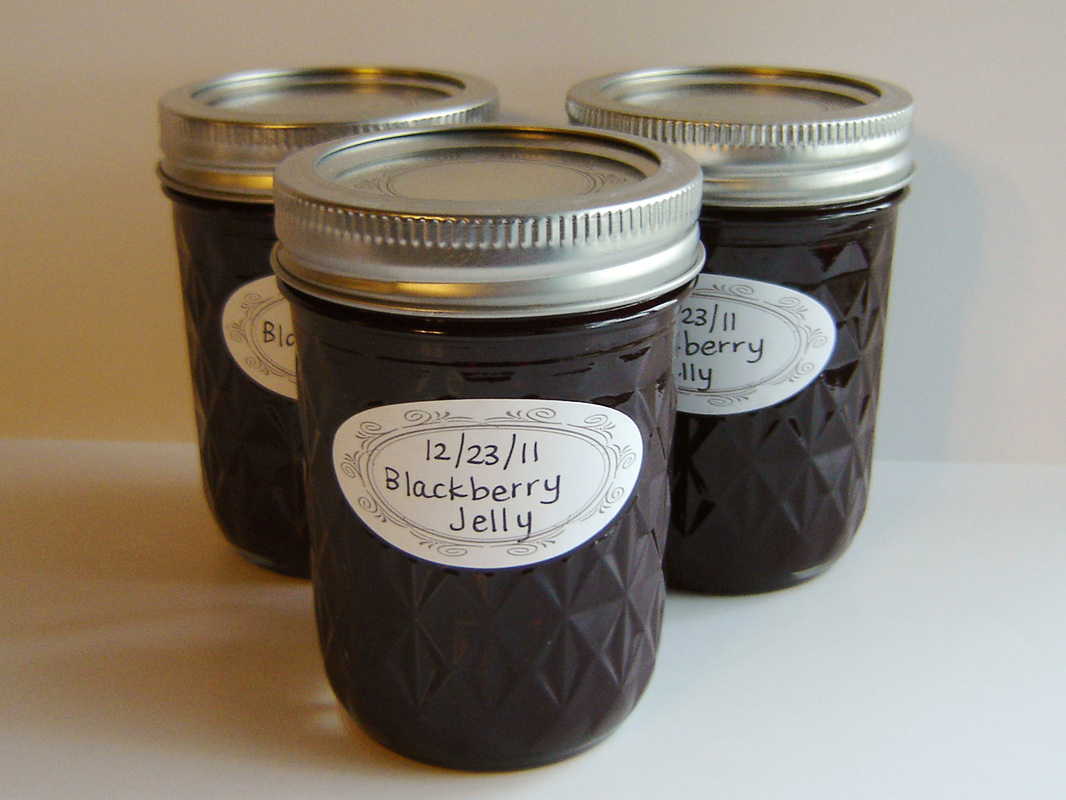
Have I ever mentioned the insane amount of Blackberry bushes that are around and behind our house? When I say an insane amount, I am talking about if we hired crews of people to pick, I don't know that they could pick them all. INSANE AMOUNT! When we first moved in we had a bush that was literally 10 foot tall and about 20 foot around, and covered in berries. I think inside the bush was actually a tree, but who knows. Unfortunately, not long after we moved in construction crews tore it up (not our choice or decision, but it was technically "city property.") Even with that loss, we still have tons and I spend a few hours every day during blackberry season picking until my hearts content. My husband says that I am the caveman definition of a "gatherer." This past year wasn't any different, and I picked a lot, not as much as I normally do, but if memory serves, I was just starting serious morning sickness and not quite up to my normal routine. I froze two gallon ziplock bags with the intentions of making Blackberry Jelly with a family friend for the first time, after trying hers last year, and deciding it was the best thing ever. Time passed, morning sickness continued, and it just never happened. Sometime in December I started cleaning out the freezer preparing for the approaching holiday, and discovered all my frozen berries. I realized I needed to do something with them, or toss them out. Why not just make blackberry jelly myself? So I did some basic research (I've never canned anything before) had the recipe from the friend, and bought a box of canning jars. Blackberry Jelly Recipe and basic canning directions HERE. These are the only things I did differently and a few hints: 1. I didn't want seeds in my jelly, so at first I started pushing the berries through a strainer, which worked, but was very slow. I ended up putting about two cups in my blender, processing them, and then pushing the puree through the strainer to remove the seeds. This worked really really well, and I'm not quite sure why some of the recipe comments say not to do it, it worked just fine for me! 2. Two gallon bags of frozen berries produced exactly the amount of juice needed for this recipe (5 cups) and filled around 9 8 ounce jars. 3. On Step 11, I didn't have a fancy canning pot, so I just used a large pot that I filled with water, and laid a towel inside. The towel inside kept the jars from clanking together while the water boiled. Make sure the water is 1" above the lids during the boiling process. Be extra careful removing the super hot jars from the boiling water after you are done, this part is rather dangerous and especially so if you are using regular tongs and not specialty canning tongs. Go slow and be careful! Enjoy the fruits of your labor year round! We have already eaten our way through three jars, and I can't wait to make more jelly during the next blackberry season! P.S. I wrote this post before I gave birth, and just never had the chance to post it, so fortunately for me, blackberry season is in full swing right now and I swear there are more than ever out there ready to be picked! I am ready! _Linking up to Tuesday at the Table over at A Quilter's Table. Hop on over and visit the others and their great recipes!
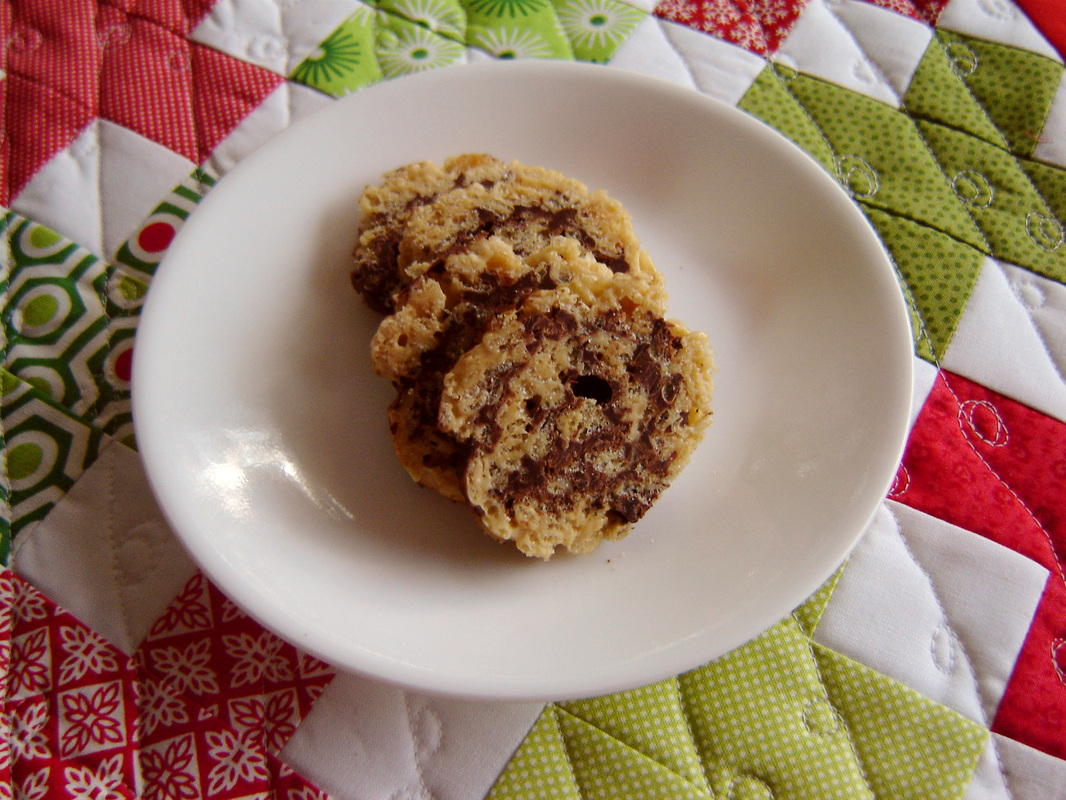
Happy Holidays everyone! It has been a while since I have blogged, but I am still here, still pregnant (34 weeks) and still huge! But that is OK, I am used to the double takes when we go out in public now. Amazingly, I have done a TON of sewing and hope to show you guys soon! What I have accomplished in sewing I have been lacking in the cooking department, but I did want to show off a new desert I made this past weekend for my husband to bring to his family's Christmas party. At the beginning of December Dana over at MADE started posting a treat recipe a day, and the very first days recipe caught my eye and I knew I wanted to make it! It takes about 15 minutes total, is super easy and quick and was a big hit at the party. I forgot to take a before shot, but this is the amount that returned back home to me! Just enough to get a picture of the remaining 4 slices. I also decided to photograph the leftovers on the mini quilt that I just won on Sew, Mama, Sew Giveaway Day and received from Debbie herself, the lovely lady who hosts Tuesday at my Table every week! So pretty and festive! Chocolate Peanut Butter Rice Krispie Roll Recipe and step-by-step directions can be found at MADE, click HERE for original recipe. Below is my slightly modified version! Ingredients: 1 (10.5 oz.) package of mini marshmallows 5.5 cups of Rice Krispies cereal 1/4 cup butter 1/4 cup peanut butter 1 1/3 cup dark chocolate chips 3/4 cup Reese's peanut butter chips Directions: Line a cookie sheet with wax paper, and then generously spray with non-stick cooking spray. In a separate large bowl, microwave for 2 minutes (stirring half way) the marshmallows, butter and peanut butter. Add in the Rice Krispies and stir until well mixed, just like you are making normal Rice Krispie treats. Spread mixture onto cookie sheet, spray non-stick cooking spray onto your hands and press/spread mixture evenly onto entire cookie sheet making sure it is even and flat. In a separate medium bowl, microwave in 20 second intervals the dark chocolate chips and the Reese's peanut butter chips. Stirring after each interval. Heat until just melted, don't overheat otherwise the chocolate will burn/scorch. Once melted, pour chocolate mixture over the Rice Krispies and spread out evenly into a thin layer. Starting at one end of the pan, lift the way paper and carefully start rolling into a log. Use the wax paper to help in the rolling process. Once you have your rolled log, refrigerate for at least 30 minutes. I refrigerated mine overnight. When ready to serve, remove from refrigerator and cut log into 1/2" rounds. Eat either cold or room temperature, both ways are delicious! _Linking up to Tuesday at the Table over at A Quilter's Table. Hop on over and visit the others and their great recipes!
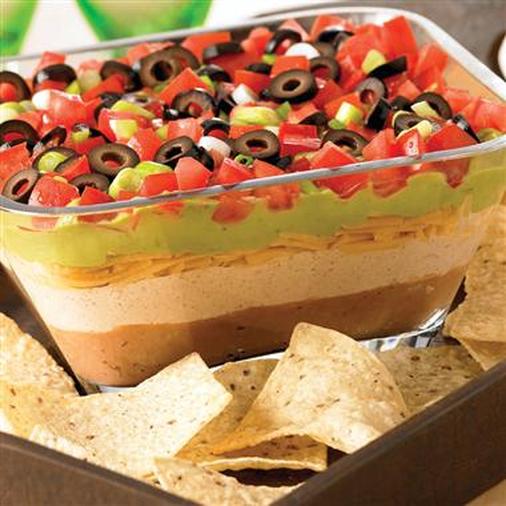
One of my all time favorite appetizers is so simple, easy and tasty, a 7 layer Mexican Dip. Oh just thinking about it makes me want to make one. It is great to make ahead of time (day before) and works year round, but is also great for this time of year because it is so easy and quick to make! This is another recipe that I had never had until I met my in-laws, and then once I had eaten it, I thought, "Where have you been all my life?" Seven Layer Mexican Dip This recipe fills a 13x9 Casserole Dish perfectly and serves a crowd! Ingredients: 2 cans Re-fried Beans 2 mashed Avocados 1 Tablespoon Lemon Juice 1 16 oz. container Sour Cream 1 packet Taco Seasoning 1 small can of chopped Black Olives 1 Tomato, chopped and seeds removed 1 8 oz. block of Cheddar Cheese, shredded Chopped Green Onions Directions: 1. Spread Re-fried Beans in bottom of Casserole Dish. 2. Mix together mashed Avocados and Lemon Juice in separate container, and then spread on top of first layer. 3. Mix together Sour Cream and Taco Seasoning until well blended. Make sure there aren't any unmixed seasoning "pockets." Spread on top of Avocado mixture. 4. Sprinkle shredded Cheddar Cheese on top of that layer. 5. Sprinkle chopped Olives, Tomato and Green Onions as the final three layers on top. Serve with favorite Tortilla Chips and Enjoy! _Linking up to Tuesday at the Table over at A Quilter's Table. Hop on over and visit the others and their great recipes!
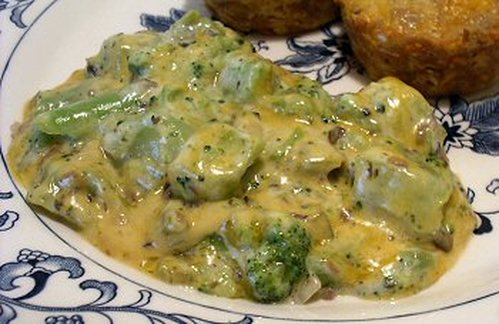
It is always funny to me how everyone has different "traditional" dishes that they serve for Thanksgiving Dinner. My family always seemed to have turkey, cranberries, cornbread dressing, green bean casserole and of course pumpkin pie. My first Thanksgiving with my husband's family was quite different. They had the traditional turkey, but I believe they forgot the cranberries or maybe didn't want them that year? It was quite a shock. They served a salad I had never heard of, small green peas with onions, rice dressing, sour dough bread...nothing I was familiar with, and quite honestly I was disappointed. The one saving grace was another dish I had never had or heard of, Broccoli Casserole, and it was wonderful. Second helping even though you are stuffed wonderful. It comes from the same Aunt that blessed us with the Steak Fingers recipe. The story should end here, but it doesn't. Her delicious recipe is below. Broccoli Casserole Ingredients: 1 Stick of Butter 3 Packages Frozen Chopped Broccoli 1 Medium Onion, Finely Chopped 2 cups Cream of Mushroom Soup 1 Roll Garlic Cheese Breadcrumbs Optional: 1 Small Can of Chopped Mushrooms, Drained Directions: Cook Broccoli as directed on package and drain well. Melt butter in skillet and add onions, saute for a few minutes until onions are soft and clear. Cut cheese and melt with butter and onion mixture, stir constantly. Add mushroom soup and stir (add can of chopped mushrooms if you wish.) Spray casserole dish with Pam. Layer Broccoli and then cheese mixture. Repeat layering. Sprinkle top with bread crumbs. Bake at 350 degrees until bubbly or about 35 minutes. Enjoy! I have only hosted Thanksgiving once at my house, and it was four years ago when my son was but a few weeks old, and we weren't really up to traveling. I decided to fix that wonderful Broccoli Casserole, and acquired the recipe. Here is where the problem comes in....after visits to 3-4 different grocery stores I was unable to locate that roll of garlic cheese. After getting frustrated, I jumped online to locate it, only to discover that it has been discontinued and is no longer produced. Great, now what? So I started experimenting. After trying several things, I found the next best thing, and now the Broccoli Casserole lives on, no it isn't identical, but it is darn close, and I guess as good as it gets. And yes, it is pretty darn good. My recipe is below. So if you are looking for a non-traditional dish to serve at Thanksgiving, give this one a try, it is really easy! Marci's Broccoli Casserole _Ingredients: 1 Stick of Butter 3 Packages Frozen Chopped Broccoli 1 Medium Onion, Finely Chopped 2 cups Cream of Mushroom Soup 1 Jar of Cheese Whiz 2 Teaspoons Garlic Powder Breadcrumbs Optional: 1 Small Can of Chopped Mushrooms, Drained Directions: Cook Broccoli as directed on package and drain well. Melt butter in skillet and add onions, saute for a few minutes until onions are soft and clear. Pour in Cheese Whiz and melt with butter and onion mixture, stir constantly. Add 2 Teaspoons of Garlic Powder, stir well. Add mushroom soup and stir (add can of chopped mushrooms if you wish.) Spray casserole dish with Pam. Layer Broccoli and then cheese mixture. Repeat layering. Sprinkle top with bread crumbs. Bake at 350 degrees until bubbly or about 35 minutes. Enjoy! _Linking up to Tuesday at the Table over at A Quilter's Table. Hop on over and visit the others and their great recipes on this special Thanksgiving Week Edition!
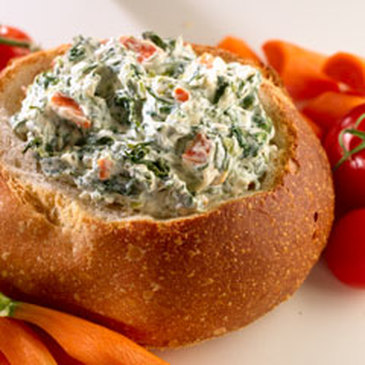
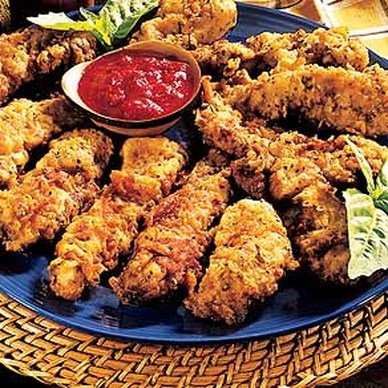
My mother-in-law has taught me A LOT about cooking, some good, some bad, but I am very thankful for every tidbit of information she has shared with me over the years. I have eaten things at her house that I would have NEVER eaten before if it wasn't for her, and that is such a good thing. One of the things that she taught me was a little pearl of wisdom that makes so much sense. If you purchase a food item, and it comes with a recipe, it usually is really good. Why? Because the food manufacturer wants to show off their product in a recipe, and isn't going to give you a mediocre recipe, they are going to give you a really good one. Now this doesn't apply all the time, I have tried some that were gross, but on a whole, the majority are fabulous! That brings us to the recipe below. I had never had a really good cold spinach dip, until I had it for the first time at my in-laws. Low and behold, it wasn't a family recipe or secret, but rather the recipe off the back of a soup package mix. So if you are looking for a great appetizer during this holiday season, pick up a pack of Knorr Vegetable Soup, Dip & Recipe Mix, usually found in the soup section, somewhere around the packaged stock, and whip up this delicious dip. I think I'll be making some myself! Knorr Spinach Dip Makes about 4 cups. Serve in a round bread bowl, or just a pretty dish! Ingredients: 1 package (10 oz.) frozen Chopped Spinach, thawed and drained completely 1 (16 oz.) container sour cream 1 cup of Mayonnaise 1 package Knorr Vegetable Soup, Dip & Recipe Mix 1 (8 oz.) can Water Chestnuts, drained and chopped, optional 3 Green Onions, finely chopped Directions: In a medium bowl stir together all ingredients until well mixed. Cover and chill for at least 2 hours to blend ingredients. Stir well and enjoy! Serve with cut up vegetables or crackers. Linking up to Tuesday at the Table over at A Quilter's Table. Hop on over and visit the others and their great recipes! My husband's Aunt shared with me a delicious recipe for something that I had never heard of or eaten before. Steak fingers. Can I sum it up in one word? Yes, absolutely delicious! The reason I am sharing this recipe today, is because my husband and I have been eating a lot of steak lately. I crave it all the time, probably because my iron levels are low and I am craving iron filled things. Anyways back to the point, our discussion was over the fact that we know of no restaurants that serve this dish, and why not? So then we said we needed to open our own restaurant (kidding.) Oh well, until a local restaurant (or chain) decides to serve this dish, I am stuck making it for myself. I am sure my version would taste better anyway! Steak Fingers Ingredients: 1/3 cup Vegetable Oil 1 pound Round Steak 2 Eggs 1/2 cup Milk 1.5 cups All Purpose Flour Cajun Seasoning (like Tony Chachere's) to taste Salt and Pepper to taste Directions: Tenderize steak by pounding with a mallet. Cut into 3 inch long strips by about 1/2 inch wide. Combine egg, milk, salt and pepper in a shallow dish, stir until well blended. Combine flour and Cajun seasoning in a gallon Ziplock bag. In a large skillet over medium heat, heat the 1/3 cup Oil (or enough to cover the bottom of the pan.) Coat steak pieces in flour, shake off excess. Dip into egg mixture, then dip into flour mixture again. Fry the strips in the hot oil until golden brown, around 2-3 minutes. Transfer to a plate lined with paper towels to absorb oil. Serve, and enjoy! Linking up to Tuesday at the Table over at A Quilter's Table. Hop on over and visit the others and their great recipes! |
Marci GirlA feisty mom designing, sewing and blogging her way through everyday life!
|






 RSS Feed
