|
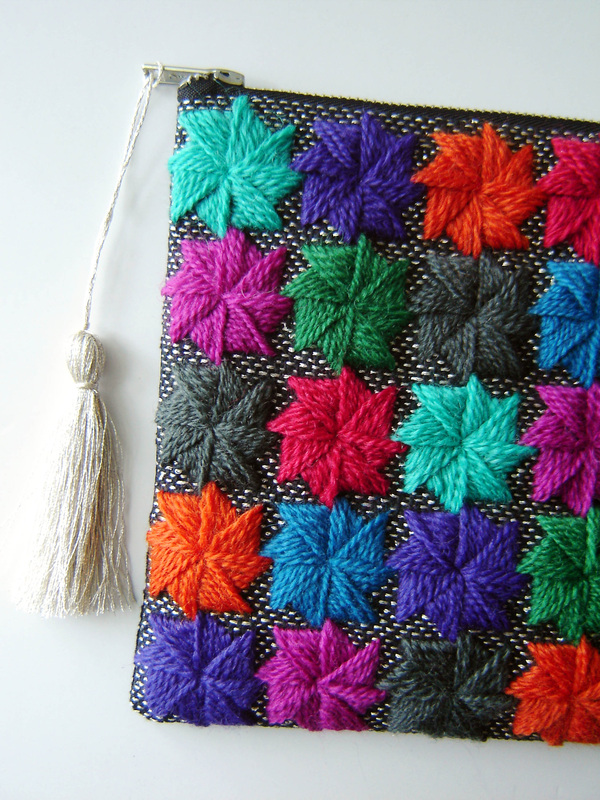
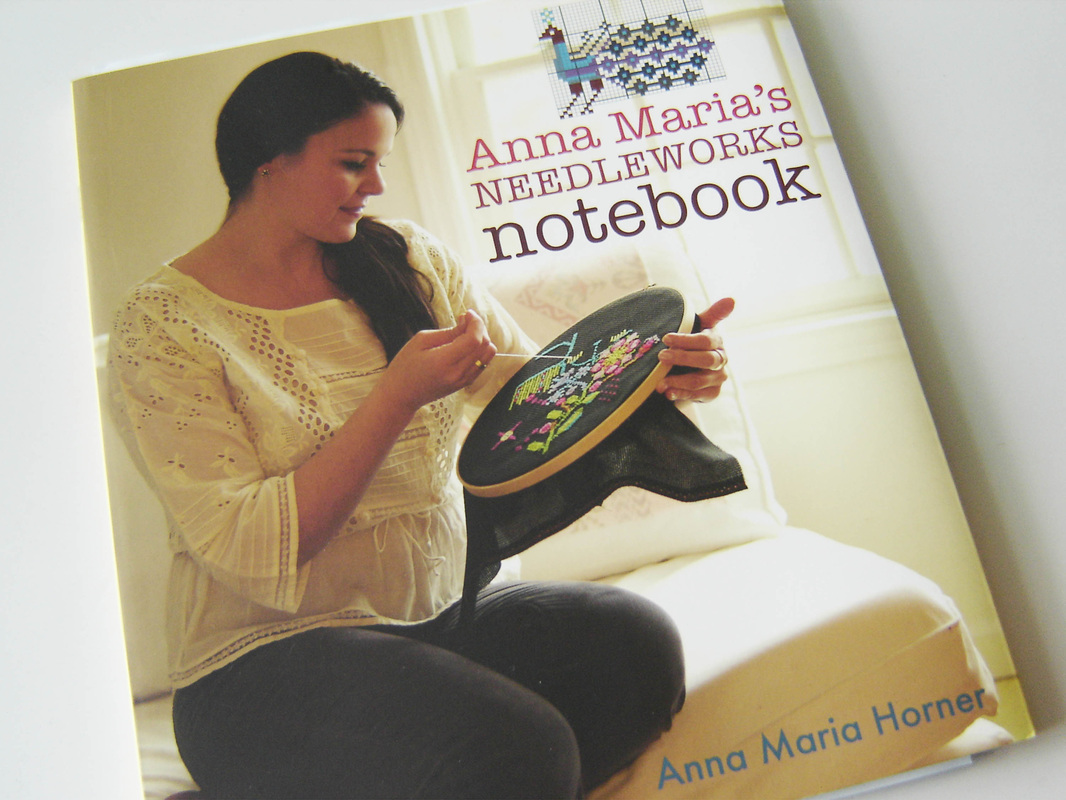
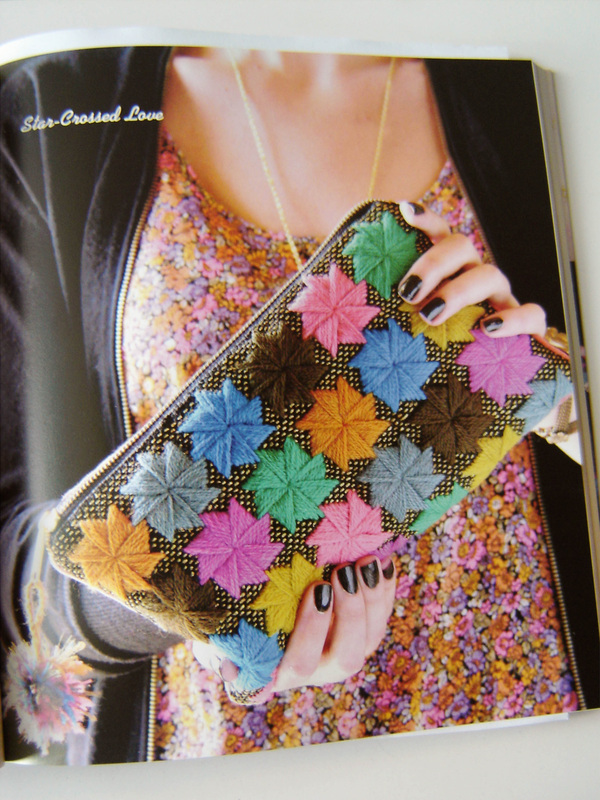
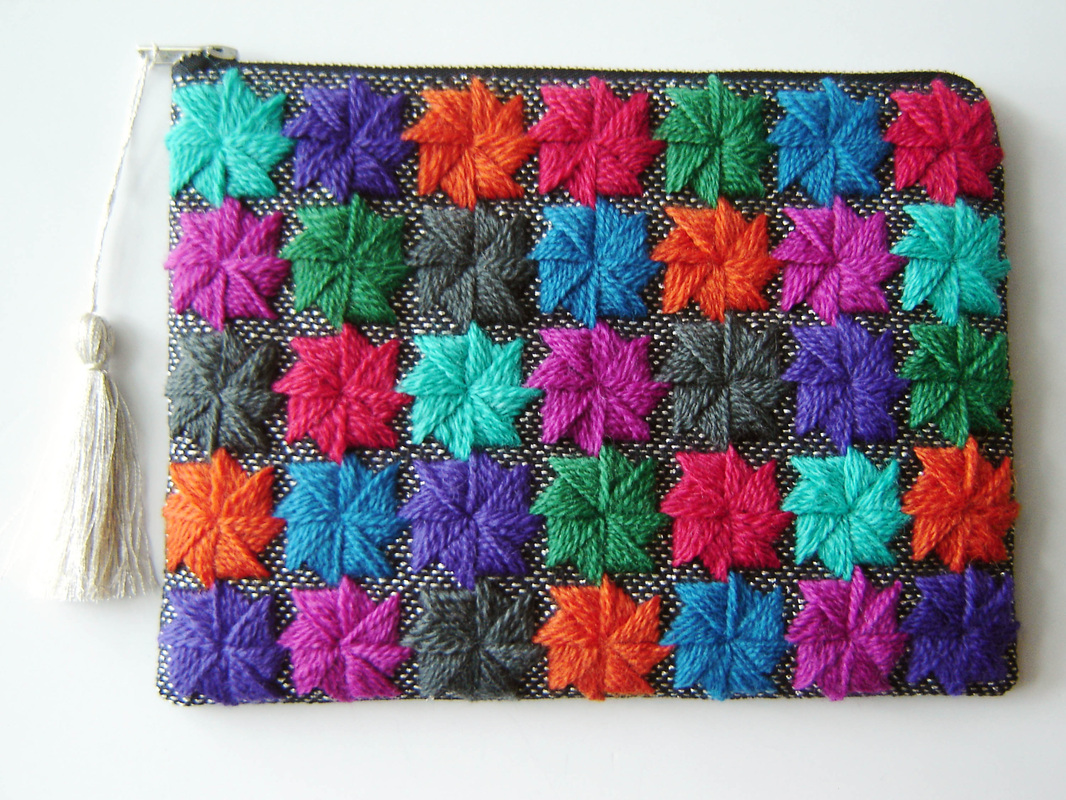
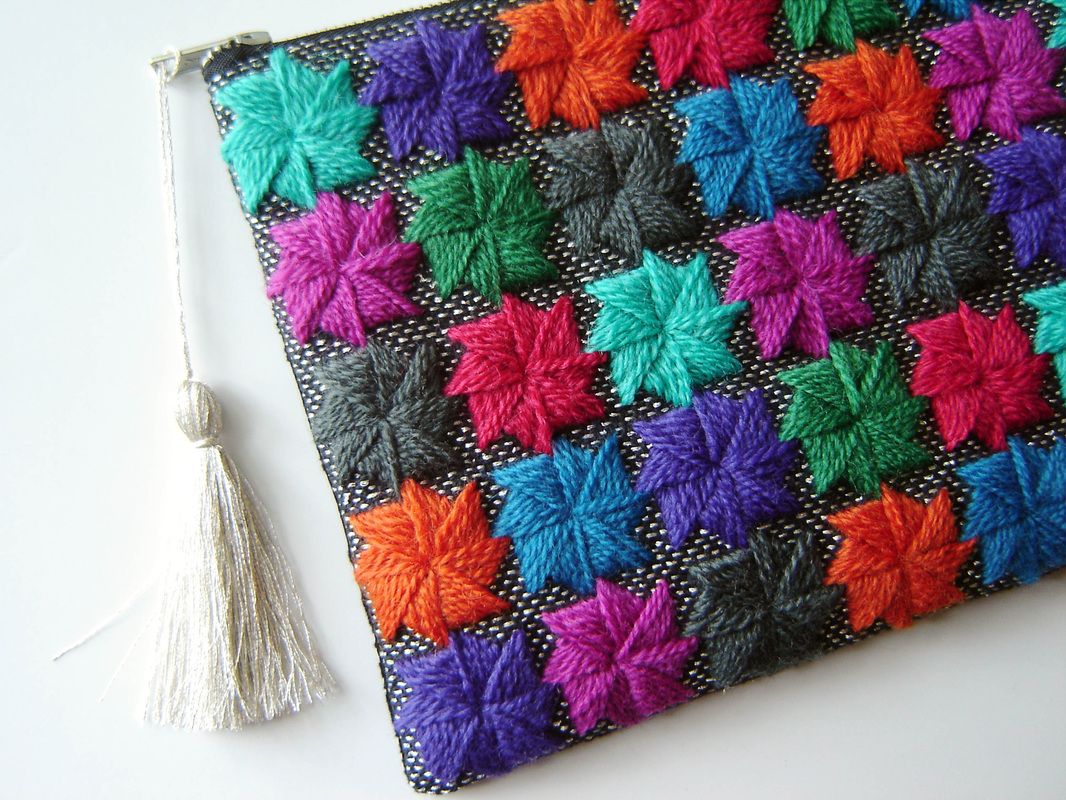
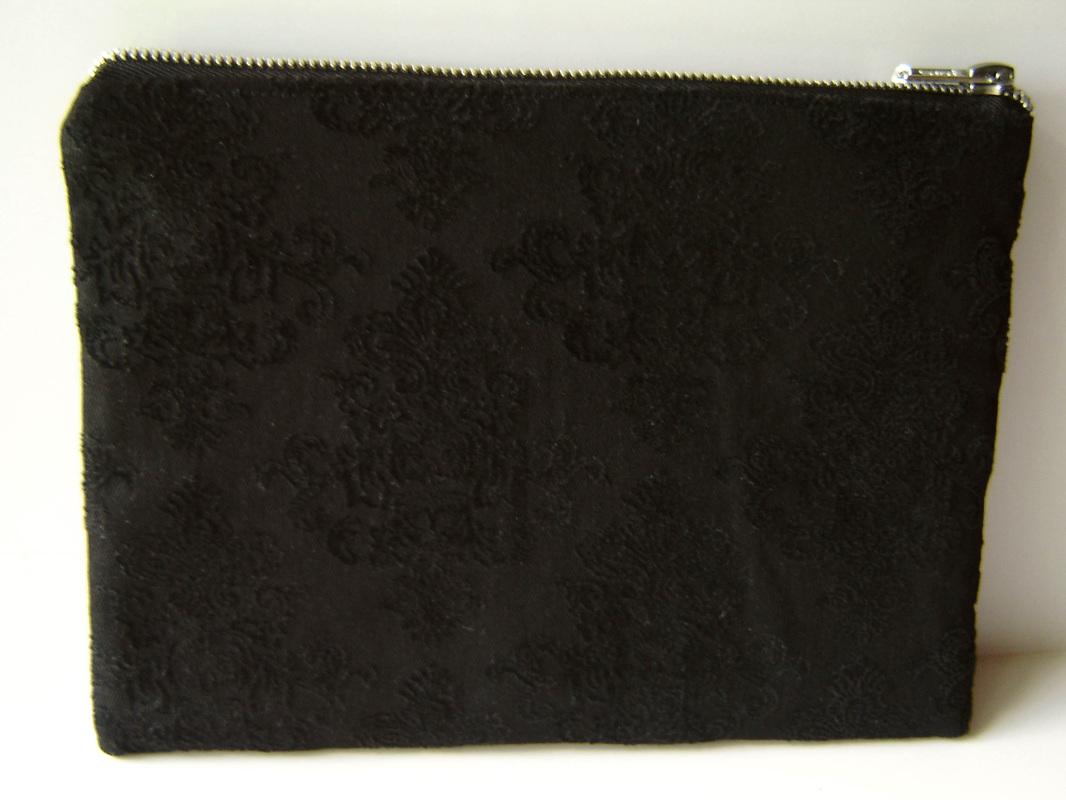
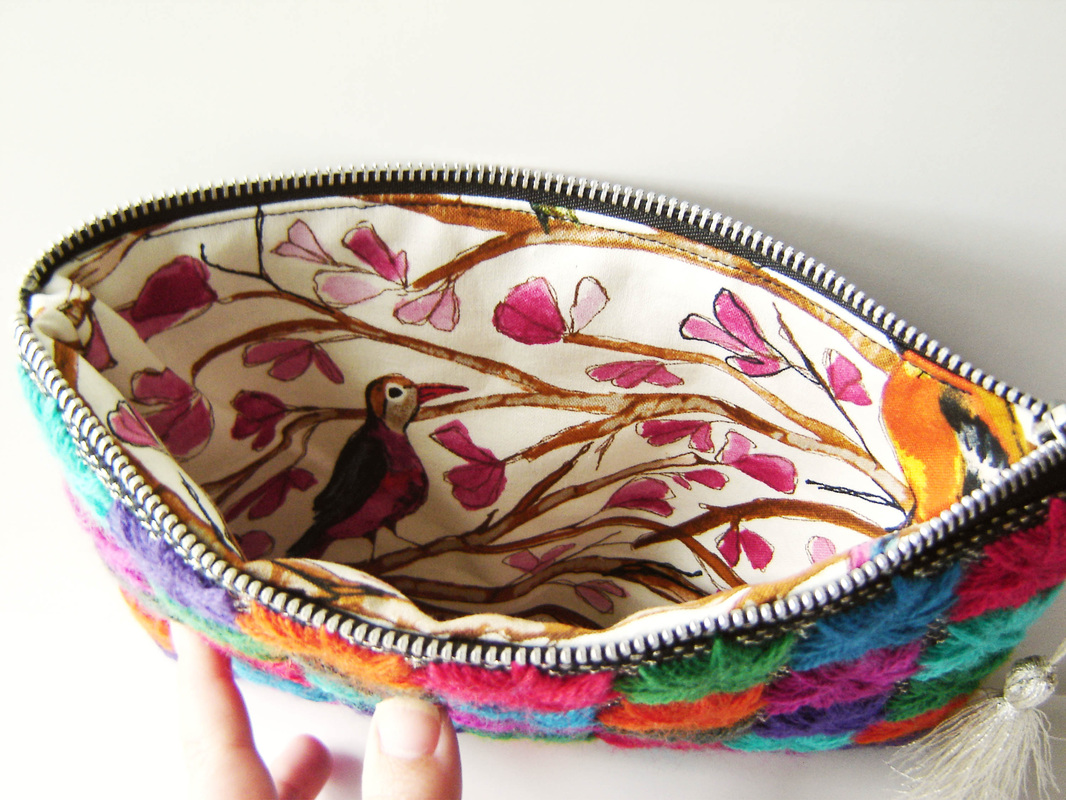
Hello everyone! Welcome to my stop on the Craft Buds Craft Book Month Blog Hop, whew, that was a mouthful! I was thrilled when Lindsay asked me back this year, as this is one of my favorite yearly events. Nothing better than actually using those craft books you have purchased that are just sitting and collecting dust. Last year I made a handbag and apparently I can not stray from that theme, as this year I have made another handbag! Oh I love it so! I dug through my collection of books for a while before settling on Anna Maria's Needleworks Notebook, written by Anna Maria Horner. Have I ever mentioned that I am obsessed with her, like LOVE LOVE LOVE everything she creates and touches. I can't wait to meet her next year at QuiltCon, hopefully I can muster up the courage to actually talk to her and not just stare at her like a freak.. Anyways, back to the point. This book has so many lovely projects in it, it was really hard to pick just one, but in the end I settled on Star-Crossed Love found on pages 65-68. You can see the project from the book below. How cute is that and I really don't own many "dressy" clutches, so win, win. One of the things I love about this book is the huge mixture of handwork projects, from cross stitch, needlework and crewel. I chose this project because of time constraints, honestly I am a very slow stitcher, and thank goodness I did because I finished this project yesterday. I literally stitched on this baby for well over a month, every evening, every car rider line, stitching and more stitching. But I love it, so it was time well spent. This project had a short list of supplies, crewel wool, metallic embroidery thread, Aida, backing fabric, a zipper, interfacing and lining fabric. Easy enough! I was able to find the crewel wool locally, along with everything else except for the right size Aida. The pattern called for 11 count Aida, and all I could find in black was 14. So I went with it. Well if you are a stitcher, then you know that 14 is smaller than 11, 14 holes per inch vs. 11 holes per inch. Thus the scale of my handbag changed immediately. No big deal, I just had to stitch a lot more and I reduced the amount of threads I was using per pinwheel (I used 2 instead of 3.) This stitch is called the Milanese Pinwheel, something I had never done before. After two of them, I had the hang of it and didn't have to refer back to the book at all, just fun stitching all those pinwheels. I chose crewel wool in jewel tones, just picked out what I liked and I am so pleased with the color scheme. After the pinwheels were complete, I then took the metallic embroidery thread (I chose silver) and I stitched a running stitch behind and around every single pinwheel. For some odd reason I thought this was going to be the easy quick part, well I was wrong, it took just as long or longer than the pinwheels. But I have to say the effect was worth it, It shines! Once the stitching was complete, all I had to do was make a pouch! That was so easy, I sewed this thing up in 30 minutes, which was really nice compared to the hours and hours of hand stitching. I found a black on black velvet like motif on a denim like substrate to use as the backing, it feels great. I bought a "fashion" zipper from JoAnn's, which had metal teeth which is more durable than the plastic ones. I used an older Laura Gunn print on the interior simply because I like it and felt like it added a little pizazz to the finished product. Upon completion, my finished clutch measures 7" x 9" and is the perfect size for date night! I had almost a whole skein of the metallic silver left over, so I made a simple tassel to hook onto the zipper pull. Voila, finished! I created a little slideshow below to show the various stages of the project, it is neat to remember the pinwheels before the metallic thread was added. I can not wait to have an event where I can actually use this thing, I am really proud of it. Now that I have dusted off my craft book, it is time for you to dust off yours! You have the whole month of September to create something and enter it over at Craft Buds. All details can be found below if you click on that little square button. Thanks for joining me today on my stop of the blog hop! Now go create something!
14 Comments
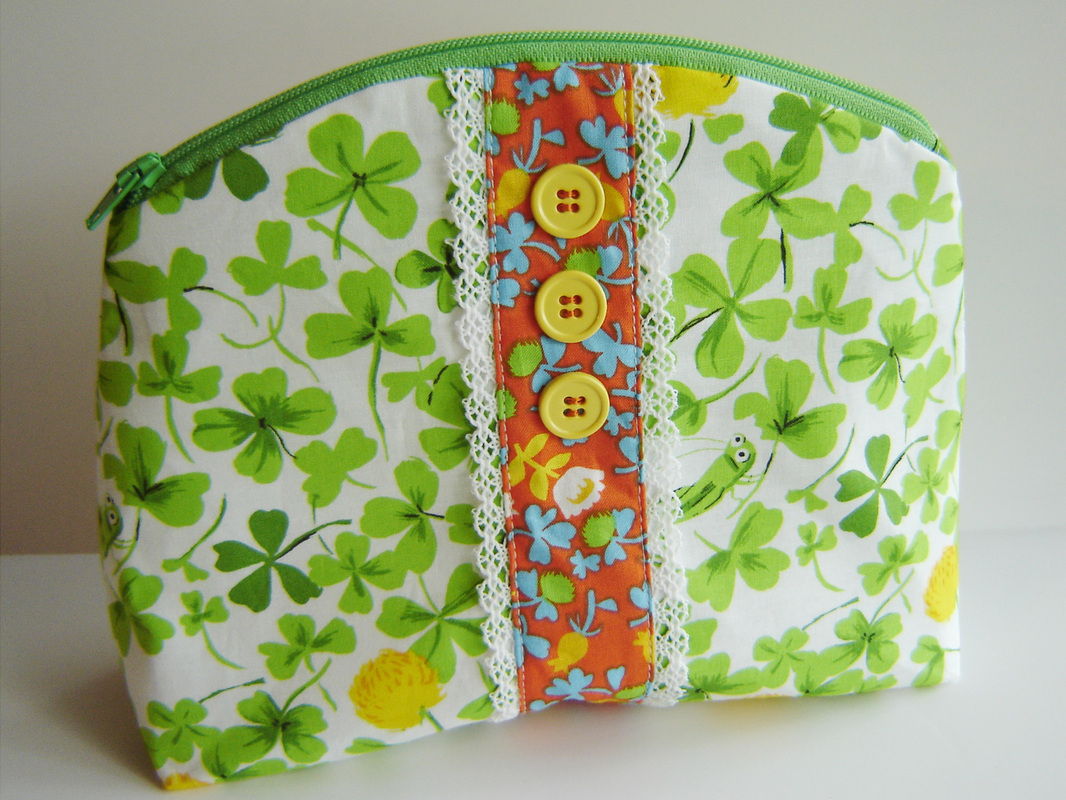
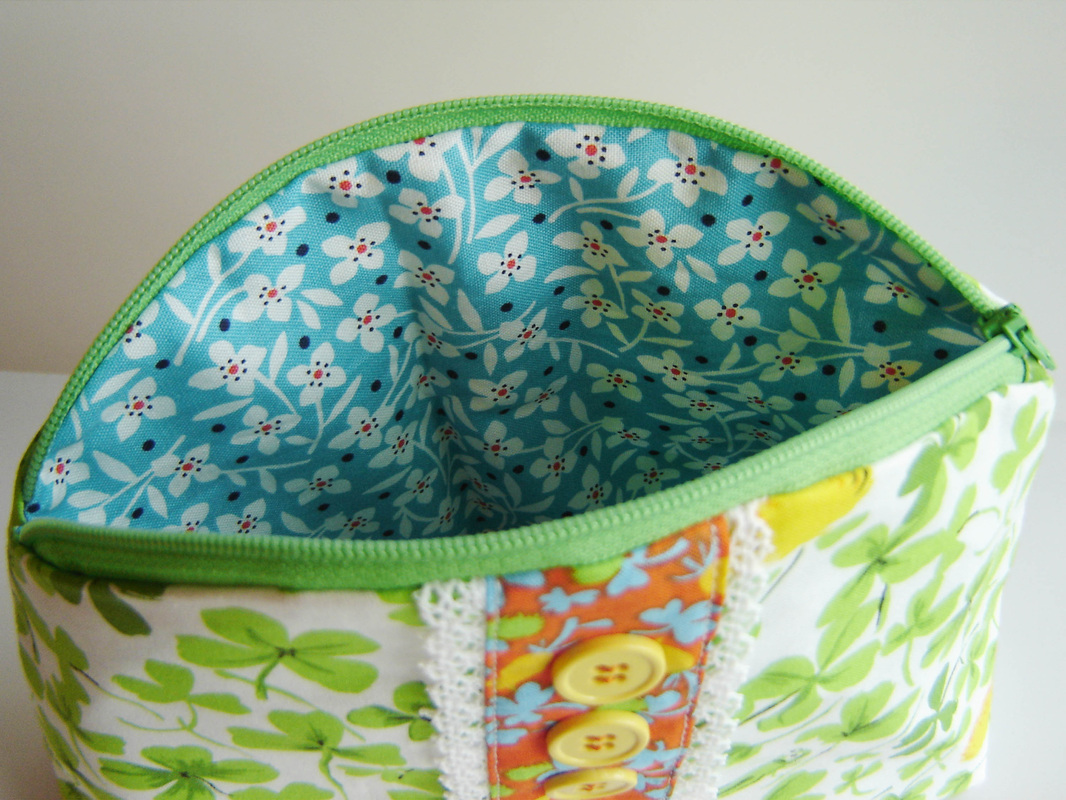
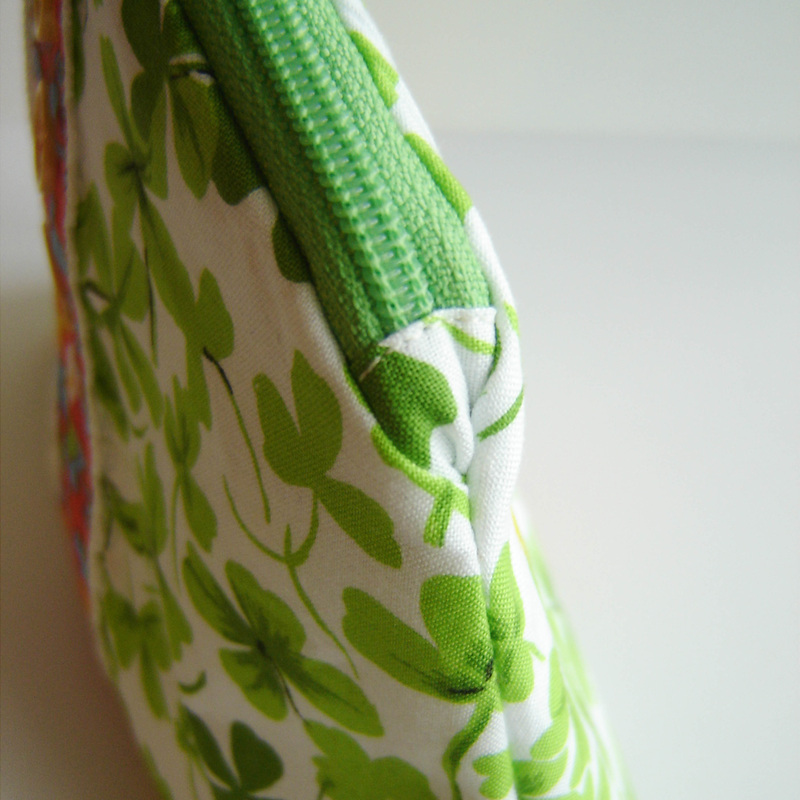
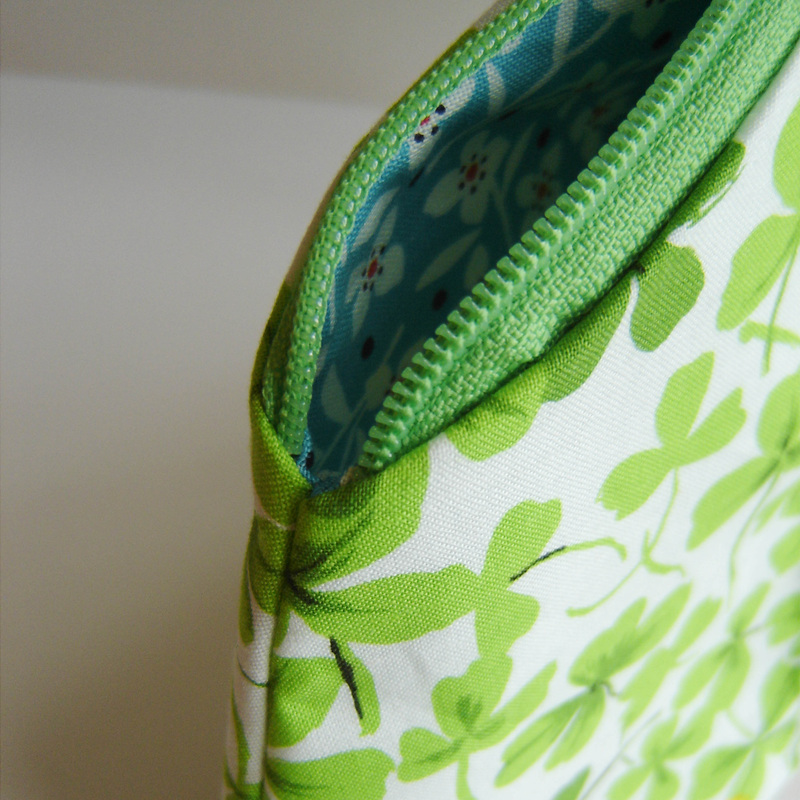
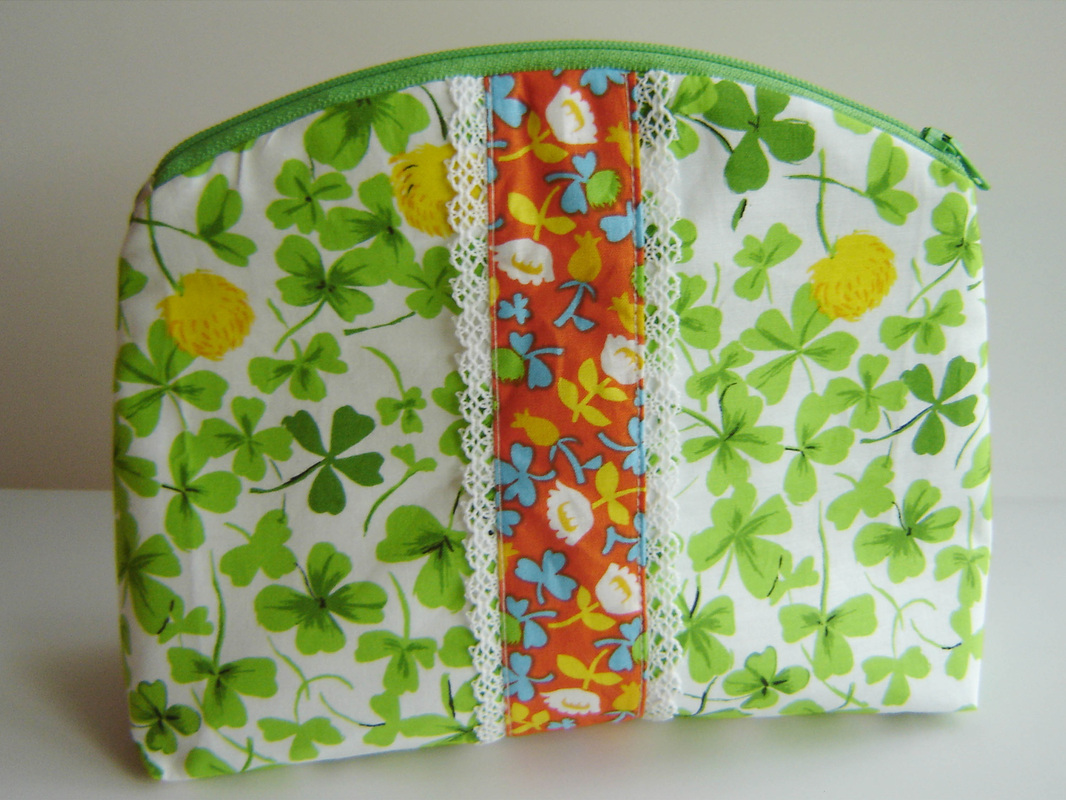
A few months ago, I (finally) got a new phone (it had been like 5 years) and with a new phone came the ability to actively participate on Instagram! One of the first things I discovered on Instagram was the fabric shop Quilt Sandwich Fabrics, and they just so happened to be holding a fabric challenge. I was lucky enough to grab a spot and participate! They sent me two fat eighths of Heather Ross's Briar Rose Fabric and I could create anything I wanted just so long as it used both fabrics. I received the two prints that you can plainly see above, so pretty! I just love the grasshoppers hidden amongst the clover! I knew all along that I wanted to make a pouch, but I stalled on the type of pouch for a while, and then in the end I decided to make one of my own designs. It is a gusset bottomed pouch with a curved top that measures 8" wide x 7" tall x 2.5" wide. It has a pretty little front detail, and is the perfect size to hold a little sewing project or throw in your purse to keep things nice and organized. For the exterior I used only the two prints of Briar Rose that I was sent and decided to add the pretty little lace details to the sides of the front panel detail. After I was finished I decided to add the three buttons, as just a final little fun detail, which also worked really well for holding down the lining on the inside of the pouch. For the interior I used some larger scraps from a Denyse Schmidt print from JoAnn Fabrics. I have a TON of zippers in my collection, so it wasn't hard to find the perfect fit, a great matching green. I tried a different technique for installing the zipper, and was really pleased with the results. On the right side or end of the zipper I sewed on a tab to cover the end, but on the left side, I chose to sharply fold the zipper into the seam, and I really was pleased with the clean finish of it, no bunching and really smooth, which worked well with my curved top. You can see both ends, above and below. Below is the back of the pouch, you can see I carried the front details over to the back, but just omitted the buttons. I used Pellon 50, which is a stiffer sew in interfacing for the pouch, which gives it just enough stiffness to totally stand on its own, but keeps it thin and not puffy at all. I love that! Now comes the part where I need your help. The Briar Rose Challenge features two winners, one will be chosen by the staff at Quilt Sandwich Fabrics, and the other is a people's choice award. So if you have a minute, hop over HERE to vote for your favorite project, it doesn't have to be mine, because honestly there are so many fabulous projects, it is hard to choose which one is the best! But if you want to vote for me, I won't mind! All you have to do is leave a comment on the blog post for your favorite. Hurry though, because voting ends tomorrow!
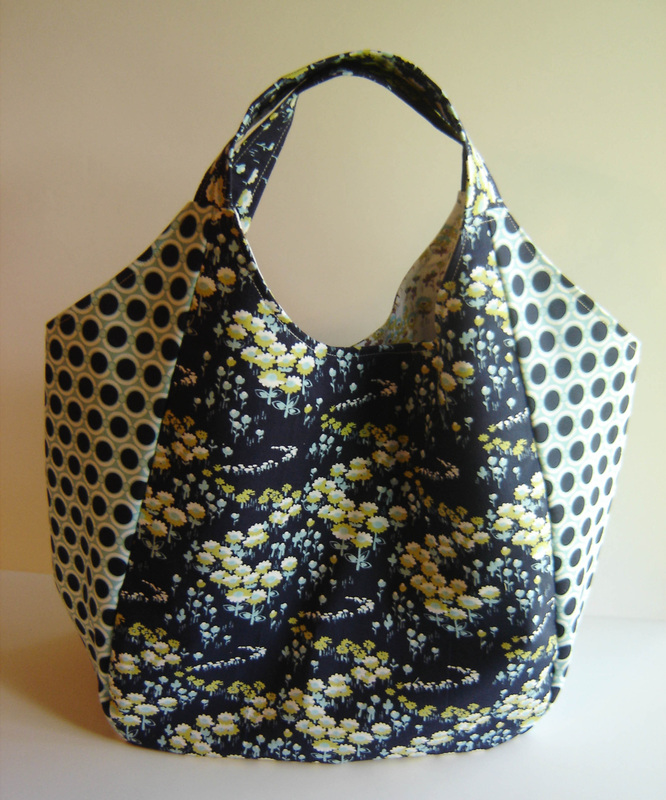
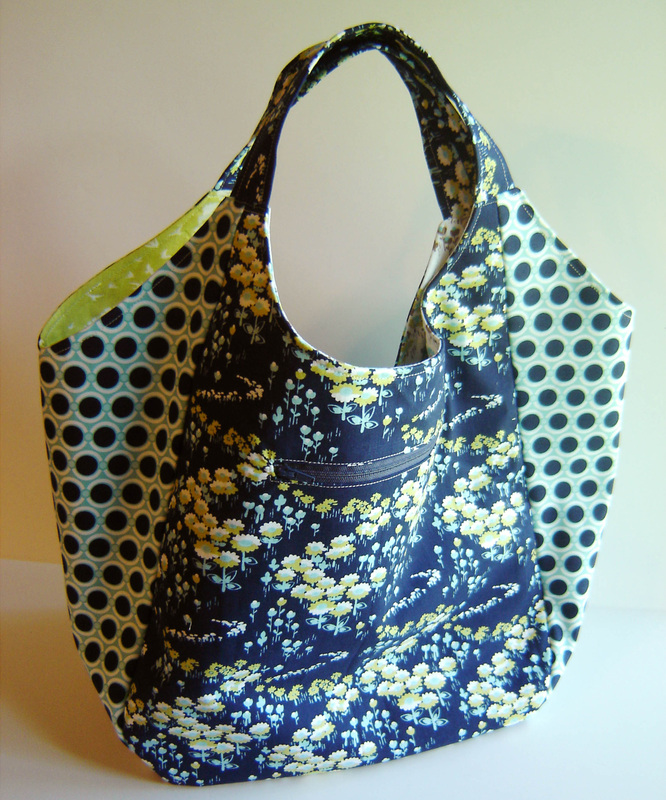
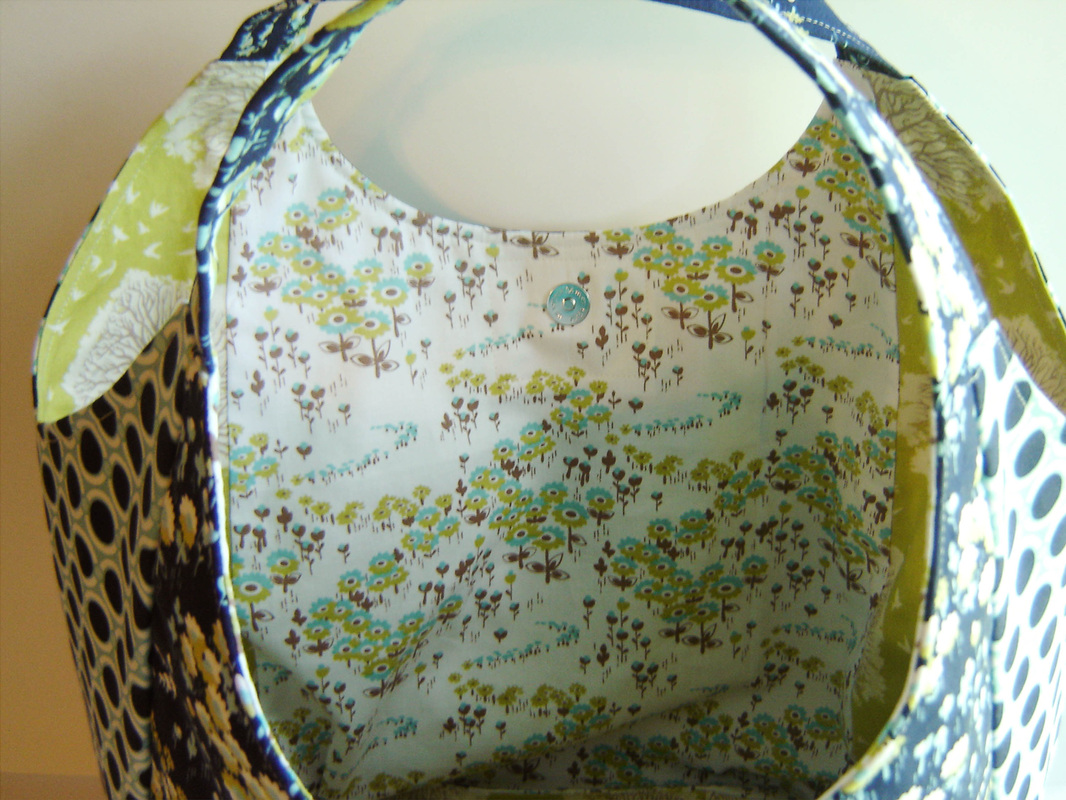
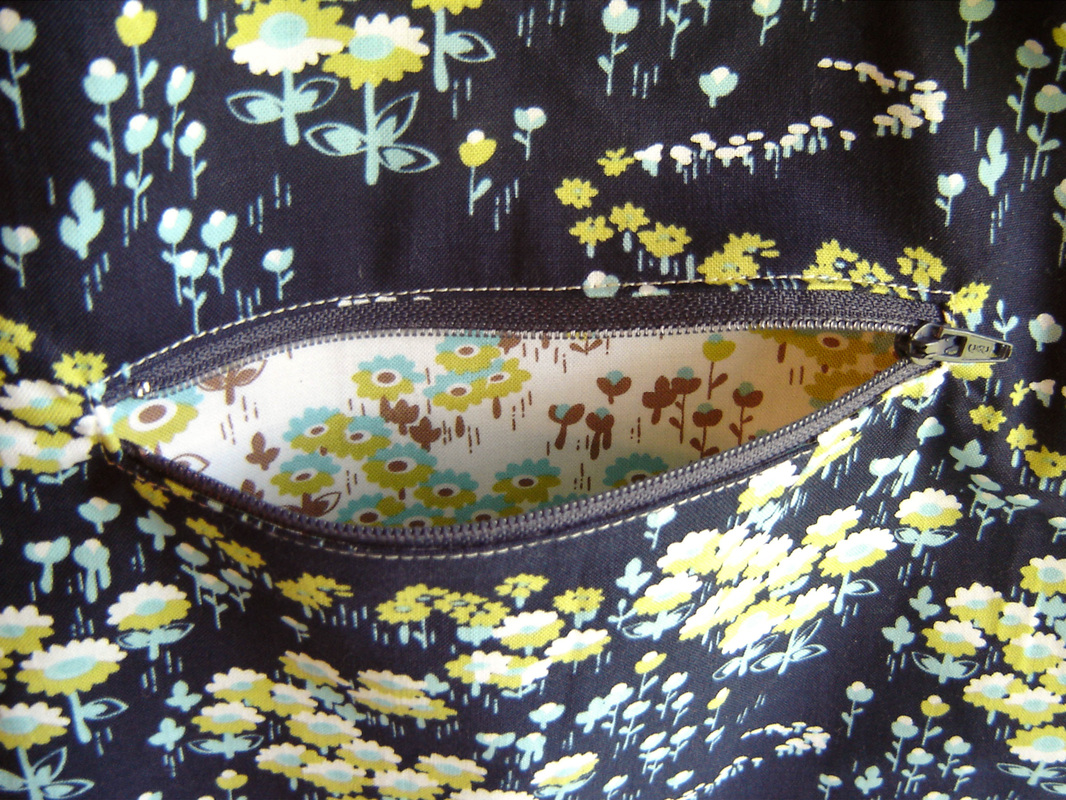
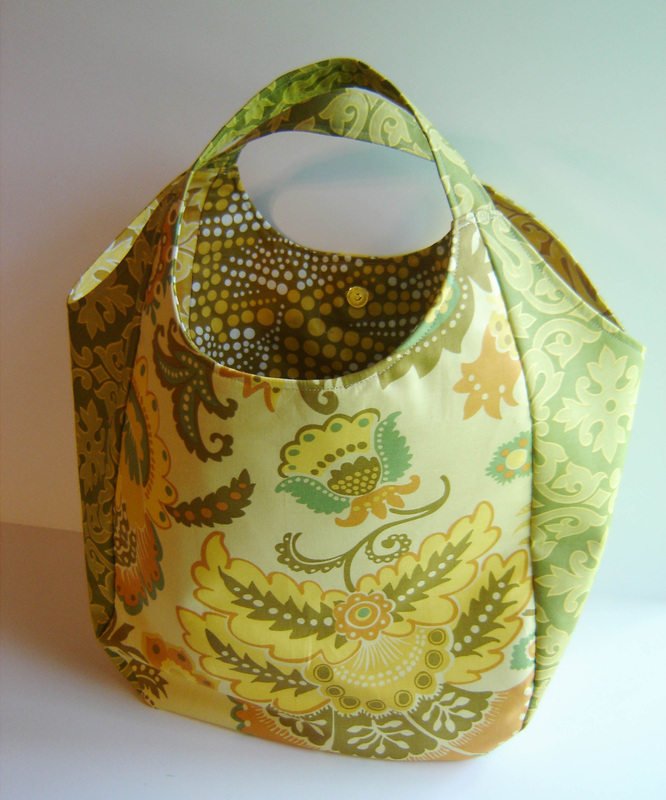
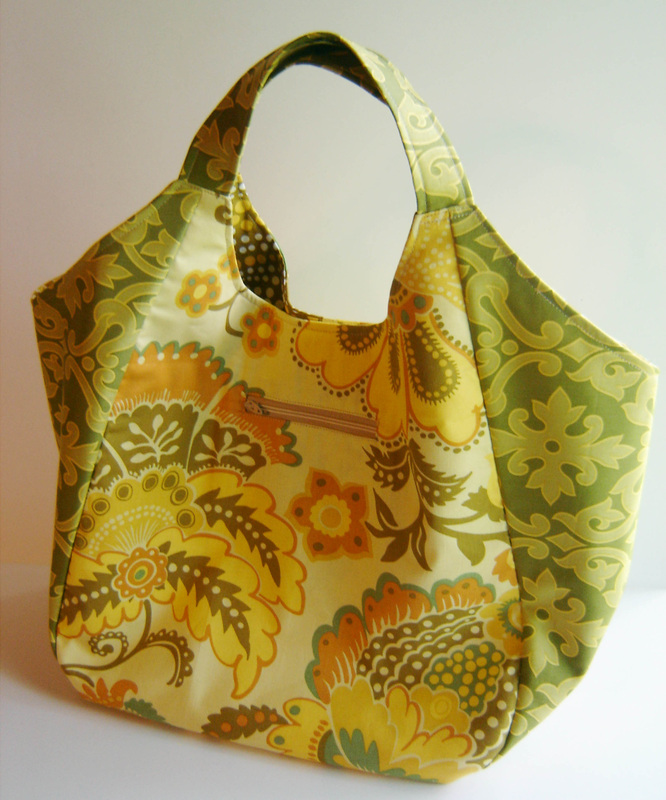
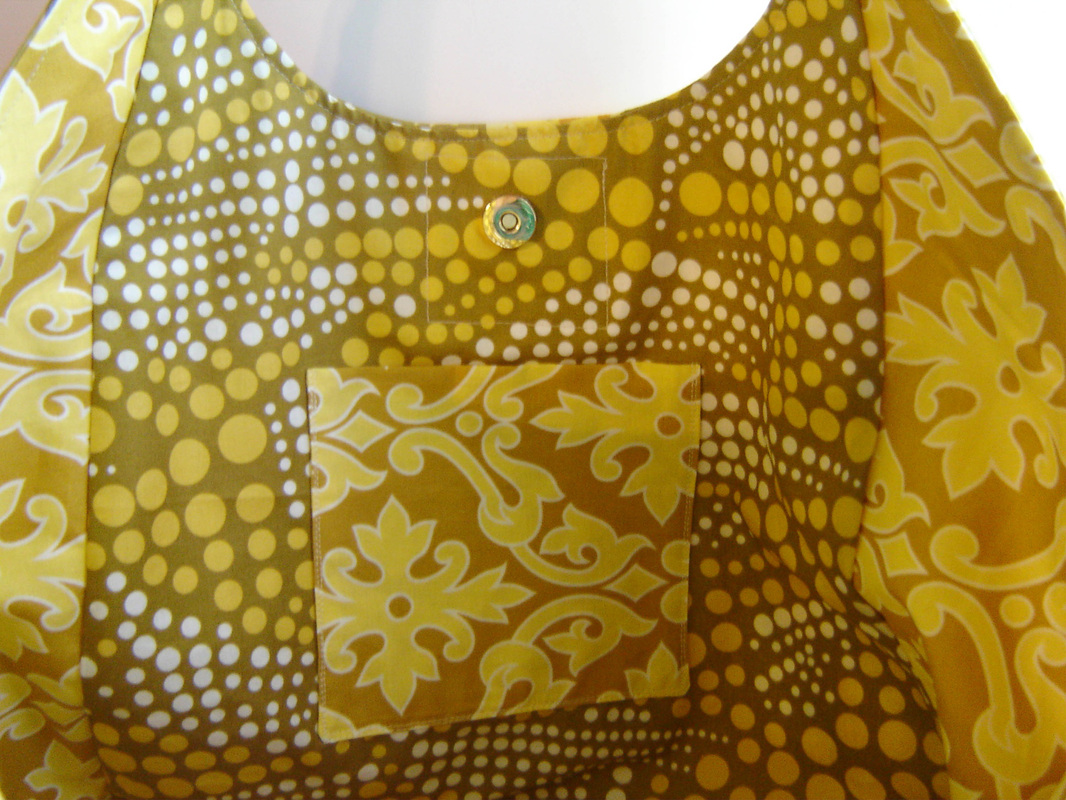
Thank you Quilt Sandwich Fabrics for the fabric and the challenge it was really fun and I forgot just how much I like making my own designs! I am here today to share one of my second quarter finishes, as part of the Finish Along hosted by The Littlest Thistle. I finished these two bags about a month ago, but haven't had a chance to share them, so I figured now or never because the second quarter wraps up tomorrow! These two bags were number two on my original list that I blogged about HERE. They were started around 2.5 years ago for a friend who requested them, because she had seen a custom order that I had sewn for someone else. I started out strong, cut them out, got all the supplies together, and then got pregnant. Then they just sat there through the pregnancy, birth, and the first years of my second child's life! I am so happy to have them done and delivered to my friend, who was thrilled to finally receive them! The pattern for these two bags is byI Think Sew. I believe it was called the No. 50 Bag, but upon searching their website I haven't been able to find this pattern available, so I'm sorry I'm not much help there. These are large bags that "kinda" stand on their own. I used a duck cloth as interfacing for these, which gives it just enough structure not to be totally floppy, and they kinda stand on their own, without being too thick and bulky. I followed the directions on all but one thing, which was that I added a zippered pocket to each of the outsides of these bags, a good place for keys or a phone, keeping it safe and secure. The first bag is made entirely of Joel Dewberry's Modern Meadow fabric, which is just one of my favorite fabric lines ever, so pretty without being to feminine. These bags come together really quickly and have such a nice finished look, and hold a TON of stuff, this could double as a beach bag, diaper bag, or just a large purse. The second bag was made with the fabric line Portobello by Alice Kennedy. I used duck cloth, and added that extra zippered pocket, exactly the same as the first. I followed the directions and added the small pocket on the interior of both, and have a magnetic snap on the inside of each for the ability to have the bag closed if you prefer. I top-stitched around the top of both bags for a nice clean finished edge. I am really glad to have both of them finished and checked off my to do list! There was no excuse other than just putting it off to get these finished, I don't want to ever do that again. So this is the first thing on my finish along list that I have blogged about, and am happy to have at least this one project finished and blogged about! Maybe if I get a little help today I can photograph my other finish and blog about it tomorrow. Wish me luck!
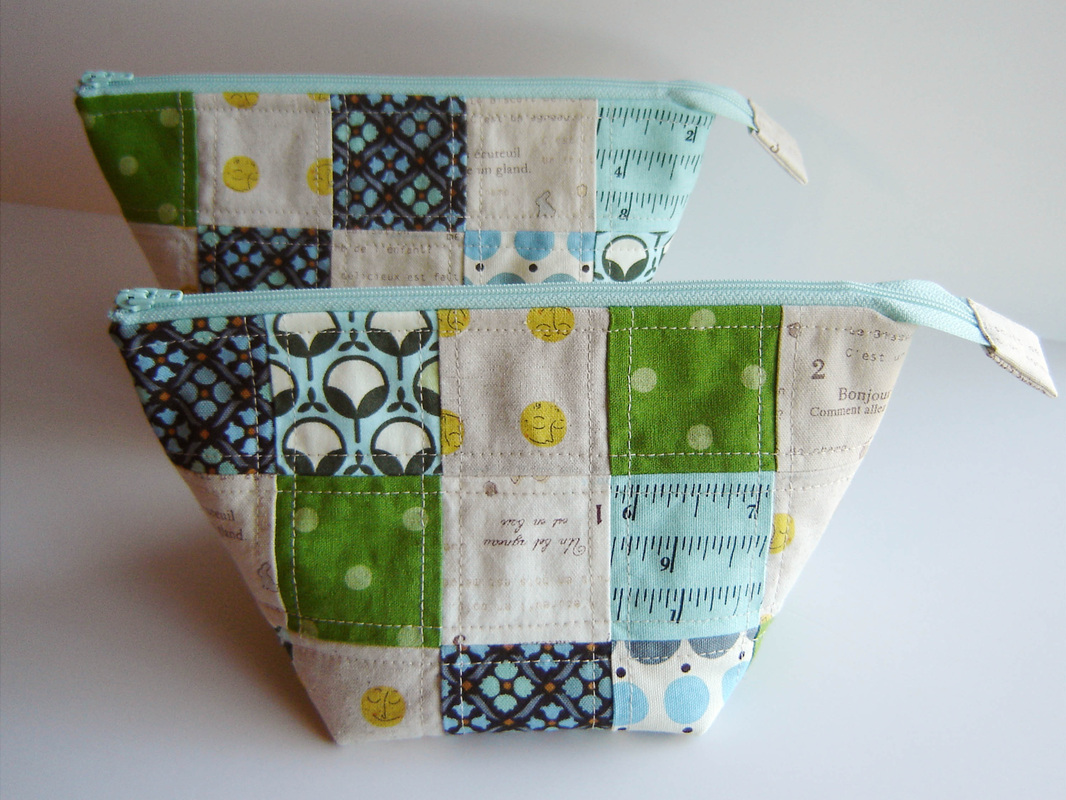
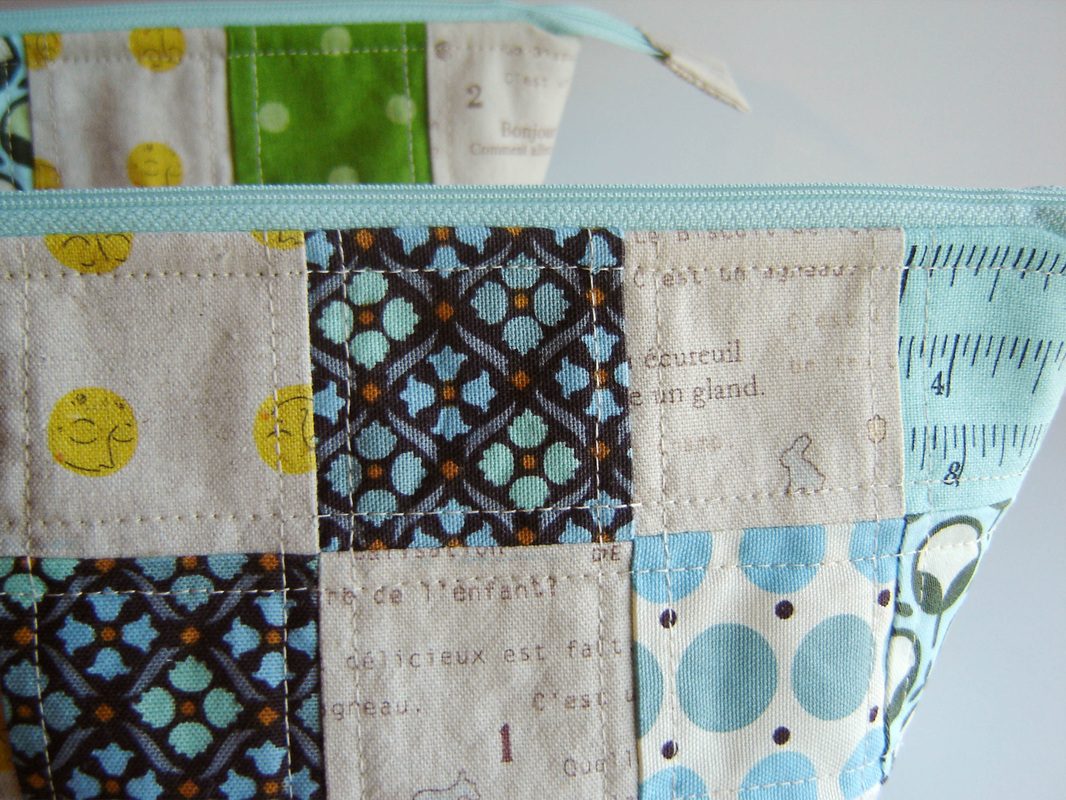
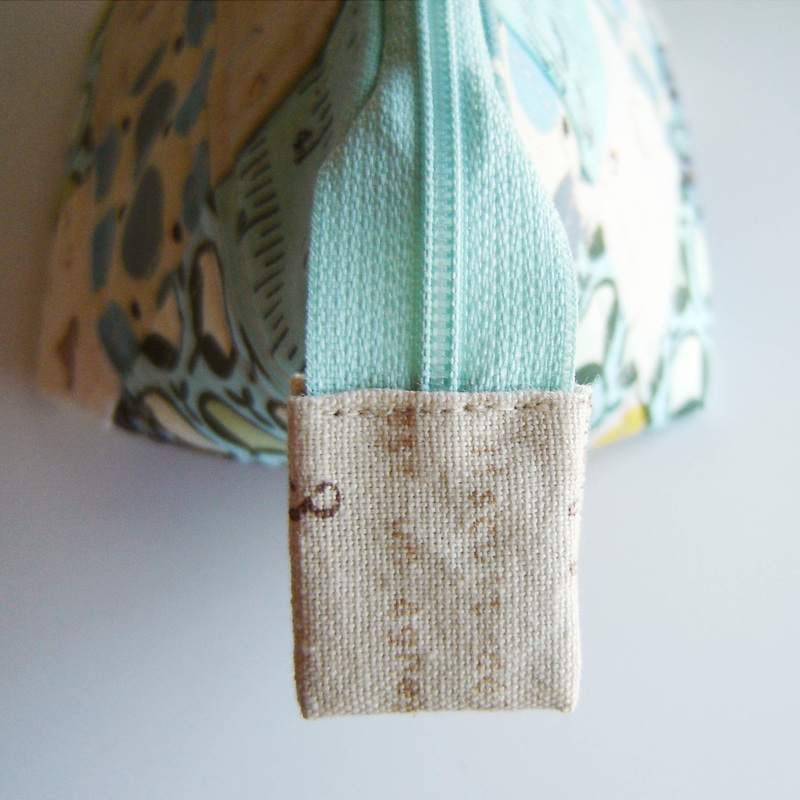
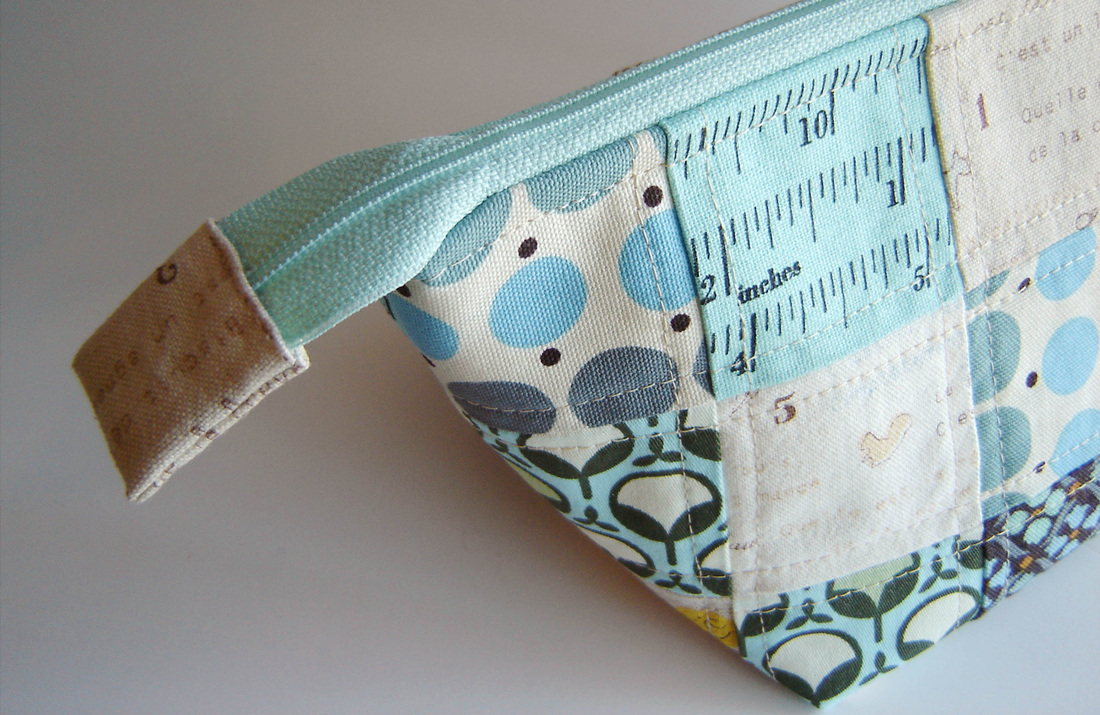
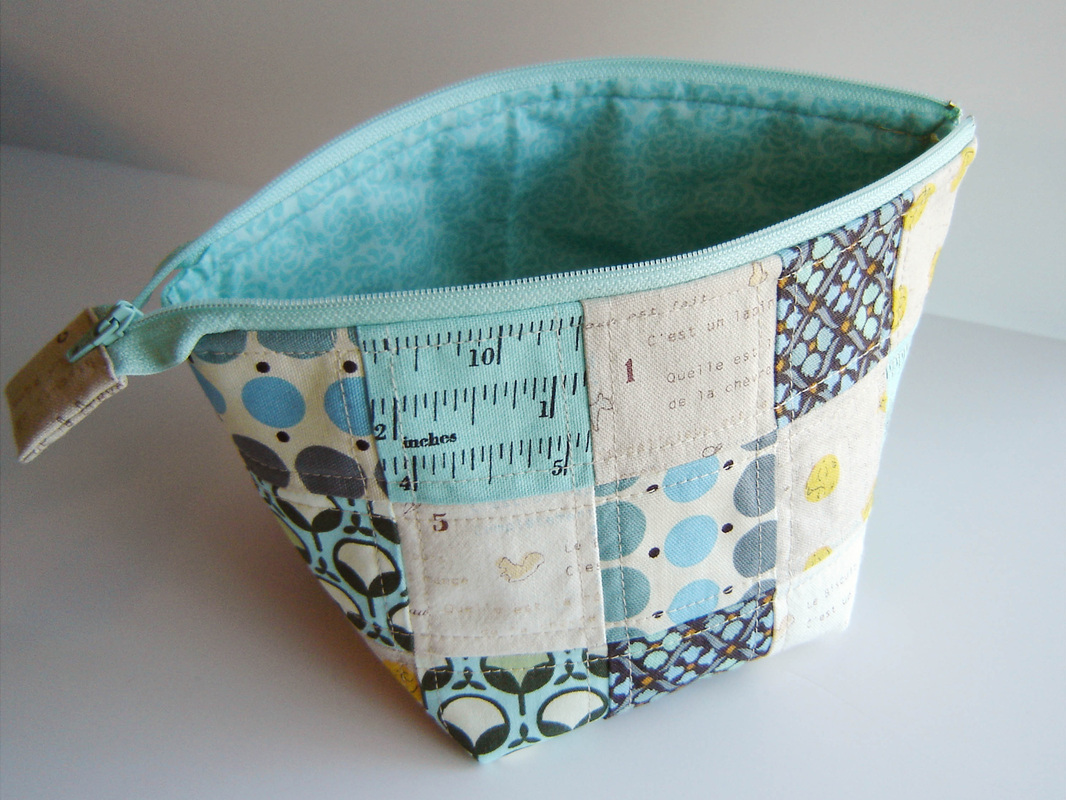
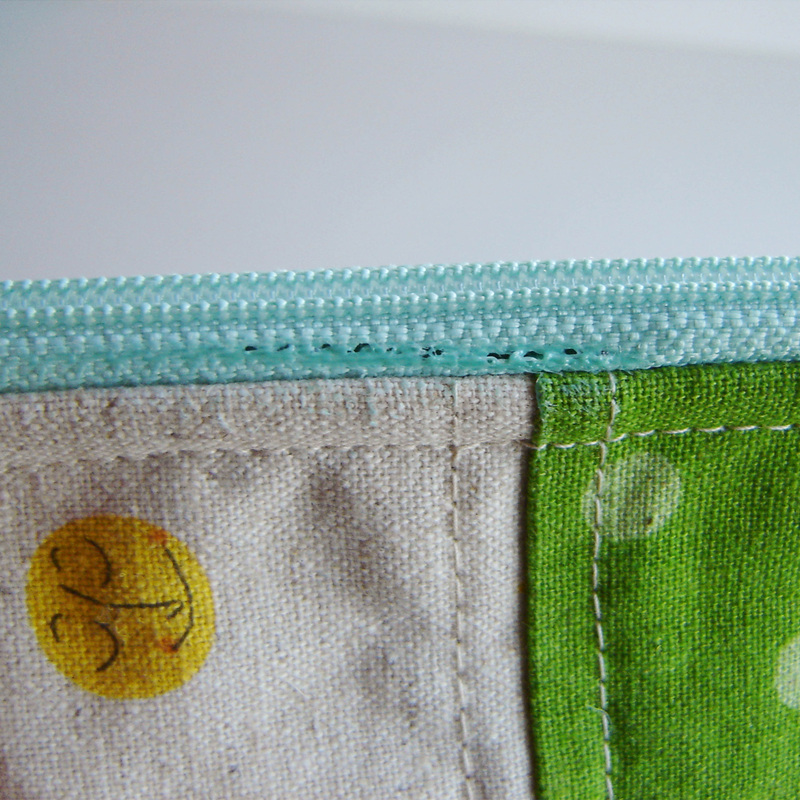
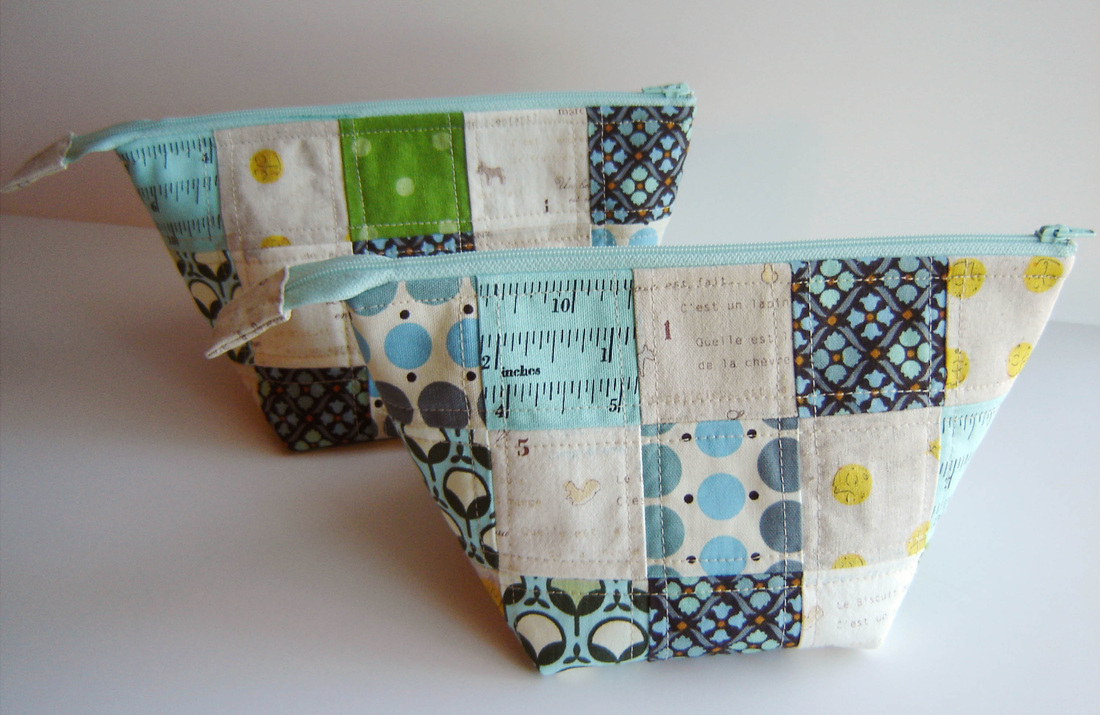
In my last post (Rebecca bag) I mentioned that my mom had picked out a ton of fabrics for me to choose from to make her bag. Well here is what I did with some of the fabrics that didn't make the cut. You see, she also requested a pouch, and I thought it would be the perfect time to make the Open Wide Zippered Pouch from Noodlehead. Oh and why make one when you can make two at the same time! I started with an assortment of home dec fabrics, some from Denyse Schmidt, a touch of Heather Ross and even some cool Japanese prints. I cut them into 2.5" squares and created 2 patchwork panels, one for each side, so I really created 4. My panels ended up being not quite the size that Anna from Noodlehead suggested, but I just rolled with it, it was close enough. Oh and I made the smallest size (the tutorial has 3 sizes, you can find it HERE.) Once the patchwork panels were done, I ironed them onto some fusible fleece, and then proceeded to straight line quilt them with a nice neutral thread. I love patchwork! At this point I just followed the directions and kept on sewing. It really is a great tutorial, very easy to understand and I love the way the zipper is done. I only changed two things from the original tutorial. The first was the little zipper end cover shown above. I put the fabric right sides together and sewed the two sides, then flipped it right side out, thus creating a little envelope of sorts. I just had to turn in the raw edge by 1/4", slide it onto the zipper end and just stitch it onto the zipper, thus the one showing seam. The only other change I made was the gusset or box corner width. The tutorial called for a 3.5" gusset, but I reduced the number to 2.5" so my bag isn't quite as wide and sits a tad bit taller. The 3.5" measurement fell weird with the patchwork, so I just adjusted it to fit better with the patchwork squares. If you look at the photo below you can see the bottom corner falls in the middle of the patchwork and not on a seam. Kinda hard to explain, sorry. I used a simple tone on tone for the lining, making it easier to see your stuff inside the pouch. The only snag I ran into during this entire project was entirely my irons (or my) fault. You see when it came time to iron the exterior and the lining flat after sewing them to the zipper, my iron accidentally touched the POLYESTER zipper and as you can see in the photo below, melted a fine line of holes in it. On the bright side, the holes are small and since the zipper is polyester, it melted and kind of "sealed" it all at the same time, so it isn't going to run or ravel with time. Oh and this is also the great benefit of making 2 at a time, you mess up one, you still have a perfect one to gift! Poor me, I have to now keep the "damaged" one! Here they are all finished! It is really a great tutorial, quick project and honestly fun! So if you are ever in need of a great little gift, go ahead and make one, I know the recipient will love it! These two pouches were my third finish of the first quarter 2014 Finish Along hosted by Katy at The Littlest Thistle.
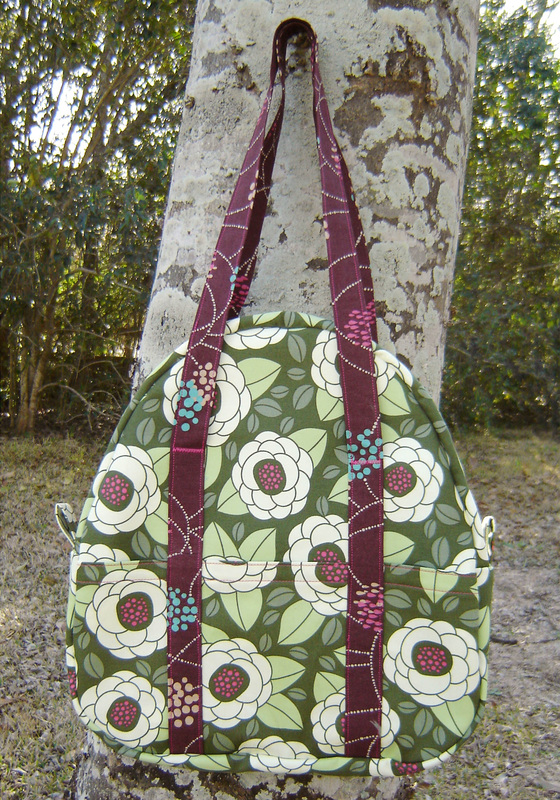
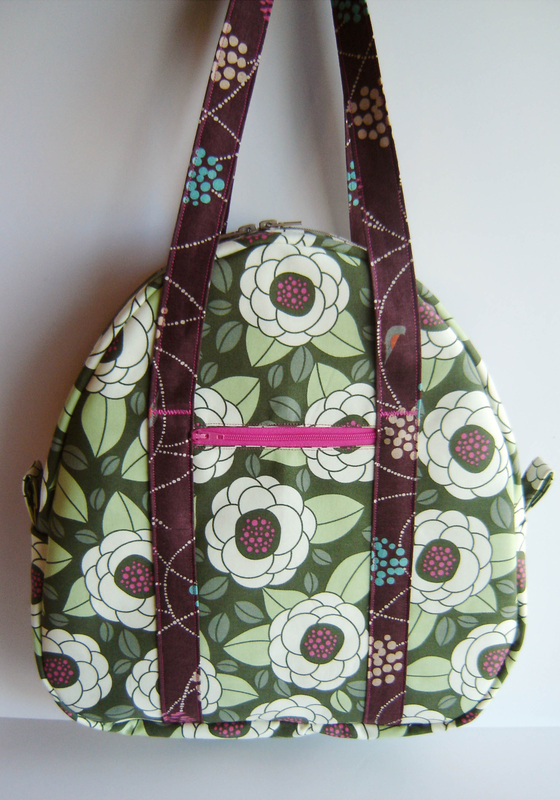
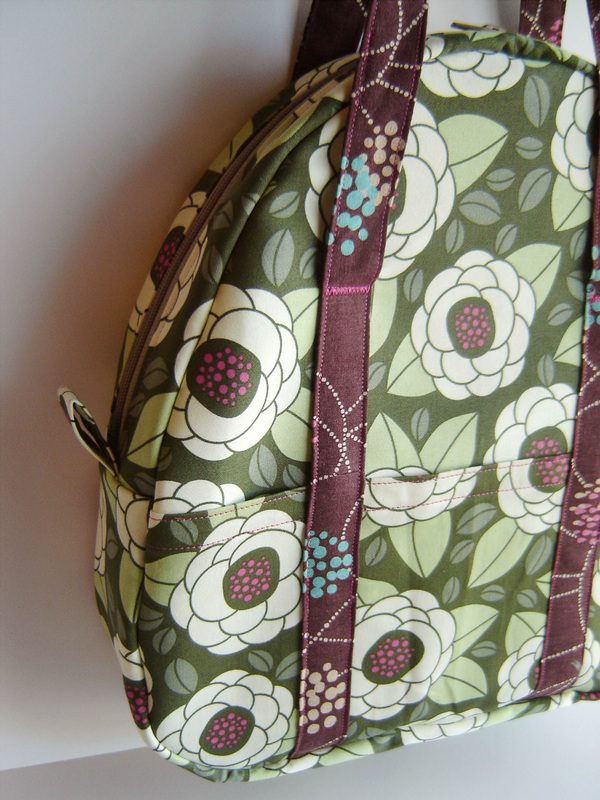
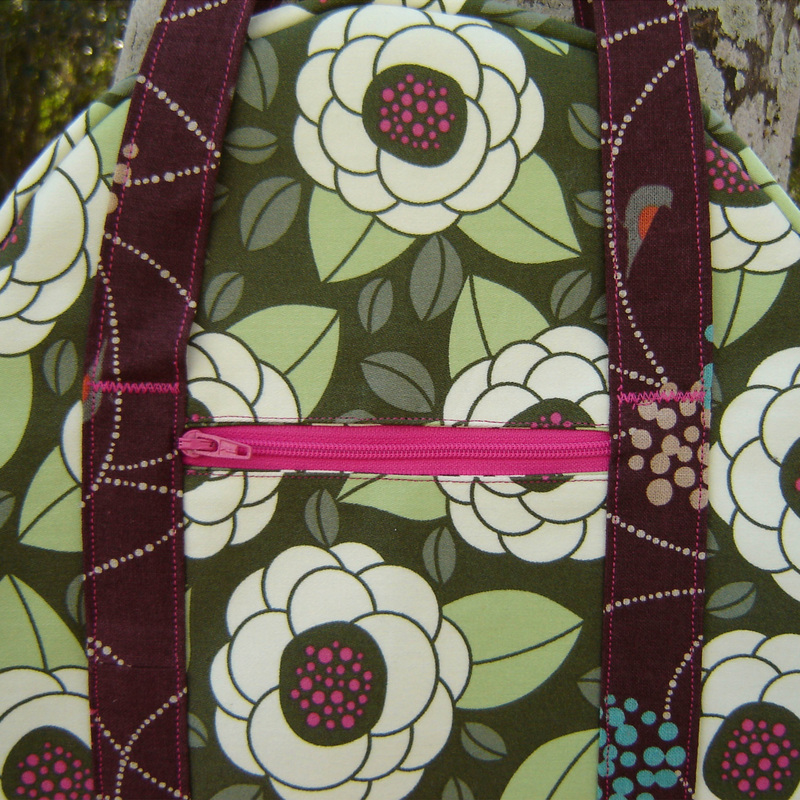
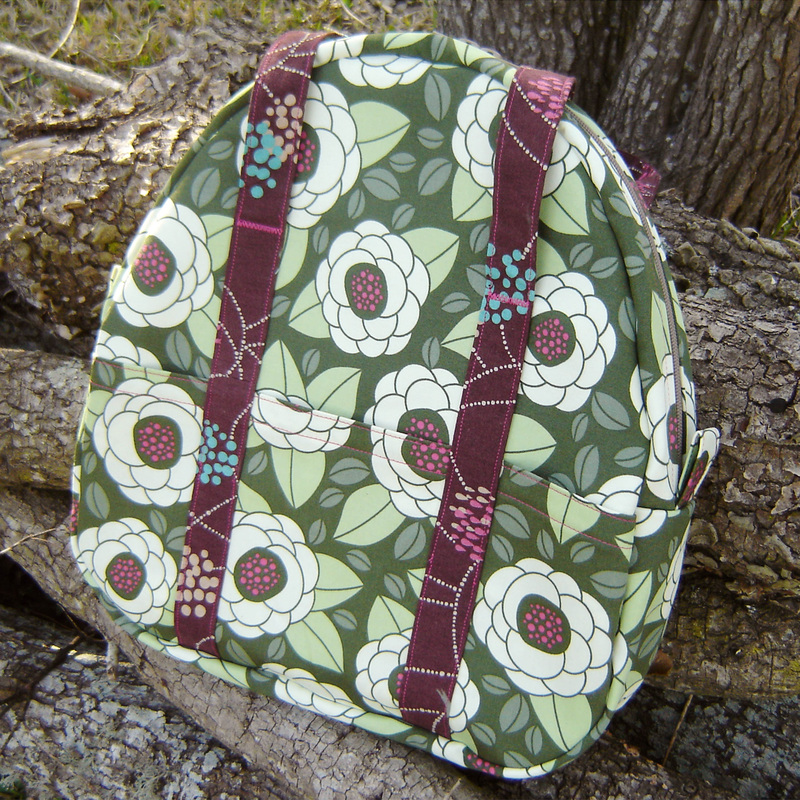
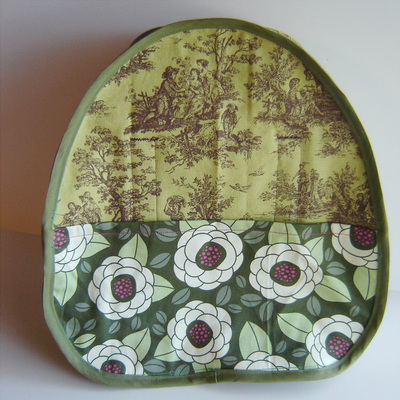
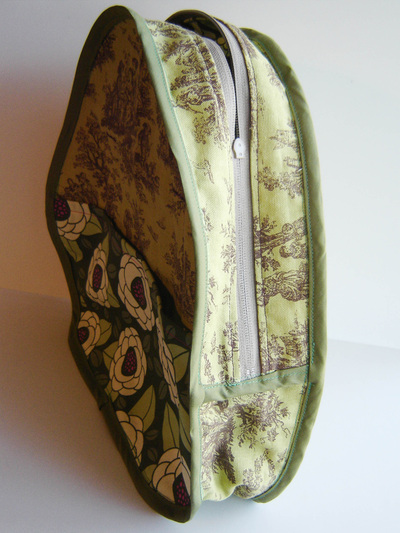
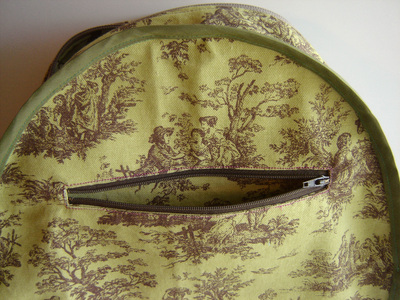
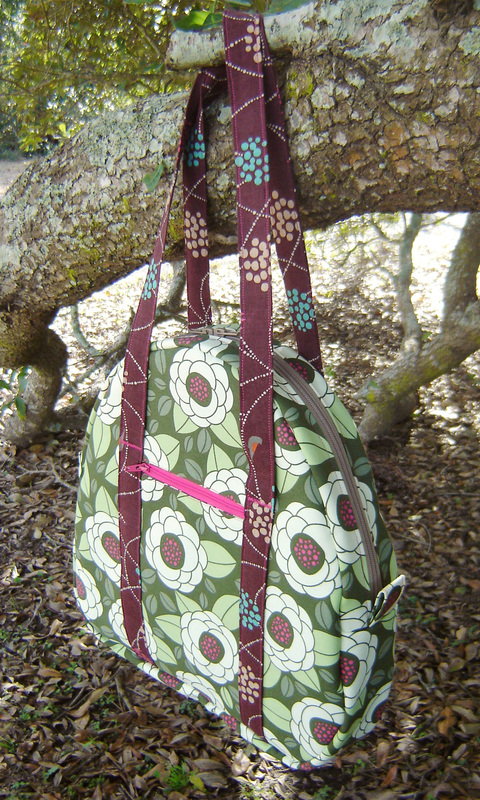
The Rebecca Bag, take two! I usually don't make a purchased pattern twice, if it is my own design I'll make it a lot, but normally with a purchased pattern I will make it once and then I move on. I think for me it is a way to learn techniques and then once I have learned from that project, it is time to move on. Well obviously this wasn't the case here. Case in point is the Rebecca Bag from the book, Bags the Modern Classics - Clutches, Hobos, Satchels & More by Sue Kim. My first time with the pattern was for Craft Book Month at Craft Buds, and you can see the finished bag and review HERE. After the blog hop, I had the bag hanging around in my house and my mom spotted it, she fiddled with it a bit and decided it would be the perfect style for her with a few modifications. She wanted more pockets, inside and out, and she wanted a shorter version, it didn't need to be as tall if she was going to use it as an everyday handbag. So I let her dig through all of my home dec fabrics (more than I care to admit) and she pulled out a mismatched stack of things she liked and gave me the job to surprise her with the final pick. Well little did she know that of the stack she picked, only one or two of the prints actually had enough yardage to make the bag, thus limiting the choices in the end. I think it worked out quite nicely though. The main fabric for the bag is a home dec from Joel Dewberry (a few years old) and the handles are a lovely Echino (also a few years old.) The interior is some random toile print that I had in my stash, whose origins are completely unknown, but works perfectly for a bag interior! Be it that I had made this bag before, it stitched up really quickly and I only referred to the directions once or twice, making the construction that much faster. I do believe that fabric choice, cutting and ironing interfacing took longer than the actual bag construction. The modifications included shortening the overall length of the pattern by around 4", thus shortening the front pocket a bit too. I added quite a bit of length to the handles also, just to make sure they would fit easily over the shoulder. I did not modify the top curve, as I didn't want to have to make changes to the zipper length and I left the depth alone because it is pretty darn perfect. Just like the original that I made, I added a zippered pocket to the back for keys or cell phone and it is nestled neatly in between the two handles (shown below.) I used a hot pink zipper and top-stitched everything with hot pink to accent the center of the flowers in the Joel Dewberry print. The top zipper was a neutral beige, so it would blend in, and is a "purse zipper" which has two toggles and is super thick and sturdy (I bought it at JoAnn fabrics.) I used a short zig-zag stitch to reinforce the handles where they separate from the bag body, I just wanted to have some extra stitching there, just making sure it was secure. I used a size 16 needle for the majority of the construction of this bag as there are many layers of home dec fabric and interfacing. For the final layers of stitching (the bias tape on the interior seams) I switched to a "denim needle" which would be equivalent to a size 18. It worked like a charm. Once I had finished the bag and it was already inside out, I decided to take a few pictures to really show you what the interior looks like. I added in the larger side pocket and another zip pocket for extra storage. You can see that all the layers are sewn together and then to finish the raw edges you attach bias tape to the unfinished seams. It seems like it would be hard, but it really isn't. I used Clover Wonder Clips (which are awesome by the way) to hold the bias tape on the seams and with that denim needle just stitched slowly and carefully around each side. It really isn't that hard, just takes a little patience. Some spots of the interior aren't perfect, and the stitching is a bit messy, mostly at the zipper ends and that short run of bias tape, but honestly what does it matter, it is the interior of the bag and barely visible. In conclusion, I love this pattern, and the book itself is filled with a ton of great projects. I think my mom loved the finished project (at least I hope so) and should be just big enough to hold all of her everyday essentials. The front divided pockets are just large enough to hold a cell phone, sunglasses, keys or anything you would want quick access to. The interior is just the right size to hold a magazine plus all of your normal purse goodies. The pattern really is a keeper! On a side note I normally take my bags outside to photograph them as I have more space and hanging opportunities outside. After I had taken the photos outside and then downloaded them to the computer I noticed that the bag really blended into the background, so I guess my colors were very nature inspired! LOL I ended up taking more photos on the white background so you could really "see" the bag. I am linking up to The Crafty Traveler over at Ellison Lane and the March Craft Book Sew-Along hosted by Live.Love.Create. This project was also my second finish in the first quarter of the 2014 Finish Along hosted by Katy at The Littlest Thistle.
|
Marci GirlA feisty mom designing, sewing and blogging her way through everyday life!
|






 RSS Feed
