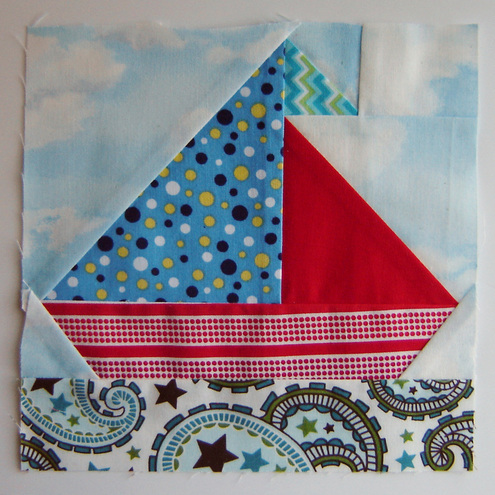
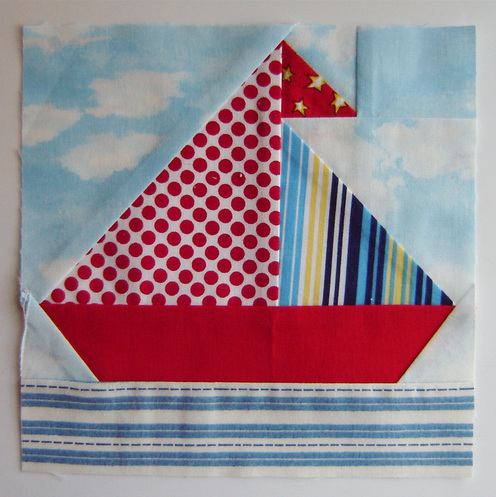
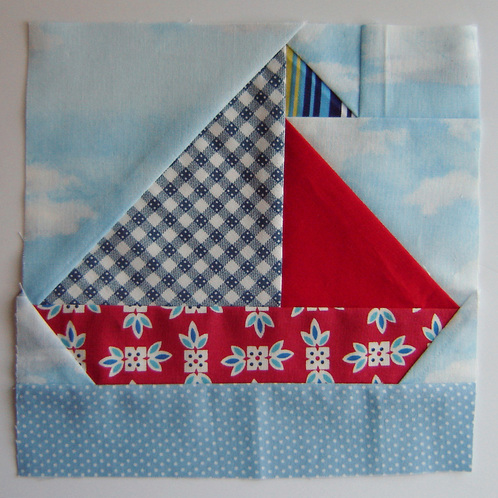
First up is for "Mad Maddy" in the Bee Connected group. She requested these lovely paper pieced sailboat blocks for a baby quilt she is making for a friend. These blocks were rather easy (thank goodness I have done paper piecing before!) She requested two, and the only real rule, was to use the cloud fabric as the sky, and that the clouds go in the right direction (a.k.a. not vertically) and even though that sounds simple enough, amazingly it was quite challenging. I felt the first two blocks I made for her weren't wonderful, so I added some of my own fabric and made her a third block just for good measure. I hope she likes them, it certainly will be an adorable quilt.
|
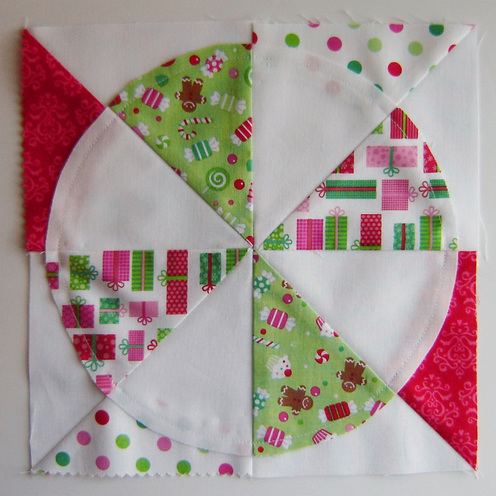
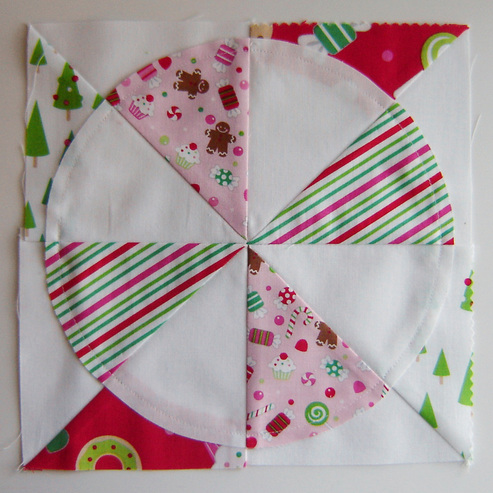
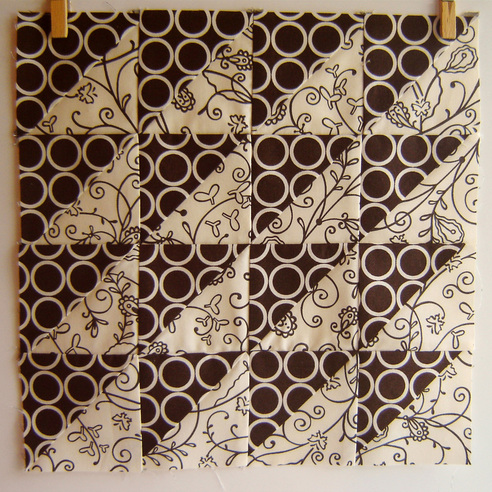
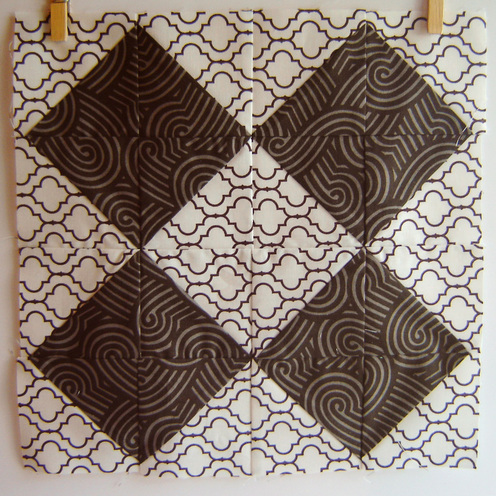
Even though I haven't been doing a lot of sewing lately, I have managed to keep up with my bee blocks, and this month's were considerably easier than last month's and I was able to whip them up pretty quickly, which was a nice change. First up is for "Mad Maddy" in the Bee Connected group. She requested these lovely paper pieced sailboat blocks for a baby quilt she is making for a friend. These blocks were rather easy (thank goodness I have done paper piecing before!) She requested two, and the only real rule, was to use the cloud fabric as the sky, and that the clouds go in the right direction (a.k.a. not vertically) and even though that sounds simple enough, amazingly it was quite challenging. I felt the first two blocks I made for her weren't wonderful, so I added some of my own fabric and made her a third block just for good measure. I hope she likes them, it certainly will be an adorable quilt. The next set are for "bluebirdluxe" in the Quilting newBEES group. She used the Taffy Go Round pattern from A Crafty Fox, tutorial HERE. These blocks were really easy to put together, and feature a raw edge circle in the middle, which was also really easy to do. These are stunning blocks, and are going to make a lovely Christmas quilt. This last set isn't for September, but rather October, and it is really nice to get them done super early! Erin "toerintx" sent her fabric off early, and since I was on a roll, I went ahead and got these done too! These blocks are part of the Always Bee Learning group, and Erin wanted everyone to try triangulations. If you haven't heard of that before, go look it up, because neither had I, and honestly I don't want to try to explain, but basically it is another neat way of making a lot of half square triangles. I really like this method and feel like these blocks are the most accurate hst I have ever made. Erin only had one real rule, and that was to use one brown print and one cream/white print in each block, but we got to decide on the layout of both blocks. Since I was feeling rather brain dead the day I put these together, I decided on a super simple layout for both, and hope my other bee members go a little more adventurous than me! If not, it will still be a stunning quilt!
5 Comments
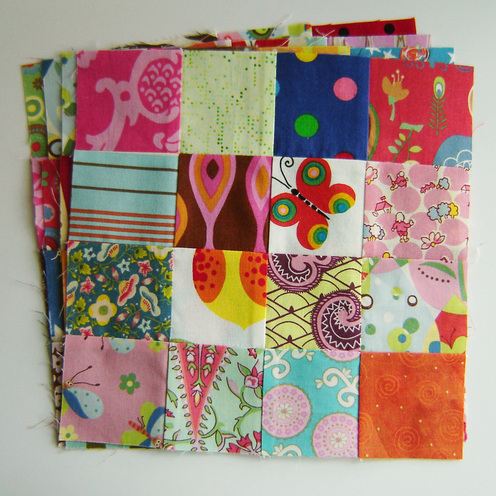
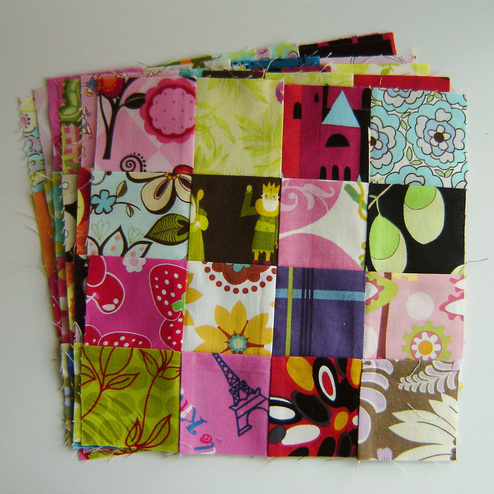
Postage Stamp blocks are the pick in round four of the Scrapbuster Swap. Each square measures 2" x 2" finished, and by not duplicating any fabrics, you will receive quite the varied selection of blocks and fabrics! I sent my blocks in quite some time ago, and honestly almost forgot to post my pictures. These blocks were fun and super easy to put together, and it really helped that I used my Go! Baby to cut these squares out!
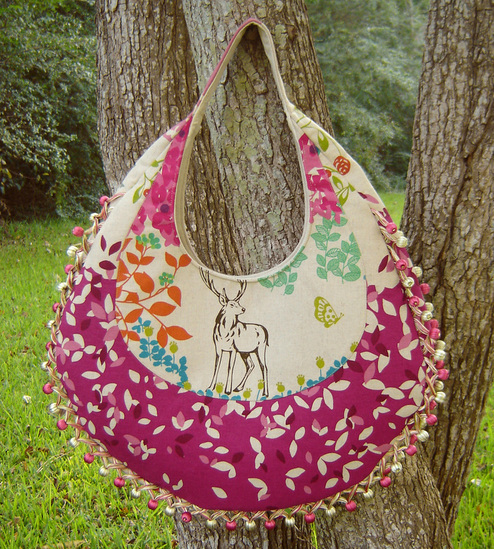
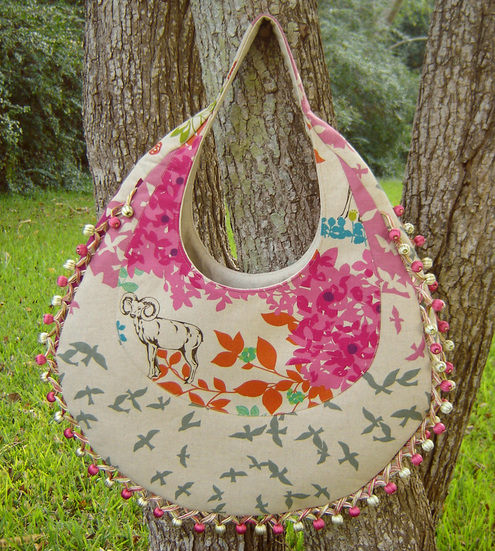
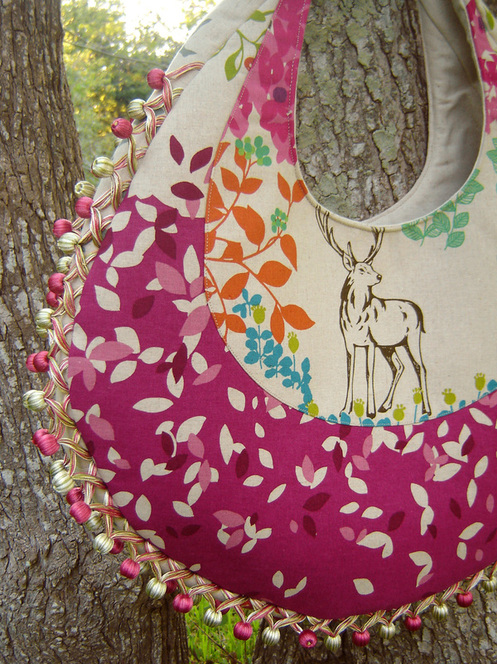
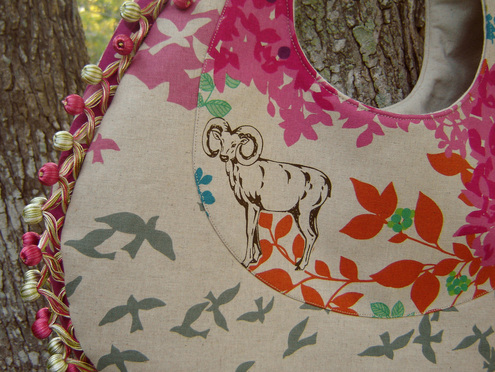
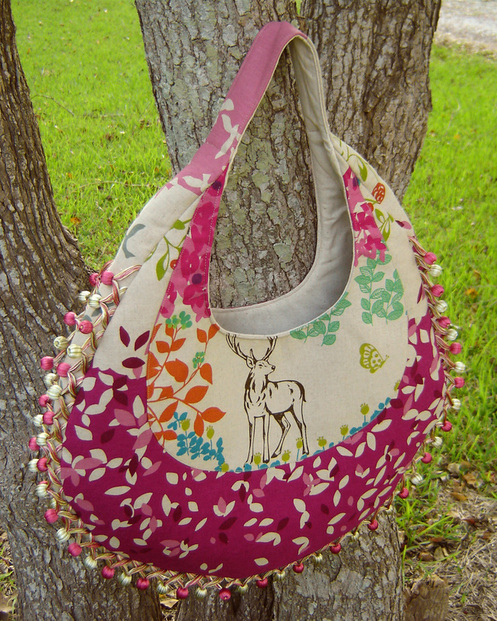
I can't wait to see the varied selection I receive back this go around, and if you are interested in participating, it isn't too late to join in. The shipping deadline for this round is October 15! Check out the Flickr group for more details and to see everyone else blocks, they are all gorgeous! This was the bag that almost wasn't. It almost seems as if everything in the world kept stopping me from making it, but boy am I glad to have it finished! This was my August project in the Amy Butler Style Stitches Sew Along, and also my entry into the Sew Sweetness Amy Butler Sew Along. I missed the deadline for the first one, I barely made it in time for the Sew Sweetness Sew Along, but I'm so glad I at least met one of the deadlines! This is the Fringed Hobo Bag from Style Stitches by Amy Butler, and was in the "advanced" section of the book. I will definitely classify it as advanced. When I first started working on this bag, I thought it was going really easy and honestly I couldn't figure out why it was an "advanced" pattern, and then I got to the very last step, and could have pulled my hair out. The last step is simply to attach the lining to the main body of the bag, and that is simple enough, except for the fact that in several spots the thickness of the interfacing, fabric, lining and everything was so thick it was virtually impossible to sew through. I broke a size 14 needle, so I jumped to a size 16, which wasn't much better. Thankfully I had a few "heavy duty" needles on hand, and that needle punched through smooth as could be, which helped a lot. I still wasn't really pleased with the outcome in these spots, but honestly it was just going to have to do. I'm not really sure how to fix that issue, maybe it stitches together a little smoother if you use regular quilt weight cotton instead of home dec fabric, but i don't know if I'll make this one again to "try it out." Overall, I do love the look of the bag, and it is a good size, I made the smaller version, and I did shorten the length of the handle so that it sits right underneath my arm, instead of hanging down lower. The interior has two side pockets that I divided in half, so they weren't just large pockets, this way things can be organized a little better inside. The fringe doesn't go all the way to the top like it is supposed to, but that is my error, I didn't buy enough, so I made it work. I kind of like it like this, and am so glad I wasn't wrestling that extra bulk in those top seams. I used two different Echino prints for the exterior, and a simple muslin for the interior. Overall it wasn't a bad project, and I could have constructed it about 2 days, but halfway through I ran out of interfacing and couldn't find it anywhere locally, ordered it online, waited and then finished the bag. This added the extra two weeks to this project, that honestly I didn't need to add! I think if you have some bag making experience, you won't struggle to put this one together, and honestly all the steps are fairly straight forward with the exception of the last step, which was easy to understand, just difficult to execute. It does make a stunning bag, and if you are wanting to make a bag that stands out in the crowd, then this is the one for you!
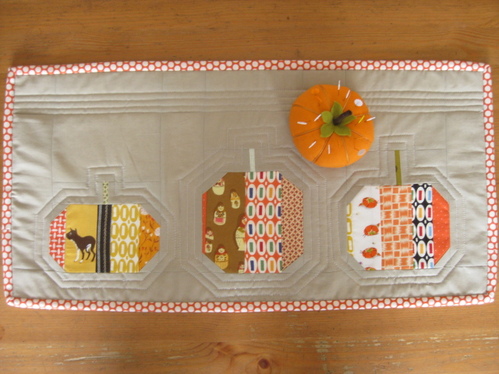
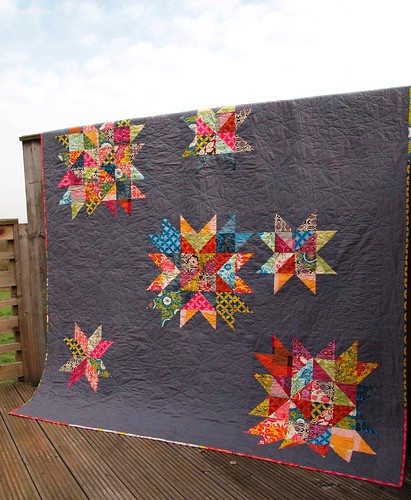
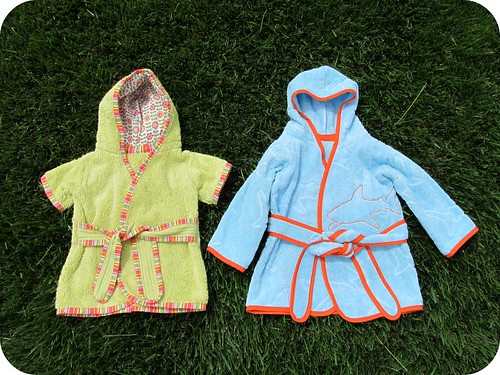
MAKE! I have quite the list of things I'd like to make, and I'm sure you do to. Now whether or now I will get them Made is a different story, but oh, if I had all the free time in the world, yes, I'd love to make all these projects! Here is my partial list, really this list is things that I have run across this week that I HAVE TO MAKE NOW. The first, a super cute table runner made by Aneela Hoey (of Sherbet Pip fame.) I love the simplicity of this table runner, and the fact that it can be used for many months! To read her blog post about it, click on the photo above. The pattern for this project can be found HERE. I REALLY want to make this one! Though I am not usually a fan of holiday quilts (other than Christmas) this one is simply stunning. I think it is the shade darker sashing used on this quilt that really makes it pop for me. Love it. The pattern is Swoon by Camille Roskelley and can be found HERE. This quilt is made by Amanda Jennings and you can read her blog post about it HERE. Simply stunning. I am really considering using my Scrapbuster Swap scrappy depression blocks to make a quilt like this beauty. The pattern can be found in Issue #5 of Fat Quarterly, and the quilt is designed by Katy of imagingermonkey, you can find her blog post HERE. I kinda think this quilt speaks for itself! Last, but certainly not least, these ADORABLE beach towel robes. The pattern is from MADE and can be found HERE. These two robes were made my Jill at homemadebyjill, and you can read her blog post about them HERE.
I have a confession to make, I bought this pattern last week, and have already whipped up one of these babies, and let me tell you, the pattern is SO EASY and the end result is SO CUTE! I'll be sharing my creation soon! Do tell, what is on your "Things I'd Love to Make!" list? |
Marci GirlA feisty mom designing, sewing and blogging her way through everyday life!
|




 RSS Feed
