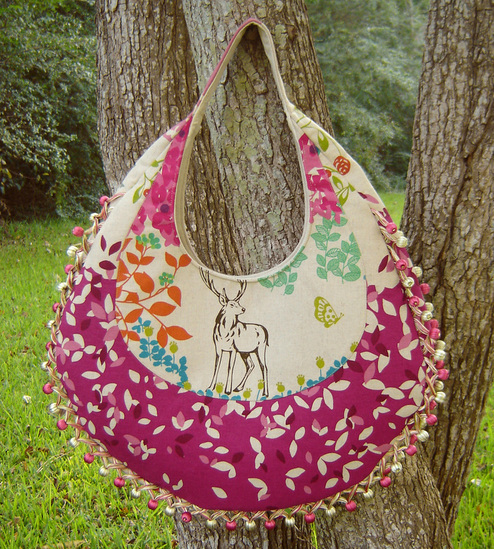
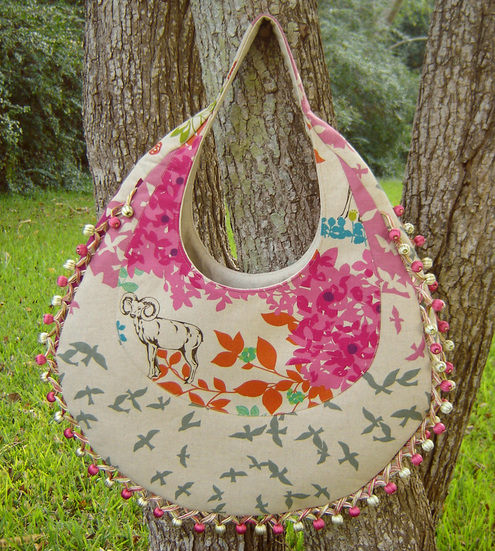
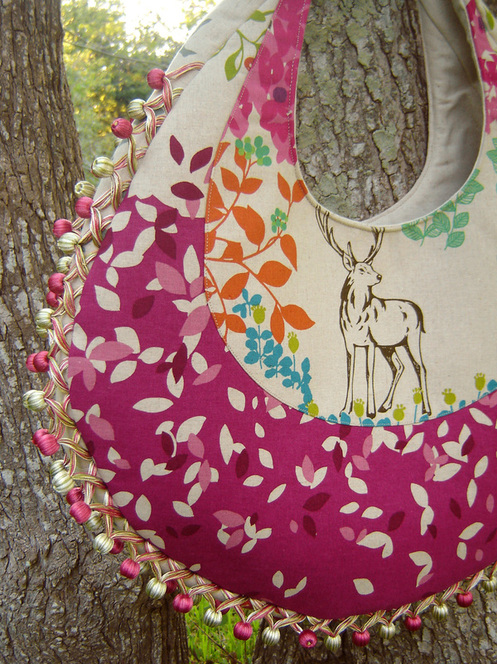
This was the bag that almost wasn't. It almost seems as if everything in the world kept stopping me from making it, but boy am I glad to have it finished! This was my August project in the Amy Butler Style Stitches Sew Along, and also my entry into the Sew Sweetness Amy Butler Sew Along. I missed the deadline for the first one, I barely made it in time for the Sew Sweetness Sew Along, but I'm so glad I at least met one of the deadlines! This is the Fringed Hobo Bag from Style Stitches by Amy Butler, and was in the "advanced" section of the book. I will definitely classify it as advanced.
When I first started working on this bag, I thought it was going really easy and honestly I couldn't figure out why it was an "advanced" pattern, and then I got to the very last step, and could have pulled my hair out. The last step is simply to attach the lining to the main body of the bag, and that is simple enough, except for the fact that in several spots the thickness of the interfacing, fabric, lining and everything was so thick it was virtually impossible to sew through. I broke a size 14 needle, so I jumped to a size 16, which wasn't much better. Thankfully I had a few "heavy duty" needles on hand, and that needle punched through smooth as could be, which helped a lot. I still wasn't really pleased with the outcome in these spots, but honestly it was just going to have to do. I'm not really sure how to fix that issue, maybe it stitches together a little smoother if you use regular quilt weight cotton instead of home dec fabric, but i don't know if I'll make this one again to "try it out."
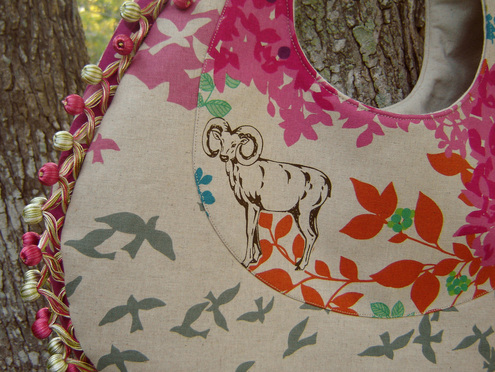
Overall, I do love the look of the bag, and it is a good size, I made the smaller version, and I did shorten the length of the handle so that it sits right underneath my arm, instead of hanging down lower. The interior has two side pockets that I divided in half, so they weren't just large pockets, this way things can be organized a little better inside. The fringe doesn't go all the way to the top like it is supposed to, but that is my error, I didn't buy enough, so I made it work. I kind of like it like this, and am so glad I wasn't wrestling that extra bulk in those top seams. I used two different Echino prints for the exterior, and a simple muslin for the interior. Overall it wasn't a bad project, and I could have constructed it about 2 days, but halfway through I ran out of interfacing and couldn't find it anywhere locally, ordered it online, waited and then finished the bag. This added the extra two weeks to this project, that honestly I didn't need to add!

I think if you have some bag making experience, you won't struggle to put this one together, and honestly all the steps are fairly straight forward with the exception of the last step, which was easy to understand, just difficult to execute. It does make a stunning bag, and if you are wanting to make a bag that stands out in the crowd, then this is the one for you!


 RSS Feed
