That is all I have today, folks, I hope you are enjoying your summer!
I am making myself sit down to blog today. I think I have just been enjoying the summer time sewing so much, I don't want to stop. But I am overdue to show these blocks (though all have been mailed) so I must do it today! 
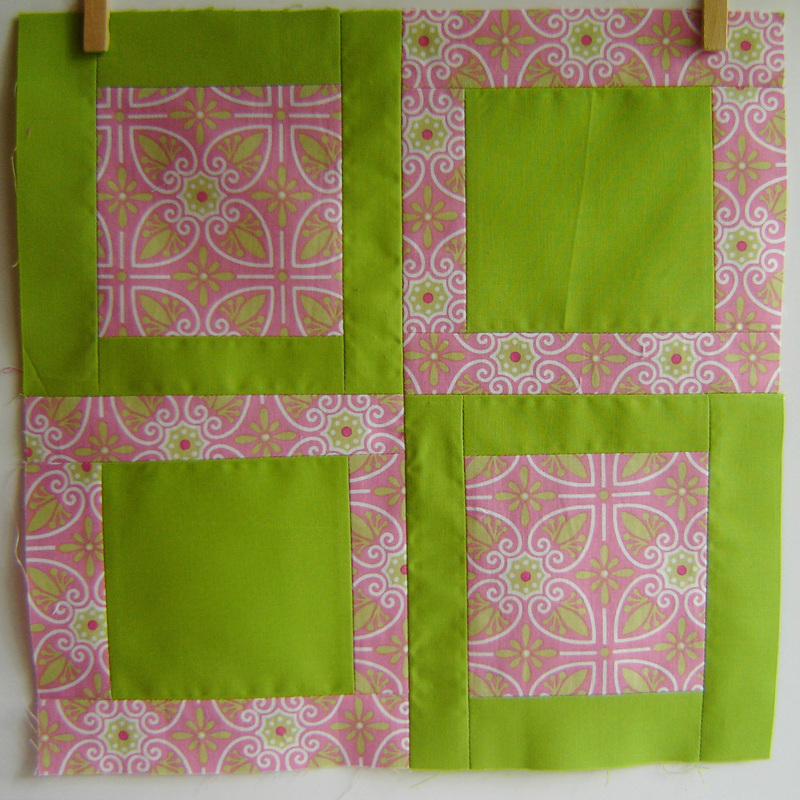
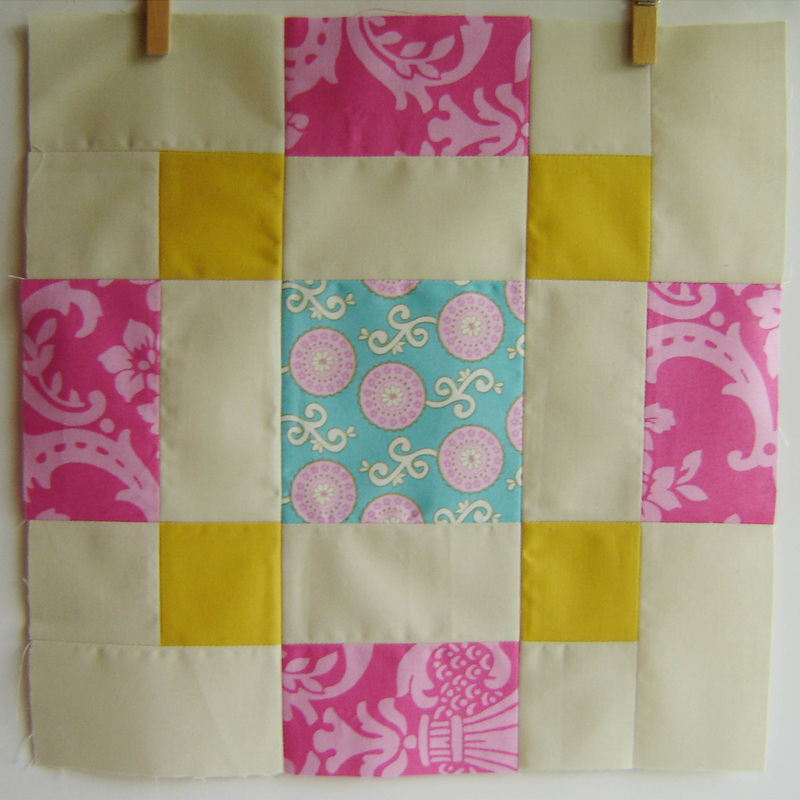
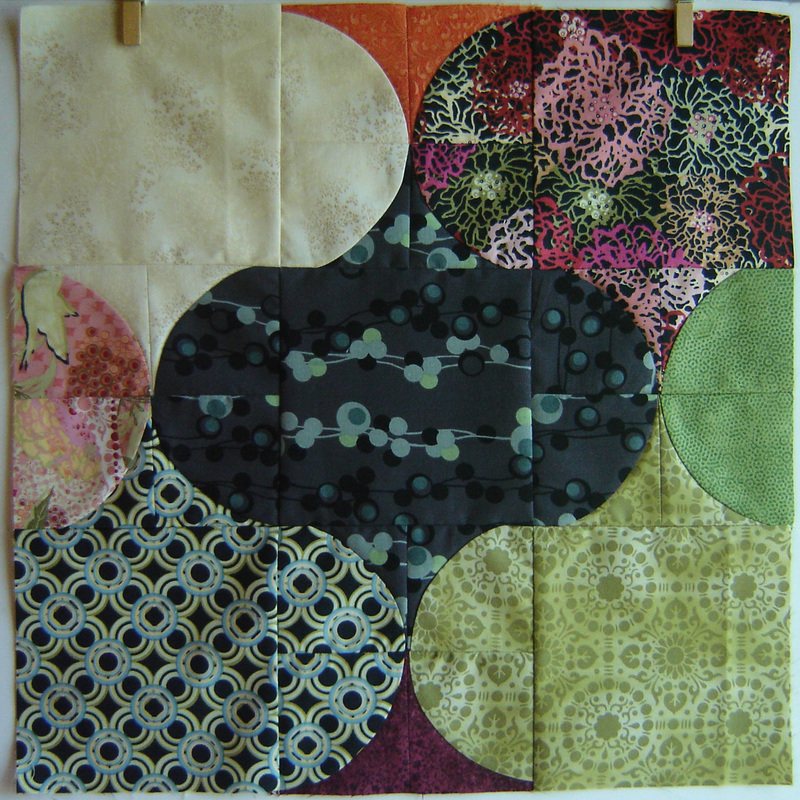
The set of four blocks above were May's blocks for Diane (Diane ~ my studioQ) in PROMISE do. Good Stitches. She chose one of the blocks from Tula Pink's book, City Sampler, 100 Modern Quilt Blocks. She got in touch with Tula Pink, asked if she could super size the block to 12.5" x 12.5" and use it for our group. Well Tula said, yes, and here they are! You guys know I loved that book and making the blocks, so of course I had to make 4 instead of 2. Our only requirements were that we use bright solids and bright prints (no novelty prints.) Well that was easy for me! 
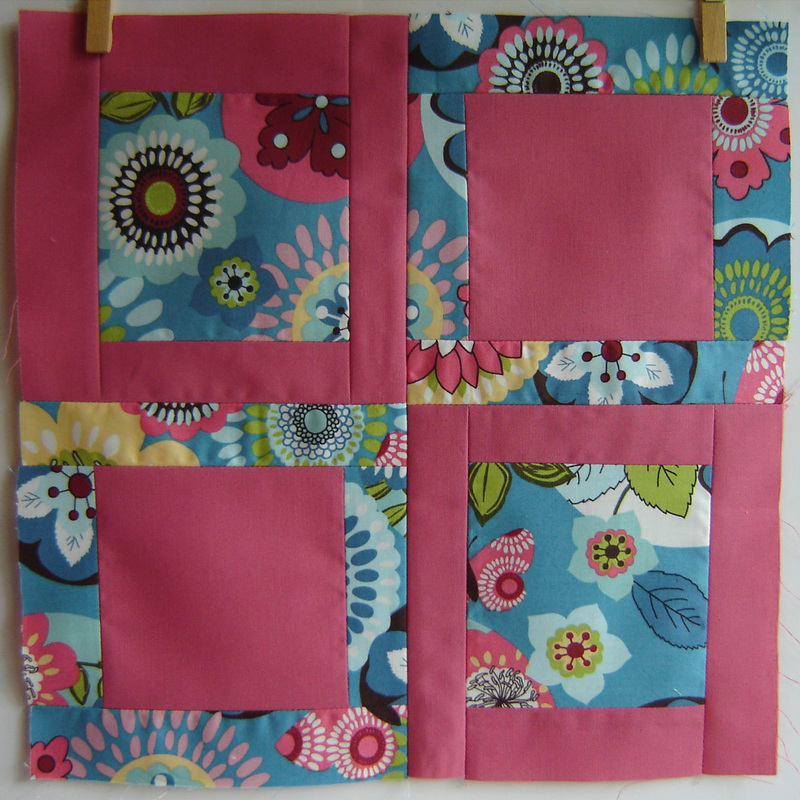
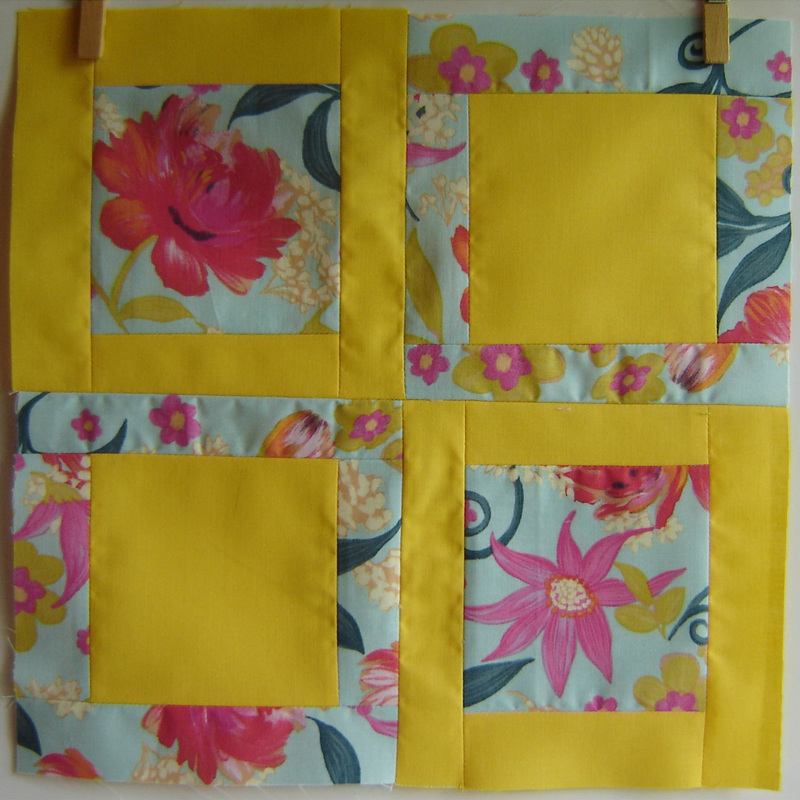
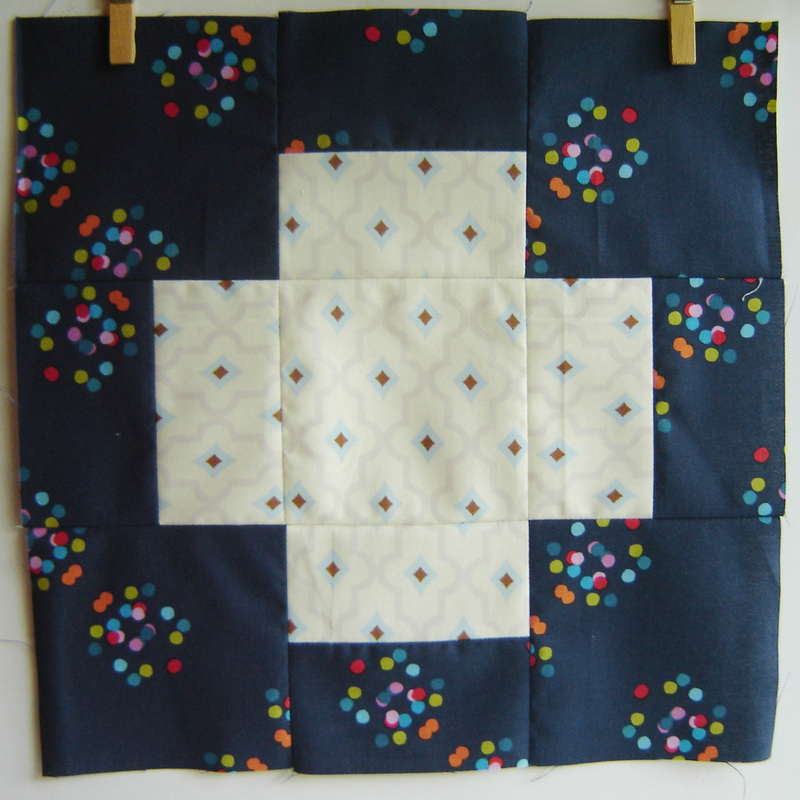
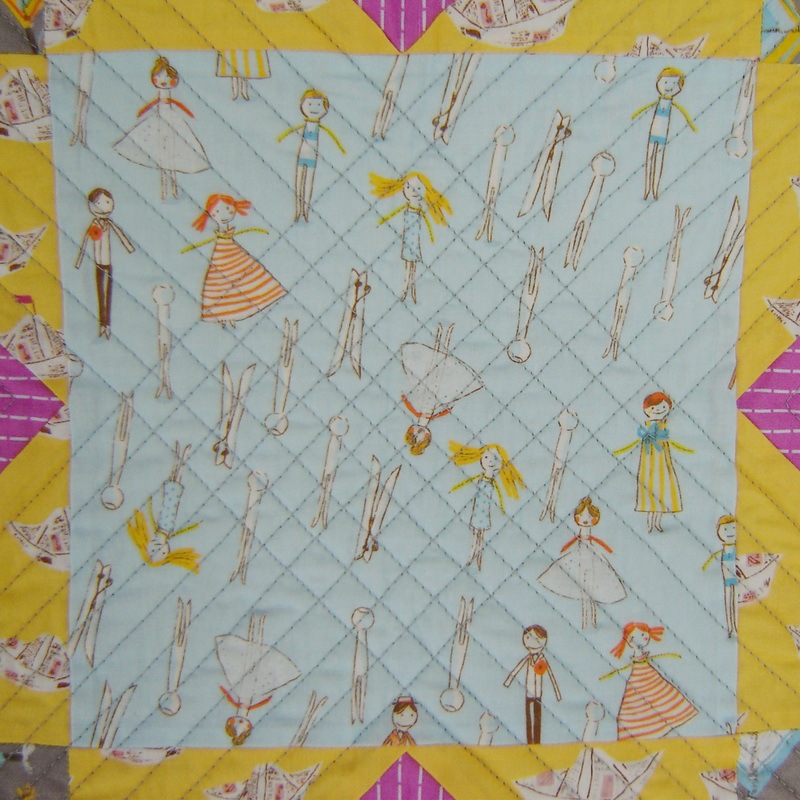
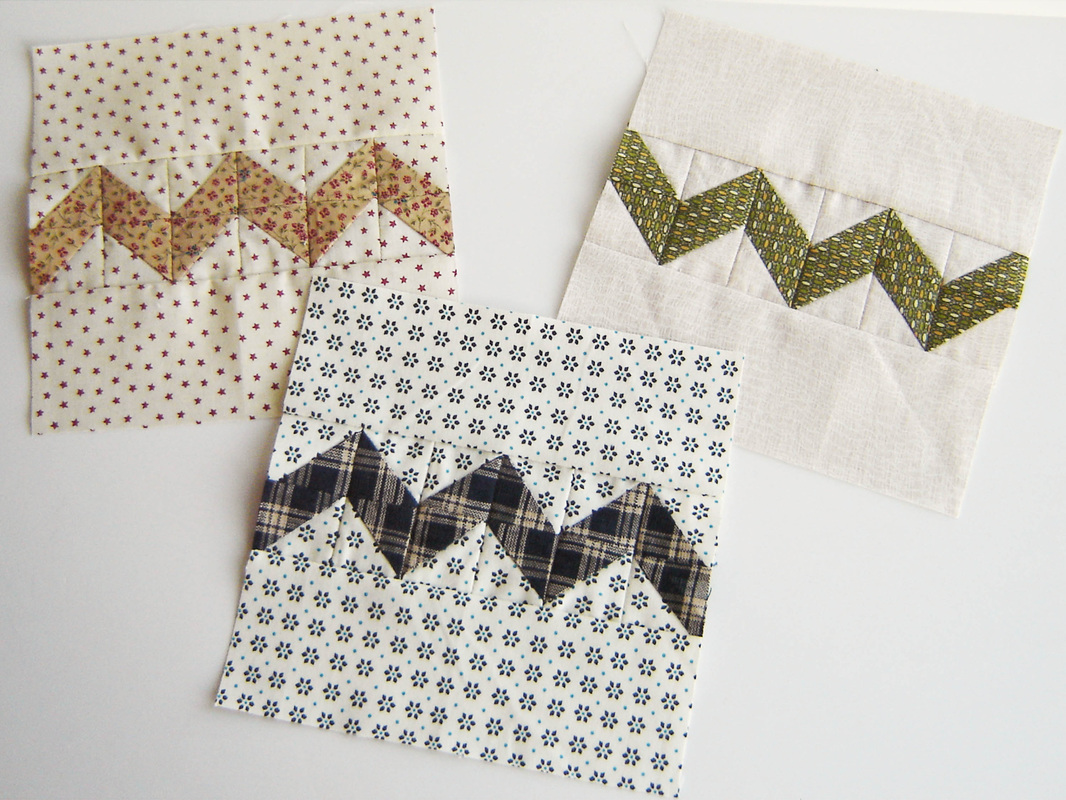
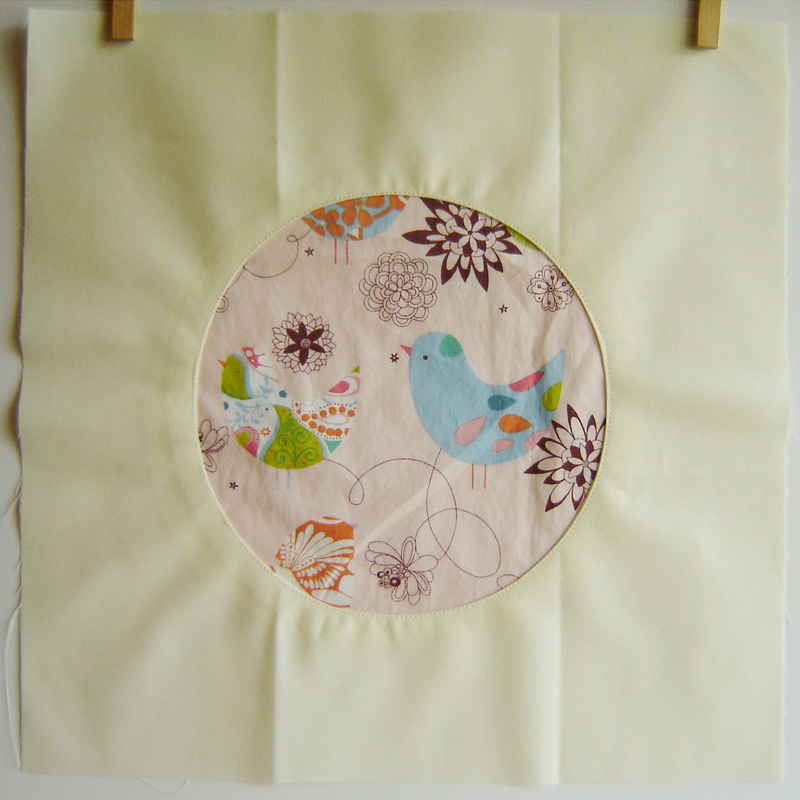
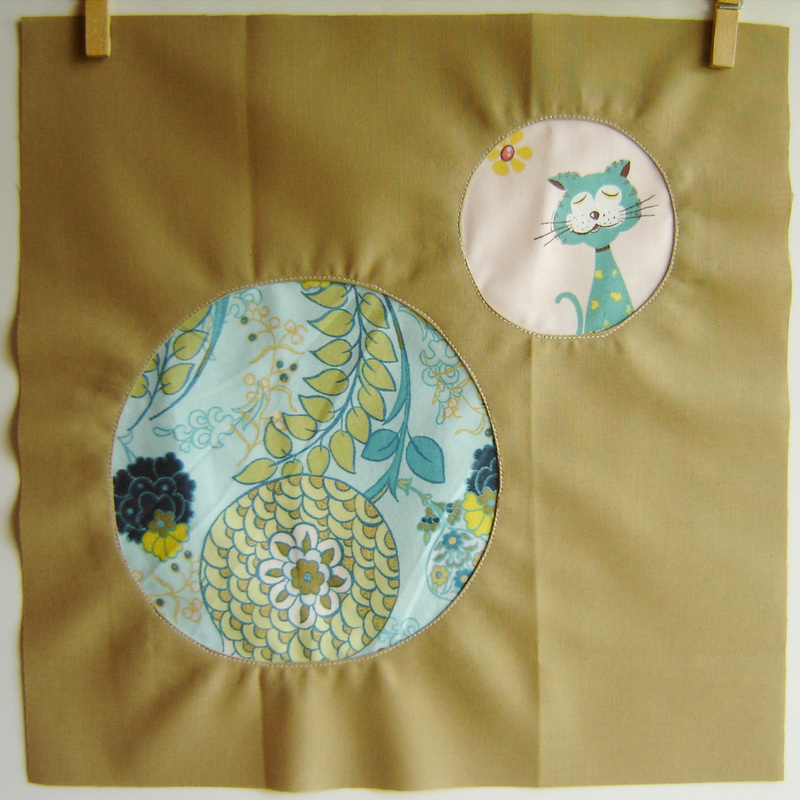
The next set of blocks are a special case. The do. Good Stitches quilter for June asked for a break, so our group leader had us make blocks to donate to OP Give Warmth hosted by Sarah at {no} hats in the house. The basic concept is that Sarah picks a color palette each month, and you can make ANY block (based on certain measurements, we did 12.5" x 12.5".) Well I chose the April color palette and made the blocks above and below. The block above is from a free tutorial by Two More Seconds and found HERE. I missed the fact that this block didn't measure 12.5" x 12.5" so I just modified it to work, since you can make any block it didn't really matter! The block below is from Faith at Fresh Lemons and can be found HERE. 
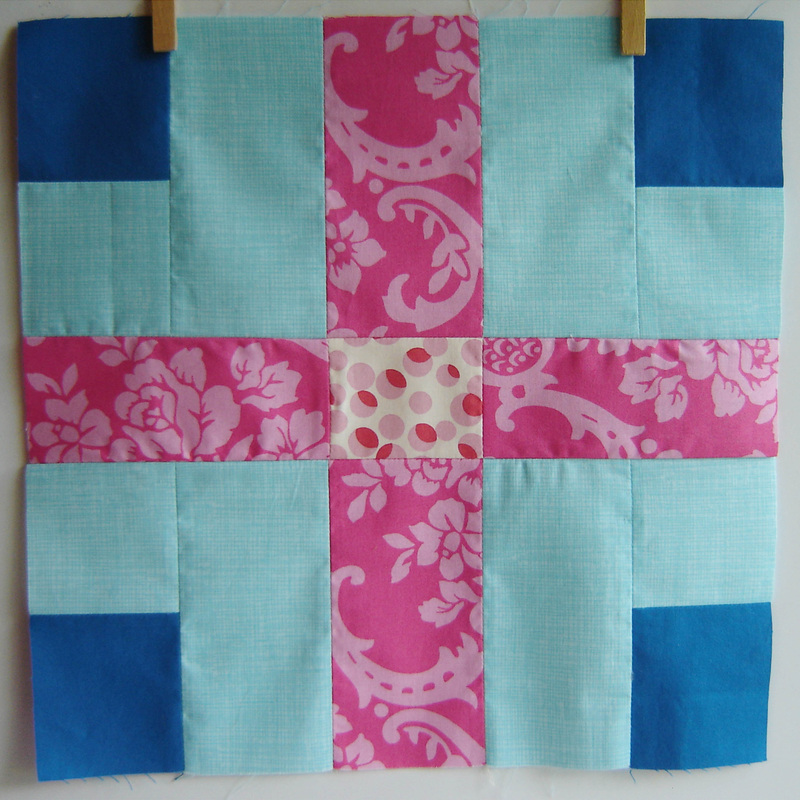
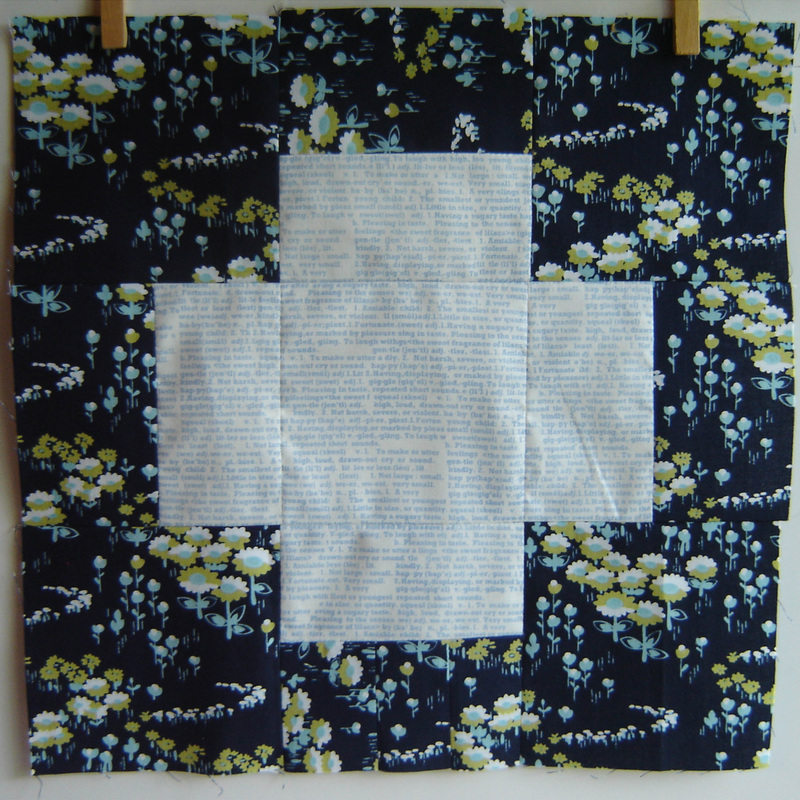
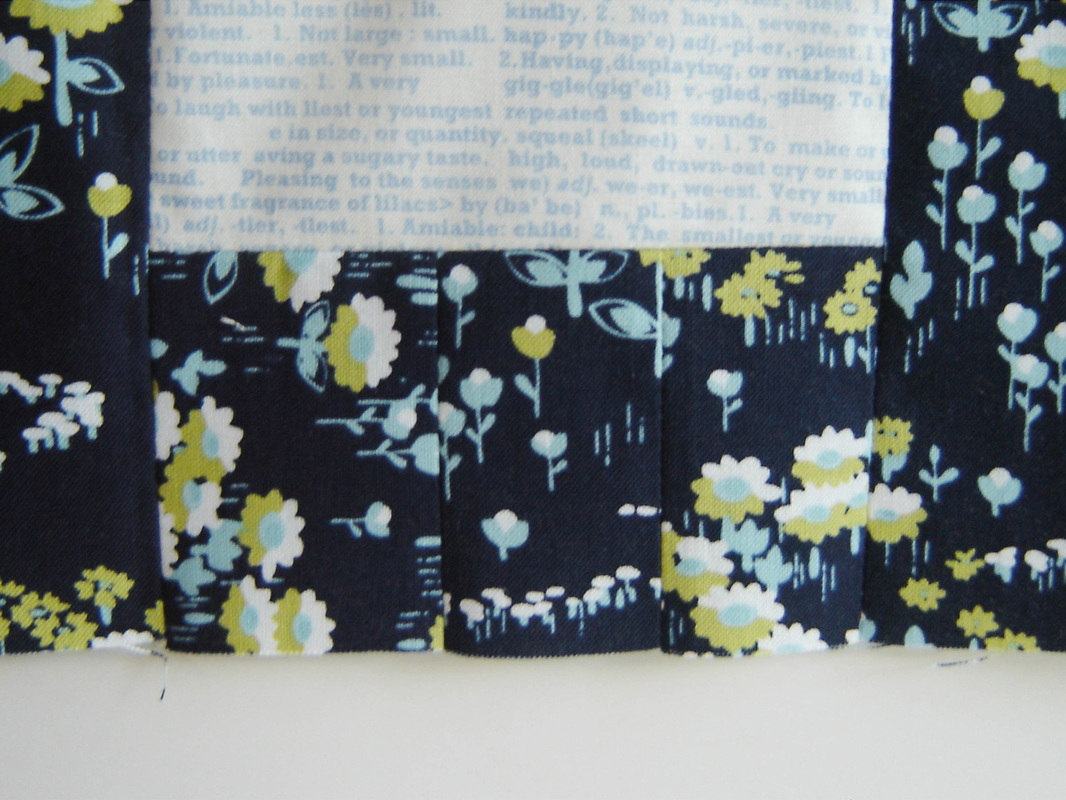
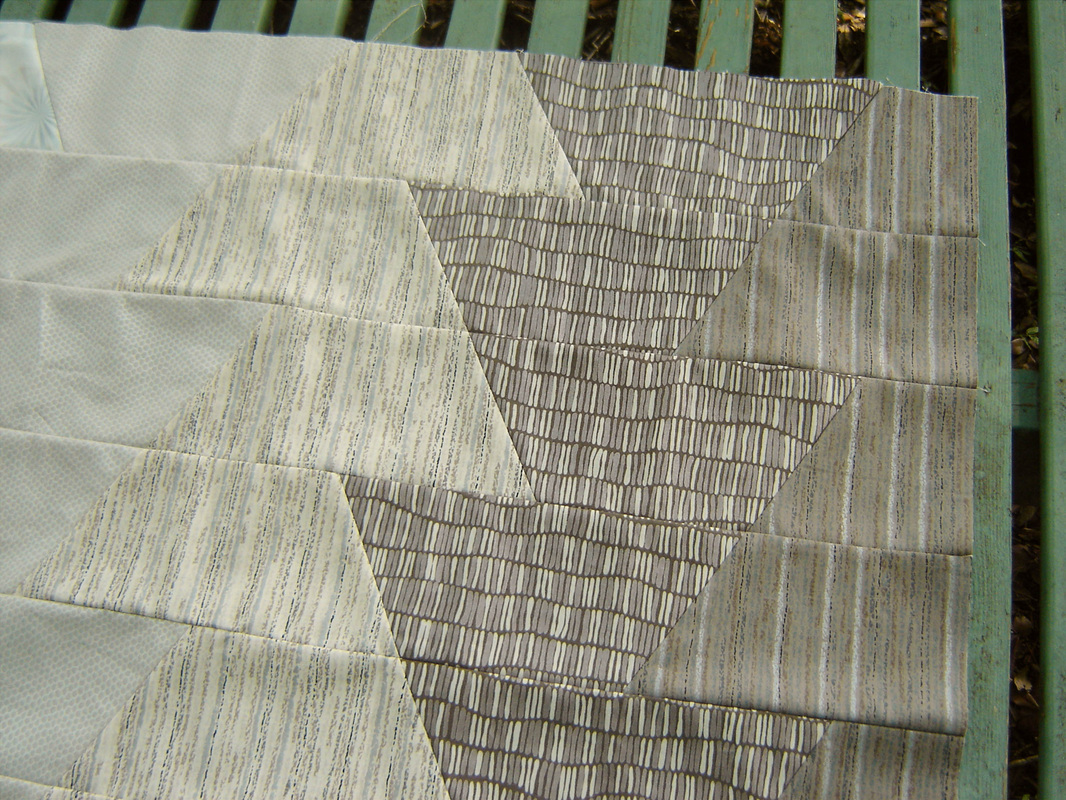
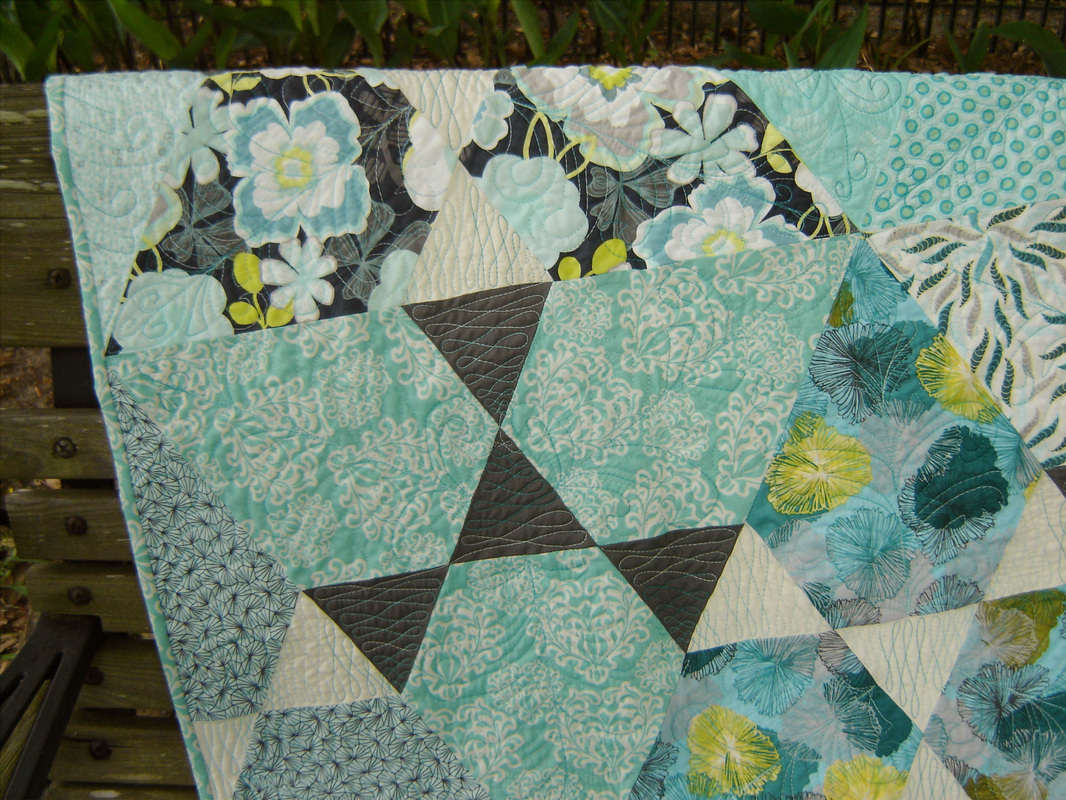
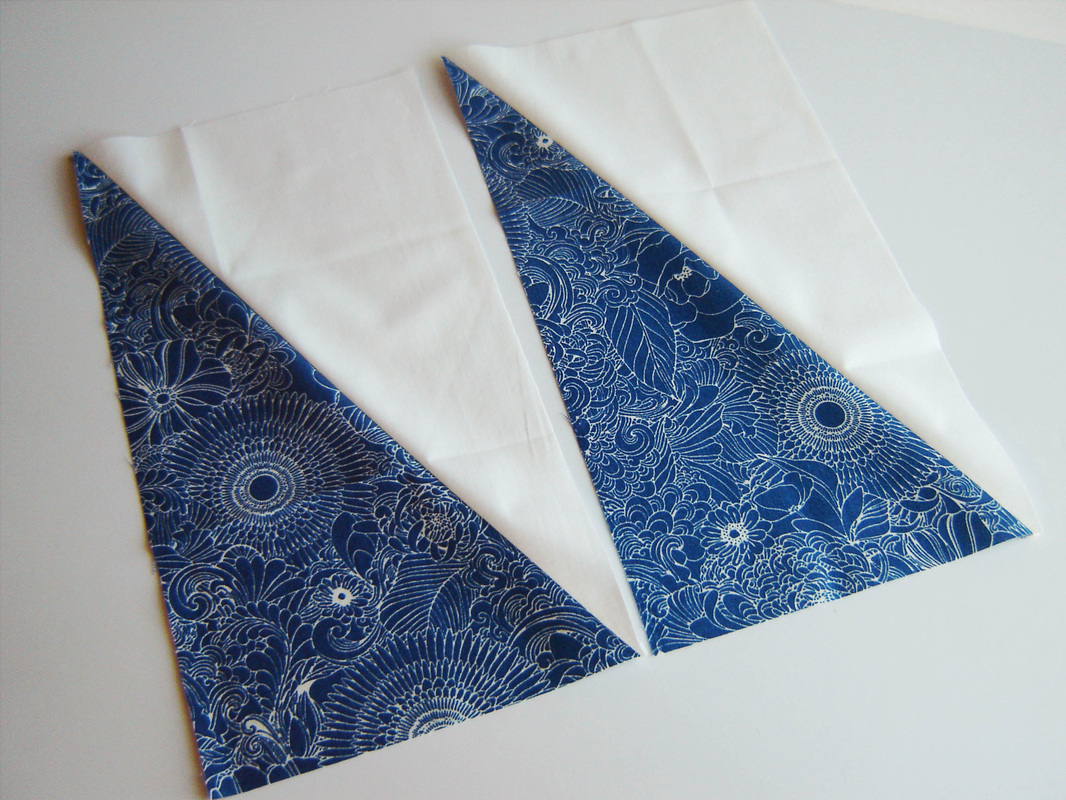
Our PROMISE do. Good Stitches leader, Sarah (sfredett) had a great idea and posted her July instructions early, so those of us with summer plans could have extra time to make them. She chose a chunky Greek Cross with navy backgrounds and low volume centers. I literally used the only two navy fabrics that I had in my stash (that I had enough of.) I love these blocks, so pretty and modern. In the block below, I thought I had enough of the fabric (Joel Dewberry) but in the end I didn't and had to piece one of the pieces from 3 little scraps, so I had just enough. You can see this below, and thankfully the print is busy enough you don't really notice my mistake. These measure 12.5" x 12.5." 
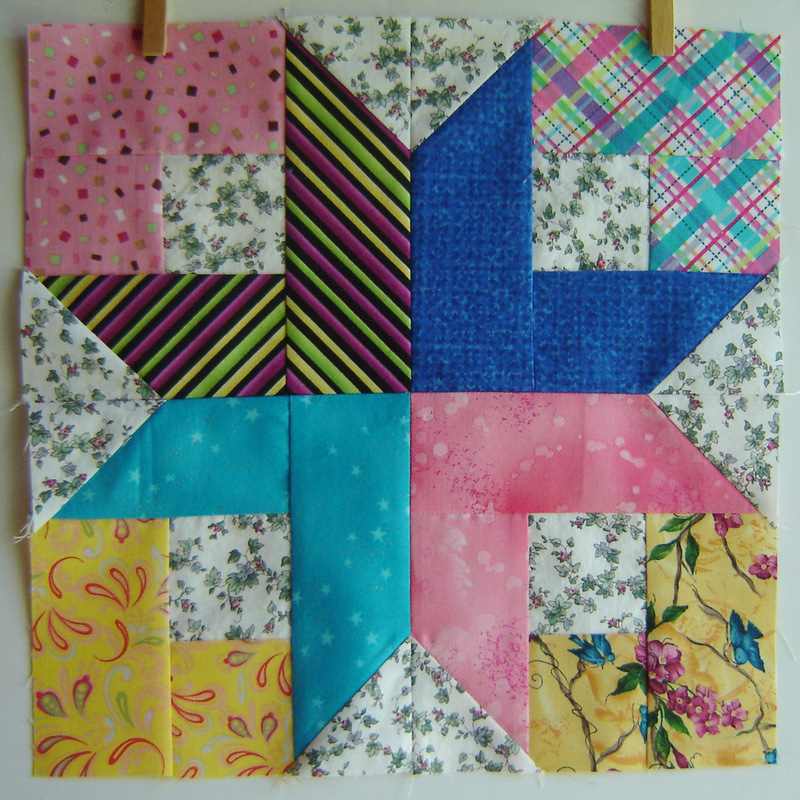
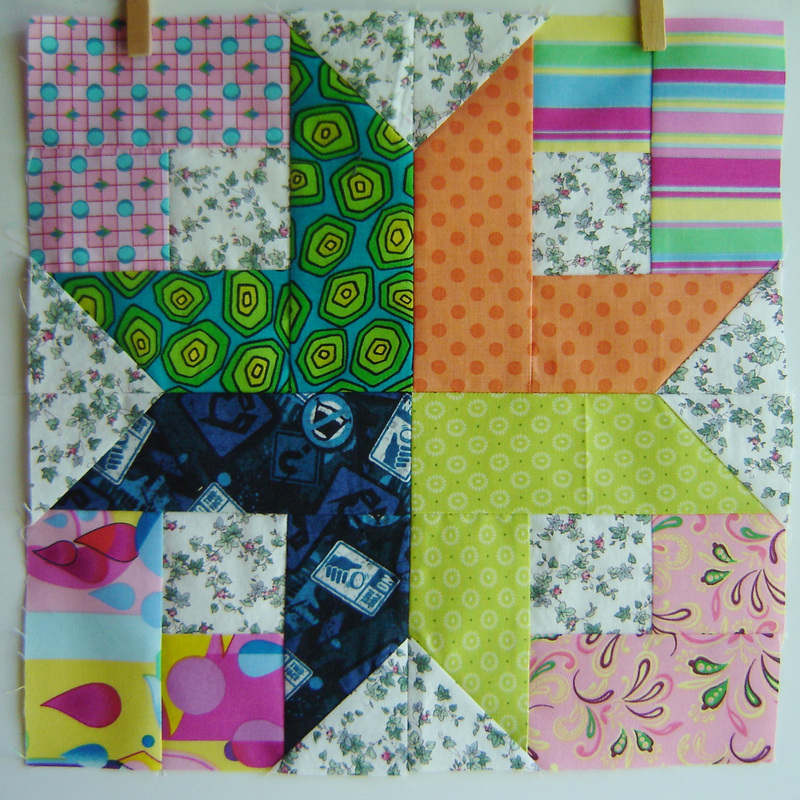
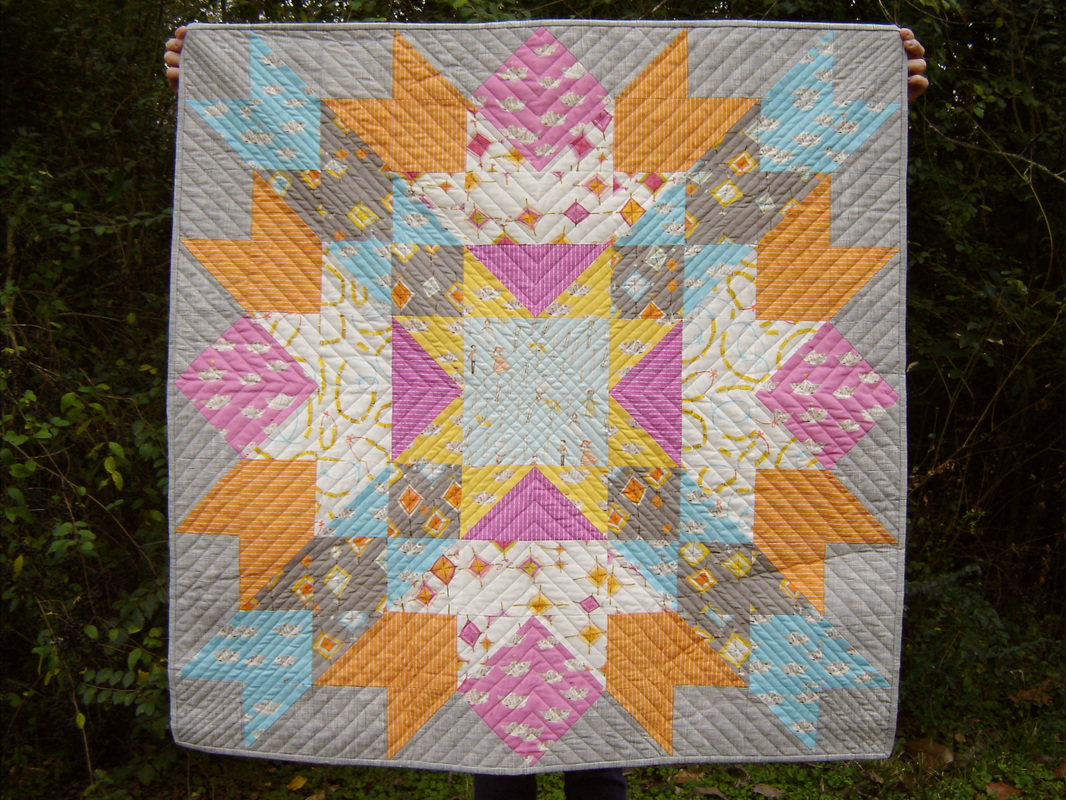
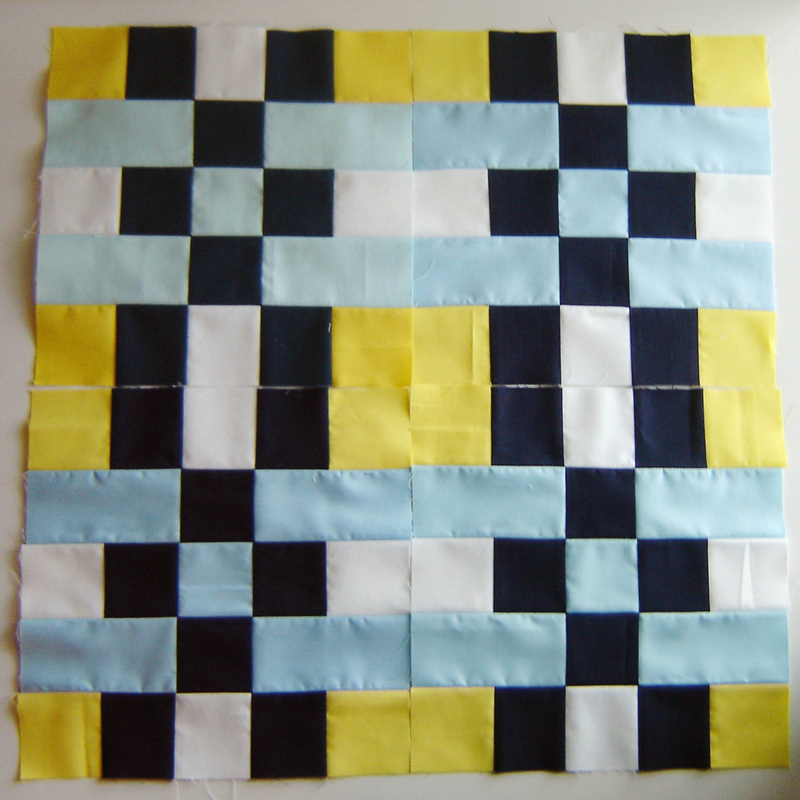
Last but not least, are two blocks for Celeste (celestejohnson2008) in Always Bee Learning. She sent us scraps and asked us to use Bonnie Hunter's Boxy Stars tutorial, found HERE. These went together really quickly, measured 12.5" x 12.5" and have a really neat effect once they are sewn together.
That is all I have today, folks, I hope you are enjoying your summer!
1 Comment
Well I'm only a day late on a post I said I'd have up yesterday. Oh well, I blame it on summer! Friday, I showed you guys my 'Gator Quilt, made using The 'Gator Quilt Pattern by I'm Feelin' Crafty. Well today I am showing you the back of that quilt, or is it the front? It is totally reversible! I didn't necessarily start out the quilt with the intention of it being reversible, but it ended up that way because I struggled to find a suitable backing for the 'Gator Quilt. Usually I like to have a solid fabric backing, usually a print that somewhat matches the front, but always something that I get the yardage at a great price. Once I had the front finished, I started searching for a suitable backing and just didn't run across anything that I was in love with. Then I started thinking about other options. What if I found a bundle of fabrics and pieced the backing into something that I actually liked, and better yet, my kids liked. This is where The Intrepid Thread comes in, because honestly, lately it has been my go to shop! Julie had these great bundles of Fun and Games by Lori Whitlock on sale, so I ordered a half yard bundle, plus one extra yard of a print in a different colorway. My basic math calculations were that this should be just enough. In the end I ended up adding in several solids just to have a bit of variety. I think it turned out pretty cute! In the photo above you can see the all over stipple that I stitched on this quilt. I used a matching green thread and it matches the other side as well as this one. The simple stipple worked equally for both sides and doesn't take away from the great prints in this collection of fabrics. At about the time I started to look around for backing fabrics, Heidi at Fabric Mutt announced her Graph Paper QAL. I figured this would work out perfectly for this quilt, a simple use of the fabrics and I could participate in this casual quilt along. I ended up cutting 9.5" squares, 60 total. Super simple construction, I didn't worry about fabric placement, my only goal was to not have two prints touching on the sides and with basically no planning, it just happened naturally. I knew with my 9" finished squares I would be cutting off chunks at the top and bottom, but the sides would fall just about perfect, so this didn't leave any overhang for the quilt backing like you normally need. So to accommodate, I cut 20 of the squares 9.5" x 11.5" and this allowed me to have 2" of overhang on each side. Once it was quilted and trimmed, the sides turned out to be perfect squares! I chose to totally machine stitch the binding on this one, and you can see that row of stitching above. I didn't cut my binding quite wide enough, so I admit it was a challenge to catch that edge, but on a whole I did, I only had to go back and fix a few spots (ok maybe 20) that didn't catch and since I used a matching blue thread you can barely see any mistakes anyway. I'm totally proud of my reversible/double sided quilt and honestly want to do this for every quilt I make now, especially throw quilts and quilts for children. You can change the look totally just by flipping it over! Before I totally forget, one of the things I forgot to mention about the other side of this quilt (The 'Gator Quilt) was that I did a straight matched binding, using a tutorial by A Quilter's Table, found HERE. I thought the three little ground pieces underneath the alligators would be a perfect use of this technique and I am really happy with the results. It extended the ground just a tad bit and added a neat little detail to this quilt! The best part is that on the other side, the brown fell really near other brown patterns and you don't even see it on the other side. Win win!
Today is my stop in the 'Gator Quilt Blog Hop! I am showing off my awesome 'Gator Quilt made from the pattern designed by I'm Feelin' Crafty! I was fortunate enough to be able to test the pattern and now I have this super cute quilt to share with you guys! Once I had agreed to be a pattern tester, I knew immediately that I wanted to make the whole quilt, I just knew my kids would love this. We are in South Louisiana, alligators are a common thing around here in these swamp lands! My journey started with a fabric pull from my stash, I have a lot of greens, so this wasn't a problem at all. I decided to make each alligator different, but each out of just one main fabric. The large polka dot is the medium sized alligator, the little white checks are the large and the green grid fabric is the small guy. I didn't have enough of any fabric in my stash for the background so I decided on this lovely Kona Ocean. It is a beautiful dark blue, but unfortunately it doesn't photograph well and honestly I am including the above photo to give you an idea of the true colors of this quilt, because once it was outside, my camera did some funky things with these pictures. The photos I chose to show today are the "most normal" ones and not the crazy neon blues that my camera created! I have a little bit of experience with paper piecing, but honestly not too much, just enough to get me through this without having to look up how to do it again. I was worried when I first started out that this would be too complicated, but honestly the way the pattern is broken down, it really was simple. The alligator is made up of lots of smaller sections, each of which are paper pieced. For example the tail is probably the most complicated part, as it is one large piece that has around 7 sections, but honestly it really isn't that hard. You then take the multiple sections that you paper pieced and just sew them together like normal blocks. So it looks really difficult, but it totally doable. I promise! I started with the largest alligator and since the pieces were larger I found it to be easier to put together. This also created a lot of smaller scraps that I was able to incorporate into the other two smaller alligators. I really had only a small pile of scraps leftover once I was done with the quilt, which is really nice. Once I made the largest, the smaller two went together so quickly. i think I did all my "learning" with the largest, and then the other two were just smooth sailing, you have learned what color goes where and how to construct the alligators, so the little tiny pieces don't seem daunting, it was fun! After the three alligators are pieced, the rest of the quilt is just a series of rectangles to assemble, quick and easy. Before you know it, you have a finished quilt! This is my first quilt that I have made that incorporates such a large amount of negative space and I love it! The finished quilt measures 54" x 70" or at least it did, that is what the pattern's finished dimensions are, but of course I had to change things a bit. You see once I had the whole top together I quickly realized this thing was way bigger than I thought it would be. I think in my head I was thinking small baby quilt, but no, this one is a good throw sized quilt. While staring at the quilt top laying on the floor I had an epiphany! What about making this quilt fit my youngest bed? You see earlier this year my husband built my youngest (2.5 years old) a trundle bed that rolls underneath my older son's bed. This trundle is not intended to lift up, but rather stay low to the ground. This creates a problem when it comes to comforters and quilts, they generously pile on the ground around the trundle. Yuck. So I grabbed my measuring tape and Eureka! 54" wide perfectly covers the mattress, doesn't drag the floor and will work out just fine. My only problem is the length, it was about a foot shy of being long enough. Thankfully I had enough background fabric left over and was able to add strips to both the top and bottom, so now my quilt measures 54" x 81." I have a quilt that is "almost" a twin size. The back of this quilt is a story I will share Monday, because I made this a double sided quilt, yes totally reversible. Because of this decision I limited myself with my quilting options. Originally I was going to do some really detailed free motion quilting on the alligators themselves, and then some kind of design for the background, think wood-grain or grass. Well that option is now out, I needed something that will work for both sides. That is where the simple stipple comes in. I bought a matching green thread and just went to town. I focused on getting the stipple very evenly spaced, I worked hard to get the tension perfect on both sides and I really paid attention to what I was doing. I quilted this baby in 5 hours! Woo hoo! So fast and I am really happy with the end result, the texture is great, I feel there is just enough stitching on the alligators to really secure them and their seams for generations to come. Since I used a green thread, it really stands out on the blue background and creates a nice visual element as well. I bound the quilt in the same Kona Ocean as the background and ta-da, finished quilt! Ok enough tooting my own horn, I did have one fail with this quilt. The pattern calls for embroidered eyes, on each of the alligators, which I did, except I didn't use a dark enough thread and I feel it is really hard to see the eyes. If I had to do it again I would use either a really dark green, or even a black so the eyes would really show up. I know you are ready to make one of these yourself! If you are, click HERE to purchase the pattern from the I'm Feelin' Crafty Craftsy store. Thank you so much Louise, for letting me test this pattern for you, it really was a rewarding and a learning experience, and now I have this beautiful quilt to show for it! Make sure to stop by the other participants in the blog hop next week and if you want more information about the pattern or how to paper piece, stop by I'm Feelin' Crafty for all of the details.
A month and a half ago, I had the pleasure to share my Lotus quilt over at Sew Sweetness as part of the Jaybird Quilts Sew Along, it was such a fun quilt to make and after it was finished I was just itching to make another one of Julie's patterns. They really are great y'all. Well I quickly figured out the next pattern I wanted to make after seeing Debbie's version of Northern Lights. Oh so pretty! So I ordered the Northern Lights pattern (I already had the Hex N More ruler) and I ordered this gorgeous fabric (Shimmer) by Jennifer Sampou. I quickly got to work! I decided to make the Baby sized quilt, I ordered seven different fabrics, so I only had to figure out which one to eliminate. Well as you can see, in the end I was unable to eliminate one and instead decided to use them all! So in order to use them all, I added another row to the width, and two extra rows to the length. Thus my quilt ended up being right in between the Baby size and Lap size, measuring 44" x 56." The great thing about this pattern is how easy it is to customize to get just the right size. I intend for this quilt to be a wall hanging in my house and honestly this is probably the most elegant thing I have ever sewn. Very subdued for me, usually I am all bright and crazy, so this is really a step out of my comfort zone. Now you can't really tell in these photos, but the fabric is named "Shimmer" for a reason, it has just a slight touch of metallic accents or shimmer to them. They are gorgeous! Really stunning. and I hate the fact that you just can't appreciate it unless you see these in person. The print in the very center, the lightest one, is my absolute favorite, in a way it reminds me of a snake skin, but it is just so darn perfect! I chose to arrange the fabrics from dark to light back to dark and also to separate the two different colorways. I was hoping for a smooth transition, and I am really pleased with the result. This quilt top was cut out and sewn in about a day, which is also one of the things I love about Jaybird Quilts patterns, so fast and it packs such a visual punch. I had hoped to have it quilted by now (I already have my thread) but am struggling to find the perfect backing and honestly don't want to just settle to have it finished. So that being said, I took it outside this morning for a quick photo shoot and for now we will have to enjoy it as just a quilt top. I plan to matchstick quilt this one via She Can Quilt inspiration, but not all over, rather in a very deliberate pattern, I think it will be awesome, or at least I hope it will be! It looks great in my head! I am linking up this quilt with the Jaybird Quilts Sew Along. It was really fun to be part of the Blog Hop, and then turn around, sew another quilt and be able to link it up! If you get a chance, head over to the link up and check out the other entries, there are some fabulous projects over there! Thank you to both Sara at Sew Sweetness for holding such a fun Sew Along and for Julie at Jaybird Quilts for designing such awesome patterns and rulers!
Popping in today to share an upcoming blog hop hosted by I'm Feelin' Crafty. I was lucky enough to be a pattern tester for this great new quilt pattern and will be showing off my finished quilt on Friday. Not to brag or anything, but it turned out so darn cute! I know you will want to make one too once you see all the great participants in this blog hop!
June 10th- I'm Feelin' Crafty June 11th- A Quilter's Table June 13th- Marci Girl Designs June 14th- I'm Feelin' Crafty- showing off other Testers work! June 15th- Made By Amanda Rose June 16th- Wombat Quilts June 17th- Wips and Tuts June 18th- Shaffer Sisters June 19th- Crafty Shenanigans June 20th- I'm Feelin' Crafty Excited already? Ready to purchase the pattern? Then click HERE to go to the I'm Feelin' Crafty Craftsy shop to purchase the pattern and get stitching!
I know I've been super quiet lately, but I've been steady sewing and have quite a few finishes to show off in the upcoming weeks, so please stay tuned and I hope you all are thoroughly enjoying your summer! Inspired by Stitched in Color's Flirting the Issue Sew Along, I was excited to quickly whip up a skirt. The sew along was based on the Flirting the Issue Skirt by Anna Maria Horner, which is a free project download from her (Anna Maria Horner's) website. I dug through my stash, found the beautiful Anna Maria Horner voile seen above, made a quick trip to the store for some muslin (for the lining) and enough elastic to make that gorgeous waist. Three supplies, super easy. The skirt is very easy to make, two rectangles, mine were cut at 19" tall by the width of fabric twice, which ended up being more than twice my waist measurement, so this skirt is very full. Once the rectangles are sewn, you stitch the outer fabric to the lining and then create four channels for the elastic. The most time consuming part is threading all the elastic, but I used my car rider line time effectively, then came home and finished it up. The hem was super quick and the last step, voila, you have a finished beautiful skirt. Well beautiful on a hanger and not necessarily on me. It fits, it is the right length, but honestly I think it is too full for my frame. I don't necessarily think it is horrible on me, and I definitely need to find the perfect shirt to wear with it (which will help a lot,) it just isn't that flattering. Oh well, lesson learned, next time I will stick with the straight skirt. But for now I will enjoy the glorious waist band, which is my favorite part and the main reason I decided to make the skirt, oh I love those gathers! You can see my lining fabric, or inside of my skirt below. I'm linking up my finished (in about 3 hours) Flirting the Issue skirt with Stitched in Color's linky party! Rachel did a great job illustrating the steps and talking your through each section making this skirt even easier to put together. A great project for a beginner! Thank you Rachel! Lastly I need to take care of a little business, time for me to post the winner of the Juliana Horner fabric bundle below from Sew Mama Sew Giveaway Day! The Random Number Generator from Random.org chose number 74, which was Beth T. Congratulations Beth, whom I already contacted, she quickly responded and I already shipped the fabrics to her, enjoy them Beth! Thanks to all that entered and all my new followers!
Welcome to Marci Girl Designs! If you are here for the first time from Blogger's Quilt Festival, I would love for you to have a look around. I am a stay at home mom to two precious boys and I fill all my free time with all forms of sewing, and in the last few years, mostly quilting. I'm pretty obsessed, but anyways, enough about me, let's talk about this quilt! This is my Cosmic Burst quilt that was part of two sew alongs that took place a few years ago. It started with the Cosmic Burst Quilt Along hosted by Distant Pickles and then I chose to use "my precious" fabrics and incorporated the My Precious Quilt Along hosted by Kelby Sews. Way back in the day when this quilt was started, I worked pretty diligently on it and had the quilt top finished in a semi-timely manner (good for me anyway.) In typical fashion, once the quilt top was finished, it sat for a long time, probably a year. Well at the beginning of last year (think last March) I finally basted, quilted and bound it. I even took pictures back then, but NEVER blogged about it. I have no idea why I never blogged about it, I ADORE this quilt, it is currently hanging in my living room and I love it, I guess I just never sat down to share this beauty. Well today is the day and I decided to share it today by participating in the Blogger's Quilt Festival! I said before that this quilt started with the Cosmic Burst Quilt Along, so the pattern was chosen from the very beginning, I knew what the overall quilt design was based on this awesome pattern that Julie designed. I still love it today as much as I did when I started this project. Such a pretty design. I then had to choose what fabrics I wanted to use to compliment the pattern. Well I knew I wanted something pretty special, so i chose to cut up my hoarded, precious Heather Ross, Macaroni Love Story that was printed exclusively for Spoonflower. I created 3 digital mock-ups of fabric placement (I didn't want to mess this thing up) and after debating for a while, chose the one I liked best. In the end I added in Patty Young, Lush, Running Stitch (the pink and orange dotted stripes) and then framed the whole thing with a background fabric of Alexander Henry Heath (the gray crosshatch,) still one of my all time favorites. I had to do quite a bit of figuring to get all of the directional prints to fall perfectly, especially those blue and yellow sail boats, that was a mental challenge! But once the cutting was done, the sewing was fast and before I knew it I had a finished quilt top. And there it sat forever. Well in the meantime Heather Ross designed fabric for Hancock Fabric stores, one of the prints was a matching clothespin doll print in gray (which worked out PERFECTLY) and I was able to buy enough yardage for the back of this precious quilt that featured all of these much loved and hoarded fabrics. So I basted it, and then had to decide on quilting. I pretty much knew that I would straight line quilt this one, and I wanted to feature the radiance of that center star from which the whole quilt pattern was based. I started quilting on the diagonal in 1/2" lines from corner to corner and then the opposite direction, this creating the wonderful grid right in the dead center of this quilt, seen below. I just loved how that turned out. Oh and I used a nice matching gray quilting thread, to hopefully blend in, but yet be seen just the right amount. Once the center sections were quilted, I just echoed the quilting in diagonal "triangles" in the top, bottom and sides. I chose to do this stitching 3/4" apart, hoping it would make the center section stand out, and I think it did exactly what I was intending! Once the quilting was complete I decided to bind it in the same Alexander Henry Heath, so that the binding would just blend into the background. The finished quilt measures 40" x 40", I used a cotton batting (don't remember the details) and it is a perfect wall hanging.
I am so happy to have shared this finished quilt today and thanks so much for reading along! I also wanted to mention that I am fairly new to Instagram, and I would love it if you would follow along with my daily antics, you can find my Instagram account here, marci_girl. The Giveaway is now Closed! Thanks for the 441 comments and to all that entered. I will announce the winner soon! Hello and welcome to Marci Girl Designs, today is Giveaway Day at Sew Mama Sew! If you are here for the first time from Sew Mama Sew, I'd love for you to stick around and have a look, but if you don't have time, you can just enter to win some fabric, that is cool too!
Today's giveaway is five fat quarters of Juliana Horner fabric from JoAnn Fabrics! Are you familiar with Juliana Horner, you know daughter of the great fabric designer Anna Maria Horner? Well Juliana has designed 3 separate lines for JoAnn Fabrics and the giveaway today is from two of those lines. You see I was kinda on the fence about the first two lines she designed. I loved the actual prints, but the colors were far from my style and I just couldn't commit, until line three came out and I knew they were right up my alley! So I went to my local store, and started digging and ended up picking out my favorite prints, and these favorites are the five featured above. The first (brown latticework) is from her first line and the other four are from her third. They all play together nicely, don't you think? If you would like to win this little collection, all you need to do is this: 1. Answer this question in the comments: Are you looking forward to any big blockbuster movie this summer? If not, any TV show that is starting up this summer that you are looking forward to? 2. For all my followers, you get a second entry, just leave a second comment, and if you want to become a new follower (hello!,) leave a second comment as well! Details: This giveaway is open May 12, 2014 and will close May 16, 2014 at 5 pm PST The max number of entries you may have is two. This giveaway is open internationally, as long as you have an address that I can ship to! The winner will be picked randomly via a Random Number Generator. Thanks and have fun entering all those giveaways! Today, I am over at Sew Sweetness with a Jaybird Quilts pattern review as part of the Jaybird Quilts Sew Along. Above you can see my fabric palette for the quilt that I created, and below you can see a sneak peak of the finished quilt. Click HERE to read my review of the pattern Lotus by Jaybird Quilts and to see my finished quilt!
Hello all! Hoping you had a good weekend and excited about starting a new week! I am, or at least really trying! I have a few bee blocks to share and will start out with the Always Bee Learning group. First up are some Hobo Blocks for "hettie k." These measure 6.5" square and I believe the symbol above is "Poor Man." These blocks feature 1.5" half square triangles, not my strongest skill for sure, but I don't think these turned out that bad. Hettie is making a quilt for her youngest sister's graduation present, I can't wait to see it all together. Above is an "Ogee Quilt" block for "QuiltGenius." Our bee is based on the concept of "learning" and I have to say that this is a great block for that. I used Leanne's (She Can Quilt) technique for sewing curves, which worked so well, sewing these curves was a snap. Well I messed up and was supposed to trim those blocks, which I didn't and I just stitched them together, then realized they were too large and decided to trim them at that point. That was a mistake, because when sewing together the final block you can see that my curves aren't very "curvy" but rather a tad squished and choppy. Sorry about that, but I really did learn a lot from this block. I don't remember the finished size, but it is large, I will guess around 16" x 16." My last set for the Always Bee Learning group are for "flickrdeb50" and technically these are super early, as these are the May blocks. Debbie requested a very easy block (but another learning one that I have never done before) half rectangle triangles. The tutorial for these blocks can be found HERE. It really is quite straight forward and I know that these blocks will become part of an awesome quilt! These measure 7" x 13" unfinished, and I made 6 of them. We were only supposed to make 4, but alas I messed up 2 (let's just say my iron didn't like those 2) so I was able to squeeze 2 more out of the fabric she sent and make things all right with the world! Now let us talk about that PROMISE. At the beginning of the year I applied for do.Good Stitches, I was at a point that I realized I was now in only one bee and was able to take on a bit more work that was going to go to a great cause. Fast forward around 1.5 months and Rachel was able to fit me into an existing group, the PROMISE Circle. I was to start with April's blocks and just continue on with the group. Well being the overachiever that I am, I also offered to make blocks for the March round as well. So first up are the two blocks that I made for "carrie bee" for the month of March. She was the quilter that month and chose to have us all make reverse applique blocks based on the tutorial found HERE. Her requirements were creme, tan or beige background, with a spring like fabric "applique." These were the only two solid fabrics in my stash that "kinda" match those requirements, I certainly hope they work. I also want to defend myself and say that these blocks photographed horribly and really and truly aren't this wrinkly and HORRID looking. I promise they aren't. I think the camera just picks up every single wrinkle and flaw, but honestly they were fairly smooth and flat. These blocks were easy and dare I say FUN. I didn't think I would like them, but I really did, and made both in less than an hour. These both measure 12.5" x 12.5." I have to say that I love my little "hippie dippy" cat down there peeping out. Last but certainly not least are 4 "plaid" blocks that I made for the month of April for "eschbaugh." From my understanding she designed this block which measures 10.5" x 10.5" and is made out of 2.5" squares and 2.5" x 4.5" rectangles. She asked for 2 blocks, but said any more would be appreciated, and since I have a ton of solid blue in my stash, I was happy to oblige and honestly these were really straight forward. Don't you think this design is so clever. I certainly do! In conclusion, I am happy/thrilled/delighted to be part of the PROMISE Circle of do.Good Stitches and look forward to contributing to quilts that will end up doing good and contributing to those in need!
|
Marci GirlA feisty mom designing, sewing and blogging her way through everyday life!
|