• Home
  • Blog
  • 2020 Finish - A - Long
  • 2019 Finish - A - Long
  • 2018 Finish - A - Long
  • Contact
  • 2017 Finish - A - Long
  • Shop
Marci Girl Designs

Style Stitches Monthly Bag Challenge - April's Bag

4/11/2011

2 Comments

 
Picture
How does that song by Whitesnake go?  Oh yeah, "Here I go again, on my own...." that about sums up how I feel about starting this project.  I sure hope it goes a lot smoother than the last one.  It certainly looks cute, and there aren't any zippers, and the checkbook cover I am using now is ugly, vinyl and tearing, so a new one would be nice.
Picture
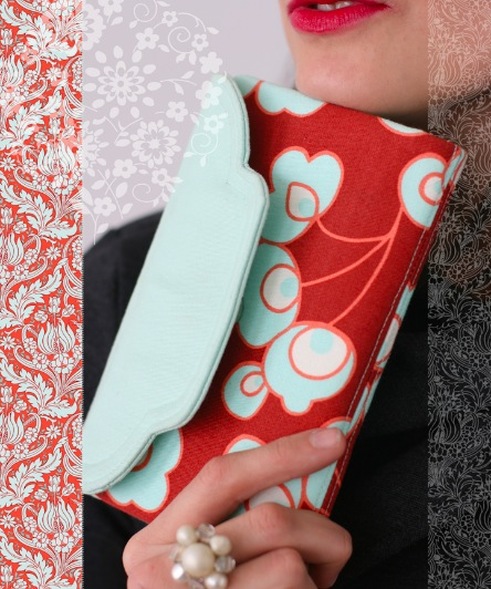
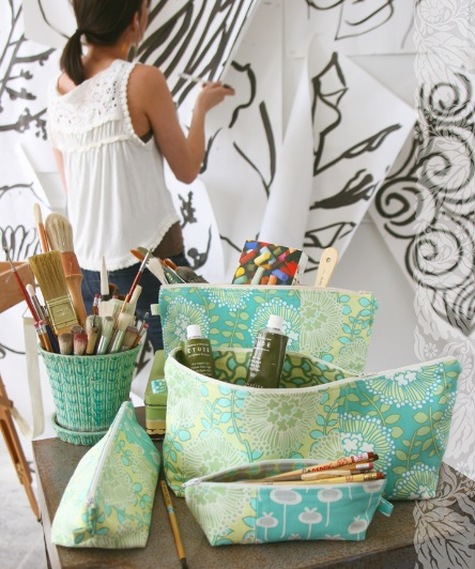
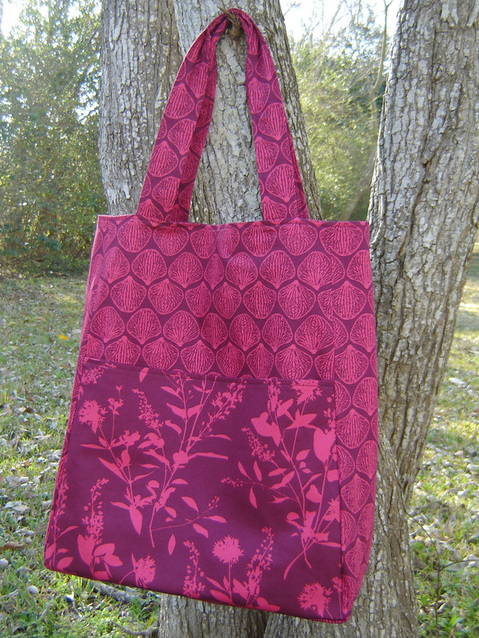
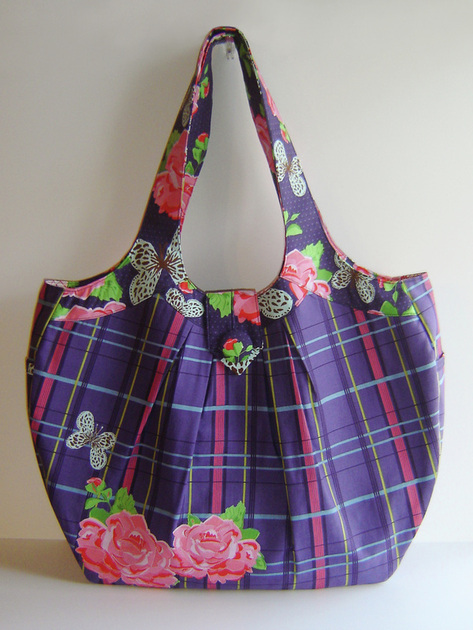
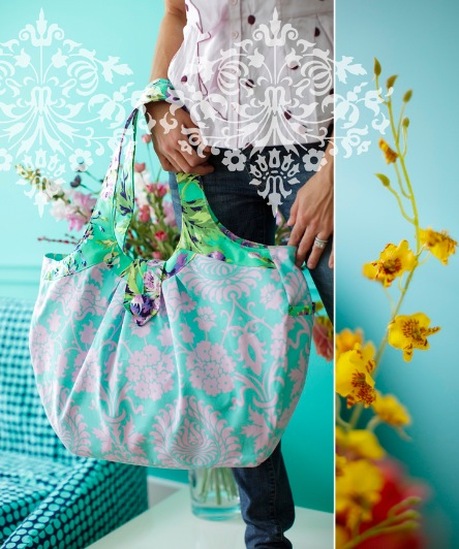
Amy Butler's Beautiful Balance Checkbook Cover from Style Stitches
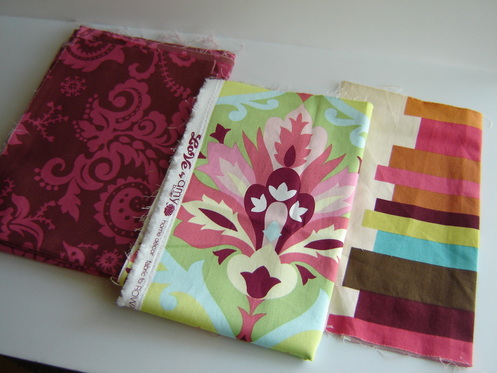
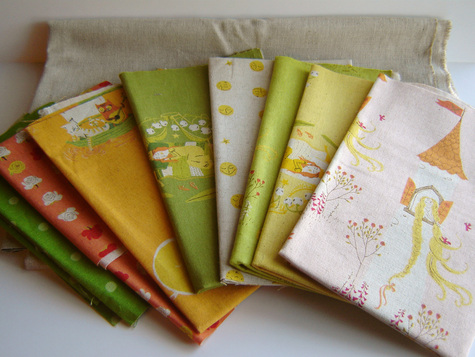
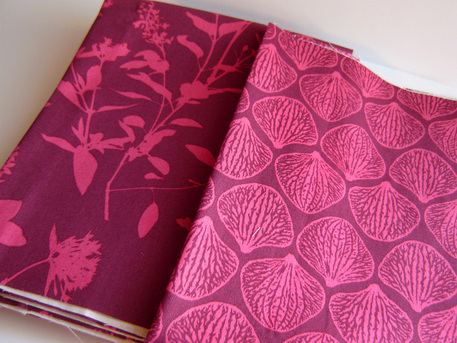
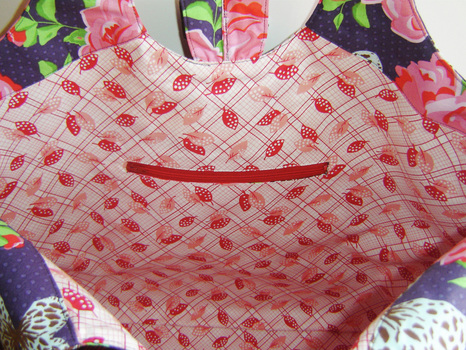
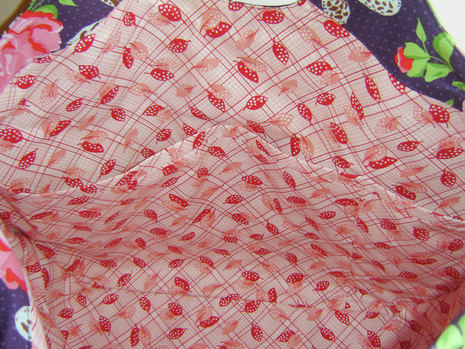
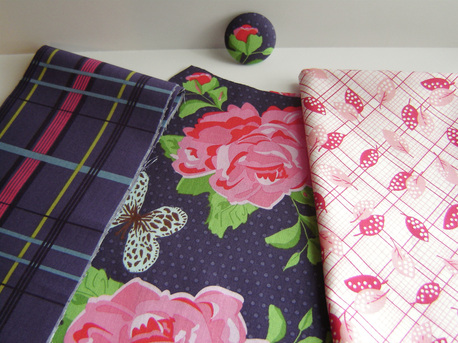
The first step is to pick out the fabrics that you plan on using.  I have chosen some Amy Butler "Love" fabric as the main body (the center fabric,) and a remnant of Anna Maria Horner for the flap (the fabric on the right, below,) and I think the two toned rose print is also by Amy Butler, but honestly I'm not sure, but it will be the interior print.  I love the Anna Maria Horner print and have been waiting to use this small piece on something special, and hopefully this project turns out OK!  I guess you will have to check back later this month to see the finished results.  Wish me luck...
Picture
2 Comments

Style Stitches Origami Bag Set

3/25/2011

11 Comments

 
My apologies, this post is rather long and a slight bit bitchy.  If you don't like bitchy...stop reading now! Oh, and you probably wouldn't like me, because I can be...
well you know....
Picture
Aren't they lovely?  I love them, I love the fabrics, I love the sizes, I love that I did a good job constructing them.  What don't I love?  The instructions on how to make these babies.  Let's start at the beginning.  I decided to make all six bags because I plan on storing all my little sewing supplies in them, possibly buttons in the smallest, zippers in one of the medium ones, and wip's in the biggest (that baby can hold a ton of stuff!)  I think the design of the pouch is great, I love the little tabs on the sides, I love that when they are open, the opening is so big and easily stays open on it's own.  On a whole I am really pleased with them.
Picture
X-Large, Small and Mini Origami Bags
Picture
Large, Medium and X-Small Origami Bags
I am going to start by saying that last year alone, I easily put in 200+ zippers in clutches, pouches and purses.  I am not a novice by any means, I'm not being a cocky jerk, I'm just saying....it isn't my first rodeo.  I shall also say that I thoroughly read all of the instructions in the book LIKE 10 TIMES.  The instructions start out simple enough, cut it out, interface the heck out of it, sew the panels together, make the little tabs, and put the zipper in.  Amy Butler's method of doing this was a little laborious, but honestly for a beginner, this is a great way of doing it without messing it up.  I thought the few diagrams were great.  Yes, you are sewing the same seam twice on each side, but this wasn't a big deal and easy enough.
Picture
Everything sounds peachy right?  WRONG.  So the next step involved top stitching a 1/4" seam across the top on each side of the zipper, starting and stopping 1/2" from the ends.  OK done.  Easy enough.  Now what?  Oh, I know flip the right sides toward each other, and have the two linings together, and yes, open the zipper half way.  Yes, I got it.  Stitch around the right side all the way up to the zipper teeth.  Then stitch around the lining fabric, all the way up to the zipper teeth (leave an opening for turning in the center bottom.)  Trim the bottom corners and trim the excess seams by the zipper ends and opening.  Here is my first complaint - Why in the heck am I trimming these bottom corners, when I will be making a gusset later?  Alright, a waste of time, but I got over it, no biggie, I don't know why I'm doing it, but OK, whatever.  I created the gussets, measured, struggled like heck to line up the side and bottom seams, especially on the x-small and mini bags, but it wasn't that big of deal.  Now it is time to flip those babies right side out!  Yeah, I am almost finished!
Picture
X-Large and X-Small Origami Bags
Picture
Large and Mini Origami Bags
Picture
Medium and Small Origami Bags
I turned my first one right side out through the opening at the bottom of the lining, poked the lining into the bag, and OH MY....WHAT THE HECK....THIS LOOKS LIKE CRAP.  All that stopping a 1/2" away from the zipper ends, what does that create?  A messy messy yuck area on both ends of the zipper on the inside of the pouch.  I really wish I had taken a photo of this yuck, but alas, I was too busy CURSING.  Since I had done as instructed (on the first one only, thank goodness) I had trimmed the extra fabric by the zipper.  Once it was turned right side out, I was left with this area of raw edges (with not enough fabric to turn under) and the ends of the zipper tape just sticking out.  OK, maybe I'm just picky or anal or whatever, but this was not acceptable.  What had I done wrong?  I re-read the instructions 10 MORE TIMES.  To this day, I still don't know what I did wrong.  I would LOVE to know, I'm sure it was something simple, and I will slap my forehead and scream NO WAY THAT WAS SO SIMPLE!

So what now?  I sealed the raw edges with Fray Check, once that had dried, I used a matching thread and whip stitched the heck out of it.  What was my solution for the rest of the bags?  Don't trim the fabric by the zipper ends!  Once I turned it inside out, I fought and wrestled with tucking in the zipper tape ends, then carefully turning in the lining to cover all that mess, and whip stitching the whole thing closed (See photo on the left, below.)  The zipper ends with the stopper weren't quite as bad, but I still whip stitched the opening to the zipper, so that there weren't any open holes (photo on the right, below.)   What I thought was the funniest, was at this point the directions say to stitch (on the right side) the side seams between the two separate top stitching areas to connect the two top stitched seams.  WHAT?  How in the heck am I supposed to stitch over this big jumble of crap? Somebody answer that please.  Oh well, I left it alone, so when you are looking at my bags (on the sides) there is a gap of top stitching, and yes it looks weird.  Really weird, and if you look on the inside of my bags at the zipper ends, that also looks really weird.  Can you tell that I was annoyed?
That all being said and done, they are complete, I love them, they will serve their purpose.  I feel truly sorry for everyone (beginner or advanced) who also struggled with this, I guess I am the type of person who just needs more pictures or something, but this project was seriously lacking something in the form of directions.  The worst part is, that now I am really worried about the complexity of the rest of the projects in this book.  If I got this frustrated with project #3, what am I going to think about project 9-12?  I guess only time can tell!  Until next time....
Picture
11 Comments

Style Stitches Monthly Bag Challenge - March's Bags

3/4/2011

2 Comments

 
Picture
This month's bag is really six bags, and not really bags, but rather pouches.  I love them, I love pouches, and I love the fabric that I am going to use, so I am super excited about this month's project!  Amy Butler has named these pouches "Origami Bag Set" and it is a collection of pouches ranging in size from extra small to extra large.
Picture
Amy Butler's Origami Bag Set from Style Stitches
The first step is to choose your fabric and get together the supplies needed (a.k.a. six zippers!)  I am using fabric designed by Heather Ross, it is from her Far Far Away II line of fabric for the exterior of these bags, and a simple muslin colored denim for the interior lining.  I am also throwing in a matching, green on green polka dot that I have no idea who designed (maybe Echino?) just to add another complimentary fabric to the group!
Picture
2 Comments

Style Stitches Reversible Everyday Shopper

2/25/2011

3 Comments

 
Picture
All finished!  Amy Butler's Style Stitches, Reversible Everyday Shopper!  It is HUGE, way bigger than I thought it would be, even though everyone said it was big, I didn't realize that it was this big!  So large in fact, that I had to bring this baby outside to take photos of it.  I do like it though, and this one was super easy to make, which was nice.  It is made of two Joel Dewberry Home Dec prints, and the first picture shows the outside, and the second picture shows the inside (or the other way around, however you look at it, because it is reversible!)

I didn't change much on the pattern this time, only a few things.  I only interfaced one side (or half) of the bag, though I did interface both bottom pieces.  I just felt with the Home Dec fabric it didn't need that much interfacing.  Instead of having the two pockets out of the same print, I did one of each print, I liked it this way much better.  I also added about 2 inches to the length of the handles, I wanted a little more room under the arms.  Other than that, I used the pattern as it was!  I think this pattern would be awesome if you made it about 75% smaller, which I may do in the future!

The hardest part of this bag was ironing on all that darn interfacing, after you finish up that task, it really only took a few hours to construct the bag, which was really nice.  Amy Butler has this project labeled as easy, and it really was!
Picture
Picture
3 Comments

Style Stitches Monthly Bag Challenge - February's Bag

2/8/2011

0 Comments

 
Picture
This month's bag is the Reversible Everyday Shopper, a rather large but simple bag, that I think will be the perfect bag to store the latest sewing or crochet project.  The bag is completely reversible, which is cool, and is supposed to be a "easy" project, so I hope it goes together quickly!
Picture
Amy Butler's Reversible Everyday Shopper from Style Stitches
The first step is to pick out your fabrics that you intend to use for the bag, and get all your supplies together, thankfully this month, not many supplies are needed!  I have decided to use Joel Dewberry's Ginseng line of home dec fabrics for the exterior and interior of the bag.  These prints are from the Mulberry colorway, don't you love that name!  I already have it cut out, I just need to starting ironing on all the interfacing - Boo!  Check back towards the end of February to see my finished bag!

Picture
0 Comments

Style Stitches Cosmo Bag

1/31/2011

5 Comments

 
Picture
Here it is, my finished Cosmo Bag for January's Style Stitches challenge.  Honestly, I finished this baby about a week ago, but rain and gloom kept me from taking photos of it.  I am really pleased with the finished results, and think she really turned out quite pretty.  I made a few changes to this bag, one being the flower and butterfly applique in the left bottom corner of the bag.  Bari J Ackerman is the designer of the fabric, and I also was inspired by Bari J to create the applique with free form stitching all over the flowers and enhancing the butterfly details.  I think the applique really enhanced this bag and gave it a little something extra!  I had never done anything like this before, and it was hard to "let go" and do something free form, but I think I accomplished the task without being too structured. 

What else did I change on this pattern, you ask?  Well, I didn't want all those floppy interior pockets, so on one side I put in a zippered pocket, and on the other interior side with the pockets, I created three pocket spaces instead of two.  I also changed the side dimensions on this pattern.  It seemed like everyone's complaint was that the bag was too large, so instead of changing the whole bag size, I simply took off some of the width of this bag.  The sides and bottom at the widest point measure (on the pattern) about 6", I knocked off a few inches, so the finished sides and bottom are only about 4" wide.  This decreased the space in the interior of the bag a lot, which is what I wanted.   I also added one layer of plastic canvas to the bottom of the bag for added structure, I slipped it in between the outside and interior of the bag before the two were sewn together.  This gave the bag a little more structure, and it is able to stand on its own, with the exception of the handles!

Amy Butler labeled this project as "easy" in her book, well this wasn't my definition of "easy" at all.  It wasn't hard, but it should have been an intermediate project, I hate to think about a brand new sewer trying a project like this for the first time - scary!  The handles were down right aggravating, and the lack of photos in this book (or diagrams) made it harder than it needs to be.  Now that I have finished one, the second would be easy, I am just not sure if I need to make a second one!  Oh, and next time I would definitely interface the fabric that is used to make the button, so that the "silver" button doesn't show through the fabric, like it does now.  All of that being said, I did enjoy constructing it, and look forward to making the rest of the items in her book!

Picture
Picture
Picture
Picture
Picture
Picture
Picture
5 Comments

Style Stitches Monthly Bag Challenge - January's Bag

1/4/2011

2 Comments

 
Picture
Jemellia at JemJam had a fantastic idea and decided to host a monthly sew along challenge using Amy Butler's newest book, Style Stitches.  There are basically 12 bag styles, one for each month!  I already owned the book, and as soon as I heard about her idea, I decided to jump aboard, something fun for the new year!  The first bag is the Cosmo Bag and is pictured below!
Picture
Amy Butler's Cosmo Bag from Style Stitches
The first step for the month is to pick out your fabrics that you intend to use for the bag, and get all your supplies together!  I have decided to use Bari J Ackerman's Country Lane line of fabrics for the exterior of the bag.  The plaid will be the main body, and the floral will be the trim and handles.  You can already see my big button I have created for the bag too!  For the interior of the bag I will be using Apron Strings by Karen Stephens, Leaves in Red.  Check back towards the end of January to see my finished bag!
Picture
2 Comments
Forward>>

    Marci Girl

    A feisty mom designing, sewing and blogging her way through everyday life!

    Subscribe
    Follow on Bloglovin
    Picture
    Follow on Bloglovin


    Categories

    All
    2017 Finish A Long
    2018 Finish A Long
    2019 Finish A Long
    Bee Sewcial
    Book Reviews
    Clothing
    Everyday Life
    Giveaways
    Handbags
    Handstitched Class
    Inspirational Projects
    Marci Girl Designs
    Projects
    Quilt Along
    Quilting Bees
    Quilts
    Random Thoughts
    Recipes
    Sew Along
    Sewvivor
    Style Stitches
    Swaps
    The Penny Sampler Class
    Tutorials
    Wip Wednesday


    Happily
    Participating In:

    Picture
    Picture
    Picture
    Picture
    Picture
    Picture

    Picture


    Archives

    January 2020
    November 2019
    October 2019
    July 2019
    April 2019
    March 2019
    February 2019
    January 2019
    December 2018
    October 2018
    August 2018
    July 2018
    June 2018
    May 2018
    April 2018
    March 2018
    February 2018
    January 2018
    December 2017
    November 2017
    October 2017
    September 2017
    August 2017
    July 2017
    June 2017
    May 2017
    April 2017
    March 2017
    February 2017
    January 2017
    April 2016
    March 2016
    February 2016
    January 2016
    September 2015
    July 2015
    October 2014
    September 2014
    August 2014
    July 2014
    June 2014
    May 2014
    April 2014
    March 2014
    February 2014
    January 2014
    November 2013
    October 2013
    September 2013
    August 2013
    July 2013
    June 2013
    May 2013
    April 2013
    March 2013
    February 2013
    January 2013
    November 2012
    October 2012
    September 2012
    August 2012
    July 2012
    June 2012
    May 2012
    April 2012
    March 2012
    January 2012
    December 2011
    November 2011
    October 2011
    September 2011
    August 2011
    July 2011
    June 2011
    May 2011
    April 2011
    March 2011
    February 2011
    January 2011
    December 2010
    November 2010
    September 2010
    August 2010
    July 2010
    June 2010
    May 2010
    April 2010
    March 2010
    February 2010

    Picture

    RSS Feed

Powered by Create your own unique website with customizable templates.