My apologies, this post is rather long and a slight bit bitchy. If you don't like bitchy...stop reading now! Oh, and you probably wouldn't like me, because I can be...
well you know....
well you know....

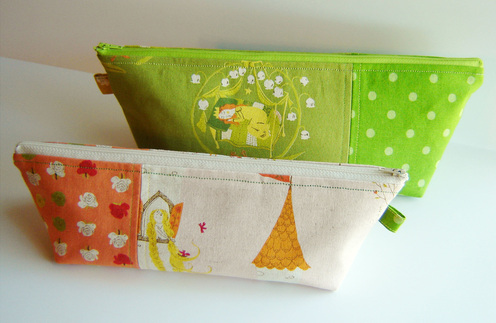
Aren't they lovely? I love them, I love the fabrics, I love the sizes, I love that I did a good job constructing them. What don't I love? The instructions on how to make these babies. Let's start at the beginning. I decided to make all six bags because I plan on storing all my little sewing supplies in them, possibly buttons in the smallest, zippers in one of the medium ones, and wip's in the biggest (that baby can hold a ton of stuff!) I think the design of the pouch is great, I love the little tabs on the sides, I love that when they are open, the opening is so big and easily stays open on it's own. On a whole I am really pleased with them.

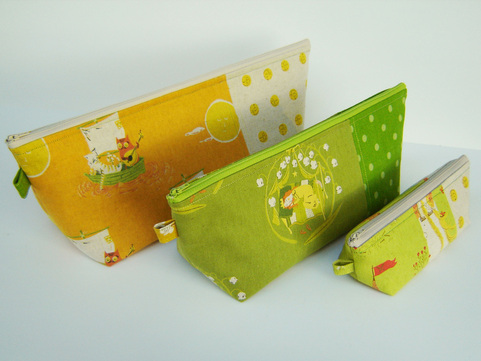
X-Large, Small and Mini Origami Bags
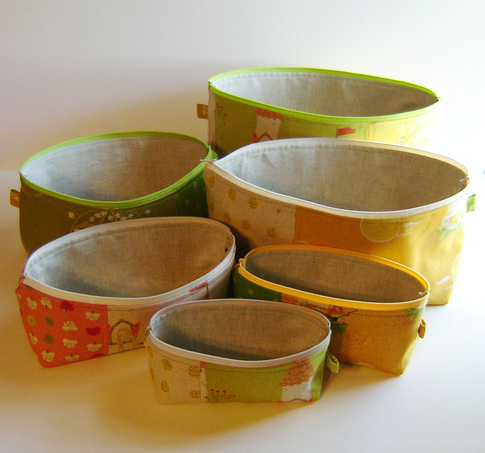
Large, Medium and X-Small Origami Bags
I am going to start by saying that last year alone, I easily put in 200+ zippers in clutches, pouches and purses. I am not a novice by any means, I'm not being a cocky jerk, I'm just saying....it isn't my first rodeo. I shall also say that I thoroughly read all of the instructions in the book LIKE 10 TIMES. The instructions start out simple enough, cut it out, interface the heck out of it, sew the panels together, make the little tabs, and put the zipper in. Amy Butler's method of doing this was a little laborious, but honestly for a beginner, this is a great way of doing it without messing it up. I thought the few diagrams were great. Yes, you are sewing the same seam twice on each side, but this wasn't a big deal and easy enough.
Everything sounds peachy right? WRONG. So the next step involved top stitching a 1/4" seam across the top on each side of the zipper, starting and stopping 1/2" from the ends. OK done. Easy enough. Now what? Oh, I know flip the right sides toward each other, and have the two linings together, and yes, open the zipper half way. Yes, I got it. Stitch around the right side all the way up to the zipper teeth. Then stitch around the lining fabric, all the way up to the zipper teeth (leave an opening for turning in the center bottom.) Trim the bottom corners and trim the excess seams by the zipper ends and opening. Here is my first complaint - Why in the heck am I trimming these bottom corners, when I will be making a gusset later? Alright, a waste of time, but I got over it, no biggie, I don't know why I'm doing it, but OK, whatever. I created the gussets, measured, struggled like heck to line up the side and bottom seams, especially on the x-small and mini bags, but it wasn't that big of deal. Now it is time to flip those babies right side out! Yeah, I am almost finished!
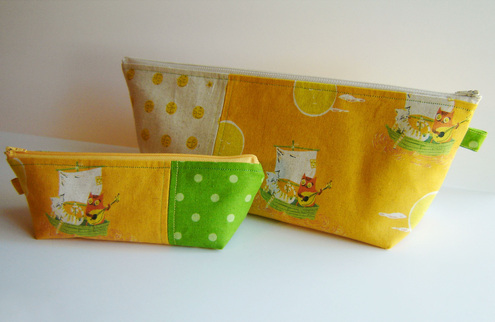
X-Large and X-Small Origami Bags
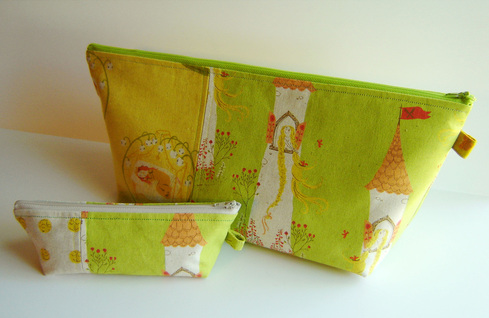
Large and Mini Origami Bags
Medium and Small Origami Bags
I turned my first one right side out through the opening at the bottom of the lining, poked the lining into the bag, and OH MY....WHAT THE HECK....THIS LOOKS LIKE CRAP. All that stopping a 1/2" away from the zipper ends, what does that create? A messy messy yuck area on both ends of the zipper on the inside of the pouch. I really wish I had taken a photo of this yuck, but alas, I was too busy CURSING. Since I had done as instructed (on the first one only, thank goodness) I had trimmed the extra fabric by the zipper. Once it was turned right side out, I was left with this area of raw edges (with not enough fabric to turn under) and the ends of the zipper tape just sticking out. OK, maybe I'm just picky or anal or whatever, but this was not acceptable. What had I done wrong? I re-read the instructions 10 MORE TIMES. To this day, I still don't know what I did wrong. I would LOVE to know, I'm sure it was something simple, and I will slap my forehead and scream NO WAY THAT WAS SO SIMPLE!
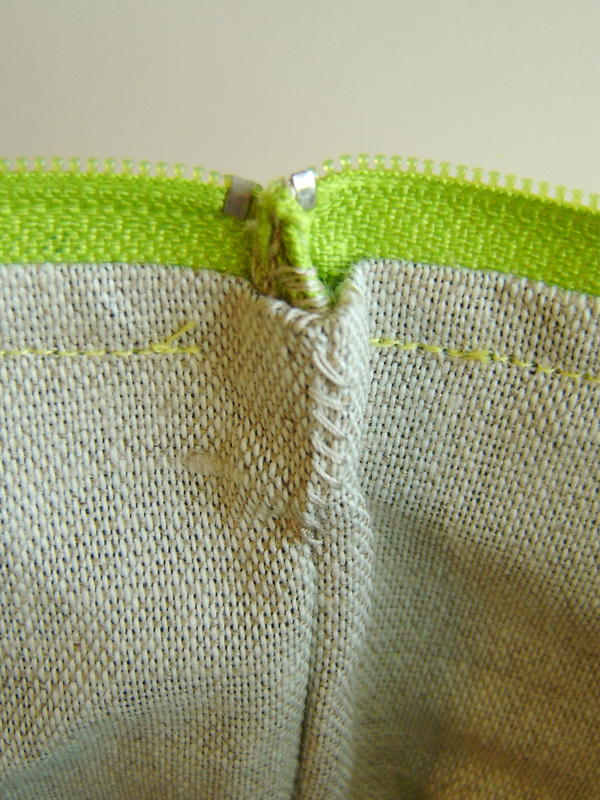
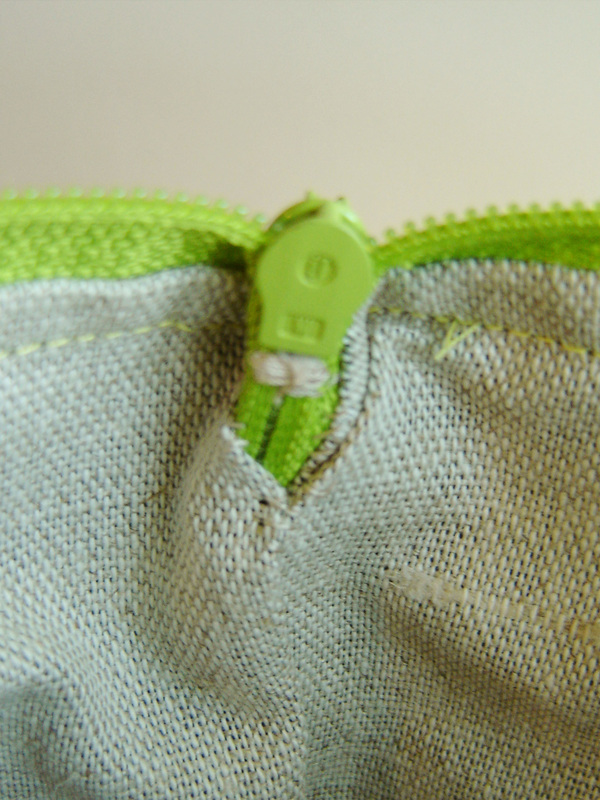
So what now? I sealed the raw edges with Fray Check, once that had dried, I used a matching thread and whip stitched the heck out of it. What was my solution for the rest of the bags? Don't trim the fabric by the zipper ends! Once I turned it inside out, I fought and wrestled with tucking in the zipper tape ends, then carefully turning in the lining to cover all that mess, and whip stitching the whole thing closed (See photo on the left, below.) The zipper ends with the stopper weren't quite as bad, but I still whip stitched the opening to the zipper, so that there weren't any open holes (photo on the right, below.) What I thought was the funniest, was at this point the directions say to stitch (on the right side) the side seams between the two separate top stitching areas to connect the two top stitched seams. WHAT? How in the heck am I supposed to stitch over this big jumble of crap? Somebody answer that please. Oh well, I left it alone, so when you are looking at my bags (on the sides) there is a gap of top stitching, and yes it looks weird. Really weird, and if you look on the inside of my bags at the zipper ends, that also looks really weird. Can you tell that I was annoyed?
So what now? I sealed the raw edges with Fray Check, once that had dried, I used a matching thread and whip stitched the heck out of it. What was my solution for the rest of the bags? Don't trim the fabric by the zipper ends! Once I turned it inside out, I fought and wrestled with tucking in the zipper tape ends, then carefully turning in the lining to cover all that mess, and whip stitching the whole thing closed (See photo on the left, below.) The zipper ends with the stopper weren't quite as bad, but I still whip stitched the opening to the zipper, so that there weren't any open holes (photo on the right, below.) What I thought was the funniest, was at this point the directions say to stitch (on the right side) the side seams between the two separate top stitching areas to connect the two top stitched seams. WHAT? How in the heck am I supposed to stitch over this big jumble of crap? Somebody answer that please. Oh well, I left it alone, so when you are looking at my bags (on the sides) there is a gap of top stitching, and yes it looks weird. Really weird, and if you look on the inside of my bags at the zipper ends, that also looks really weird. Can you tell that I was annoyed?
That all being said and done, they are complete, I love them, they will serve their purpose. I feel truly sorry for everyone (beginner or advanced) who also struggled with this, I guess I am the type of person who just needs more pictures or something, but this project was seriously lacking something in the form of directions. The worst part is, that now I am really worried about the complexity of the rest of the projects in this book. If I got this frustrated with project #3, what am I going to think about project 9-12? I guess only time can tell! Until next time....


 RSS Feed
