• Home
  • Blog
  • 2020 Finish - A - Long
  • 2019 Finish - A - Long
  • 2018 Finish - A - Long
  • Contact
  • 2017 Finish - A - Long
  • Shop
Marci Girl Designs

Triple-Zip Pouch - An Alternate Ending Tutorial

1/31/2013

28 Comments

 
My last post showed off the two Triple-Zip Pouches that I made back in December.  At the time I figured out a different way to finish up those pouches (different from Debbie's tutorial.)  You see, the last steps of the tutorial were really hard (virtually impossible) for Debbie to photograph, so there weren't any photos, just step by step directions.  Well that is a problem for me, I'm totally a visual learner, so I was kinda like "what?"  So I stopped and I thought about it for a few days.  The more I thought about it, I started pondering a different way to finish, then decided to try it out.  Success!  It worked!  Debbie has so graciously given me permission to share my method (tutorial) with you guys here today!  I have photographed every single step of the process, and hopefully for those of you who are visual learners this alternate ending will help you finish it up!

I know that several of you have figured out this method already and have even posted basic directions in the Flickr group and online.  In no way do I mean to step on anyone's toes, and only hope to provide a visual step by step to this already great award winning tutorial.  If you have any tips or tricks in regards to this tutorial, feel free to add them in the comments section.

Triple-Zip Pouch - Alternate Ending Tutorial

Triple-Zip Pouch Tutorial by A Quilter's Table found HERE.  Use this tutorial all the way through until the last photo.  This tutorial picks up and replaces the "To Finish" section in Debbie's original tutorial.
Picture
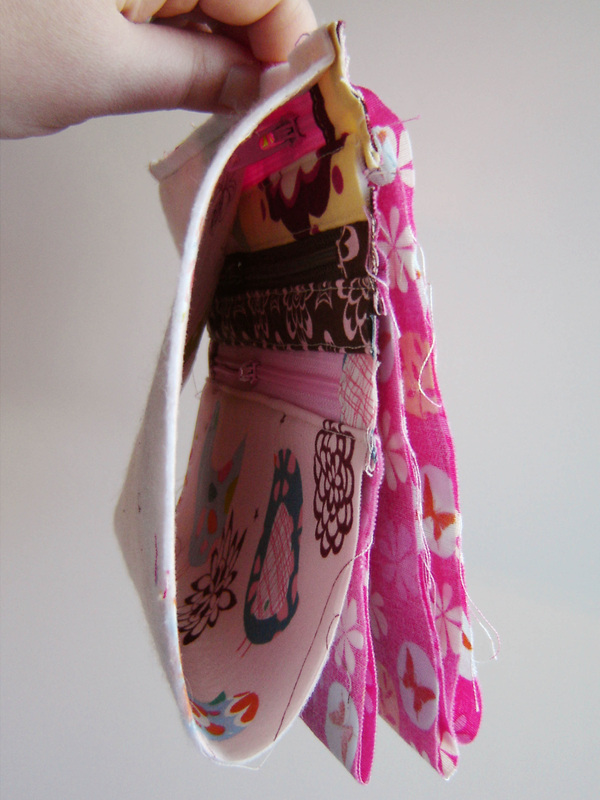
This is a photo of the last photographed step in Debbie's tutorial.  Your pouch is inside out, all zippers and linings are sewn into the pouch and basically it is an odd looking tube.
Picture
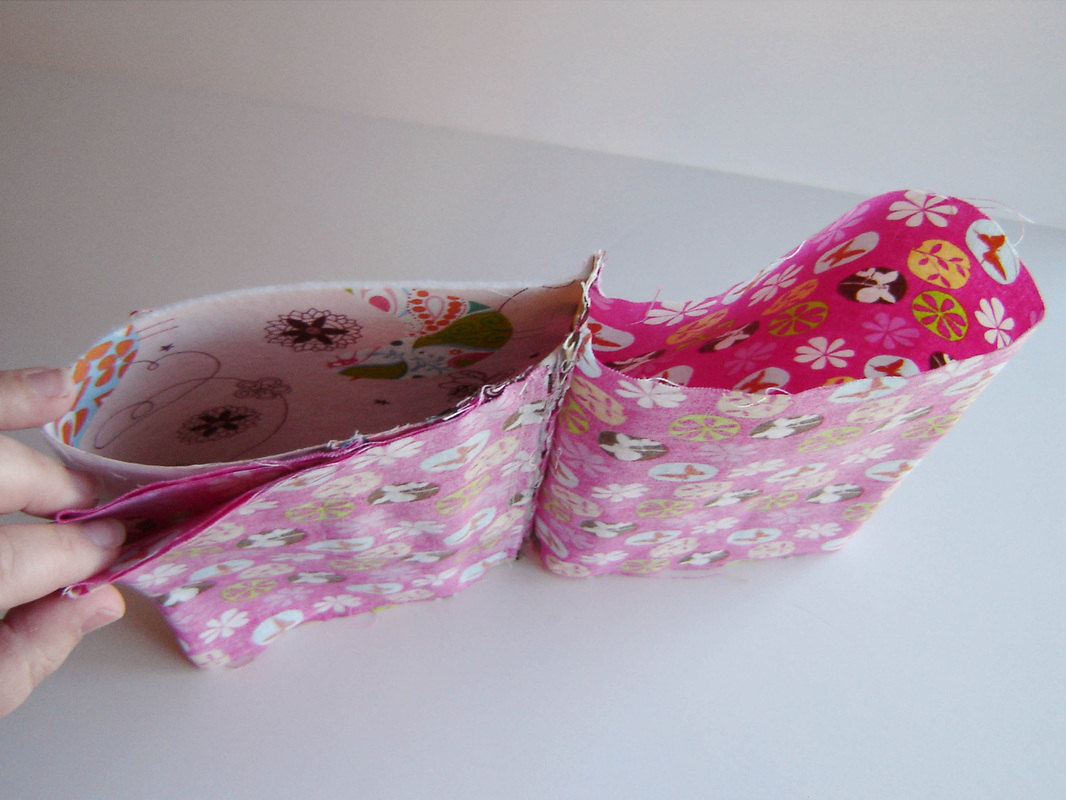
Separate out the main (largest) lining from the main body and two other linings.  Zipper should be centered in the middle.  On the left (in this photo) is the main body fabric, and the two lower pocket linings.  On the right is the main (largest) lining.
Picture
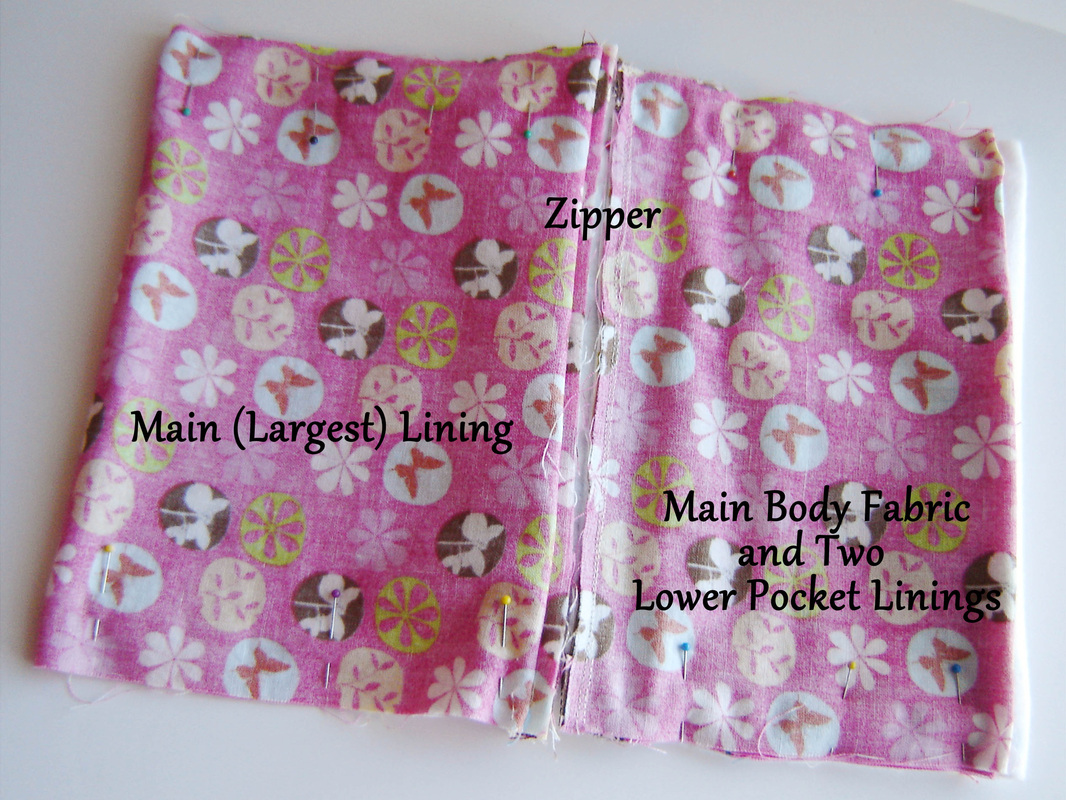
Flatten out and pin.  Zipper should be centered.  One side will be the main lining only, the other side will be the main pouch with two other linings flat on top.
Picture
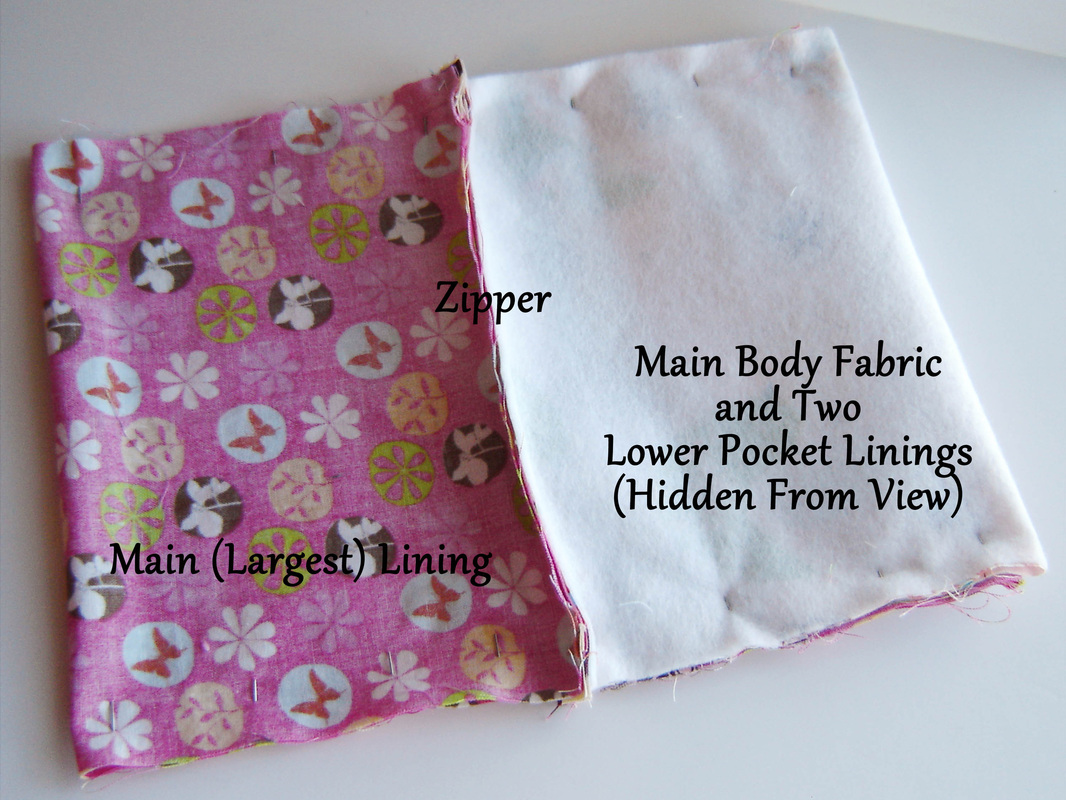
This is the same step, just the back view, pinned.  Basically if you flip it over, it should look like this.  You can see the fusible fleece on the main body of the pouch.
Picture
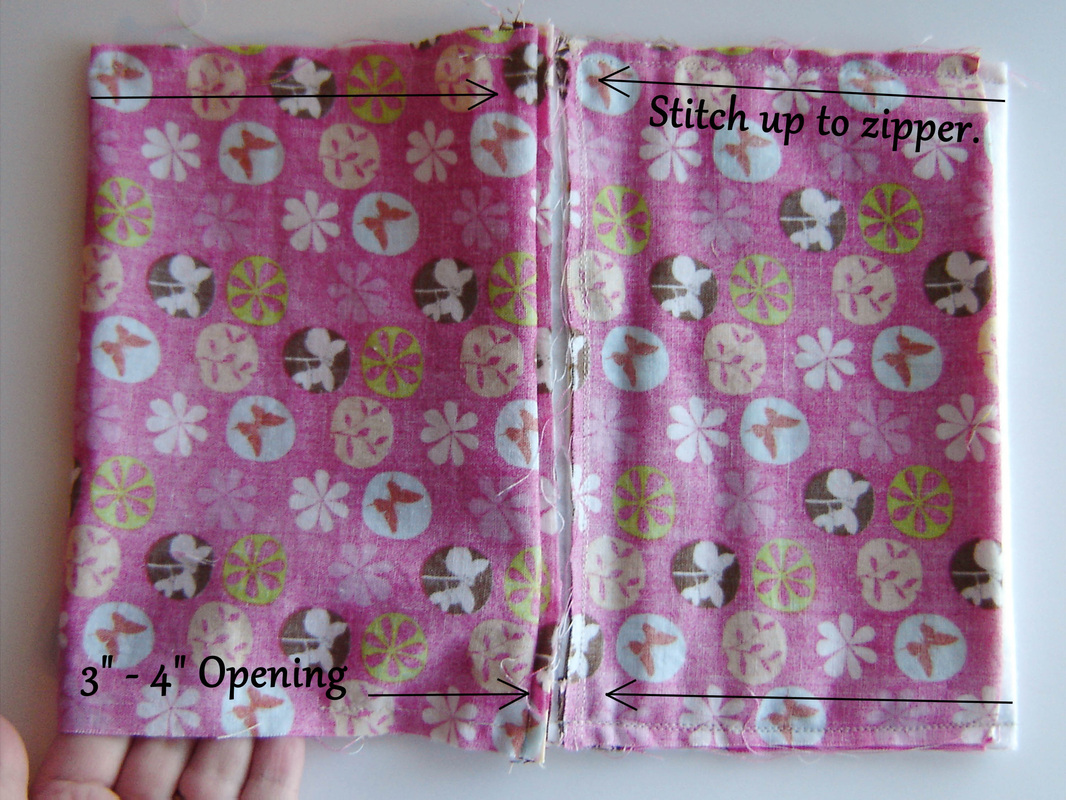
Using a 1/4" seam allowance.  Start sewing on one side, following the directions of the arrows in the above photo.  Stitch up to the zipper, as close as you can without going over the zipper.  Repeat for the remaining three seams.   Leave a 3"-4" opening on the bottom of the main lining.  This opening is for turning the pouch later on.

There are two main reasons for not stitching over the zipper.  First, it is easier not to stitch over all that bulk.  Second, by not stitching over the zipper, once you turn your pouch, it allows for you to push out those top corners further than you could if you had stitched over the zipper. Creating a nice square pouch.  If you choose to stitch over the zipper in one continuous line (it can be done.)  Be sure to go slowly, and to push the zipper itself towards the main body fabric and two pocket linings.  This method creates more of a "rounded corner look" when you turn the pouch later on, which some deem as a slight downfall, but it is totally up to you and your preferences.
Picture
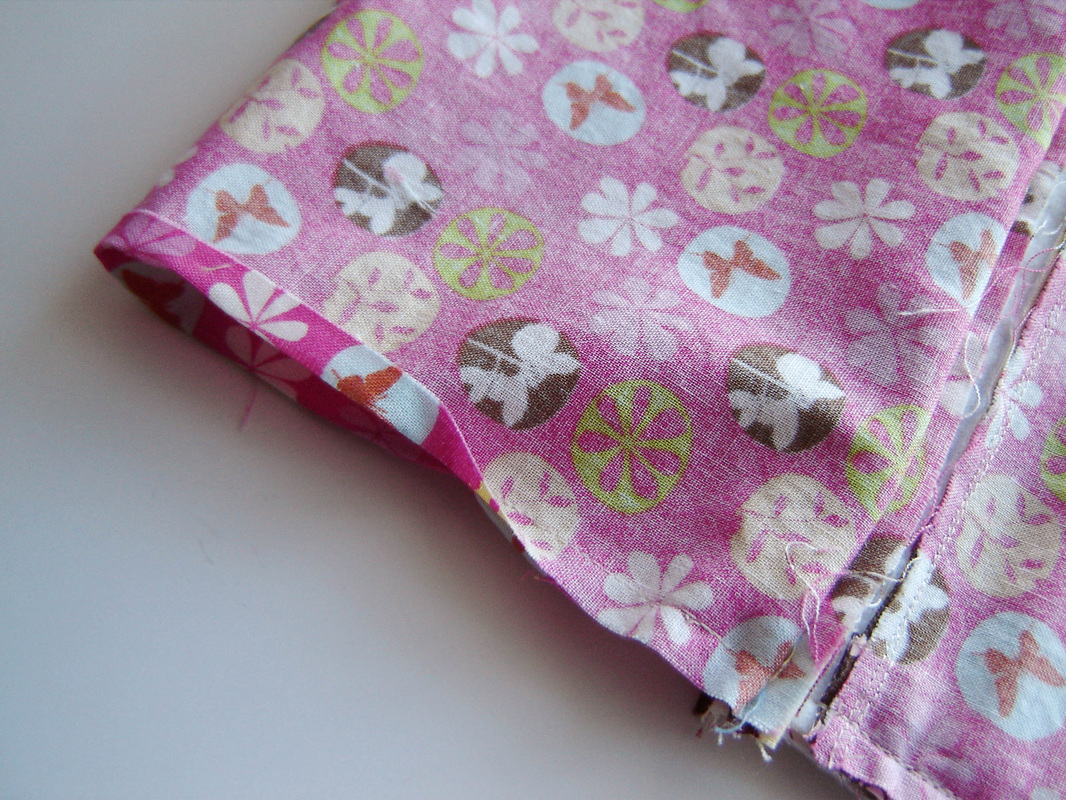
Press the 3" - 4" open edge of the main lining in 1/4".  You can always finger press this opening, you don't have to use an iron.
Picture
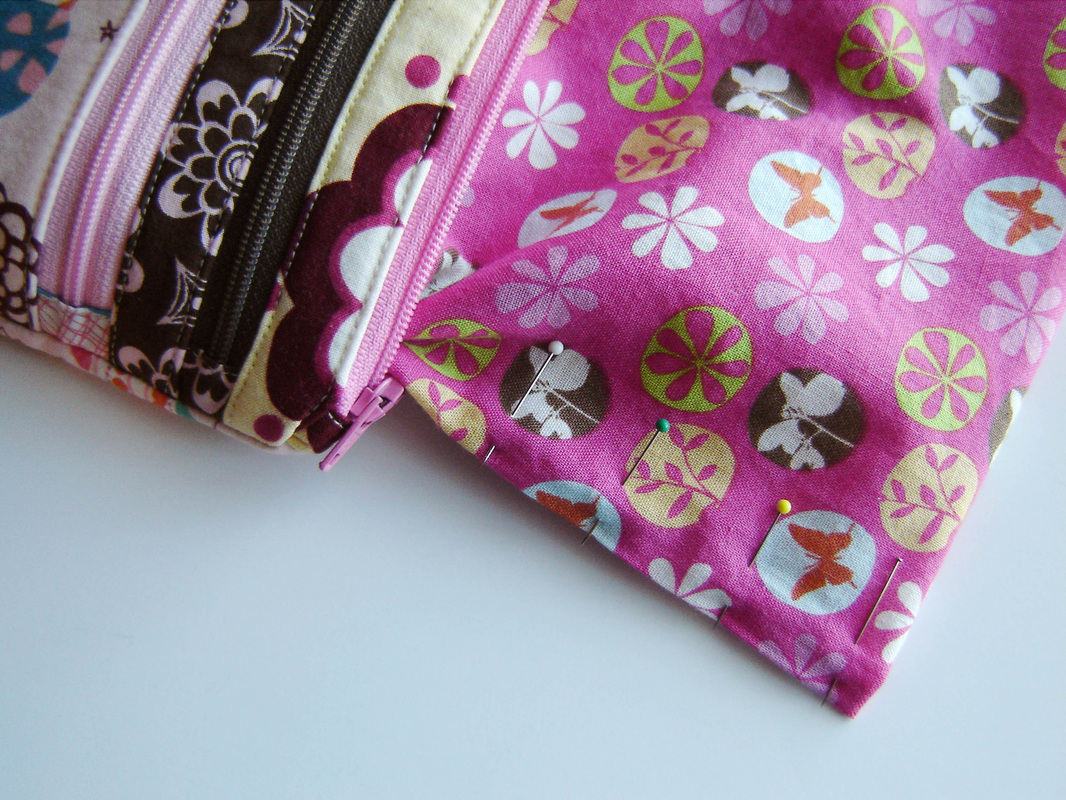
Turn the pouch through the 3" - 4" opening, leaving the main lining sticking out of the pouch.  At this point, push out all your corners to get them nice and square.  Pin the opening of main lining closed.
Picture
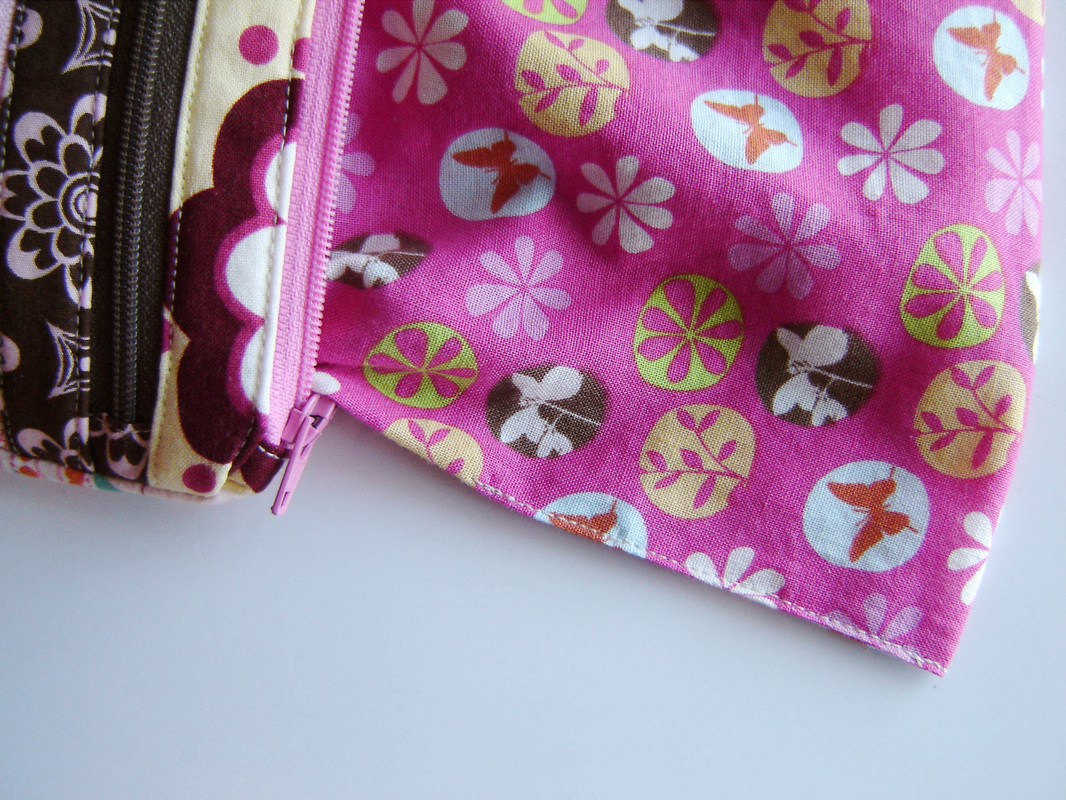
Stitch the opening closed, very close to the edge (normally in a matching thread color.)  Push the main lining into the pouch, push out the corners, then iron to smooth out and flatten, creating a nice finished crisp look.
Picture
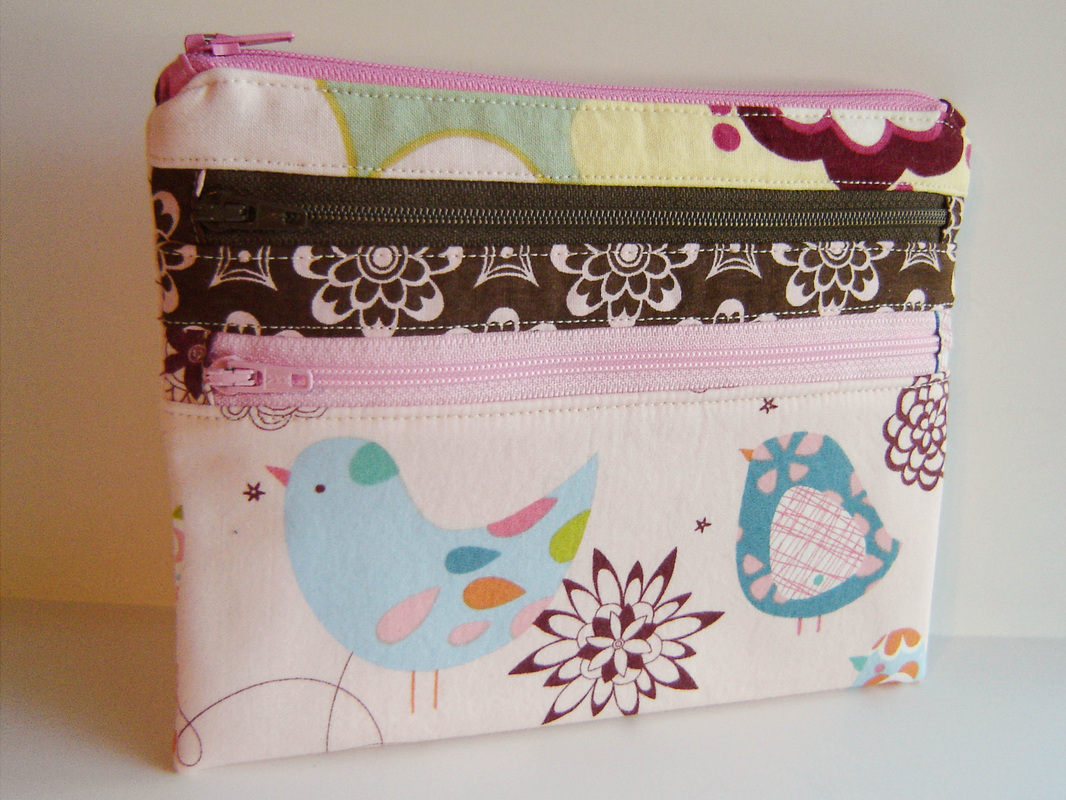
Congratulations, you now have a finished Triple-Zip Pouch!

A Quilter’s Table
This tutorial is part of the Triple-Zip Along hosted by Debbie over at A Quilter's Table.  The event runs from January 28, 2013 through February 15, 2013.
28 Comments
Debbie link
1/31/2013 04:07:14 am

Awesome! Thanks Marci! I appreciate your thoughtfulness in sharing your alternate ending. Plus, your photos are so helpful!

Reply
Toni link
1/31/2013 04:57:13 am

Marci, this is brilliant! I finished my pouch yesterday, but I think I'll use this as an excuse to make another!

Reply
Celtic Thistle link
1/31/2013 07:00:17 am

I have just reached the last stage of making my first Triple Zip pouch and was stumped, so thanks for posting this it all makes sense to me now!

Reply
Sewfrench link
1/31/2013 07:42:33 am

Much better! And thank you for explaining square corners to the world!!

Reply
Letty link
1/31/2013 07:58:03 am

Making mine later today - so very grateful for this super addition to the tutorial!

Reply
Linda H. link
1/31/2013 12:44:27 pm

Your triple zip turned out MUCH nicer than mine did. Yep, I struggled with the first lining method. I like yours better. Thank you very much for taking the time to share it.

Reply
lisa m
1/31/2013 03:13:44 pm

Thank you for putting this together, it helped me finish up quickly. I'm not thrilled with the top corners, but they'll do.

Reply
Flying Blind link
2/1/2013 05:12:28 am

Thank you - I was drawing a blank at the original lack of pictures, between you and Leanne, I am going to give this a go! xxx

Reply
Leanne link
2/1/2013 12:09:53 pm

This is excellent, and it is basically how I decided to do it too, only your approached it a bit more elegantly and described it so nicely. I have also done Debbie's method which works too but I am far more clumsy than her with pushing the parts out of the way.

Reply
usairdoll
2/1/2013 04:55:17 pm

I'm making mine this weekend and I'm so glad I procrastinated, um I mean waited to make mine. Thank you so much from one visual learner to another!

usairdoll(at)gmail(dot)com

Reply
Jen L.
2/3/2013 04:49:43 am

Thank you! I am a visual learner too! :)

Reply
Elise
2/9/2013 05:34:10 am

Thank you for this! Just wondering if it's possible to get this in PDF form (or printable form) somehow so I can attach it to the end of my already printed out pages. This worked like a charm for me! Thank you so much again!

Reply
Molly Pitts
2/14/2013 02:29:25 pm

A PDF would be super helpful - if one is available I would love to have one also. Thanks so much for posting this method!

Reply
Lisaleh link
2/9/2013 08:47:51 am

This is so helpful! I'm a visual learner too WS was totally lost!

Reply
Ginny link
2/10/2013 03:18:11 am

Thanks so much for the alternative finish! The pics were so helpful- I can be a bit spatially challenged sometimes LOL!

Reply
Carla link
2/11/2013 03:14:22 pm

BLESS YOU ,bless you, bless you! This would have been another UFO if not for you ; ) I stitched up to the zipper, but found I had a hole that the end wanted to pop through. I re-sewed it straight across and it finished better. Thanks again and will post about it soon.

Reply
Wendy link
2/13/2013 11:03:29 pm

I struggled with this step, too, and was thinking on my next one that I'd cut the main lining in two pieces (adding a seam allowance), but I think I like this even better! Thanks for the clear tutorial!

Reply
Deb@simplelifequilts link
2/15/2013 03:21:06 am

Thank you so much for this! I found this way easier to understand although it might have just been my tired brain after thinking once the zippers were done I was home free... your pictures were SO helpful.

Reply
Mindy
3/11/2013 07:33:01 am

THANK YOU!!!!! I was so confused on this step on the original tutorial. This makes much more sense!

Reply
Chris link
4/1/2013 08:39:08 am

I made my first pouch last night and just now found this. This is EXACTLY what I needed to see before making my next one! This solves the toughest part of the tutorial and makes it so clear. Thank you so much for taking the time to put together this fabulous post and all the great pictures with text on them. I know it's time-consuming and I can't tell you how helpful it is. Well done.

Reply
Tifini
9/15/2013 05:06:51 pm

I am a very very beginner....with that being said is there any way to box the corners of this bag so that it stands up? If so which pieces do I box and at what part would I do this?

Reply
Carol
11/2/2015 11:00:20 am

The bottom piece, which in the picture is the bird fabric, looks like the bottom outside piece. That would be the piece in which to sew across the bottom corners about an inch, which would give you your boxed corners.

Reply
donna Pierce
6/25/2014 04:04:37 pm

Thanks for rewriting these instructions. I have been sewing forever, I put this pouch together and took apart 4 times. I will try your way and hope for the best.

Reply
Silvana ( a.k.a. Silort) link
8/30/2014 12:05:32 pm

Your suggestion for finishing is perfect!! Thank you for sharing your great solution! Hugs from Brazil!!

Reply
Karen link
9/11/2014 12:49:30 am

FINALLY! I have been searching for directions to finish this bag. I have look at the original tutorial over and over and couldn't quite get the finish. Thank you!

Reply
Susan McC
10/20/2016 09:08:43 am

What are the dimensions of the pockets on this pouch? I've been looking for something I could make similar to the Flight 001 Seat Pak and this could be it. Would this be large enough to hold a Kindle and iPhone in one of the pockets?

Reply
Annabella link
6/20/2019 08:52:16 pm

Me encantaría recibirlas, es una página fantástica.!!

Reply
Beth P
3/3/2020 09:17:03 am

OMG...thank you sooooo much! I have all the pieces cut out as per Debbie’s tutorial and I have been struggling to decipher her last set of written instructions. Your explanation, with pics, has saved my project!

Reply


Leave a Reply.

    Marci Girl

    A feisty mom designing, sewing and blogging her way through everyday life!

    Subscribe
    Follow on Bloglovin
    Picture
    Follow on Bloglovin


    Categories

    All
    2017 Finish A Long
    2018 Finish A Long
    2019 Finish A Long
    Bee Sewcial
    Book Reviews
    Clothing
    Everyday Life
    Giveaways
    Handbags
    Handstitched Class
    Inspirational Projects
    Marci Girl Designs
    Projects
    Quilt Along
    Quilting Bees
    Quilts
    Random Thoughts
    Recipes
    Sew Along
    Sewvivor
    Style Stitches
    Swaps
    The Penny Sampler Class
    Tutorials
    Wip Wednesday


    Happily
    Participating In:

    Picture
    Picture
    Picture
    Picture
    Picture
    Picture

    Picture


    Archives

    January 2020
    November 2019
    October 2019
    July 2019
    April 2019
    March 2019
    February 2019
    January 2019
    December 2018
    October 2018
    August 2018
    July 2018
    June 2018
    May 2018
    April 2018
    March 2018
    February 2018
    January 2018
    December 2017
    November 2017
    October 2017
    September 2017
    August 2017
    July 2017
    June 2017
    May 2017
    April 2017
    March 2017
    February 2017
    January 2017
    April 2016
    March 2016
    February 2016
    January 2016
    September 2015
    July 2015
    October 2014
    September 2014
    August 2014
    July 2014
    June 2014
    May 2014
    April 2014
    March 2014
    February 2014
    January 2014
    November 2013
    October 2013
    September 2013
    August 2013
    July 2013
    June 2013
    May 2013
    April 2013
    March 2013
    February 2013
    January 2013
    November 2012
    October 2012
    September 2012
    August 2012
    July 2012
    June 2012
    May 2012
    April 2012
    March 2012
    January 2012
    December 2011
    November 2011
    October 2011
    September 2011
    August 2011
    July 2011
    June 2011
    May 2011
    April 2011
    March 2011
    February 2011
    January 2011
    December 2010
    November 2010
    September 2010
    August 2010
    July 2010
    June 2010
    May 2010
    April 2010
    March 2010
    February 2010

    Picture

    RSS Feed

Powered by Create your own unique website with customizable templates.