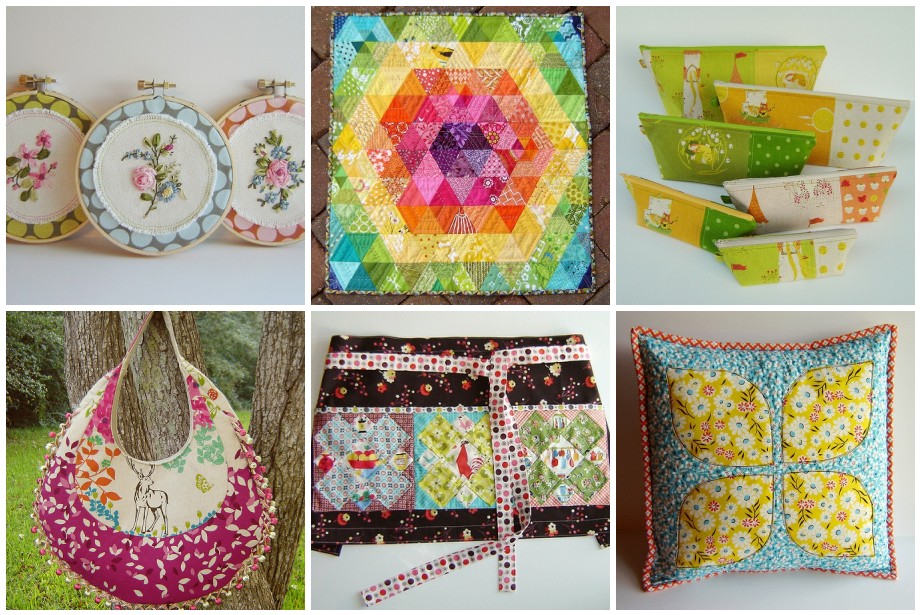
Hello and welcome to my little blog! I am thrilled to be participating in the 3rd annual Craft Book Month hosted by Craft Buds. If this is your first time visiting my blog I would love to have you stick around and discover all the cool things going on in my little world. Below is a mosaic featuring just some of the projects I have made in the past few years, just to give you a little taste of what I am all about!
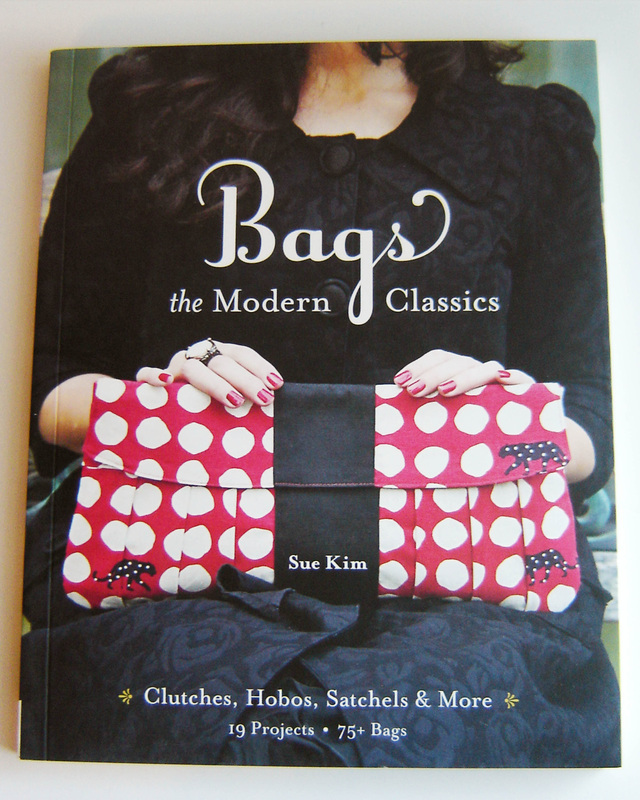
Today I will be showing off a project and reviewing the book, Bags the Modern Classics - Clutches, Hobos, Satchels & More by Sue Kim. When I was first asked to participate in this blog hop I knew instantly that I wanted to make a bag, the problem was, which book??? I own A LOT of handbag sewing books. I pulled them all out, picked out my favorite bags and in the end decided on the Rebecca Bag from Bags the Modern Classics book. I was just so drawn to the shape of this bag, so cute and large, and one that has been on my to do list for quite some time!
This book is laid out in a really nice format. The first part of the book explains basic terminology when bag making (types of stitching and how to clip curves.) The next section breaks down different parts of bag making in easy step by step directions and photos (how to install a zipper, how to install an interior pocket, how to make piping.) This makes it really easy to customize each pattern in the book, which is really nice. If you want to add a pocket that isn't called for in the pattern, you just look it up in the front of the book and you can easily figure out how to incorporate it into your bag. After the basics, the book is broken into three sections (small bags, clutches and large bags) and in each section are several patterns to chose from. For example the large bags section includes the patterns and directions to make 12 different bags. Most of the bags in the book offer several different size options, which makes for limitless varieties. This book comes with two double sided full size pattern sheets. The bag patterns are layered on top of one another, so in order to use one you will need to trace the pattern onto something else. I just use wax paper, which works great, is cheap and see through, so it works great for fussy cutting the pattern pieces onto the fabric. This book includes step by step photos (which I love) and written directions and is very easy to follow along and understand exactly what you are supposed to be doing. The projects are not labeled by easy or hard, but I think there are enough directions that even a beginner could tackle the majority of the projects in this book.
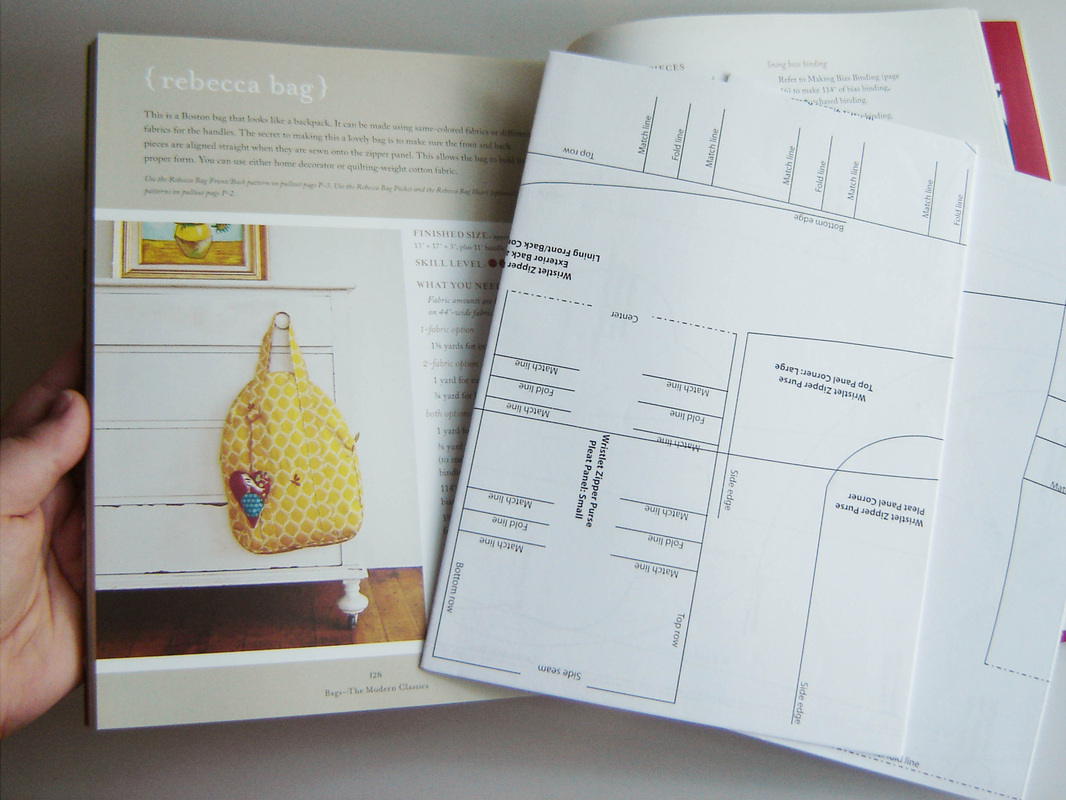
Rebecca bag from page 128 and the two pull out pattern sheets included with the book.
The Rebecca bag called for minimal supplies, basically fabric, interfacing, thread and a zipper. Simple enough! Once I had chosen this pattern, I then had to dig through my stash to see what would work for this pattern. I actually had quite a few choices in my stash that would have worked perfectly, but in the end I settled for two lovely prints from Anna Maria Horner's Field Study linen/cotton blend of fabrics. The author suggested using either quilting-weight cotton or home decorator fabric for this bag, and since the linen/cotton blend was somewhere in between the two, I figured it would work perfectly (and it did!) The cutting directions were based on 44" wide fabric, but since my fabric was 56" wide I was easily able to cut the main body and pockets out of 1 yard, and I used 1/2 yard for the handles (with plenty of leftover.) I then used 1 yard of quilting-weight cotton for the lining and bias binding on the inside of the bag.
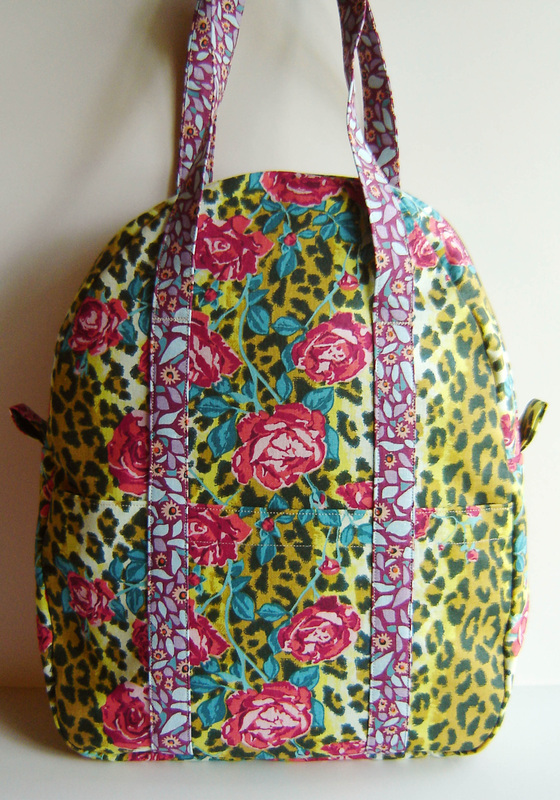
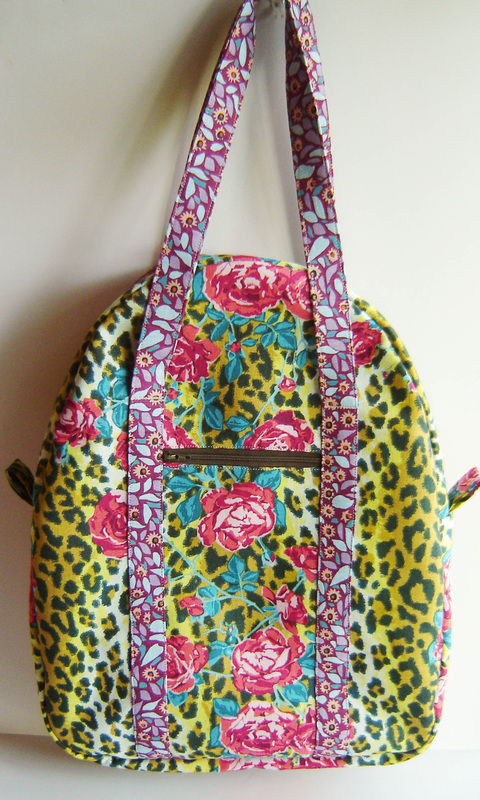
The bag is stuffed with a huge plush blanket to make it stand on its own.
The pattern called for a heavy weight fusible interfacing. I chose to use Pellon Shapeflex 101, which is a mid-weight interfacing, and I interfaced EVERYTHING. All of the exterior pieces, the exterior pocket, the handles, and the lining. This was a smart move and made the bag just sturdy enough, but not too bulky to sew. Though I will say that this bag does not support itself, it is a wee bit floppy. If you want to make the bag stand by itself, you just need to use a heavier duty interfacing, but honestly I think my bag is perfect.
Here the bag is hanging on a hook and is empty inside.
I followed most of the directions exactly with the exception of a few additions or small changes. The first change that I made to the pattern was to add extra length to the handles. I added around 4" extra to each side, which was a good idea, but honestly I could have added more because it barely fits on my shoulder. Next time I will add between 6" - 8" to each handle. If you make the pattern "as is" then you will have a carry only bag that doesn't fit on your shoulder comfortably. Which is fine, it just depends on what you plan to use your bag for!
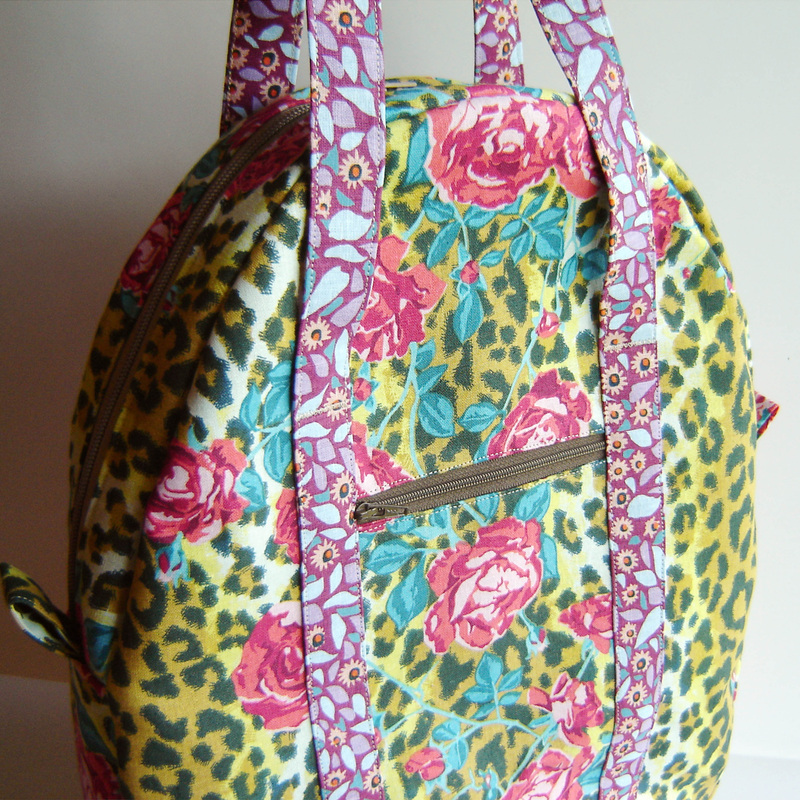
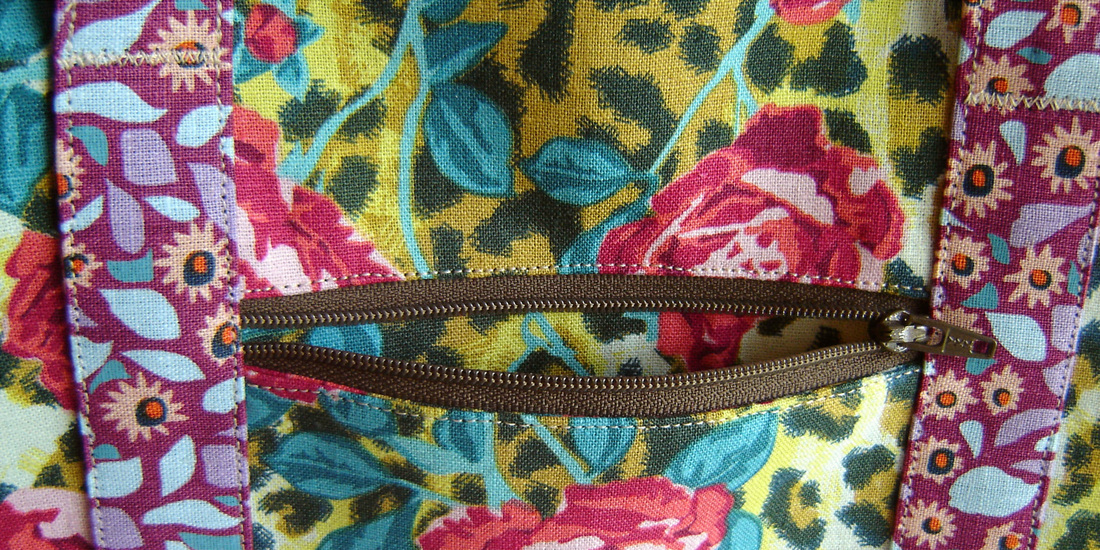
The next addition that I made was to add an exterior zip pocket to the back of the bag. I use this pocket for my keys and sometimes my phone. This book does not include directions on how to install a pocket like this, I just knew how already (sorry folks) but I am sure you can find directions online how to install this sort of zipper. I purposely made it fit in between the two handles, and this worked out so nicely to hide those zipper ends that sometimes don't come out exactly perfect. You can also see in the photo below the extra small zig-zag stitching that I did to reinforce the handles on the bag. The author's directions were to just stitch straight across, but I wanted a little more strength at the point in which the handles become "free" from the bag itself.
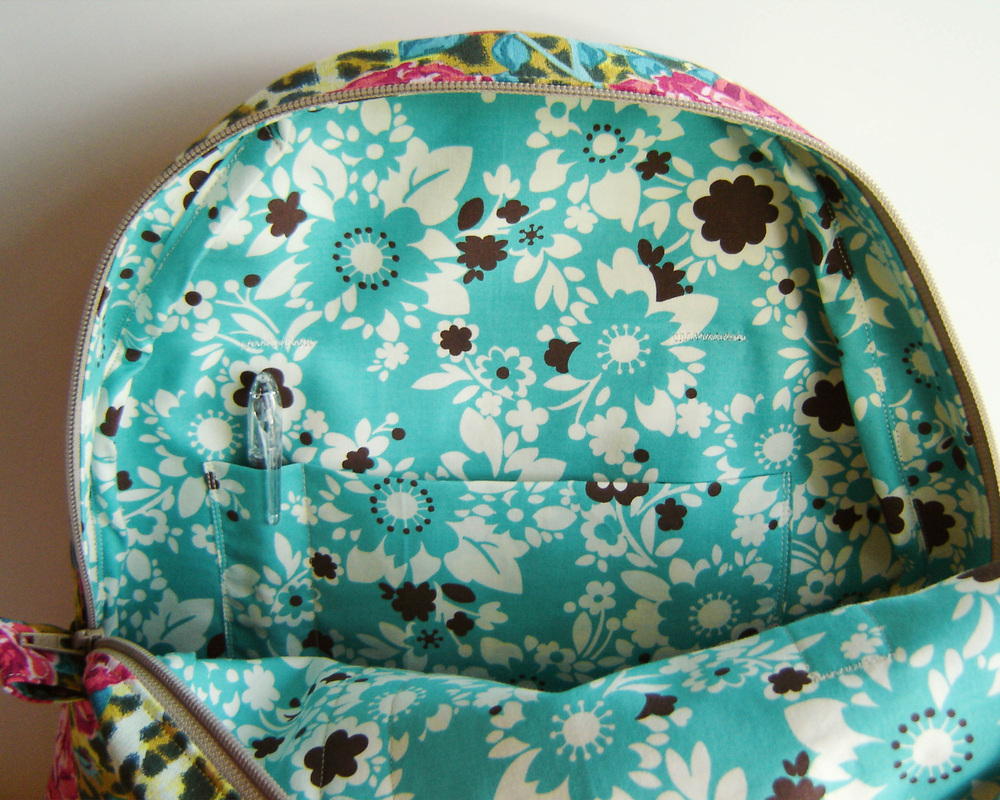
The last addition that I made to this bag was to add an interior pocket to the inside. Directions for this type of pocket are included in the book, and this type of pocket is super easy. I divided the pocket to include a spot specifically for my ink pen, which is something that I do every time I make a bag for myself. No searching around for that pen at the bottom of the bag! You can see the Momo quilting-weight fabric that I chose for the interior, which I think only "slightly" matches the exterior, but I am a bit wild and crazy and this is just perfect for me!
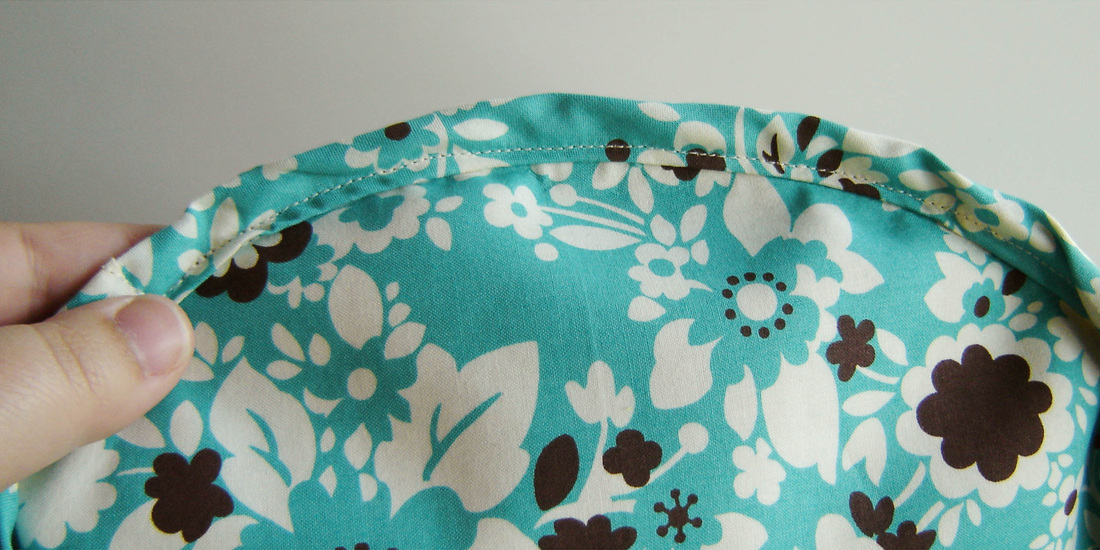
This is the very first pattern that I have ever made that uses the technique of sewing the exterior and lining pieces together and having raw seams on the interior of the bag that have to be covered with bias binding. At first I thought about altering the pattern to have enclosed seams so that I could skip the binding step, but decided against it because I thought there had to be a reason as to why the author would construct the bag in this manner. After it was all said and done, I realized she did have a very good reason. The bias binding on the inside actually gives the bag more structure and holds the shape much better than if the seams weren't encased. I thought I wouldn't like this step, but honestly I used Clover Wonder Clips to hold all the layers together, used a heavy-duty sewing machine needle and plowed through, and it worked perfectly with no problems. You can see my bias binding above. It isn't beautiful or perfect, but it is inside the bag and you don't really notice it when you are using the bag, it just blends into the corners and curves.
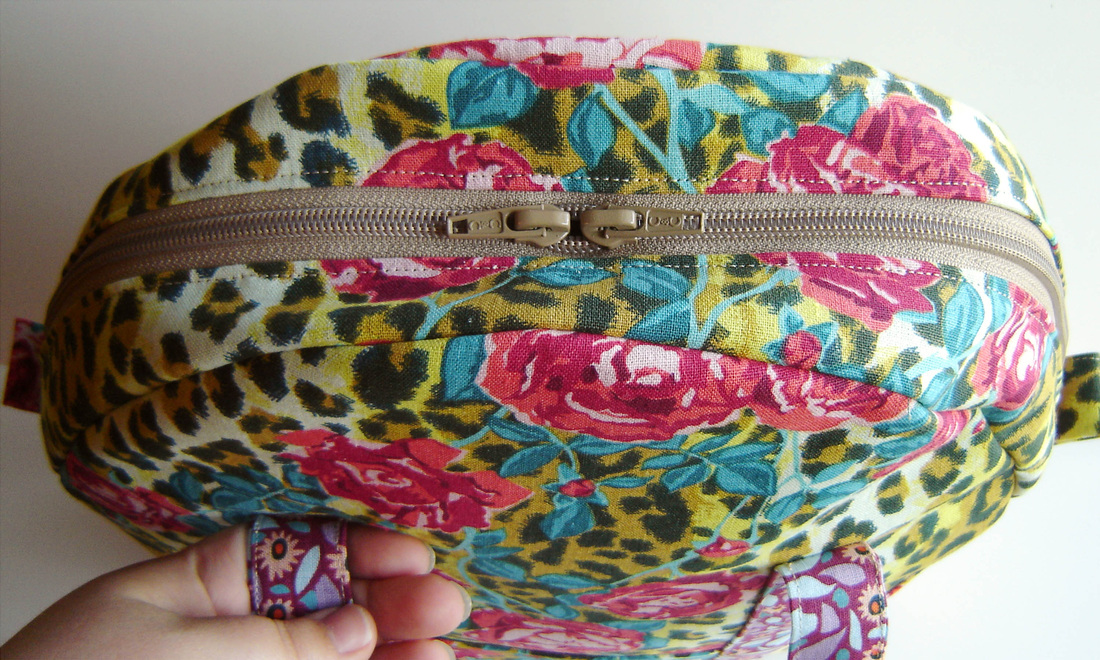
I opted to buy a 22" Coats and Clark Purse Zipper that features two sliders and closed bottoms on each side. It is a touch heavier duty than a regular zipper and the double sliders make it feel like a real handbag and not a handmade one. I was really happy with this decision and I love the look of it.
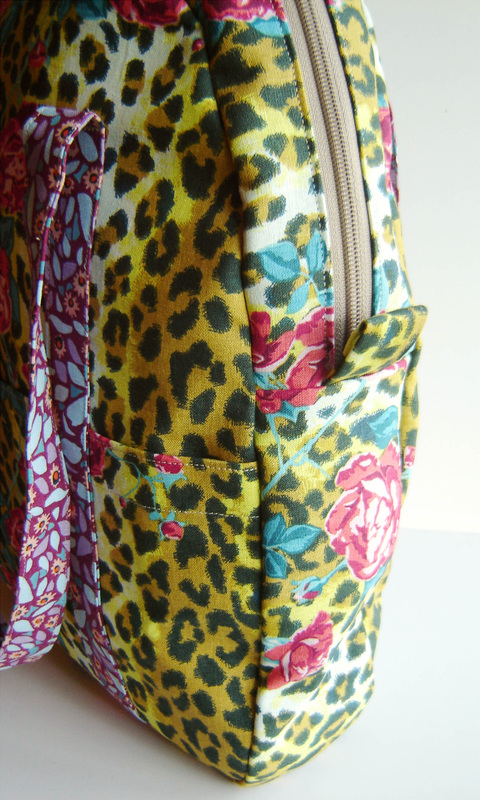
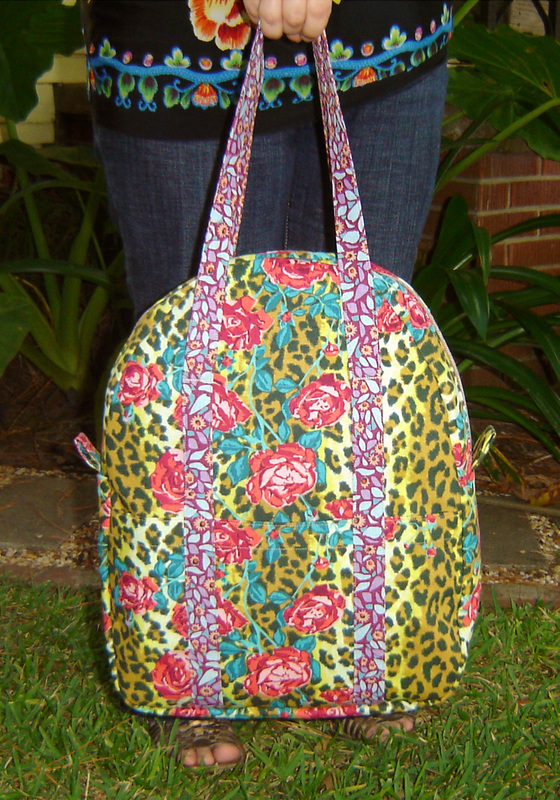
This bag pattern has a large front pocket that runs the entire length of the front of the purse. It is divided into three sections once you sew on the handles and each pocket is a great size for your phone, sunglasses, keys or whatever you want to just drop in. I took special care to line up the floral pattern when cutting out this pocket so that it just blended into the front of the bag. I love how the roses run up the center in between the handles. The author also added the little tab details on either side of the zipper ends, which I think was just the perfect touch, it adds a little something "extra!"
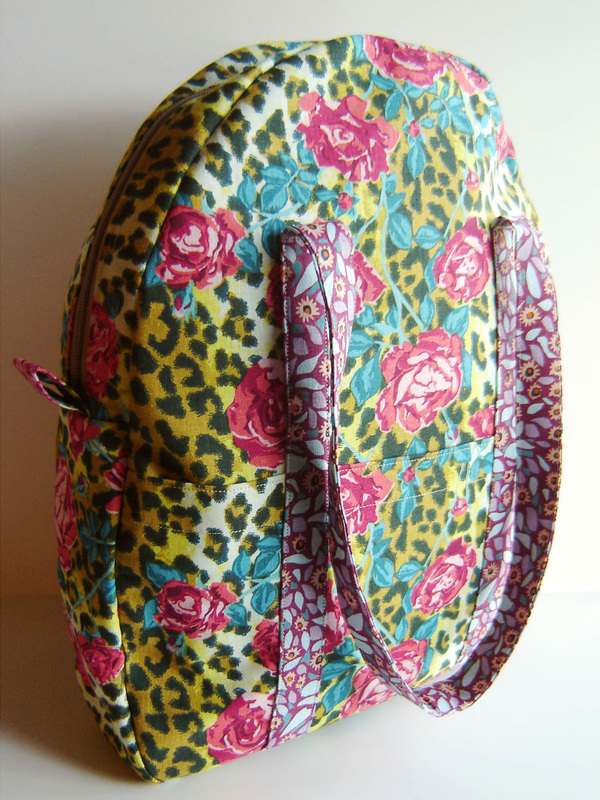
The photo above shows the bag stuffed with an over-sized plush blanket that I had laying around. This bag is BIG! It could easily hold two over-sized beach towels, maybe even three. I plan to use this bag when traveling, it will work great for holding all those overnight essentials, change of clothes, normal purse stuff, you know when you need to carry all those extras when traveling. In the picture below I am holding the bag and I hope it gives you a good example of just how large this bag really is. It measures 17" from bottom to top, not including the handles.
Overall I love the finished product and have plans for another in the immediate future. I really enjoy this book and love the majority of the projects in it, I can definitely see making more bags from it, and would especially love to try one of the clutches. If you are thinking about getting into handbag making, this book would be a great starter for learning all the basics and in the process of learning you will end up with a really great handbag yourself!

Blog Hop
Week OneMonday 9/2: Fabric Mutt / LRstitched
Tuesday 9/3: Stitch This! The Martingale Blog / Stitched in Color
Wednesday 9/4: Fabric Seeds / Pile O Fabric
Thursday 9/5: The Feisty Redhead / Rae Gun Ramblings
Friday 9/6: Sew-Fantastic / Clover + Violet
Saturday 9/7: A Prairie Sunrise / Small Town Stitcher
Week Two
Monday 9/9: Hopeful Threads / Go To Sew
Tuesday 9/10: The Sewing Rabbit / Sewing Mama RaeAnna
Wednesday 9/11: Marci Girl Designs / imagine gnats
Thursday 9/12: Sew Sweetness / amylouwhosews
Friday 9/13: Lindsay Sews / 13 Spools
Saturday 9/14: Inspire Me Grey / Angela Yosten
Week Three
Monday 9/16: Sew Very / Craftside
Tuesday 9/17: The Littlest Thistle / CraftFoxes
How to Enter:
9/1 - 9/30: Link up your craft book project at Craft Buds from your blog or Flickr account, and enter to win prizes. Winners will be announced on Tuesday, October 1! To participate in the month-long contest, just link up any project you've made from a pattern in a craft book. That easy! You'll tell us a little about the book, the project, how you personalized it, etc. Full rules and details can be found at Craft Buds or right HERE!


 RSS Feed
