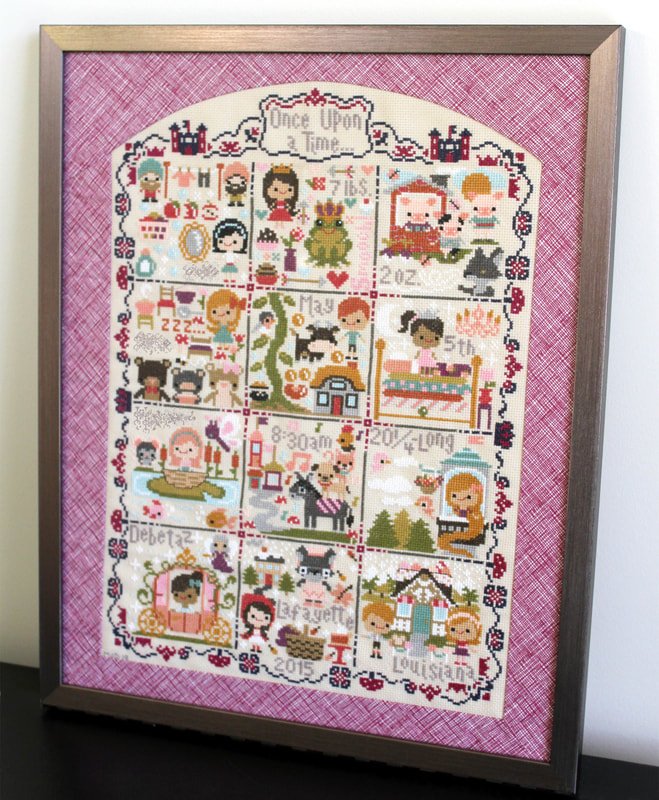
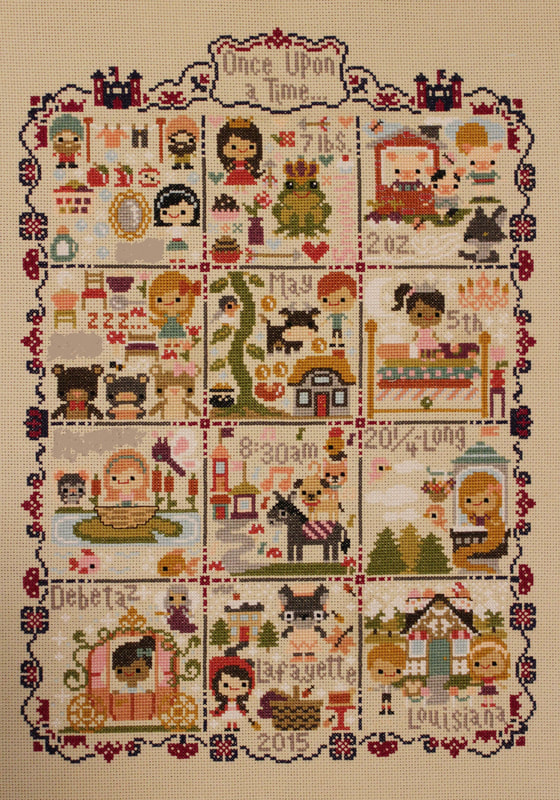
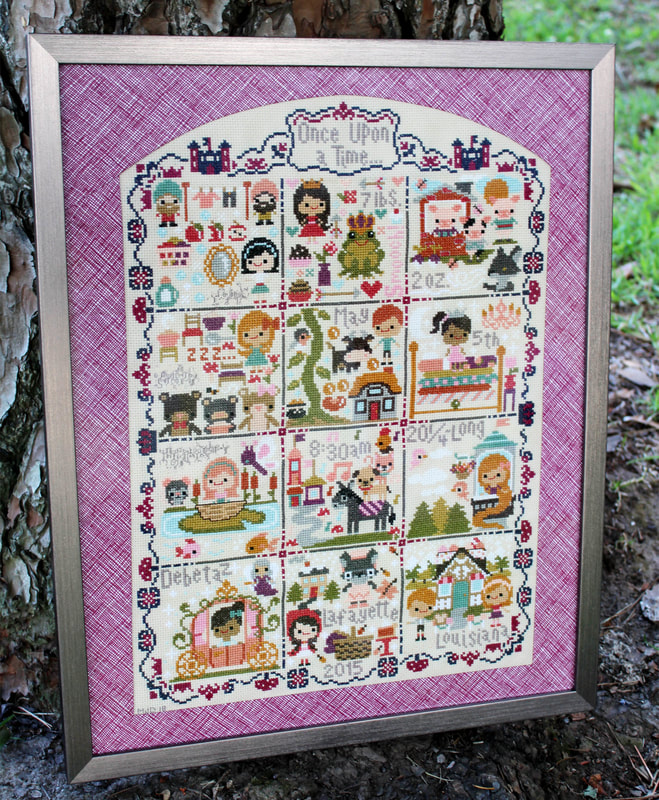
In an effort to not wait until the last possible minute to blog about my finishes, I thought it would be nice to actually do it ahead of time, especially since this one has been done for at least a month. So without further ado here is my finished Once Upon A Time cross stitch that has been a work in progress for roughly four years.
This cross stitch pattern is by The Frosted Pumpkin Stitchery and I purchased it with the intention of keeping up with the year long stitch-along, which of course didn't happen. I couldn't even figure out how in the heck people could stitch one of these scenes in a month! Apparently I stitch SLOWLY. Originally I was stitching pretty often, then I lost interest, put it away for a good 1.5 years and then picked it back up as my car rider line project when getting my kids from school. Slowly but surely I added a few little bits every day and now I'm done!
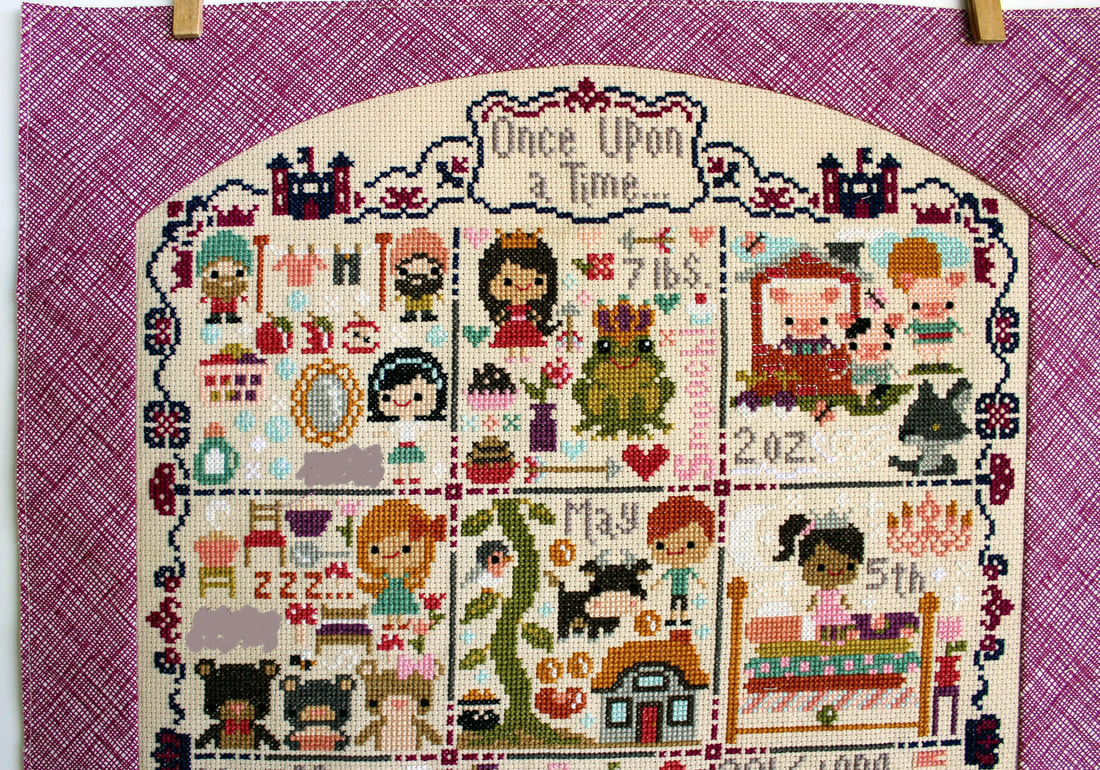
Instead of having the months of the year in each block I decided to make this a birth announcement for my little girl. I blurred out her name on here but you can see how I added all the details like birth weight, time and day. It took a little work to figure out how to fit everything in, but I couldn't be more pleased.
Instead of having the months of the year in each block I decided to make this a birth announcement for my little girl. I blurred out her name on here but you can see how I added all the details like birth weight, time and day. It took a little work to figure out how to fit everything in, but I couldn't be more pleased.
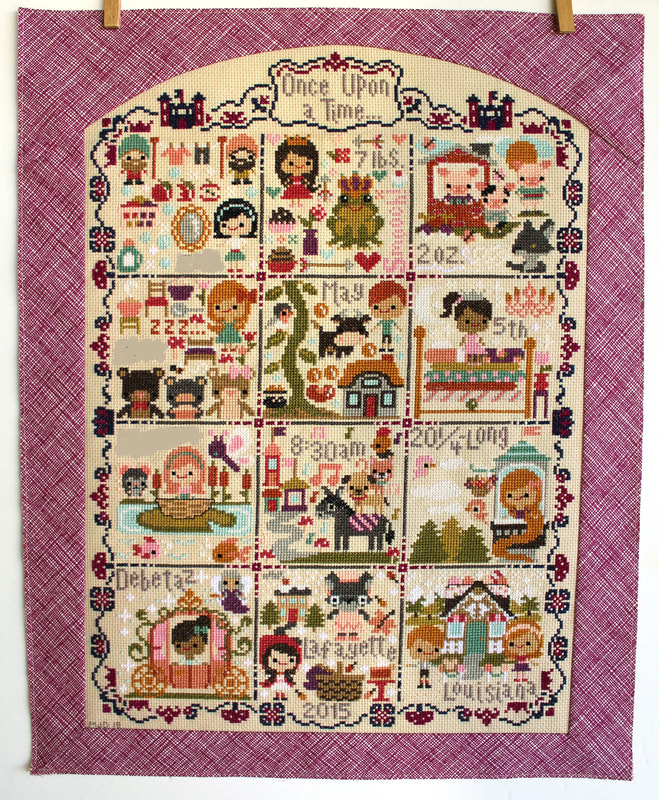
Once the stitching was finished I had to figure out how I was going to mat and frame this. originally I was just going to purchase a mat (custom cut) and then find a frame. I kept putting it off and then it occurred to me, what if I made the mat out of fabric, then I could really customize it. I ended up using a Carolyn Friedlander crosshatch in this great shade of purple that matched one of the purples in the stitching. I then decided to have the arched top to customize it even more. I used a 1/4" seam and sewed it directly to the Aida cloth, I mitered the bottom corners.and then did the arch as the last step. After it was all sewn on, I pressed it one good time and then stitched all around the outside edge as close as I could catching the Aida cloth underneath. It took some planning but in the end I think the outcome was totally worth it.
I found the frame on a clearance rack and carefully stapled the fabric to the Masonite board that was the back of the frame. All done!
It was beyond difficult to get pictures of this once it was framed, the glass reflected everything. So sadly every picture is at a weird angle and in a weird place. Haha, I just had to get it to work so I could officially call this project done. It's finished measurements are 17" x 21".
Now I just need to gather courage to get it hung on the wall...
This project was number three on my Q2 Finish-A-Long list that can be viewed HERE. Yay I have one finished. Speaking of the Finish-A-Long, the quarter two finishes link up will open on July 1, 2018 so you still have some time to finish up a few of those WIPs.


 RSS Feed
