This tutorial is part of the 2017 Finish Along Quarter 3 Tutorials Week.
Find the link up to the Quarter 3 Finish Along HERE or on any of the other hosts blogs.
Find the link up to the Quarter 3 Finish Along HERE or on any of the other hosts blogs.
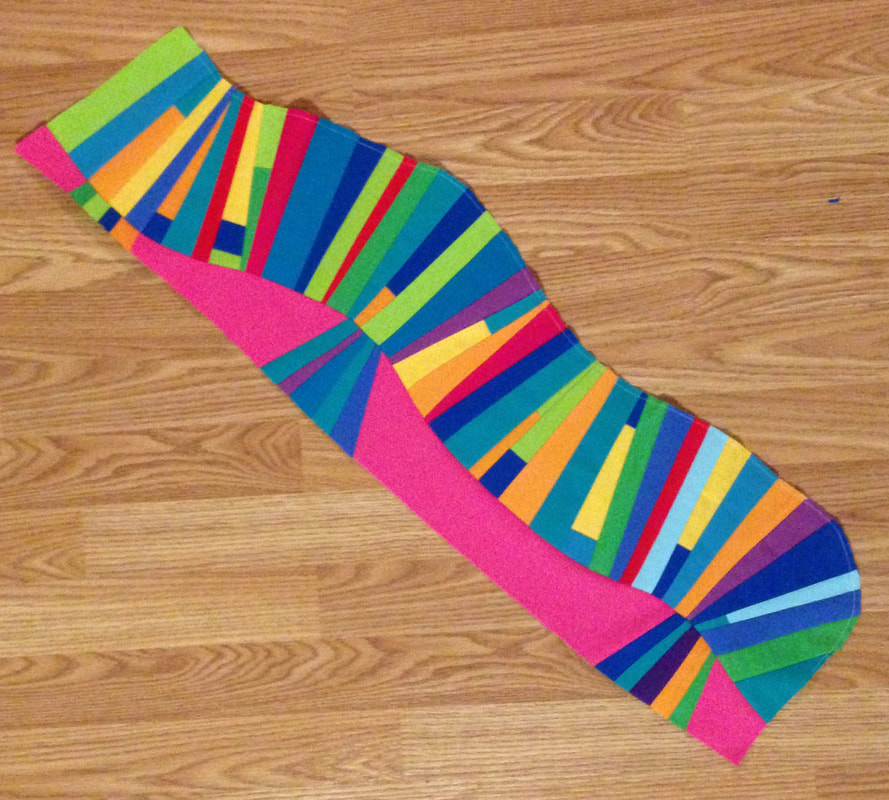
A few years ago (November 2015 to be exact,) one of my Bee Sewcial mates, Leanne requested "No Negative Space, Maximalist" blocks in all the colors. Above is what I designed. At the time I had several ask how I did it and a few months later when participating in a swap I documented the process and was all prepared to give a tutorial on Instagram. At that very same time is when Instagram switched to non-chronological order and I just couldn't stand to do a tutorial that would show in everyone's feed all out of order, so I just sat on it. Well here we are today and I'll share this process on my blog (and I'm not sure why that never occurred to me before. LOL) As you will see my tutorial block looks extremely different from above, but the process is the exact same, just different fabric choice, which really shows the versatility of this block.
A Few Notes:
For this tutorial I won't be giving dimensions, as you can do this technique in a variety of sizes. The first time I made this block my "piano keys" were around 7"-8" long, for this tutorial they were around 5" long so that I could use a charm pack I had on hand. I'm sure you could make them even smaller or a lot longer. Play with it and have fun.
I'll also not be going into depth on the technique of sewing improv curves. There are a ton of tutorials already in existence and you can find some good ones here -
Red Pepper Quilts - Cutting and Sewing Free Hand Curves
Gefilte Quilt - Curvy, Modern, Red, Improv Scrap Quilt
Elm Street Quilts - Improv QAL Strips and Curves
All that being stated, let's get started!
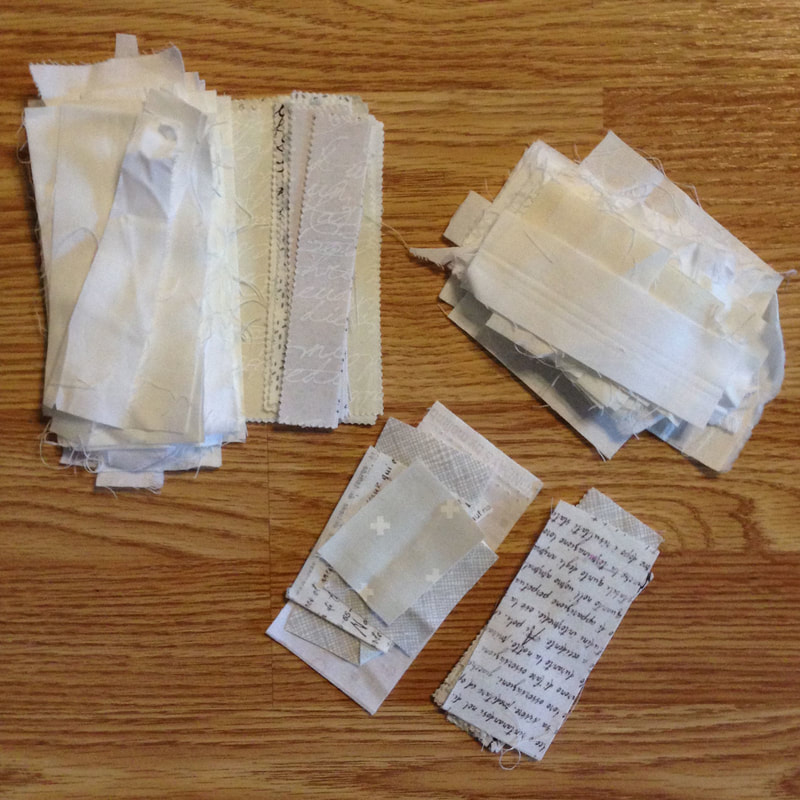
1. Gather Supplies - Variety of scraps, strings are perfect, but smaller chunks can be pieced into longer strips. These scraps in the upper left corner are in the 1"-2" wide and 5" long range.
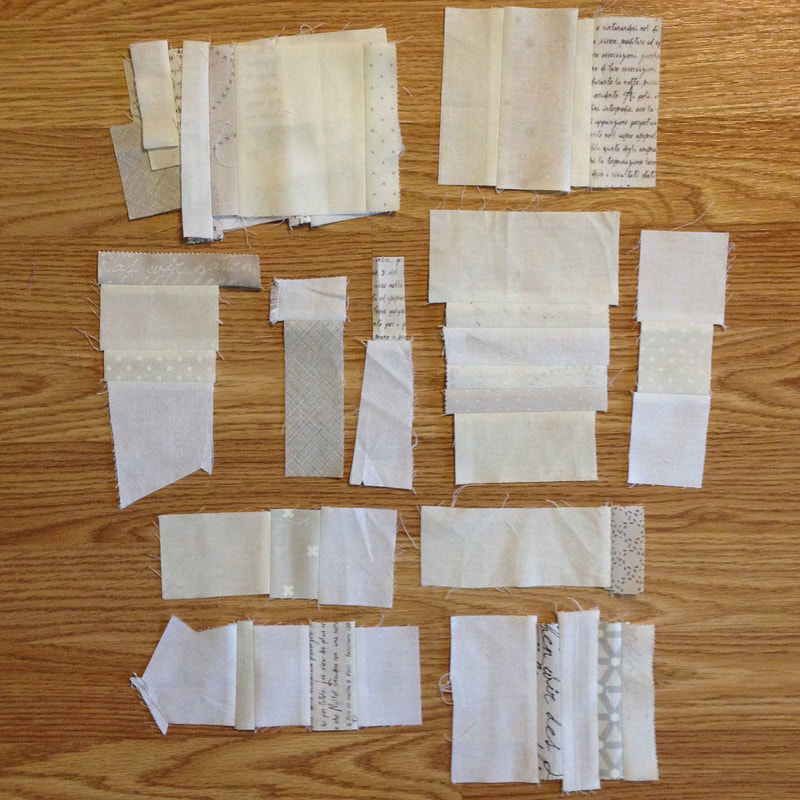
2. Sew Together Smaller Scraps - I took my little scraps and sewed them randomly to each other to create at least 5" long pieces. Press seams open. Don't trim anything at this point.

3. Cut Piano Keys - Once you have a pretty good sized stack of scraps, start cutting "pie" shaped pieces as seen above. Use scissors and not a rotary cutter or ruler and just make sure one end is thicker than the other end. Make sure the smallest end is at least 3/4" wide. You can see above I have a variety of shapes and sizes.
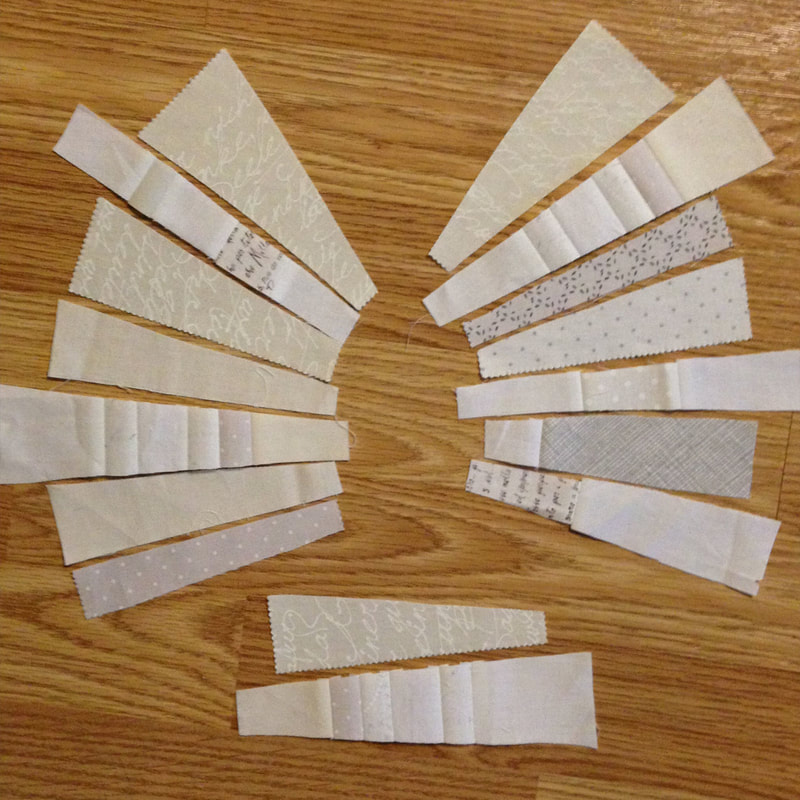
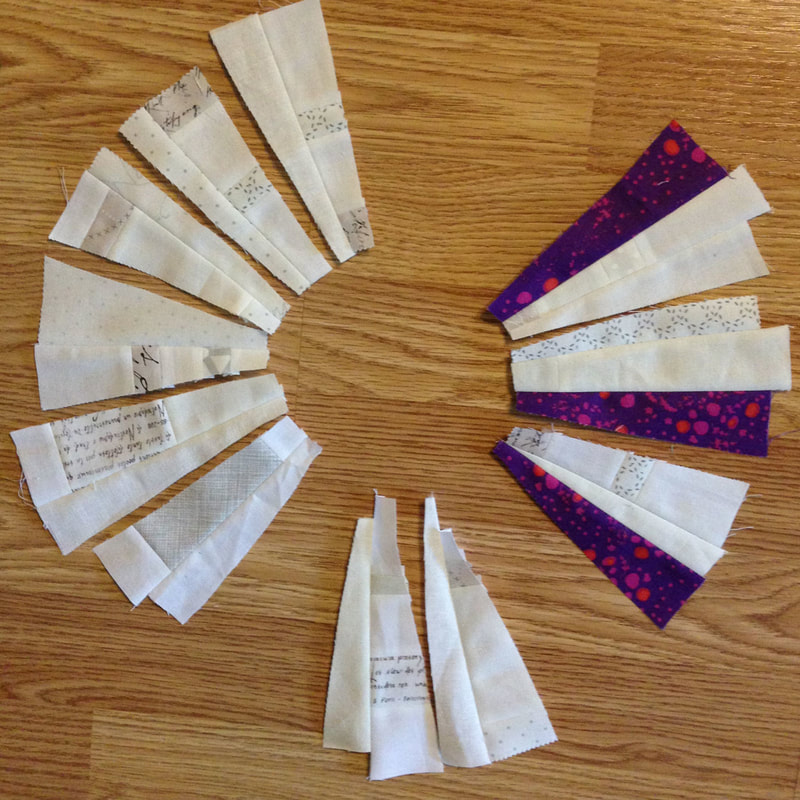
4. Playing With Layout - Start laying out your "piano keys" in segments of around 5-8 pieces all with the wide ends on one side and the skinnier ends together on the other to start creating a nice curve as shown above. I alternated solid scraps with pieced ones, or at least tried to stagger the seams.
5. Sewing Together The Piano Keys - Once you are happy with your layout, start sewing the segments together two at a time, pressing the seams open. I usually try to line up the narrower ends, but it doesn't really matter.
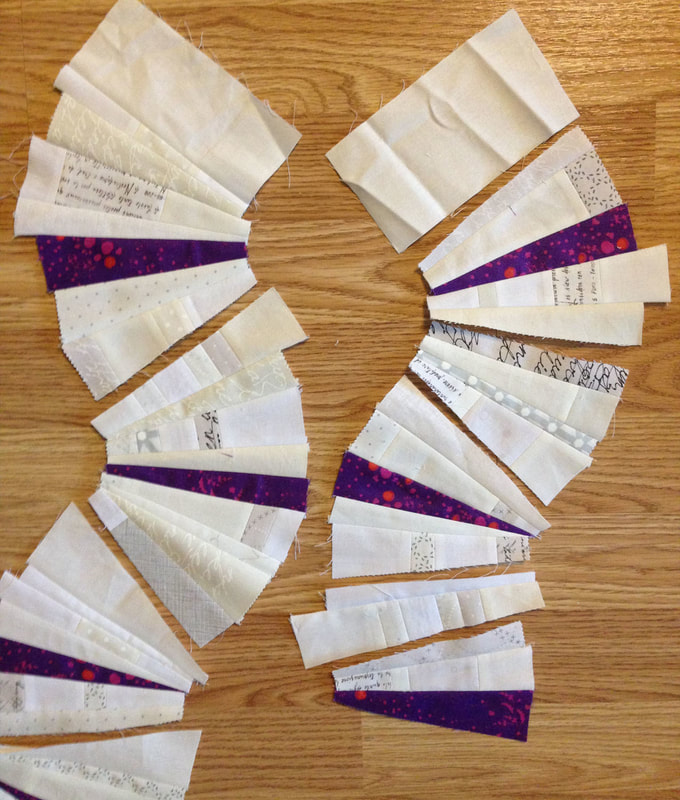
6. Sewing Together The Larger Panel - Now that you have chunks sewn together start to play with your pieces to create a nice long "S" curve. Sometimes you might have to add in a a larger scrap (see the tops) and sometimes you might have to add in a smaller chunk to make the curve do exactly what you want it to do. Overall you want to have a nice meandering curve, make sure the curve doesn't change too sharply, but rather think of an extended long "S."
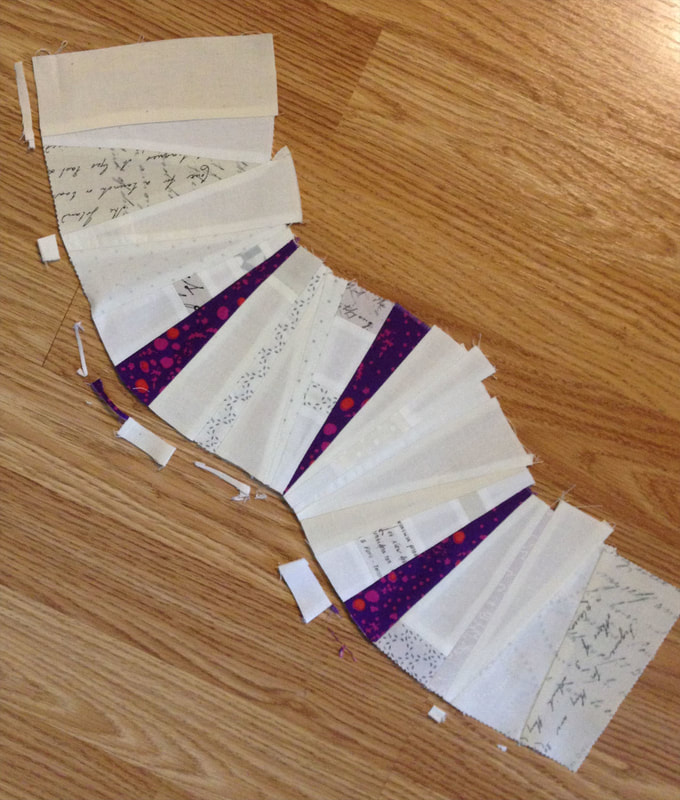
7. Trimming The Piano Keys - Once you have reached your desired length and are happy with the way it looks, it is time to trim the curves to make a nice smooth piece. Trim as little or as much as you want, but you can see above I trimmed only the bits that extended too far past the piece next to it. You can see I kept the nice gradual curves and had very little waste or trash.
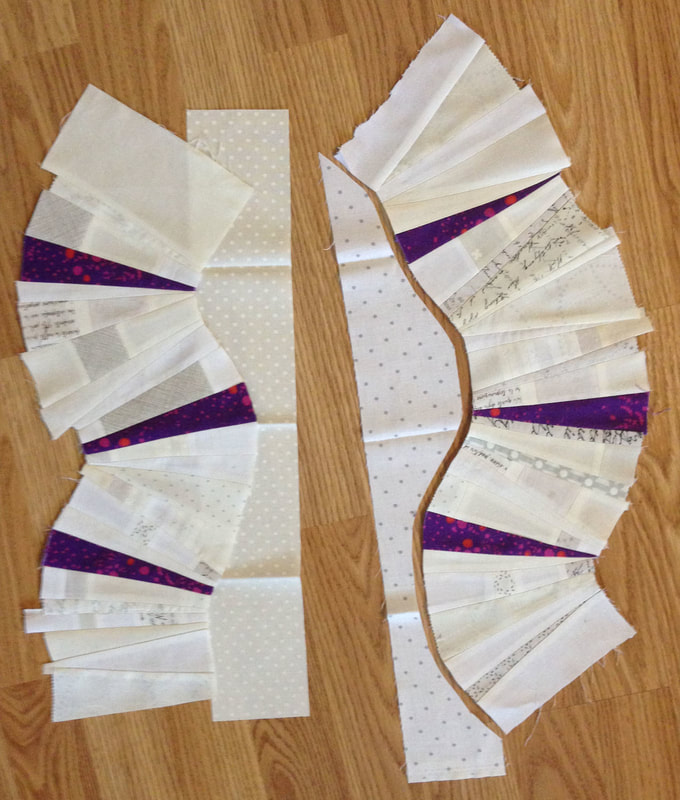
8. Cutting The Background - Now it's time for you to decide how wide you want your piece to be and cut a solid piece long and wide enough for your specifications. As you can see on the example above to the left I lay the piano keys on top of the fabric and make sure I have plenty enough room to accommodate the curves and the seam allowance. The piece on the right has been cut and towards the bottom you can see it gets thin in one spot, but it is still at least 1" wide (I wouldn't really go any thinner than that.) As for cutting the background piece I just over lap the two pieces like the one on the left and literally cut the background piece following along that curved edge. Pretty easy.
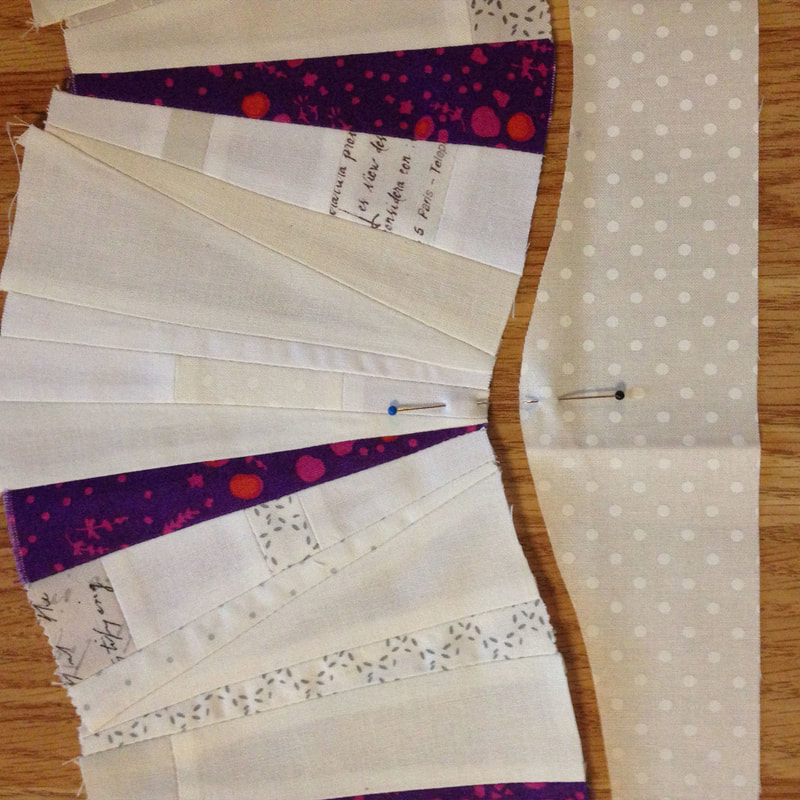
9. Aligning The Curves - There is no exact science when sewing this long curve, but I mark all the outer and inner curves with a pin on each side and when I am sewing I aim to make those pins match. It doesn't always work perfectly but that is my ultimate goal.
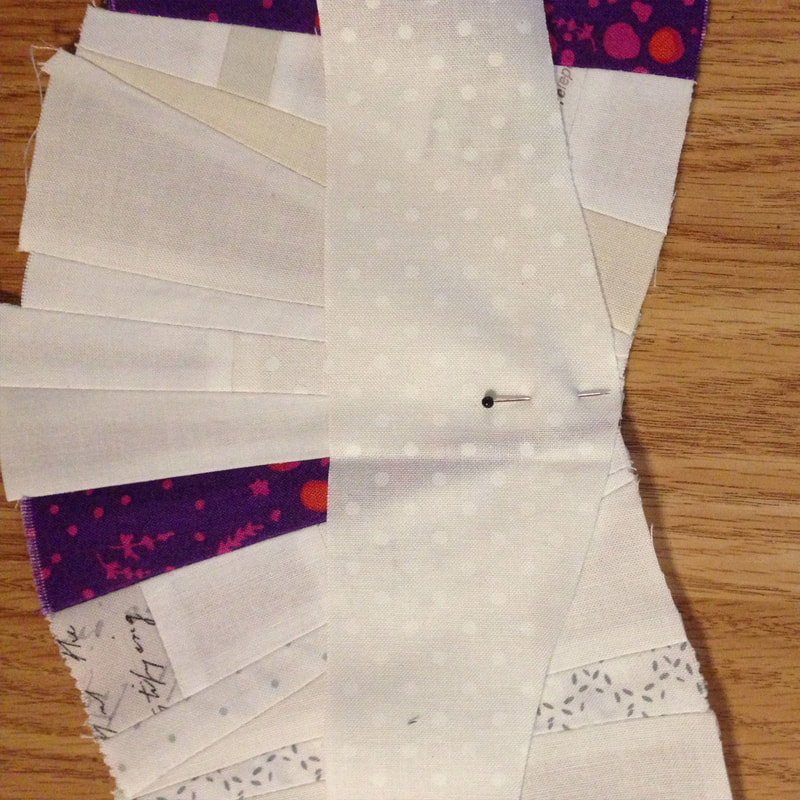
10. Aligning The Curves 2 - Sometimes I will start in the very middle of a really long piece and actually pin right sides together where it should match. Then I will start sewing from the middle out until I get to the end. And then I will start on the loose end (or top) and sew (and ease) it all until I get back the middle where I first started.
11. Clipping Curves And Ironing - Once you have your "background" sewn on the piano keys and you are happy with how flat or not flat it is, you can clip the concave and convex curves to make it lay even flatter. I press this seam toward the background because it is a whole piece of fabric and it tends to lay better this way.

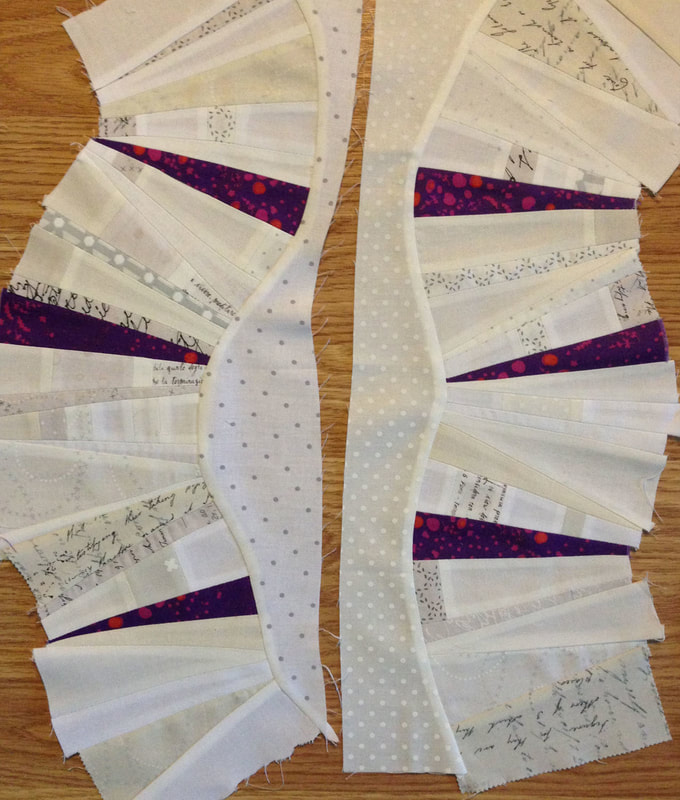
12. How To Use This Block - The first time I made this block it was a bee block and was sent in it's entirety for the recipient to use whole, as is. The second time I made this block was for a swap and I needed to cut it into pieces that I could mail to the recipients, you can see those above. I just cut up the long piece into unique blocks. You could also sew a background to the other curved side and make more of a traditional rectangle or square block. Lots of options and fun things you can create with this design.
Thank you for joining me today and I truly hope you give this technique a try. If you do, please tag me in your photos and use Hashtag #ImprovPianoKeys.


 RSS Feed
