For any of you not familiar with Bocce Ball or want to know the rules of the game, click HERE for the basics and images of how the game plays.
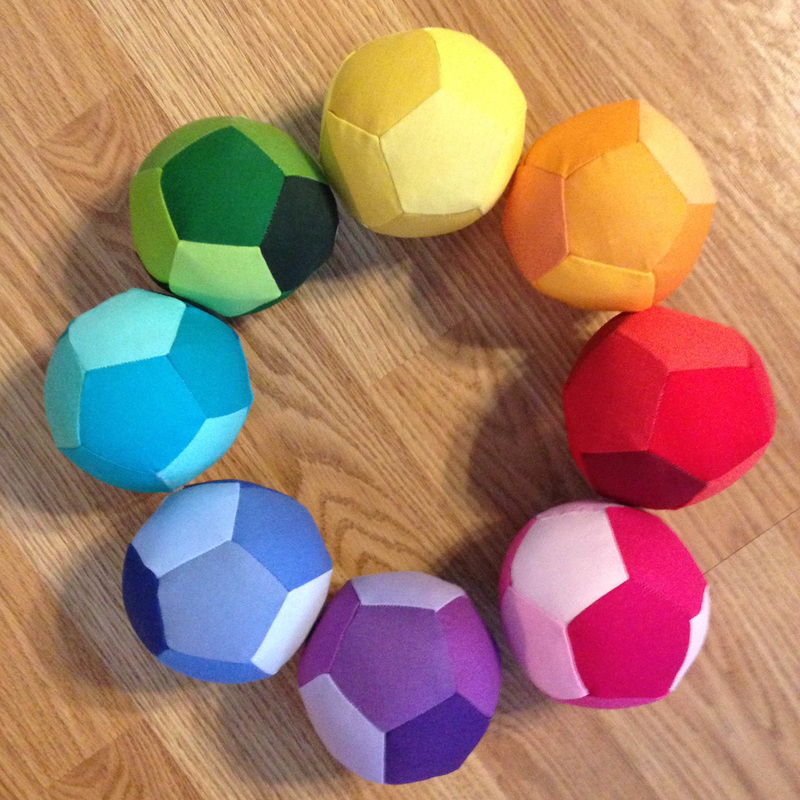
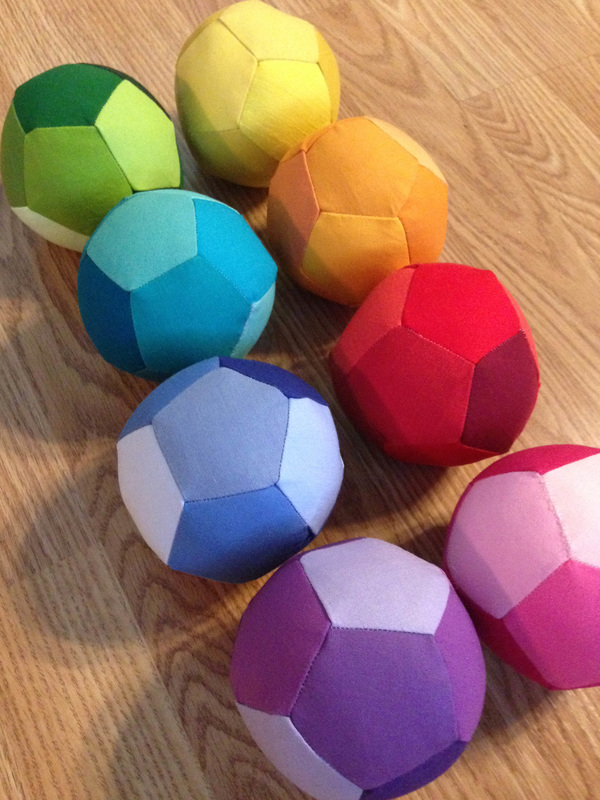
This tutorial can be used to make a variety of sizes of fabric balls, just increase the size of the starting Pentagon and your ball will be larger. I drew the original Pentagon and then enlarged it on my copier. This resulted in a ball just large enough for babies to play with. Insert a small rattle or bell along with the stuffing and baby will have fun hours!
3.5" Fabric Bocce Ball Tool and Supply Lists
Tools Needed:
Paper, Pen, Sewing Machine, Thread, Pins, Scissors, Ruler, Rotary Cutter, Self Healing Cutting Mat
Supplies Needed:
Drafted template onto paper.
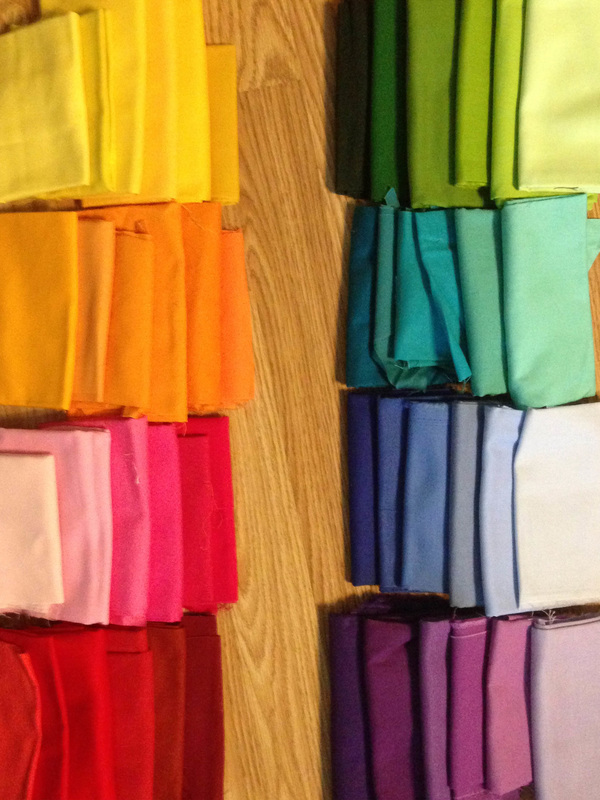
6 fabric prints/solids for each ball, cutting 2 pentagons from each fabric for a total of 12 for each ball.
Iron on interfacing scraps, I used Pellon SF-101 in both black and white.
Fiberfill or Batting Scraps
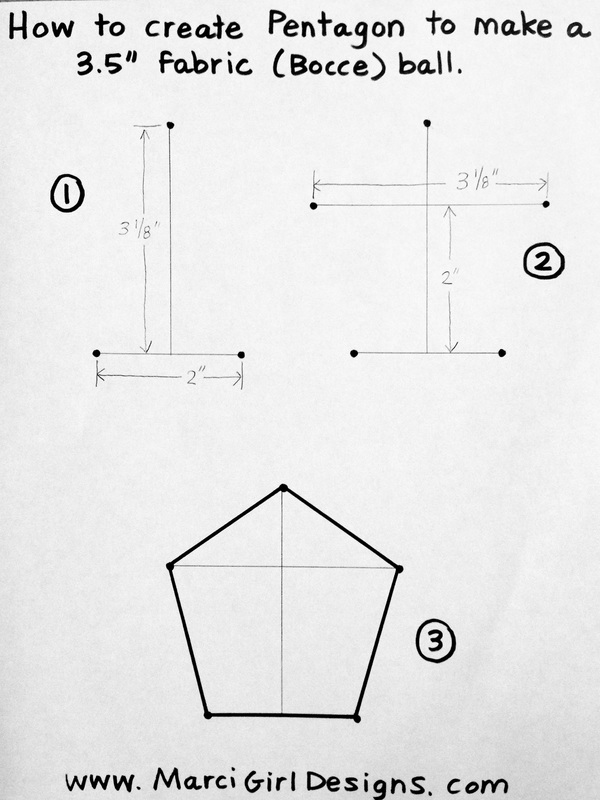
How to Draft the Pentagon Template
1. Draw a dot, which will be the top of the pentagon. Draw a line straight down from the dot that measures 3 1/8." Next draw a perpendicular line at the bottom that measures 2". This line should be centered with 1" on either side. Draw two dots, one on each end of this line.
2. Measure up 2" from the bottom line and draw a line that is perpendicular with the center line. This line should measure 3 1/8" and should be centered just like the bottom line. Since this measurement is a bit odd, I just measured over 1 1/2" and then marked 1/16" over from that. Do that on both sides and then check to make sure the overall line measures 3 1/8". Draw two dots, one on each end of this line.
3. Now that you have 5 dots, ignore everything else and just connect the dots. Voila! You now have a finished pentagon template. To double check and make sure everything is the correct size, each side of the pentagon should measure right at 2". Trust me, if the measurement is a little off, you will still be fine. Now cut out the template and move on to the next step.
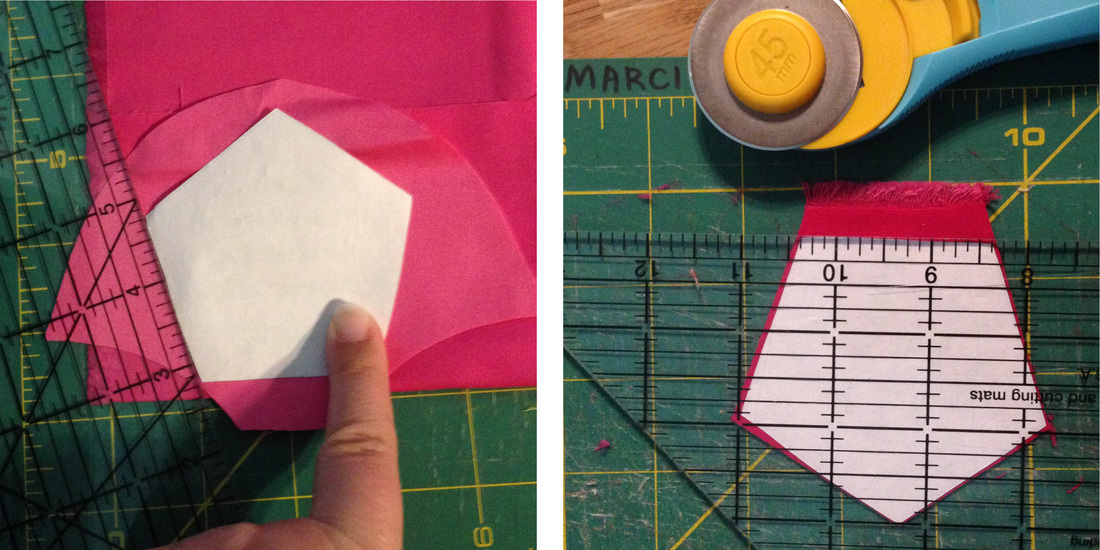
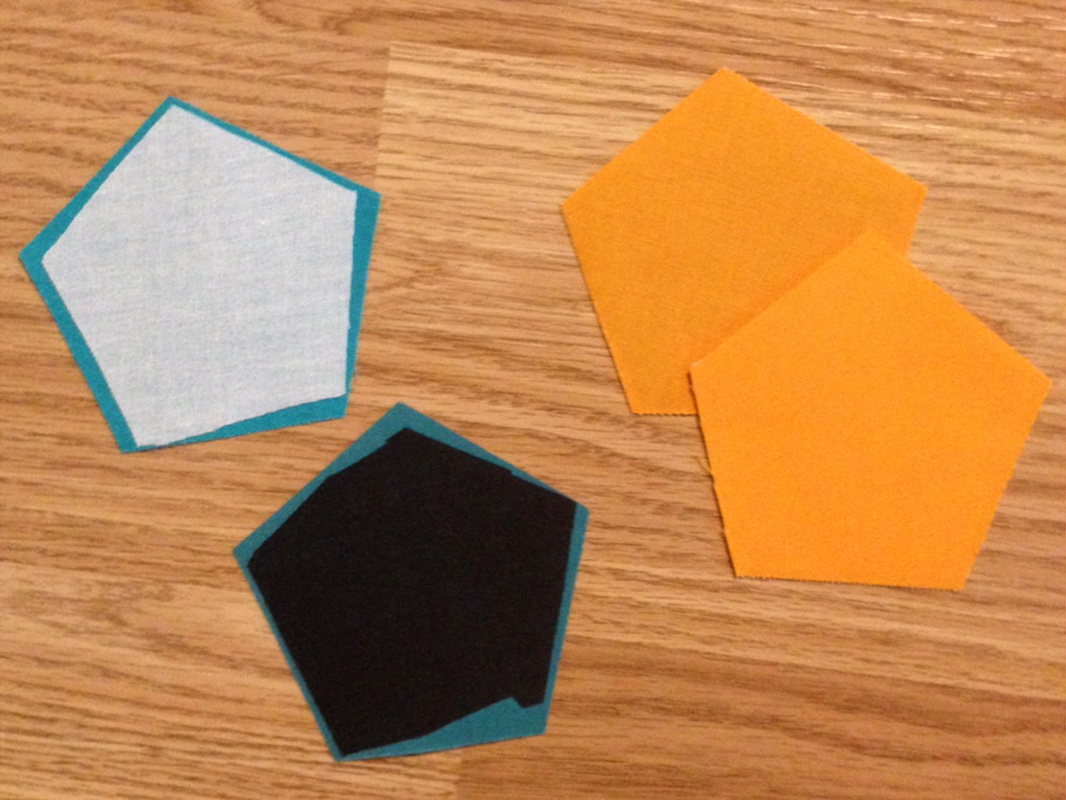
3.5" Fabric Bocce Ball Cutting and Interfacing Instructions
3.5" Fabric Bocce Ball Sewing Tutorial
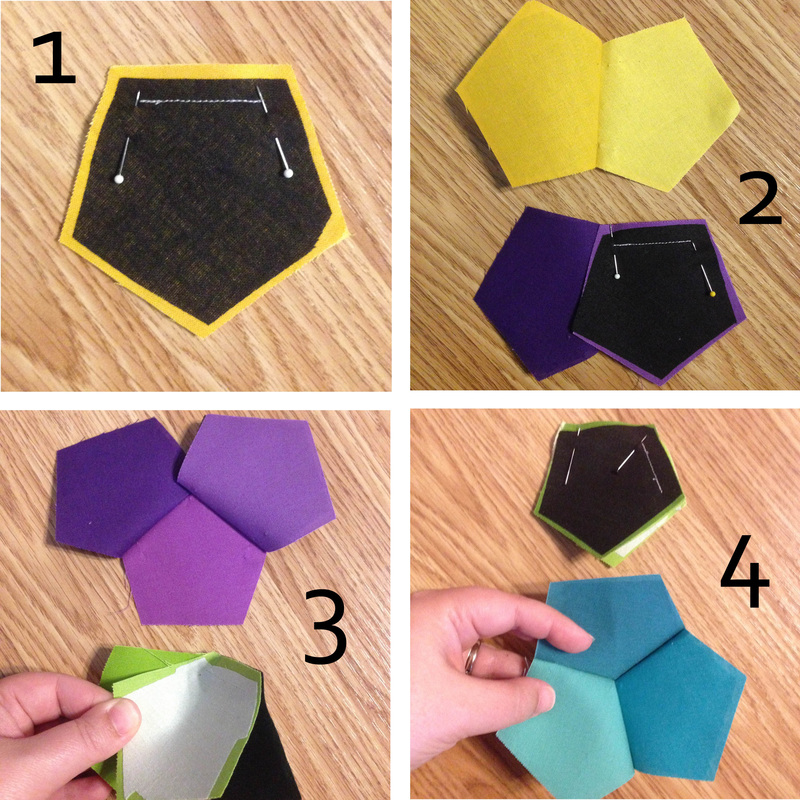
2. Open up the two pentagons and finger press the seam to the left. Taking a third pentagon, right sides together, pin right where the seam is in the middle and pin the other end at 3/8". Stitch, remembering to back stitch at both ends.
3. Open up the three pentagons. Now here is the tricky or neat part, you need to connect these three pentagons together. Gently rotate the upper right pentagon over onto the upper left pentagon. As seen on the green fabric that I am holding.
4. Now pin these two together. 3/8" in from the left side and then put a pin right where the other seam ends. You can see I have this pin at an angle, be careful not to catch the fabric that is sandwiched in there because it is neatly tucked inside. Stitch, back stitching at both ends in between the two pins. Remove pins, open up and you should have three pentagons neatly stitched together like the blue one I am holding. Congratulations if you can get this far, you can make a fabric ball and you have successfully sewn a Y seam!
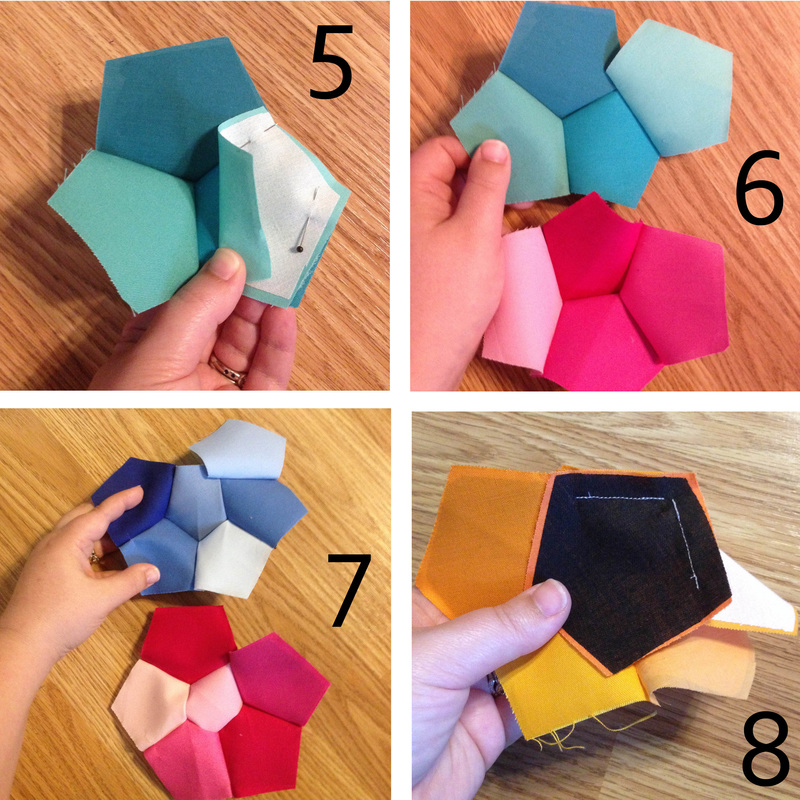
6. Remove pins, open up and it should look like the upper aqua set that I am holding. You will then do the same neat rotating trick (the same as step #3) and attach the newly sewn forth pentagon to the now designated middle pentagon. Pinning and stitching in the same manner as all the others. Remembering to always finger press that back seam out of the way and not catching any of that sandwiched fabric. Once finished you will have 4 pentagons sewn together.
7. Taking a fifth pentagon, add it to the top of the forth pentagon, sewing the same way as all the others. Open it up and it will look like the top blue set. Then repeat that neat little rotating trick to stitch it onto the middle pentagon. You should now have a middle pentagon and 5 other pentagons attached with just one opening as shown on the bottom pink set.
8. This is what step #7 looks like when you rotate it to stitch it onto the middle pentagon.
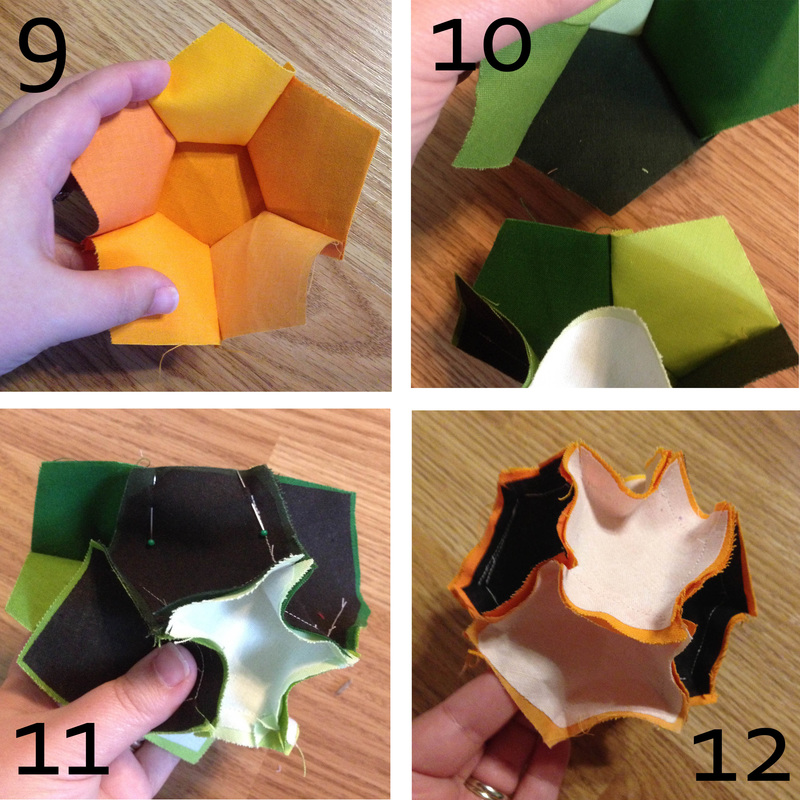
10. You now have 2 ball halves that you need to stitch together. Rotate the halves around until you have no prints/same colors touching. The key to joining the two halves together is to remember that the peaks join into the valleys as shown in the photo. The upper half (peak) nestles into the lower half (valley.)
11. Pin, finger pressing the left seam in the back towards the left and finger pressing the right seam to the right as shown in this photo. Stitch.
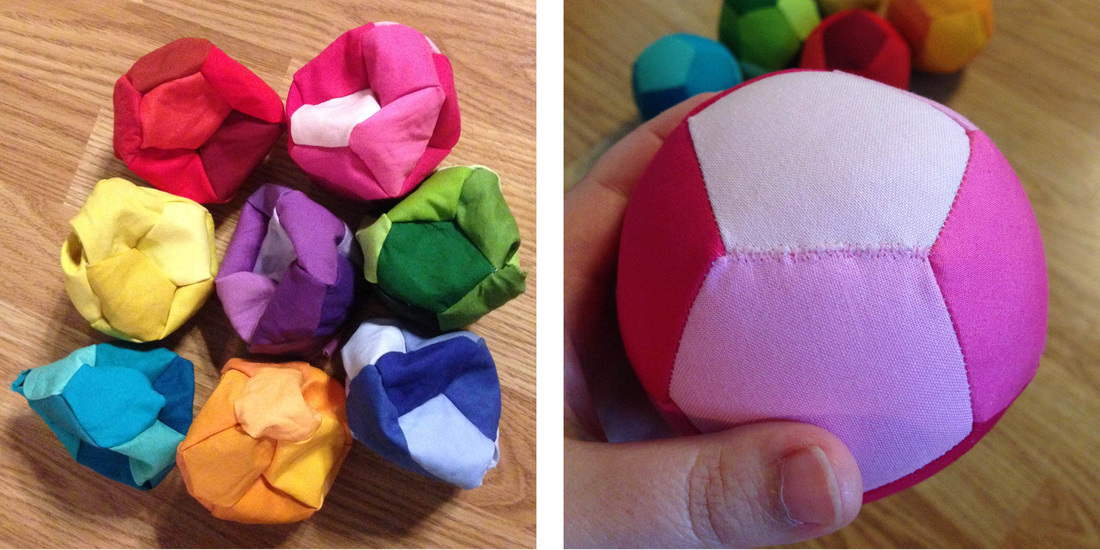
12. Continue to stitch around the whole ball, one short seam at a time, finger pressing the seams out of the way. Stitch all nine joints, leaving the tenth open. You can see in the photo I have my finger stuck in the opening, leave it un-sewn as this is where you will turn the ball right side out.
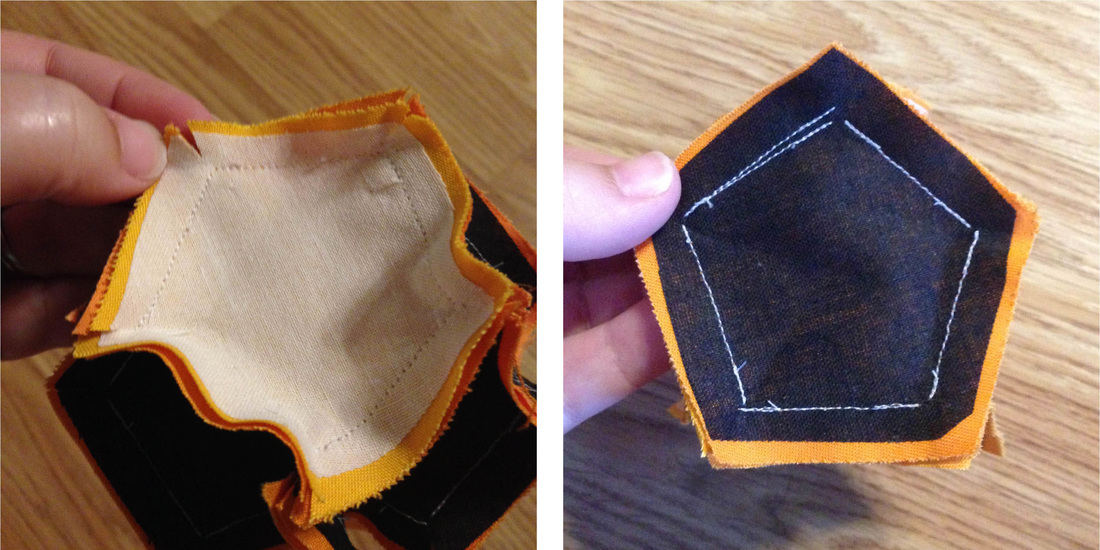
1. Once you have sewn all your seams and are ready to turn the ball right side out. I found clipping the corners 1/4" in on every intersection produced a smoother ball in the end. I didn't trim the seams, it wasn't necessary. You can see my clipped seam in the left photo above.
2. Another key to stitching these and having a smooth ball with no tucks or puckers can be seen on the photo to the right. When stitching each separate seam make sure you don't overlap your stitching and you don't even have to meet the adjacent stitched seam, it is better if you don't. You can see in the photo that my seams are about an 1/8" away from each other. I even messed up that top seam by starting out at 3/8" and then gradually shifting to 1/4" (old habits.) You can see I just left it and restitched the seam correctly. By leaving that little bit of space you are making sure not to catch other bits of fabric on the inside and creating tucks. When in doubt, leave the space! This is not the type of project where you have to be precise.






 RSS Feed
