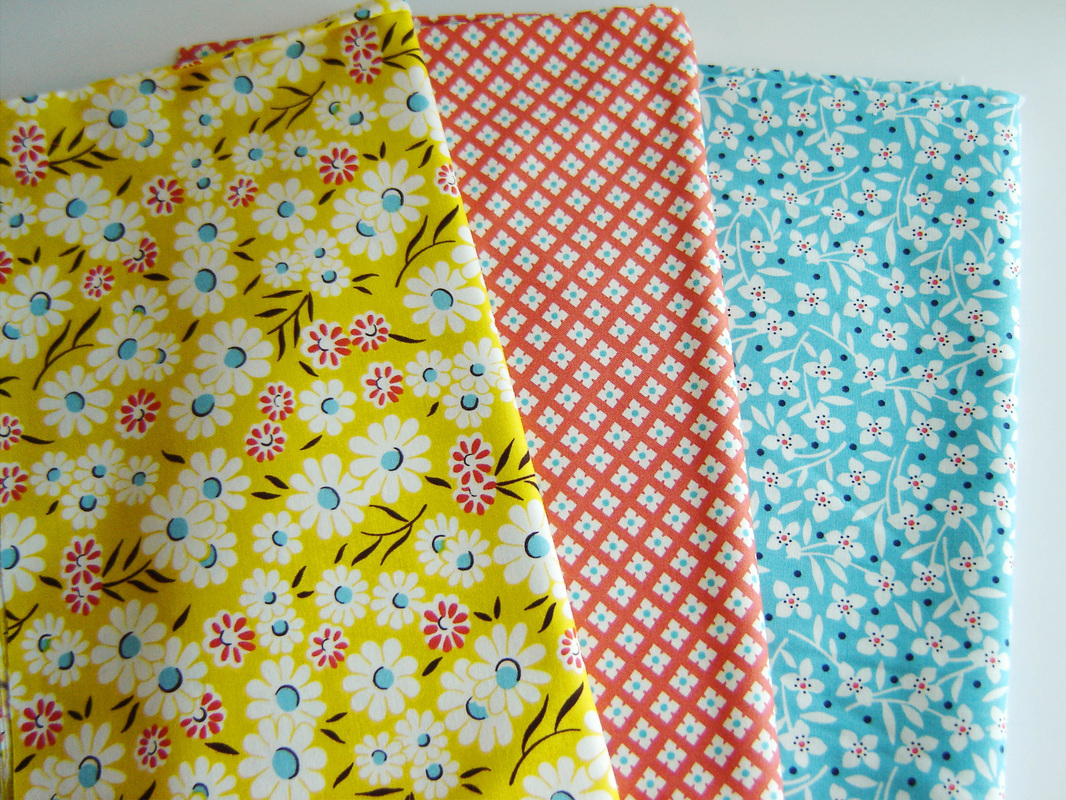
Once upon a time I found myself at JoAnn Fabrics. I originally went there to purchase Juliana Horner's new fabric line Rosette. Once I was there I decided that the fabrics did really read "me." They are beautiful, but honestly just not my style, but since I was there, it wouldn't hurt to look around, right? After spending some time browsing the bolts, I ran across that gorgeous yellow print above. Then I discovered the other two coordinating prints. They are all by Denyse Schmidt and are part of her DS Quilts line for JoAnn Fabrics. Though, I do believe that two are from one line and one is from another, they all coordinate beautifully. So I bought 3/4 yard of each (why that weird amount, who knows?) and headed home. There the fabrics sat for a few weeks.

In the meantime I enrolled in Stitched in Color's Penny Sampler Class. The very first project of the class is a pillow that featured a Dogwood Blossom applique on it. Originally I had no intention of making it, but once I remembered I had bought these fabrics (and bought enough yardage) I knew it would make a beautiful pillow. So here it is! Just as pretty as I envisioned!
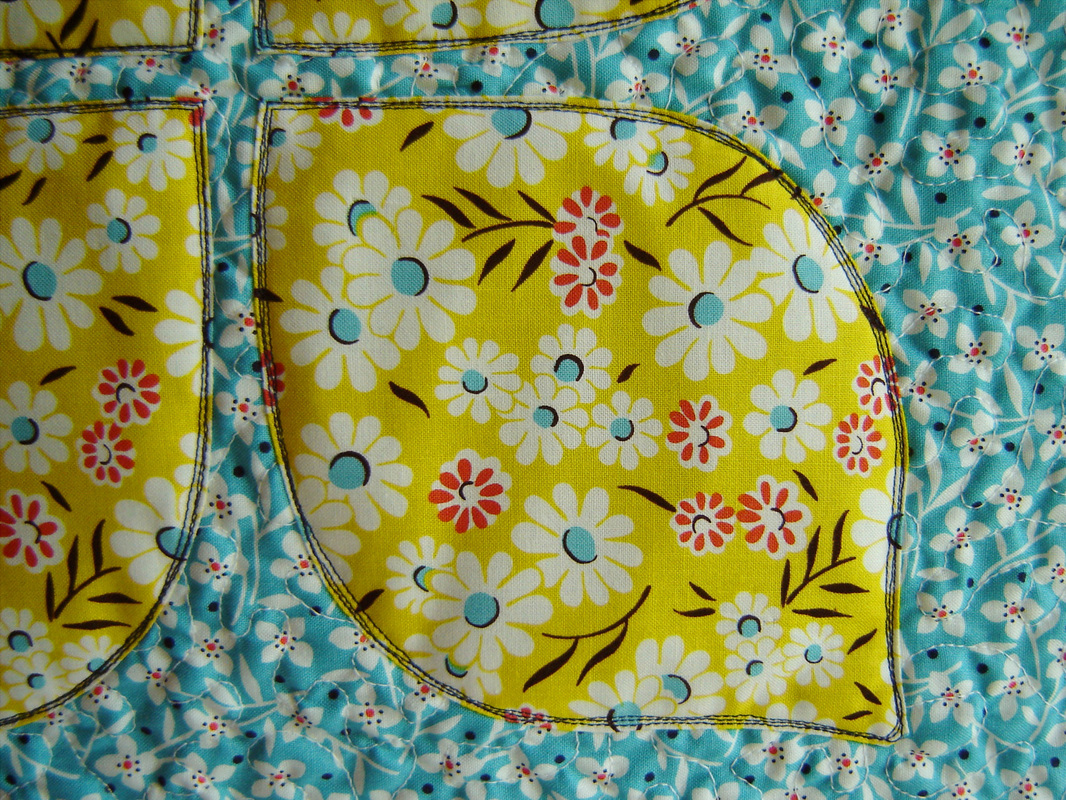
The background was free motion quilted in a simple stipple pattern using white thread on both the front and the back panels. Then the applique was added on top.and features "the sketch stitch technique" that Rachel teaches in the class. And yes, it is my new favorite thing to do and just perfect for applique blocks. It really seals the edges of the applique and I KNOW that there won't be any raveling and no chance that it will come off in the future. So awesome. I used navy blue thread for the sketch stitch because those little dots on the blue fabric are actually dark blue.

I know that it appears like I followed directions to a "T" with this pillow, but alas I did not. I don't think I am capable of following directions exactly like I am told. The one thing I changed with this pillow was the applique technique that I used. Basically in Rachel's class she teaches two applique techniques. One for light colored fabric on top of dark fabric (where see through would be a problem) and the other for darker fabrics on top that won't show see through. Because of the larger white flowers on the yellow print, you could see through to the blue fabric. I didn't want to use the correct method because that would have entailed a trip to the store for missing supplies, and I really didn't want to go to the store. So I figured out a way around it, and it worked GREAT for this pillow project.
I have a bolt of Pellon 50, which is a sew-in interfacing (it is NOT fusible.) It is slightly see through (so I could trace the template onto it) and it is fairly stiff, around the stiffness of a cereal box, but thinner. So I traced the template and cut out four petals from the interfacing. I then took the yellow fabric and carefully ironed it around the interfacing template, once I was done ironing, the interfacing stayed inside, making a sandwich of sorts (finished edge fabric on top, interfacing in the center and the raw edges wrapped around to the back of the shape.) I then pinned the four petals to the background and stitched them on using the sketch stitch. It worked out so well, no see through and the petals are slightly stiffer so they stand out a bit from the background. This worked perfectly for a pillow, but this is not a technique I would use for a quilt, as it would just be too stiff for a quilt.
I have a bolt of Pellon 50, which is a sew-in interfacing (it is NOT fusible.) It is slightly see through (so I could trace the template onto it) and it is fairly stiff, around the stiffness of a cereal box, but thinner. So I traced the template and cut out four petals from the interfacing. I then took the yellow fabric and carefully ironed it around the interfacing template, once I was done ironing, the interfacing stayed inside, making a sandwich of sorts (finished edge fabric on top, interfacing in the center and the raw edges wrapped around to the back of the shape.) I then pinned the four petals to the background and stitched them on using the sketch stitch. It worked out so well, no see through and the petals are slightly stiffer so they stand out a bit from the background. This worked perfectly for a pillow, but this is not a technique I would use for a quilt, as it would just be too stiff for a quilt.
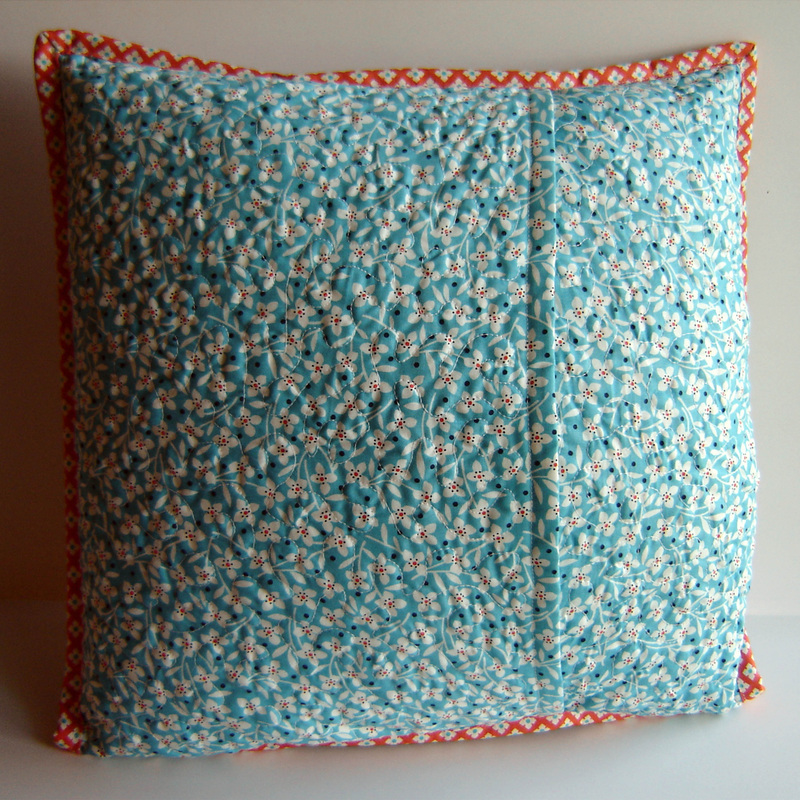
The only real mistake that I made was that I cut the pillow to the exact dimensions and then quilted it with the stipple pattern, well I didn't take into account that this quilting technique caused the fabric to "draw up and shrink a bit." The finished pillow was supposed to measure 15" x 15" and would accept a 16" x 16" pillow form (so that it would look nice and plump.) Well my finished pillow measured 14" x 14" and I JAMMED a 16" x 16" pillow form into it, so you can obviously see from the back view that it is overstuffed big time. The front looks ok, but the back is lumpy. I am hoping over time that it "settles in" a bit better. We shall see...
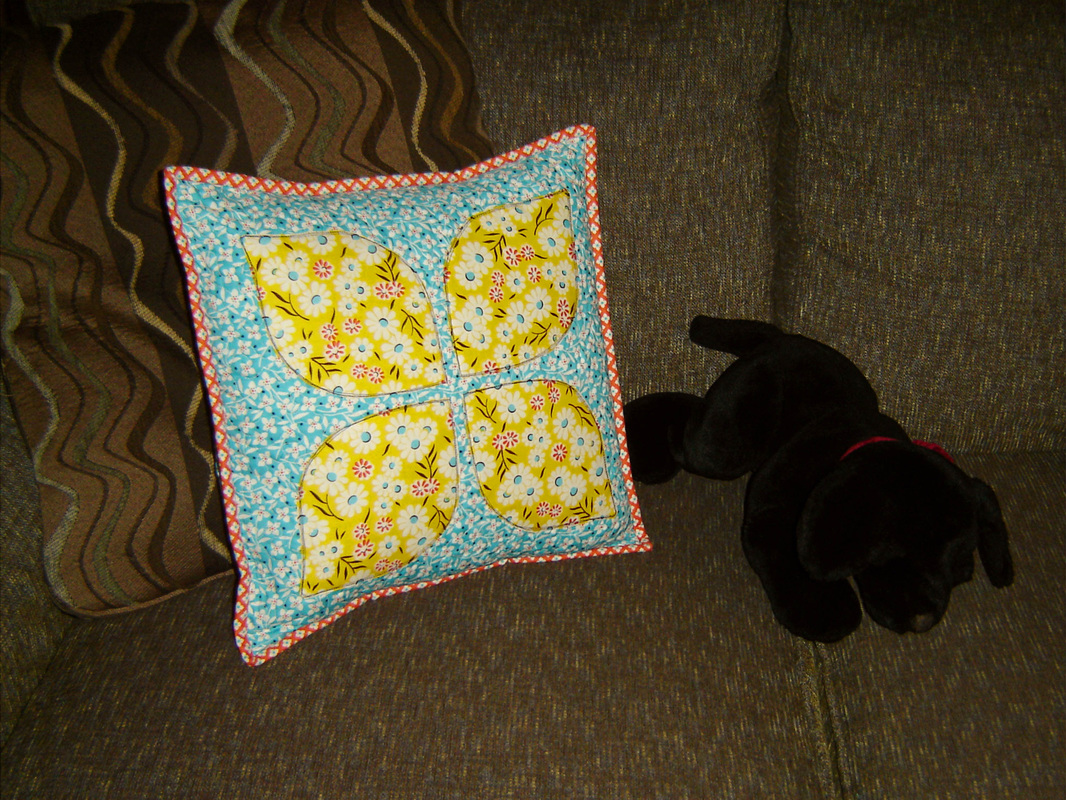
I machine stitched on the binding and voila, it is a finished pillow that is now proudly displayed on my sofa next to the only type of indoor dog we shall ever have! It certainly brightens the sofa and I just love this first project of the Penny Sampler Class!


 RSS Feed
