|
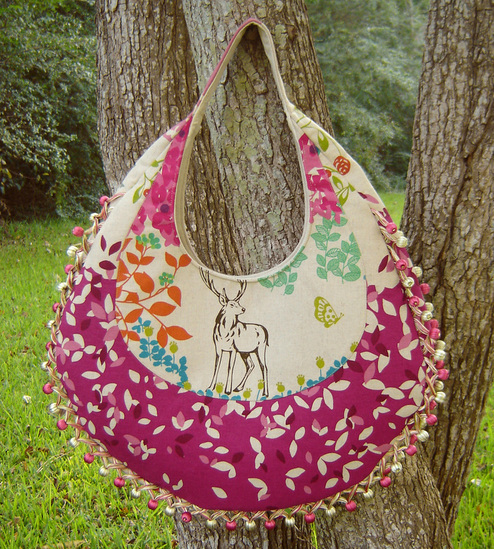
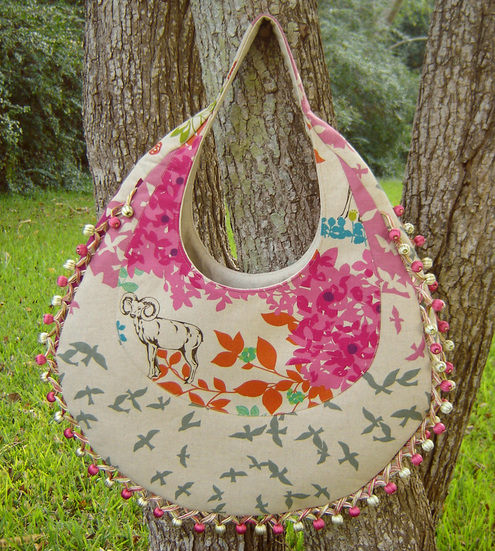
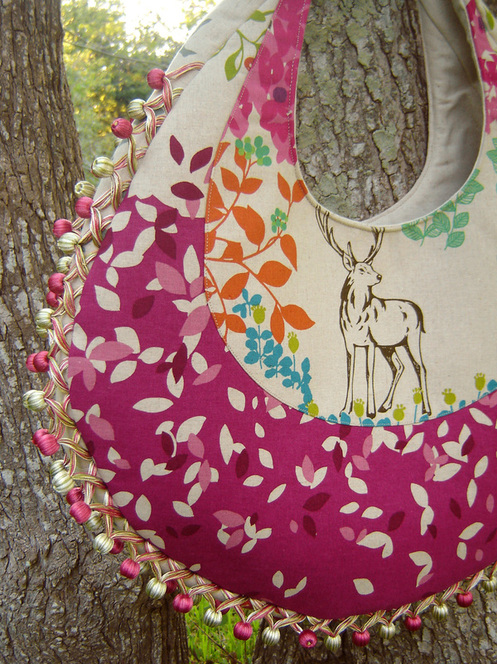
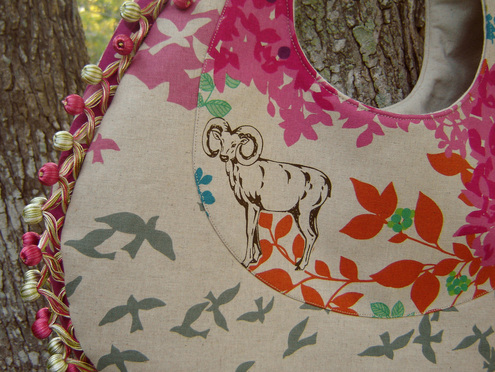
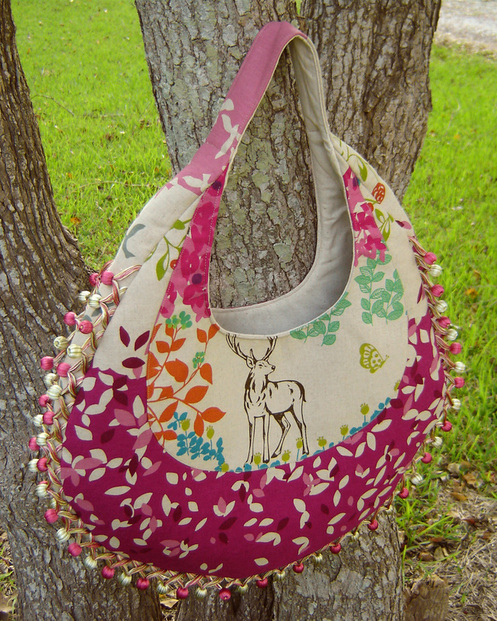
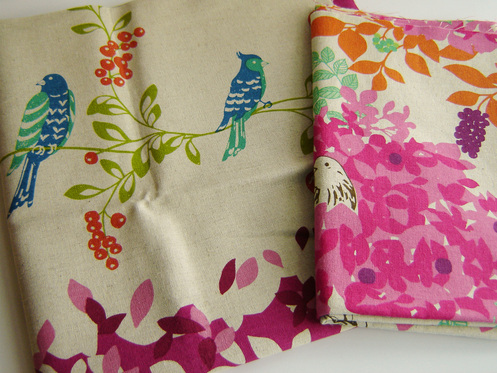
This was the bag that almost wasn't. It almost seems as if everything in the world kept stopping me from making it, but boy am I glad to have it finished! This was my August project in the Amy Butler Style Stitches Sew Along, and also my entry into the Sew Sweetness Amy Butler Sew Along. I missed the deadline for the first one, I barely made it in time for the Sew Sweetness Sew Along, but I'm so glad I at least met one of the deadlines! This is the Fringed Hobo Bag from Style Stitches by Amy Butler, and was in the "advanced" section of the book. I will definitely classify it as advanced. When I first started working on this bag, I thought it was going really easy and honestly I couldn't figure out why it was an "advanced" pattern, and then I got to the very last step, and could have pulled my hair out. The last step is simply to attach the lining to the main body of the bag, and that is simple enough, except for the fact that in several spots the thickness of the interfacing, fabric, lining and everything was so thick it was virtually impossible to sew through. I broke a size 14 needle, so I jumped to a size 16, which wasn't much better. Thankfully I had a few "heavy duty" needles on hand, and that needle punched through smooth as could be, which helped a lot. I still wasn't really pleased with the outcome in these spots, but honestly it was just going to have to do. I'm not really sure how to fix that issue, maybe it stitches together a little smoother if you use regular quilt weight cotton instead of home dec fabric, but i don't know if I'll make this one again to "try it out." Overall, I do love the look of the bag, and it is a good size, I made the smaller version, and I did shorten the length of the handle so that it sits right underneath my arm, instead of hanging down lower. The interior has two side pockets that I divided in half, so they weren't just large pockets, this way things can be organized a little better inside. The fringe doesn't go all the way to the top like it is supposed to, but that is my error, I didn't buy enough, so I made it work. I kind of like it like this, and am so glad I wasn't wrestling that extra bulk in those top seams. I used two different Echino prints for the exterior, and a simple muslin for the interior. Overall it wasn't a bad project, and I could have constructed it about 2 days, but halfway through I ran out of interfacing and couldn't find it anywhere locally, ordered it online, waited and then finished the bag. This added the extra two weeks to this project, that honestly I didn't need to add! I think if you have some bag making experience, you won't struggle to put this one together, and honestly all the steps are fairly straight forward with the exception of the last step, which was easy to understand, just difficult to execute. It does make a stunning bag, and if you are wanting to make a bag that stands out in the crowd, then this is the one for you!
11 Comments
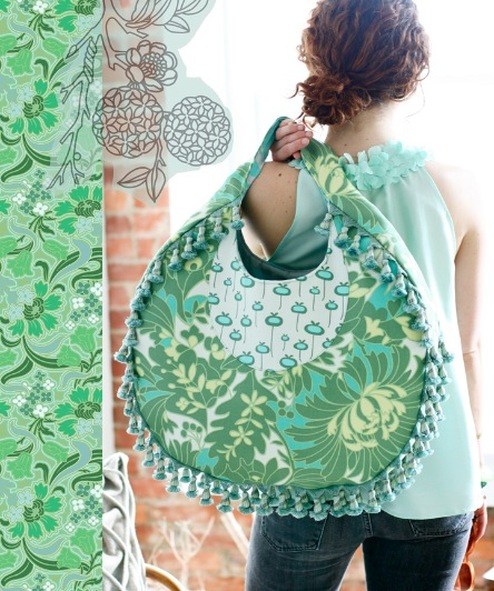
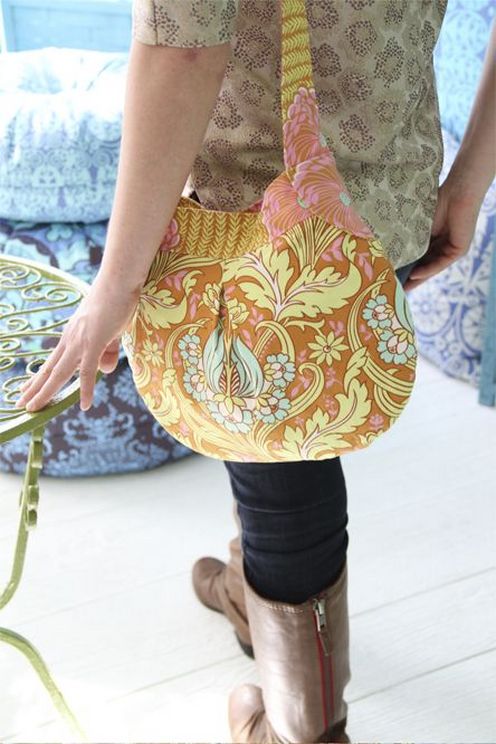
NO, the month can't be half way over already? Well almost, close enough anyways. Time flies even when you aren't having fun! HaHa. It is that time again to share my fabric choices for the Style Stitches sew along. This month is one of my absolute favorites from the book, the Fringed Hobo Bag. I'm not sure why I like it so much, but I do, I love it, and can't wait to see how it comes together! The picture below is the large version, but I'll be making the smaller version, and hoping that it isn't too huge, but given Amy Butler's track record, I can be pretty sure that it will be quite BIG. I have chosen two different Echino prints to use on my bag, though I'm not sure which will be the main body, and which will be the yoke, but I am excited to use these fabrics that have been in my stash for quite some time waiting on that perfect project! You will have to tune in for the finished product to see the fringe that I have chosen. It wasn't my first choice, but the price was right, compared to spending an INSANE $10+ a yard on something. It doesn't make any sense to spend more on the darn fringe than you do on the fabric itself. Even with my 40% off coupon, it still cost me more than I was wanting, and that was my second choice! Not only is this month one of my favorite bags, but it is extra special because I am the giveaway sponsor this month over at My Crafty Crap. All you need to do to enter to win my giveaway goodies, is to make the bag and enter at the end of the month at My Crafty Crap. Simple as that! Want to know what I am giving away? Well go visit Bree right HERE to see the loot! While you are there, make sure to leave her a super sweet comment because she is anxiously awaiting the birth of her first child! Good luck Bree! What are you waiting on...get to working on that bag!
Giveaway is now Closed, but feel free to still leave comments! Thank you! This bag comes a month late (or is it two months now?), but heck, late is always better than never, right? At least that is what I have been telling myself a lot lately. I felt like this bag was actually really easy to construct, and the hardest parts were turning the darn handle and sewing on those side "hips." I have no idea as to how you would sew on those hips if you made the small bag, I made the medium one and that was tough enough. Anyways, I don't really have any complaints about this bag, I think the instructions were very clear and straight forward, I didn't have any issues putting it together, and honestly it went together really quickly, which was also nice. I did find the handle extremely difficult to turn, but I think that even though this was difficult, I think it was the best option in this circumstance, and honestly when is a long tube ever easy to turn? If you have stuck with my rambling this far, time for the giveaway! I have been extremely blessed lately and feel like spreading the love! I will be giving away this bag to one lucky person! You have two simple methods to enter to win, just be sure to leave a separate comment for each entry.
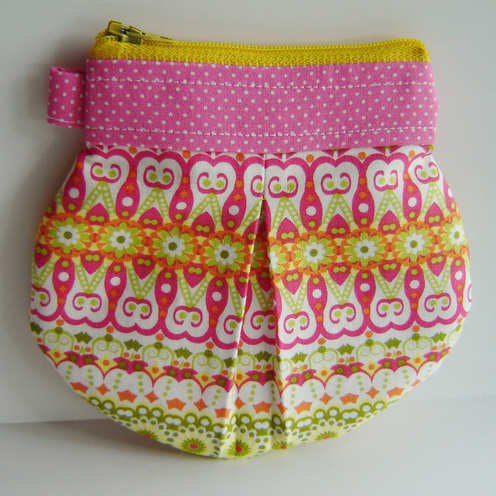
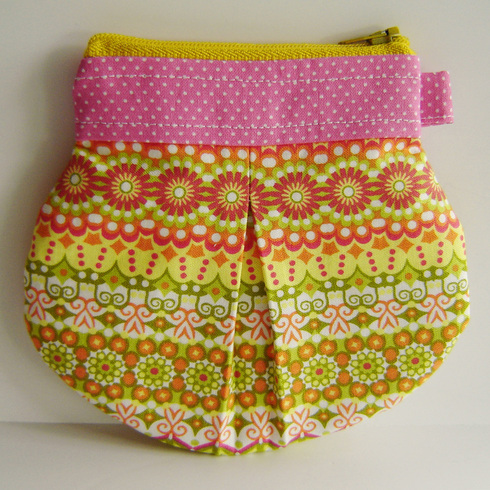
1. I am looking for some good summer reading, and would love a book suggestion. I just finished the "Girl with Dragon Tattoo" series, and I love a variety of subjects, but I LOVE time travel books, or a good love triangle. So for your first chance to win, just suggest a good book for me to read! Super simple! 2. If you are a blog follower, leave a comment saying so, or if you become a new follower, just let me know! Also super simple! Easy peasy! This giveaway will close on Wednesday, August 10, 2011 at midnight! Looking forward to some great book suggestions! Whew! I finished this one just in time! A quick project, really, I think I completed it in around an hour, which was nice to have it done so quickly. I really like this little (not really as little as I thought it would be) coin purse, it is big enough to hold lipstick, coins, credit cards, a compact...quite a bit of stuff! It really was a easy project, so once again, I'm not really sure why this is supposed to be a "harder" pattern? As with many of Amy Butler's projects, I find the hardest part to be applying all that darn interfacing! Only a few things I did differently than what the pattern called for. The first, the zipper, I used my normal method of applying a zipper, it worked like a charm, and I'm not sure why anyone would use the method Amy Butler suggests. The second was a flat out mistake. See that little tab to the side and top....yeah, that isn't supposed to be right there. I totally didn't pay attention to the directions, and just assumed it went there, sewed it up and then noticed, no it wasn't supposed to go there. Oh well, it looks fine, and now mine is completely "unique!"
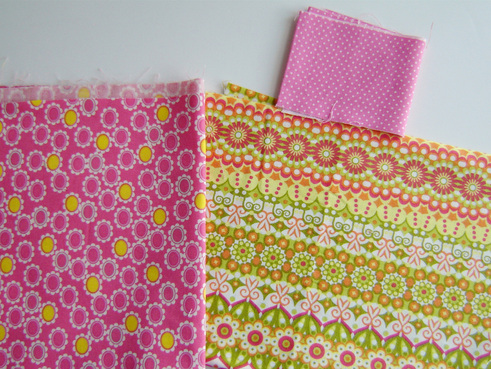
I see myself making more of these in the future, but the only thing I would do differently is to not use most of the interfacing that the pattern calls for, the darn little pouch is just too stiff. I would use the interfacing for the top bands and that is it, I would eliminate the interfacing that is on the bottom sections. A "softer" pouch would have been nice. I also would eliminate the inside pocket/divider, it is absolutely pointless and honestly just takes up space. I don't have a photo of the inside of mine, but if I did you would see a hot mess of unnecessary bulkiness! I also finished my Teardrop Bag, but will wait to share it sometime next week, and keep an eye out for a giveaway and an announcement sometime soon too! Wow, it is already July! Where do the months go? This months bag is a small coin purse/key keeper. I'm excited to make this little project, who doesn't need a little bag that fits inside their purse! The size seems just right too! I'll be using scraps of fabric for this little coin purse, and honestly I don't know much about the fabrics other than the lower right hand corner one is a Jenean Morrison Californian Dreamin print, which will be the main body of the coin purse. The small pink polka dots will be the accent fabric, and the hot pink to the left will be my interior fabric (which my best guess is an Art Gallery print.) I'm thinking this project will go together really quickly, which will be nice for a change!
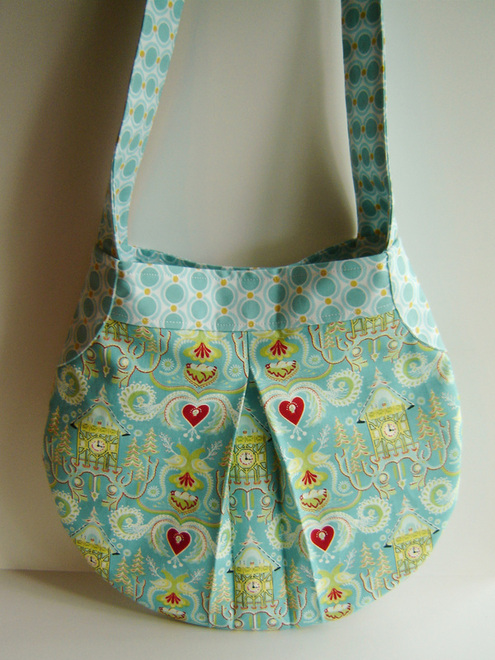
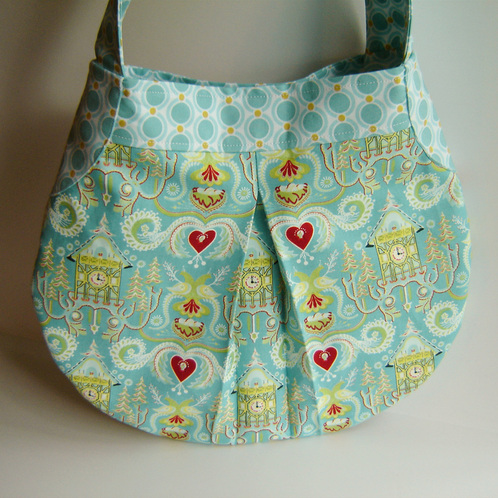
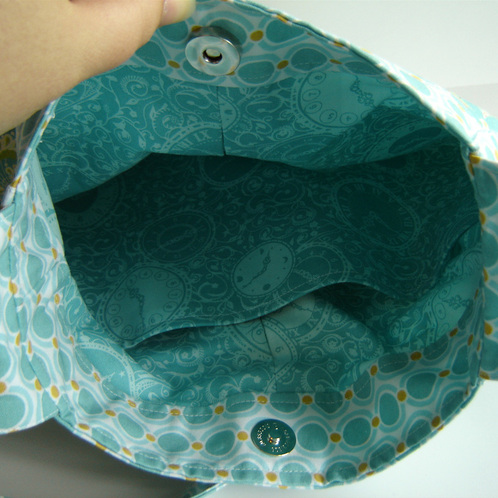
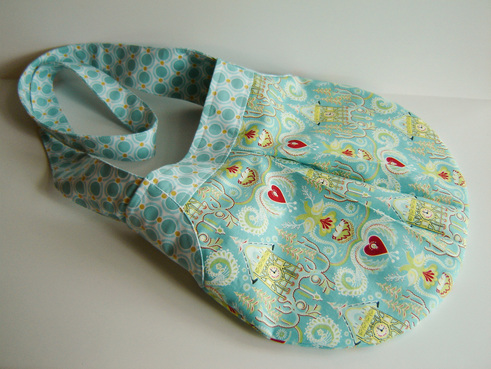
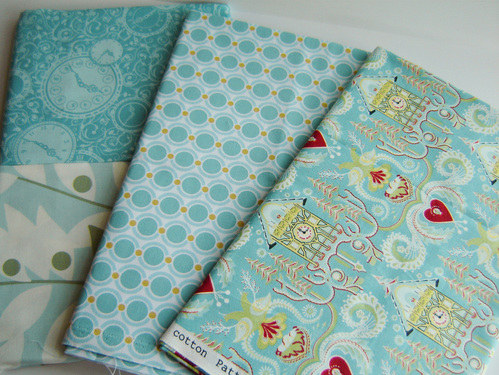
I know what you are thinking. Wait? Did I miss last month's bag? Well, you didn't miss it, I did. The month sped by so quickly I didn't get time to finish it up. So, in theory I will finish both last month's and this month's bag and post pictures of both! It's that time of the month again to pick out some fabrics! This month's bag is the Teardrop Bag and the pattern is available in two sizes, small and large. I will be making the large size (because I haul around a ton of crap in my purse!) Honestly, of all the patterns in the Style Stitches book, this bag is my least favorite, I'm just not feeling it. I'm hoping that once i have made the bag, I'll fall in love with it and want to carry it myself! I'll be using the fabrics below to make this bag. The main body will be the fabric all the way to the right, which is a Hideaway print, don't you just love the cuckoo clocks! I'll be using the center print, Joel Dewberry's Modern Meadow as the accent fabric (the handle.) And I'll be using the clock print all the way to the left as the lining. Please ignore the Nicey Jane print in the left hand lower corner, was thinking about using it, but changed my mind! I think it certainly will be a unique one of a kind handbag!
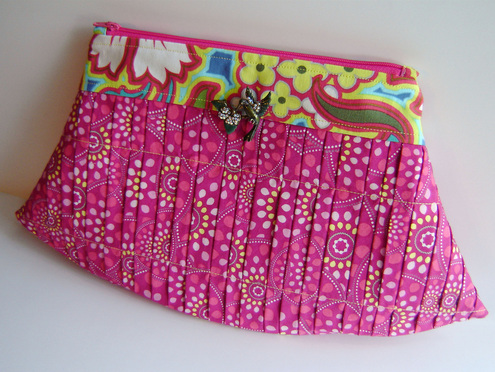
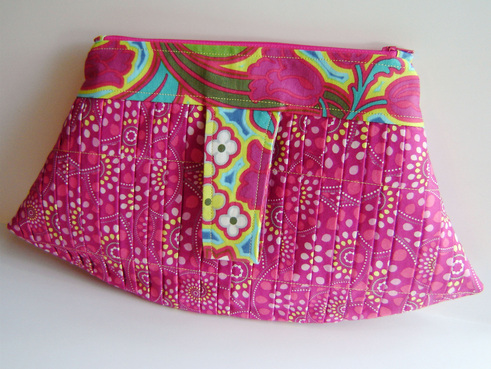
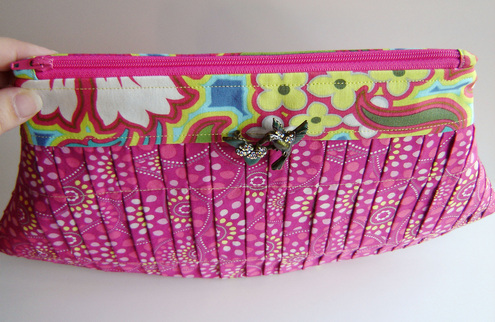
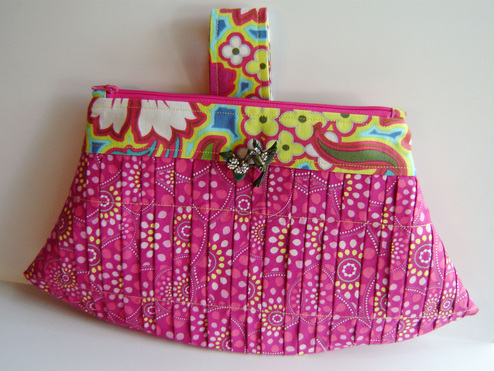
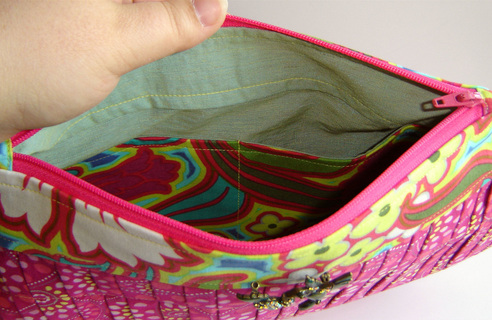
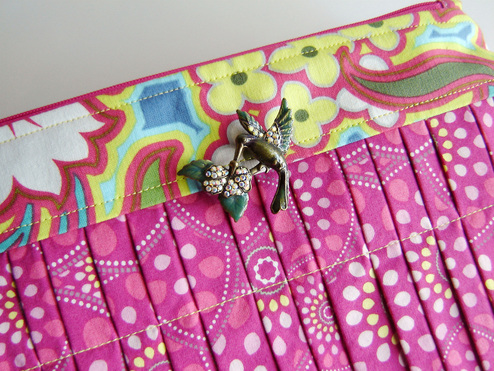
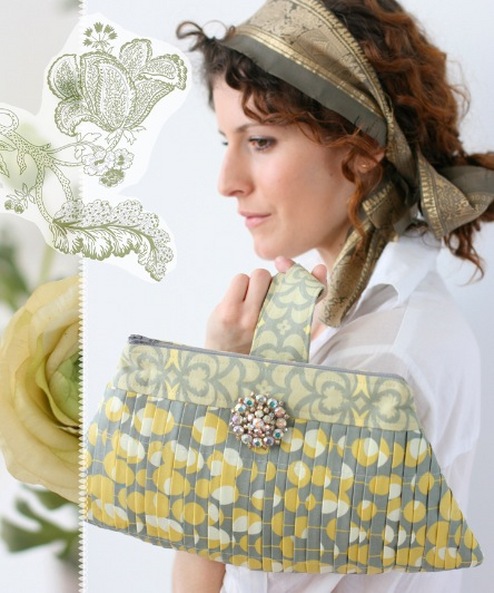
Wow, it is the beginning of May and I already have my clutch done! I was really excited to start working on it, and nothing better than getting something crossed off the list. I really enjoyed working on this one, and it came together really quickly, and honestly I thought it was pretty darn easy, maybe the more Amy Butler patterns you accomplish, the easier they get? I hope so! I changed a few things with this pattern (and maybe that's why I think it was easier!) I did not use the zipper installation method Amy Butler suggest, after learning a hard lesson with six Origami bags, I knew I wouldn't do it like that again. I used the Noodlehead tutorial, and installed little tabs on the ends. I love this method, and it creates such a wonderful edge and a clean finish. I only made the tabs about 1/4" and then narrowed my seam in that area to about 1/4", so that I would have the same amount of opening space, which worked out perfectly. When it comes time to attach the handle (or baste it) I also did a zig-zag stitch to really attach the handle on the bag, I don't want pulled or ripped seams. Other than that, I didn't change anything else. Originally, I thought the bag shape was a little weird, but now that I have made it, I rather like it and think it really accentuates the pleats. I love the fact that Amy Butler had you create different size pleats ranging from 3/8" to 5/8", this really made the pleat process easier, because each one didn't have to match perfectly. The only thing I would do differently if I made it again, would be to lengthen the handle just a tad bit. I found it a bit to snug to put on quickly, and honestly who wants to fight getting the strap on your wrist? If I made it again, I would add about 1/2" to 1" in the overall length. Bree over at My Crafty Crap, (don't you just love that blog name) did just that, and added just a touch of length to her strap, and she said it fit perfectly! Awesome! As a last little touch, I added the little hummingbird broach to it, and thought that it added that "little something extra!" I made the medium sized clutch, and thought it was the perfect size for a night out on the town. Now all I need is a baby sitter!
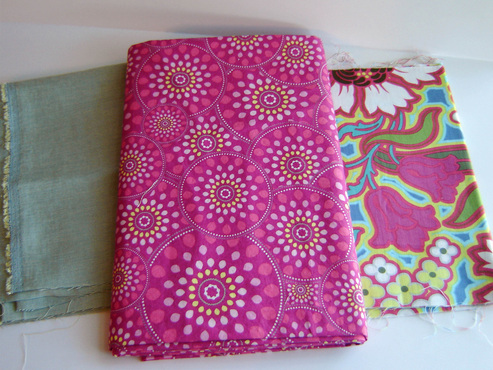
New month, new project! Time to pick out fabrics for the Style Stitches bag this month. May's bag is the perfectly pleated clutch, and honestly I wasn't that thrilled about making this one, but toward the end of last month I started to get a little excited to make all those pleats! I've done pleats before, but not this many, and not over an entire surface. It is quite a neat effect. Below are the fabrics I have chosen to make this clutch. The hot pink, an Art Gallery print, is going to be the main body (the pleated part.) The fabric to the right is an Amy Butler print from Soul Blossoms, it will be the accent fabric. The greenish colored fabric all the way to the left is some funky polyester blend stuff that I will be using as the lining. I have decided to make the medium size, it seems the most versatile for me. The best part? I do believe that I have a fabulous broach to accent the bag and these fabrics! Then my clutch can be "so pretty" just like the picture above!
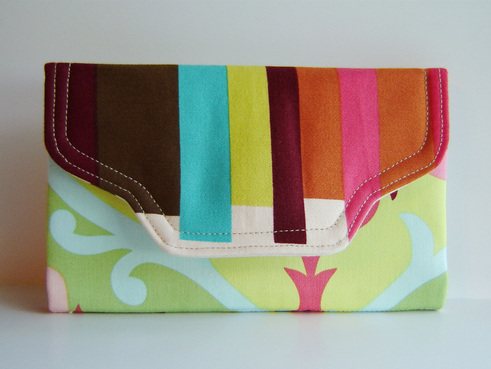
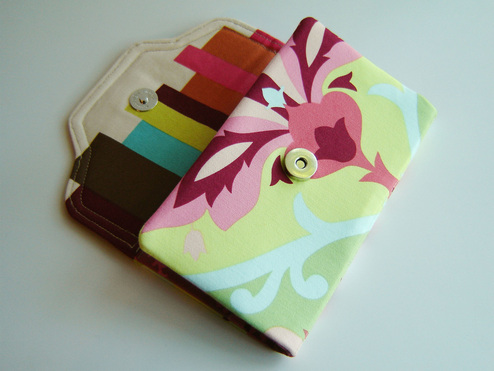
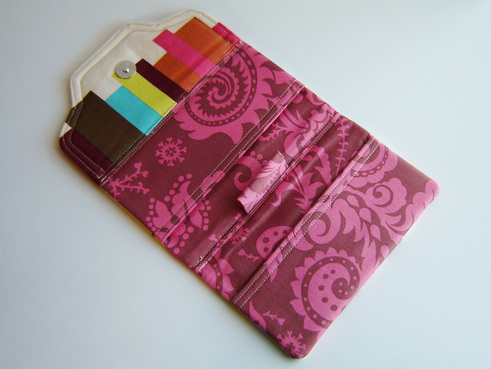
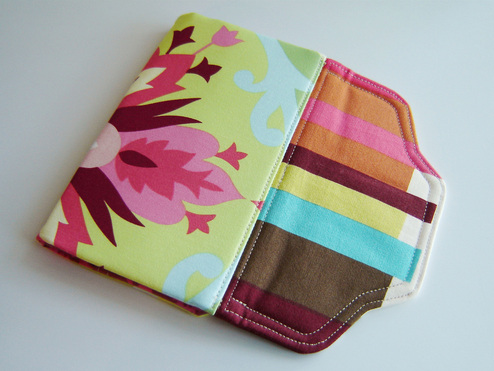
Finished! Guess what? I love it! The brilliant part, I don't really have any complaints about it either! Of all the Amy Butler bags I have made so far, I think this one had the easiest, clearest instructions. I really love these fabrics together, though next time I would center the pattern on the main body, but I was using up scraps, so oh well. My only suggestion to those of you who haven't made it yet, is to carefully pay attention to the placement of the magnetic snaps. The wording on this step is a little funny, and I could see how you could easily mess it up. Also, don't expect for the square corners to perfectly push out either. If you look at mine open (above) you can see the bottom corners are pretty round. There is just too much thickness for it to be perfectly square. After all my frustration with last months bags, I was really pleased at how quickly this came together and honestly it only took a few hours. The longest part is probably cutting it out and interfacing everything. I liked it so much, I plan to make another!
What happens when the weather is rainy and gloomy three days before Wednesday? That's right, no photos! Normally, I just wouldn't post at all, but this week I decided to go the silly route! So you are going to have to use your imagination! I finished my Style Stitches Checkbook Cover, and I honestly think it turned out great and was so much easier than previous Amy Butler projects, yippee! I also finished up my pouch for the Pretty Little Pouch Swap, also quite happy with the results! I will be posting about both of these projects as soon as I can take pictures. My Advent Calender Quilt is back from the long arm quilter and is now awaiting a binding, which I already have cut and ready to sew on! Plan on doing that today! Very excited to get this project wrapped up. I joined a sew-along this week to make a tunic for myself, you can read more about it HERE. I need to get working on this, and am quickly falling behind. That is all I have today folks! Sorry I don't have any photos, hopefully next time. Hopefully you had a successful week and were able to accomplish a lot! Finished Projects: Amy Butler's Style Stitches Beautiful Balance Checkbook Cover Pretty {Little} Pouch Swap Ongoing Projects: Organizing my OUT OF CONTROL Fabric Stash (65% complete) Bottled Rainbows Ticker Tape Quilt-Along (5 of 16 blocks complete) Lily's Quilts Quilt-Along (Using Sherbet Pips) Advent Calender Quilt (Back Home and Awaiting Binding) Making a Light Box (Supplies bought, partly assembled) Sewing (for myself) a few tops/shirts. Other Random Projects: (These are not counted in my weekly stats!) A Box Full of Alterations and Random "Fix It" Projects. Roughly 150 + Items that are Finished and Need to Be Photographed for my Shop. This Week's Stats: New Projects - 1 Completed Projects - 2 Currently in Progress - 6 Dream Projects On Hold For Now: A Cathedral Window Quilt Cutting into the stack of Home Dec fabric to make Mary Rose Clutches. Sock Monkey Quilt Denyse Schmidt Home Dec Fabric Wall Hanging Quilt Making a bunch of clutches from a new pattern that I have purchased. Head over to Freshly Pieced to have a look at what everyone else is working on!
|
Marci GirlA feisty mom designing, sewing and blogging her way through everyday life!
|



 RSS Feed
