|
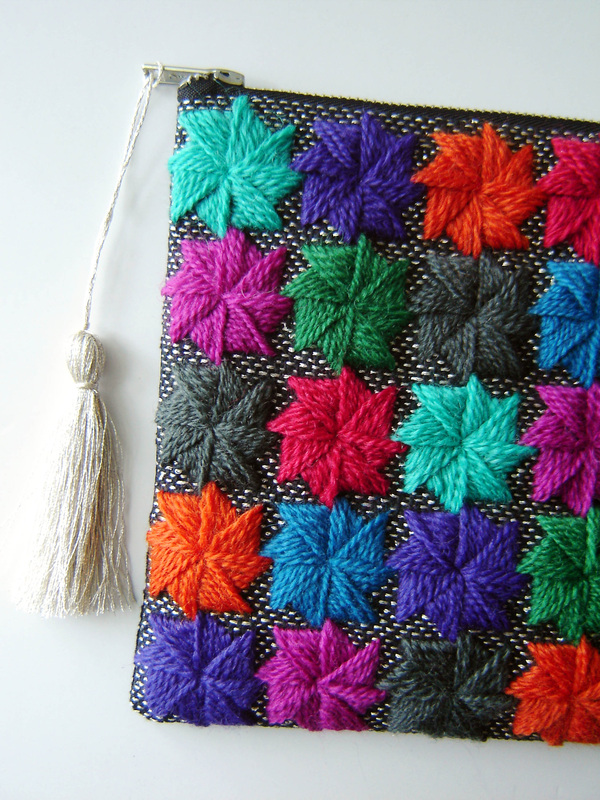
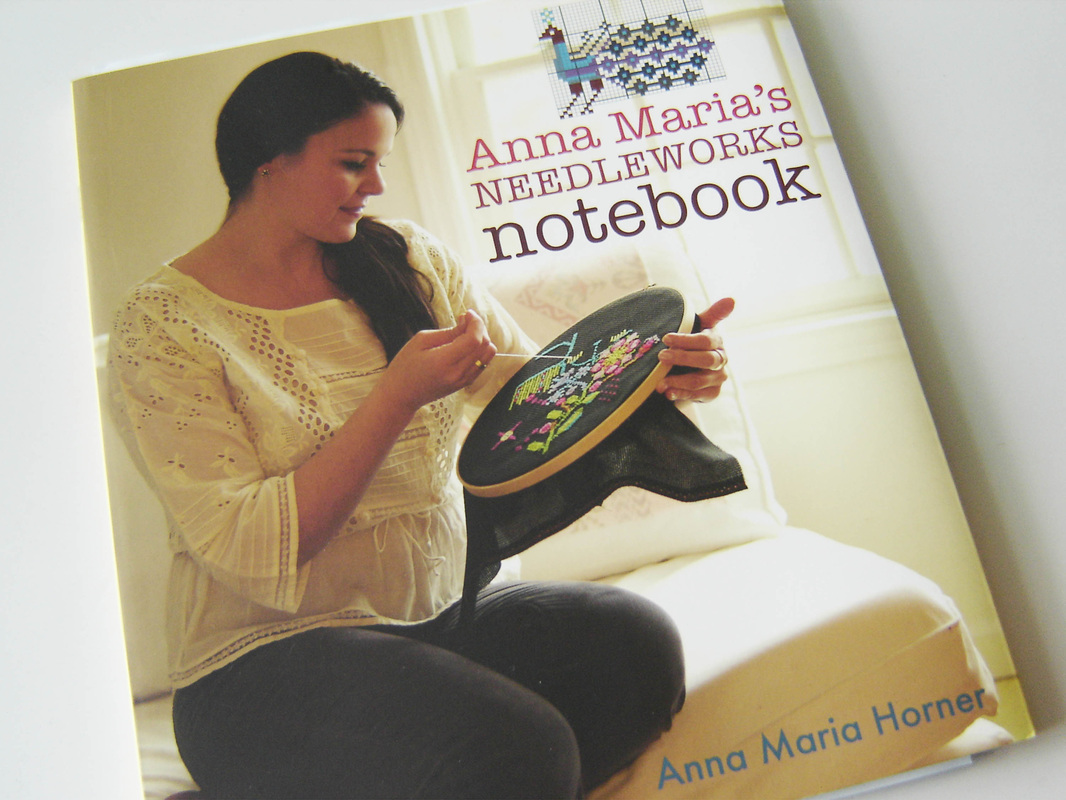
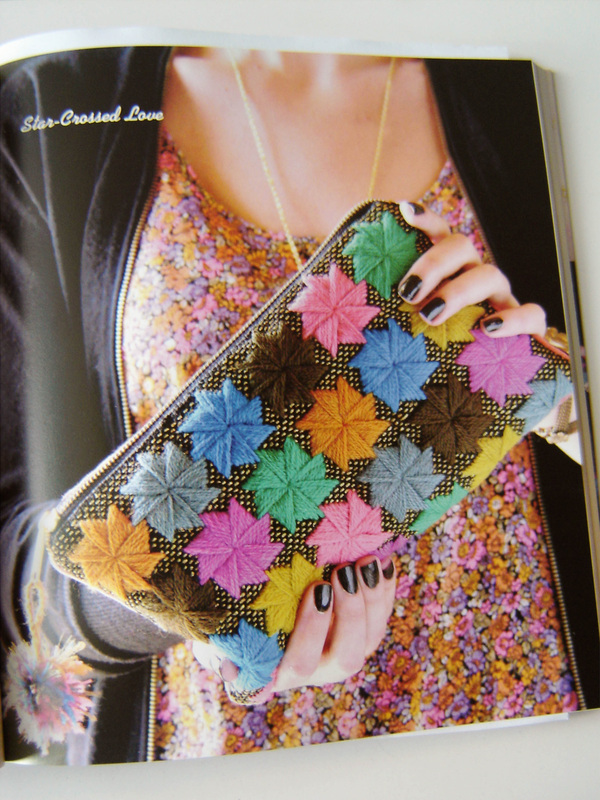
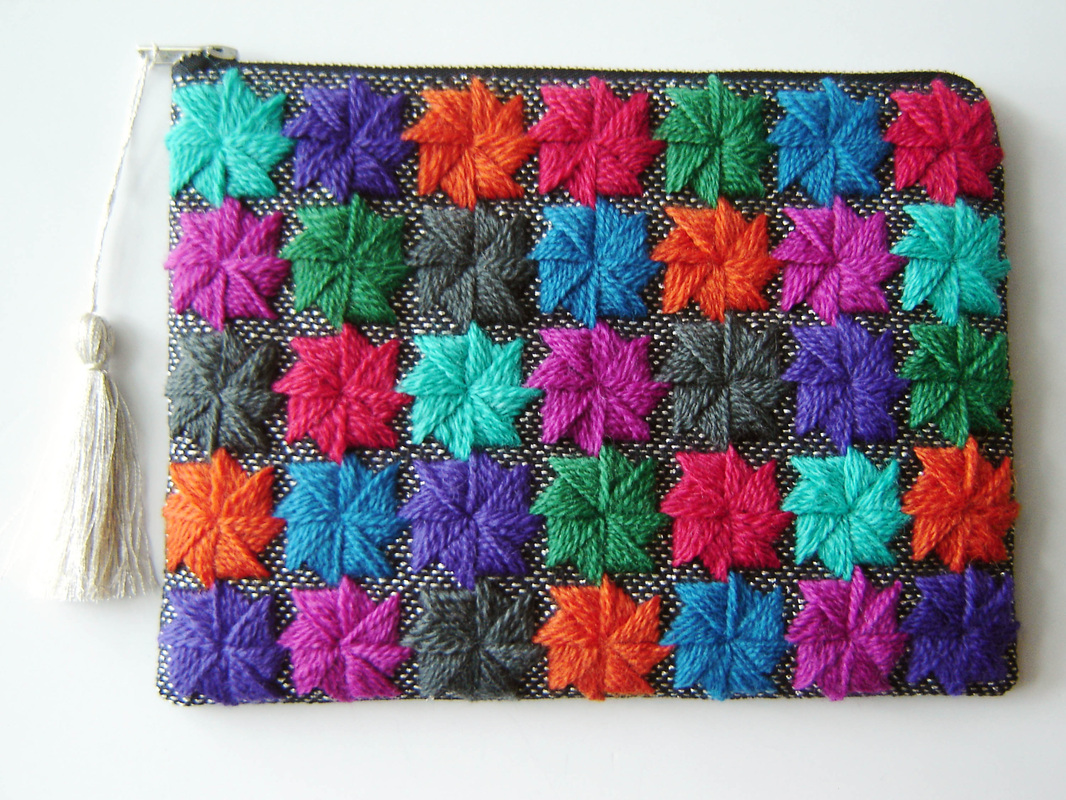
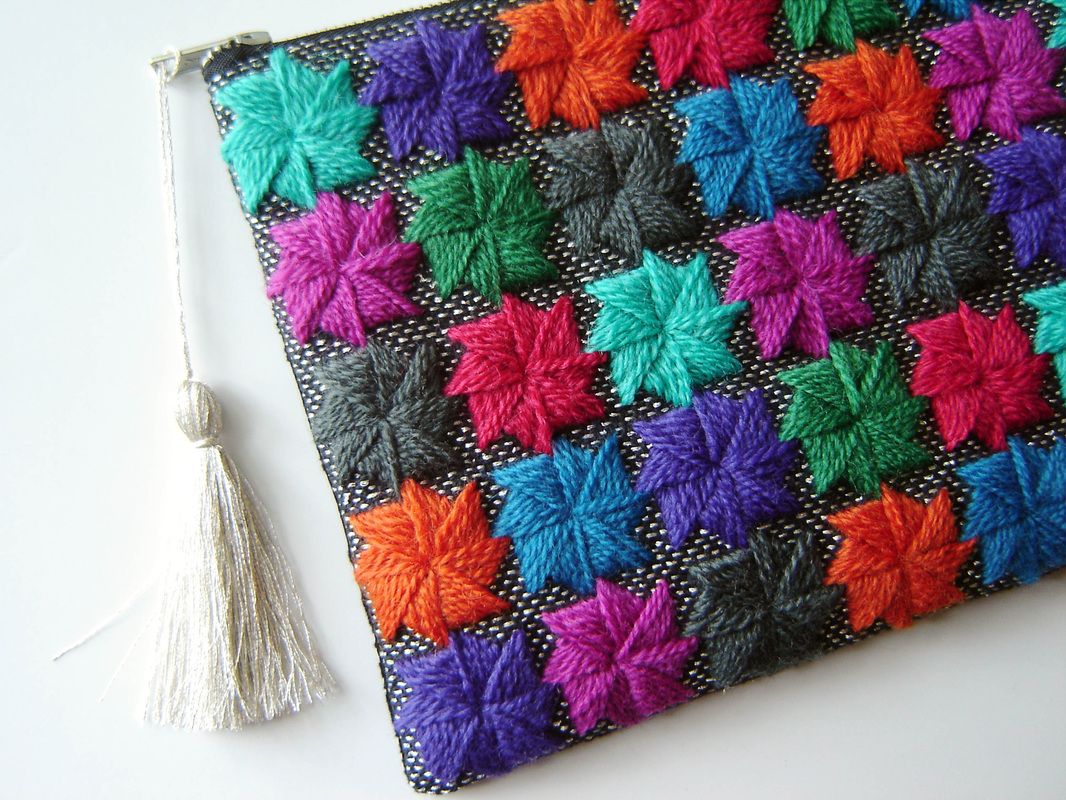
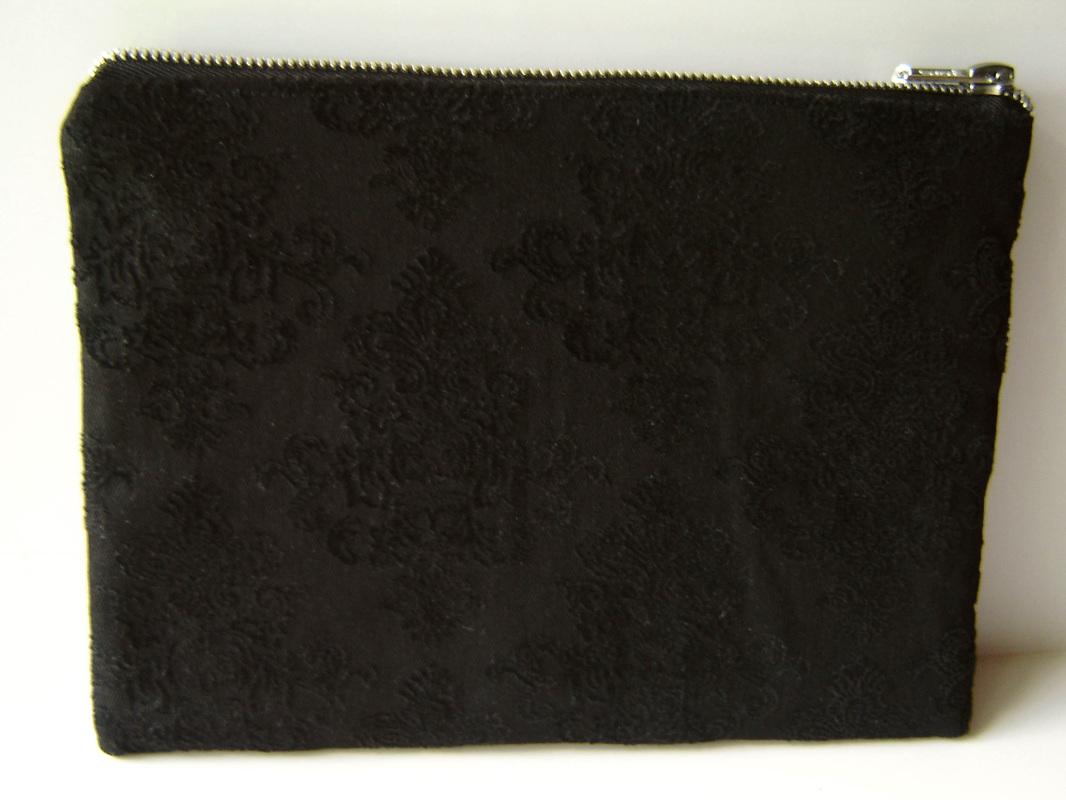
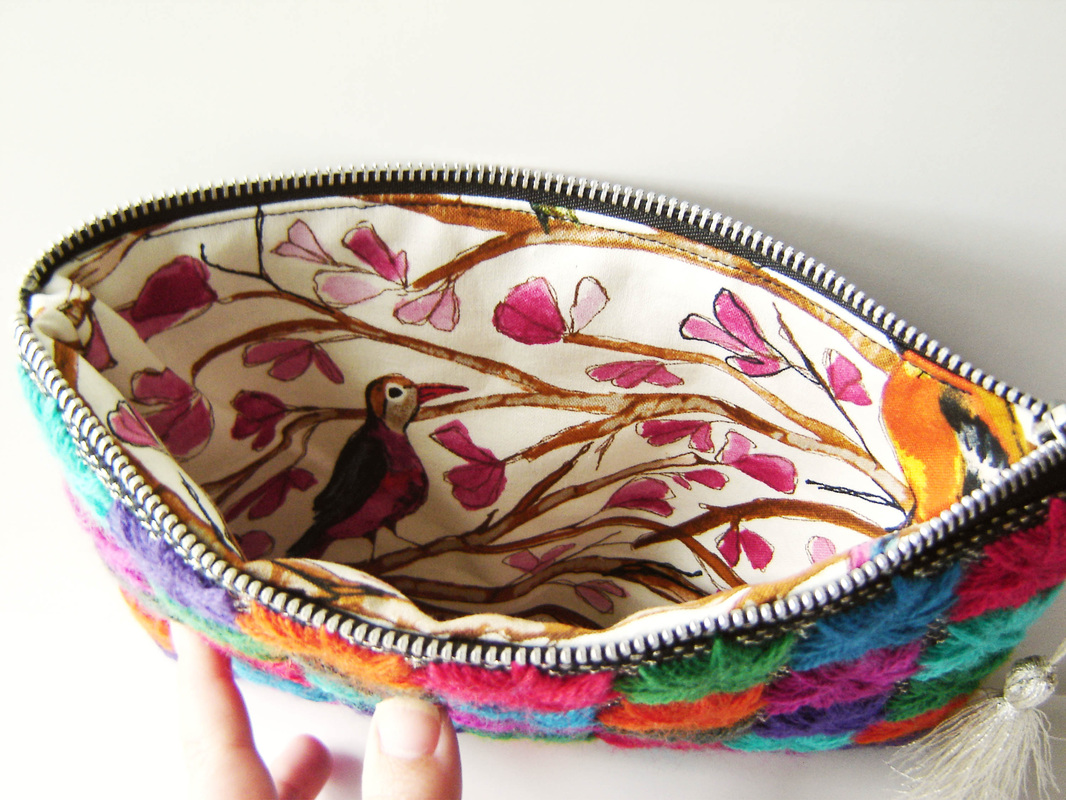
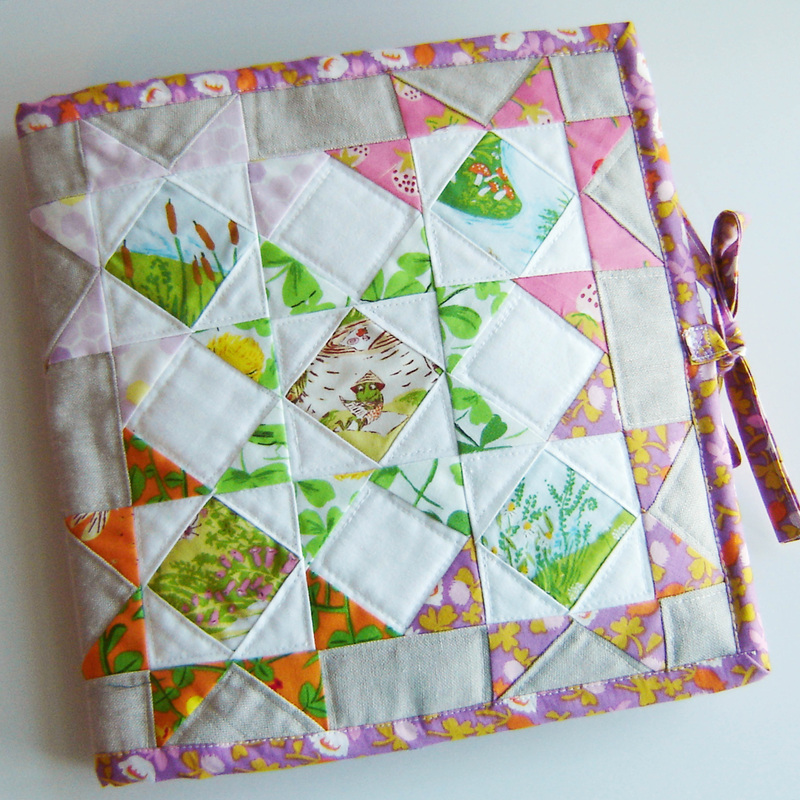
Hello everyone! Welcome to my stop on the Craft Buds Craft Book Month Blog Hop, whew, that was a mouthful! I was thrilled when Lindsay asked me back this year, as this is one of my favorite yearly events. Nothing better than actually using those craft books you have purchased that are just sitting and collecting dust. Last year I made a handbag and apparently I can not stray from that theme, as this year I have made another handbag! Oh I love it so! I dug through my collection of books for a while before settling on Anna Maria's Needleworks Notebook, written by Anna Maria Horner. Have I ever mentioned that I am obsessed with her, like LOVE LOVE LOVE everything she creates and touches. I can't wait to meet her next year at QuiltCon, hopefully I can muster up the courage to actually talk to her and not just stare at her like a freak.. Anyways, back to the point. This book has so many lovely projects in it, it was really hard to pick just one, but in the end I settled on Star-Crossed Love found on pages 65-68. You can see the project from the book below. How cute is that and I really don't own many "dressy" clutches, so win, win. One of the things I love about this book is the huge mixture of handwork projects, from cross stitch, needlework and crewel. I chose this project because of time constraints, honestly I am a very slow stitcher, and thank goodness I did because I finished this project yesterday. I literally stitched on this baby for well over a month, every evening, every car rider line, stitching and more stitching. But I love it, so it was time well spent. This project had a short list of supplies, crewel wool, metallic embroidery thread, Aida, backing fabric, a zipper, interfacing and lining fabric. Easy enough! I was able to find the crewel wool locally, along with everything else except for the right size Aida. The pattern called for 11 count Aida, and all I could find in black was 14. So I went with it. Well if you are a stitcher, then you know that 14 is smaller than 11, 14 holes per inch vs. 11 holes per inch. Thus the scale of my handbag changed immediately. No big deal, I just had to stitch a lot more and I reduced the amount of threads I was using per pinwheel (I used 2 instead of 3.) This stitch is called the Milanese Pinwheel, something I had never done before. After two of them, I had the hang of it and didn't have to refer back to the book at all, just fun stitching all those pinwheels. I chose crewel wool in jewel tones, just picked out what I liked and I am so pleased with the color scheme. After the pinwheels were complete, I then took the metallic embroidery thread (I chose silver) and I stitched a running stitch behind and around every single pinwheel. For some odd reason I thought this was going to be the easy quick part, well I was wrong, it took just as long or longer than the pinwheels. But I have to say the effect was worth it, It shines! Once the stitching was complete, all I had to do was make a pouch! That was so easy, I sewed this thing up in 30 minutes, which was really nice compared to the hours and hours of hand stitching. I found a black on black velvet like motif on a denim like substrate to use as the backing, it feels great. I bought a "fashion" zipper from JoAnn's, which had metal teeth which is more durable than the plastic ones. I used an older Laura Gunn print on the interior simply because I like it and felt like it added a little pizazz to the finished product. Upon completion, my finished clutch measures 7" x 9" and is the perfect size for date night! I had almost a whole skein of the metallic silver left over, so I made a simple tassel to hook onto the zipper pull. Voila, finished! I created a little slideshow below to show the various stages of the project, it is neat to remember the pinwheels before the metallic thread was added. I can not wait to have an event where I can actually use this thing, I am really proud of it. Now that I have dusted off my craft book, it is time for you to dust off yours! You have the whole month of September to create something and enter it over at Craft Buds. All details can be found below if you click on that little square button. Thanks for joining me today on my stop of the blog hop! Now go create something!
14 Comments
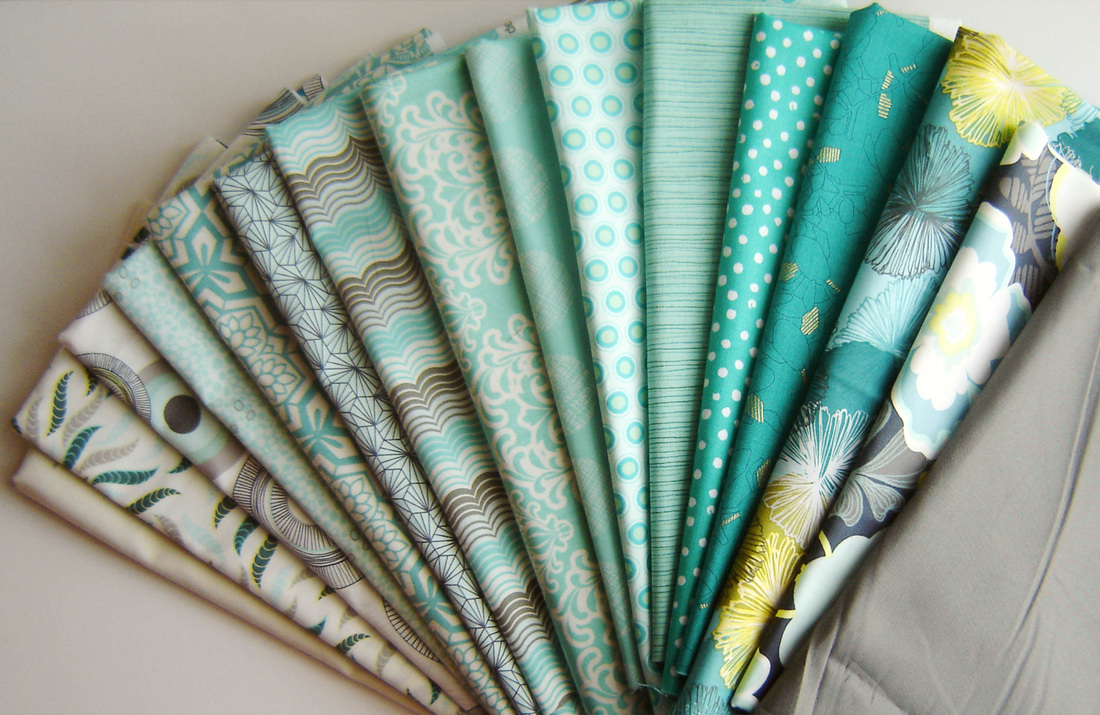
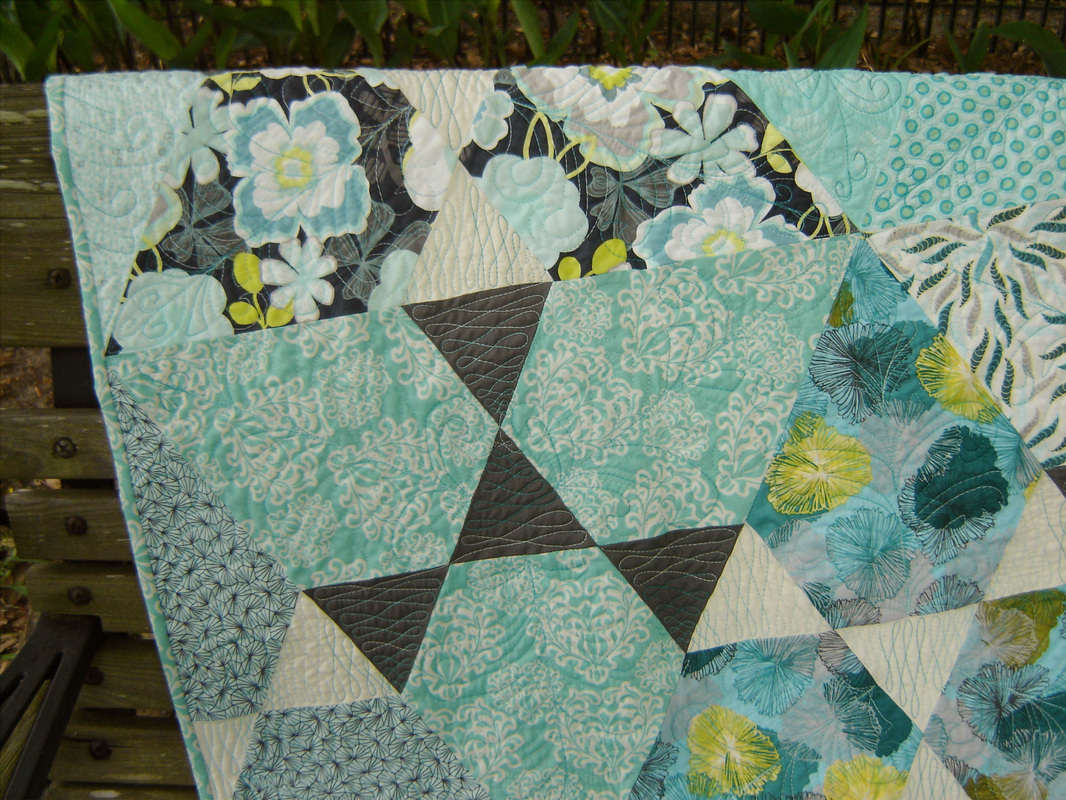
Sorry for the radio silence around here, I've been busy to say the least. I'm sure you have already heard, but if you haven't, I didn't make it past the first round of Sewvivor. Yep, I got the boot. Yes, I was disappointed, I mean really disappointed, and may have moped around for a few days. But, I am happy to say that life goes on, I'm over it and steady sewing! Actually doing a LOT of secret sewing that I can't share for a while, so that is why I've been absent. I do want to thank all my followers and friends, because I did receive over 200 votes for my little bag, and I'm really proud of that and I have all of you to thank for that! Now let me talk about some of that secret sewing for a moment, one of the things I've been working on will be shared next week as part of the Craft Book Month Blog Hop, hosted by Craft Buds, I'll be here next Thursday showing off my Craft Book creation! I'm not done with that project yet, so I better get stitching, and I may or may not have shown off a sneaky peak over on my Instagram account. All of the Craft Book Month information is below, and it really is a great event that encourages you to pull out those craft books you bought and USE THEM. And no, this is not limited to quilting/sewing. Do you have a great canning recipe book? Preserve some food, enter to win. Knit or crochet something, enter to win. Easy peasy! The prizes were announced today, which are really awesome, so there is no excuse not to create something, enter and hopefully win! I'll be back next week, enjoy your Labor Day weekend! September marks the 4th Annual Craft Book Month at Craft Buds! This year, we're excited to celebrate all month long with a blog hop of inspiring craft book projects and LOTS of giveaways for sewing along with a sewing, knitting, cookbook or other craft book of YOUR CHOICE. If you are a craft book hoarder, you are not alone. Several years ago, I had an urge to dust off my craft books, unfold those crisp pattern sheets and put those patterns to good use by actually making some projects. :) 2014 Craft Book Month Blog Hop!I've teamed up with some fabulous bloggers who will be showing off their projects made from craft books, all month long! Monday 9/1: Fabric Mutt / Lindsay Sews Tuesday 9/2: Rae Gun Ramblings / Craftside Wednesday 9/3: The Feisty Redhead / The Fabric Studio Thursday 9/4: Marci Girl Designs / Small Town Stitcher Friday 9/5: LRstitched / A Prairie Sunrise Monday 9/8: Hopeful Threads / sewVery Tuesday 9/9: 13 Spools / Lisa Liza Lou Wednesday 9/10: Stitch This! / My Sewcial Hour Thursday 9/11: The Littlest Thistle / Fabric Seeds Friday 9/12: Sew Sweetness / Clover + Violet Monday 9/15: Inspire Me Grey / amylouwho Link Up 9/1-9/30: Link up your craft book project at Craft Buds from your blog or Flickr account, and enter to win prizes. To participate in the month-long contest, just link up any project you've made from a pattern in a craft book. That easy! You'll tell us a little about the book, the project, how you personalized it, etc. Winners will be announced on Wednesday, October, 1! Rules1) One entry per person. 2) Your craft book project must have been completed in 2014. 3) Create a new blog post or Flickr photo (dated September 1, 2014 or later) and link back to Craft Buds/Craft Book Month in your post or photo description. In your post or photo description, make sure to list the craft book you used and provide a link if possible. 4) All winners chosen via Random.org. Some prizes available to international winners, so please join us!PrizesVisit Craft Buds and link up your craft book project during the window of Sept 1-30 and you'll automatically be entered to win some fantastic prizes from the Craft Book Month sponsors! More info coming soon . . .Today, I am over at Sew Sweetness with a Jaybird Quilts pattern review as part of the Jaybird Quilts Sew Along. Above you can see my fabric palette for the quilt that I created, and below you can see a sneak peak of the finished quilt. Click HERE to read my review of the pattern Lotus by Jaybird Quilts and to see my finished quilt!
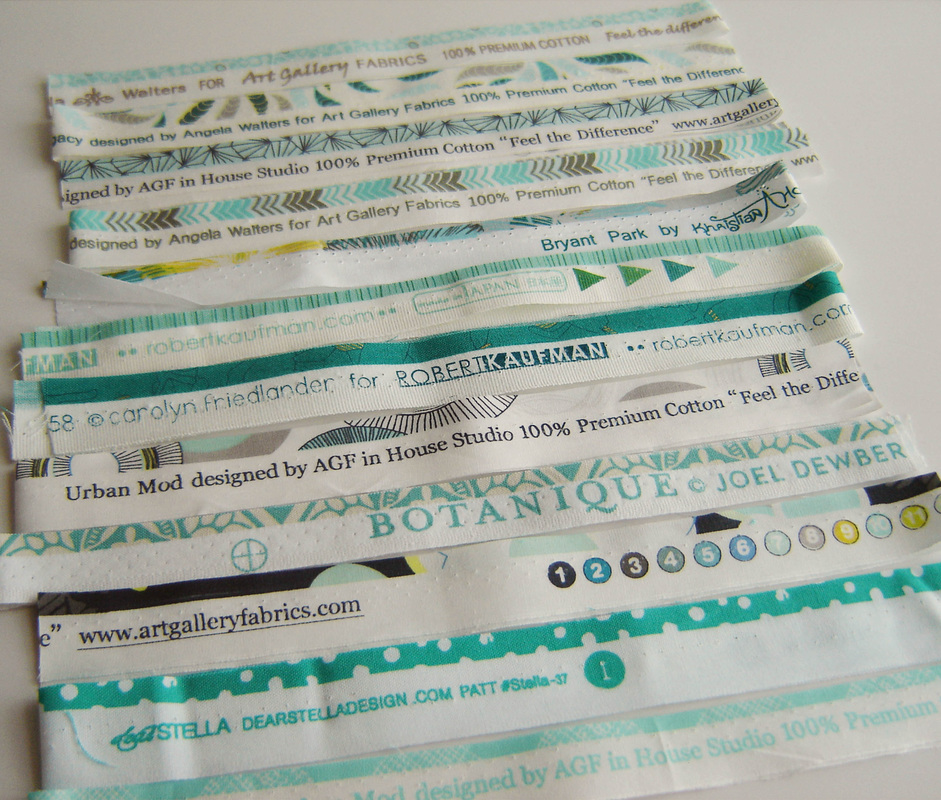
This week is the start of the Jaybird Quilt Sew Along hosted by Sew Sweetness! I am happy to announce to that I am a participant in this blog hop and you can see my quilt next Friday! Until then, make sure to go and check out all the guests this week (there are some awesome projects) and then just continue to follow along! I don't want this to be a "photo free" post, so I'll share a tiny sneak peak of the selvedges that I used in my quilt! Here is the schedule of guest posts: April 21 - Lynn @ The Little Red Hen – Science Fair April 22 – Scott @ Blue Nickel Studios - Seaside April 23 – Emily @ Mommy’s Naptime – Mini Disco April 24 – Hadley @ Flying Blind on a Rocket Cycle - Jawbreaker April 25 – Kelly @ Kelby Sews - Giggles April 28 – Becky @ My Fabric Obsession - Snack Time April 29 – Sara @ Sew Sweetness - Tasty April 30 – Michelle @ City House Quilts - Candy Dish May 1 – Debbie @ A Quilter’s Table - Northern Lights May 2 – Marci @ Marci Girl Designs - Lotus May 5 – Kerry @ Verrykerryberry - Rock Candy May 6 – Andres @ Mad Tesla - Mini Northern Lights May 7 – Lee @ May Chappell - Day Break & Kim @ My Go-Go Life – Candy Dish May 8 – Leona @ Leona’s Quilting Adventure - Wonton May 9 – Heather @ House of a la Mode - Disco May 12 – Jane @ Quilt Jane - Night Sky May 13 – Lucy @ Charm About You - Tiny Dancer You can participate in the Sew Along also and win some awesome prizes! Starting April 21, 2014 - June 13, 2014 all you have to do is create a project from one of Julie's (Jaybird Quilts) great patterns or her book, Skip the Borders. Link up your finished project over at Sew Sweetness and Julie herself will pick the winners! For full details of the contest and to see all of the wonderful prizes, click HERE. Now go pick up a ruler and pattern and get started! You won't regret it, I promise!
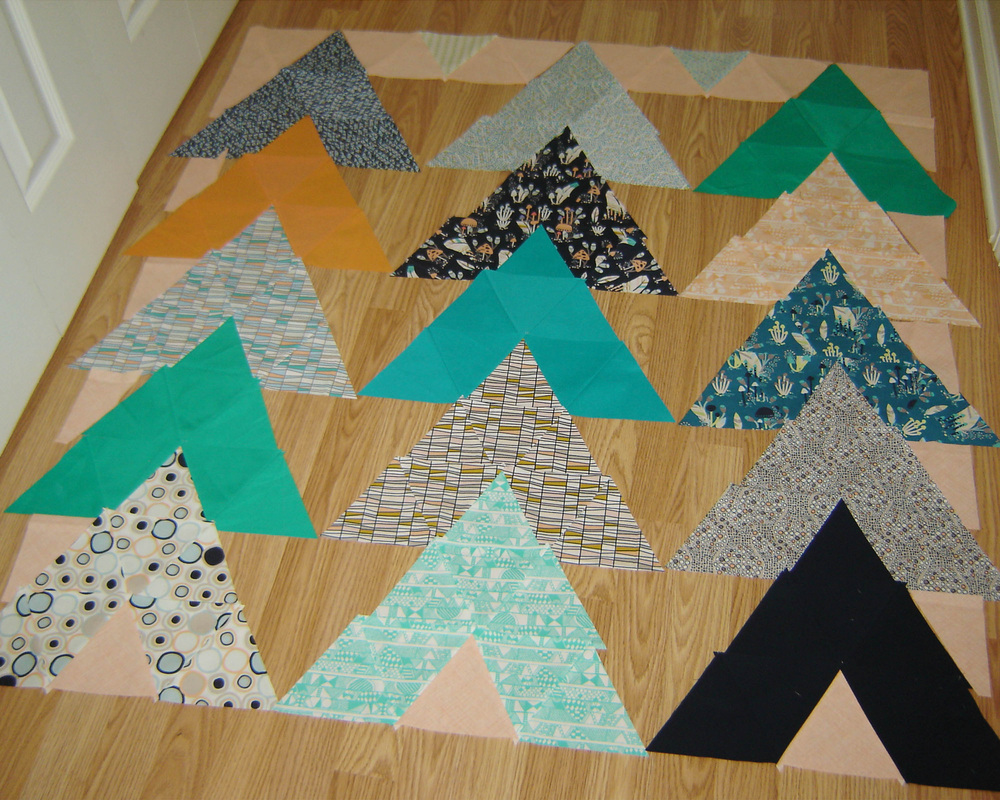
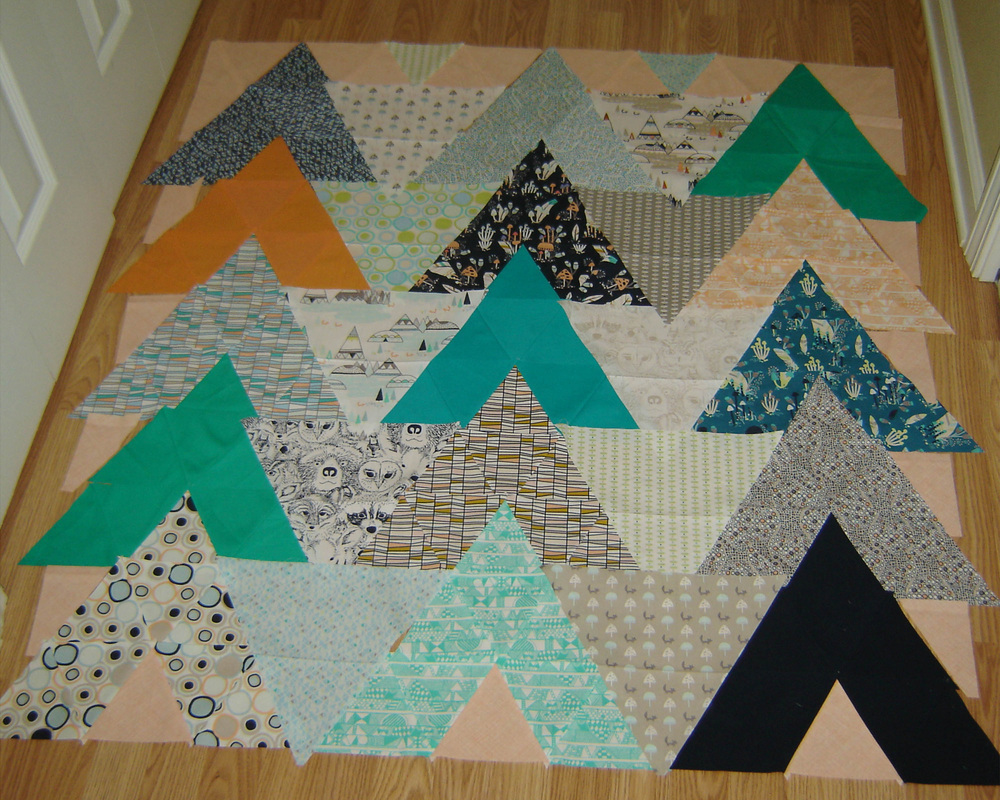
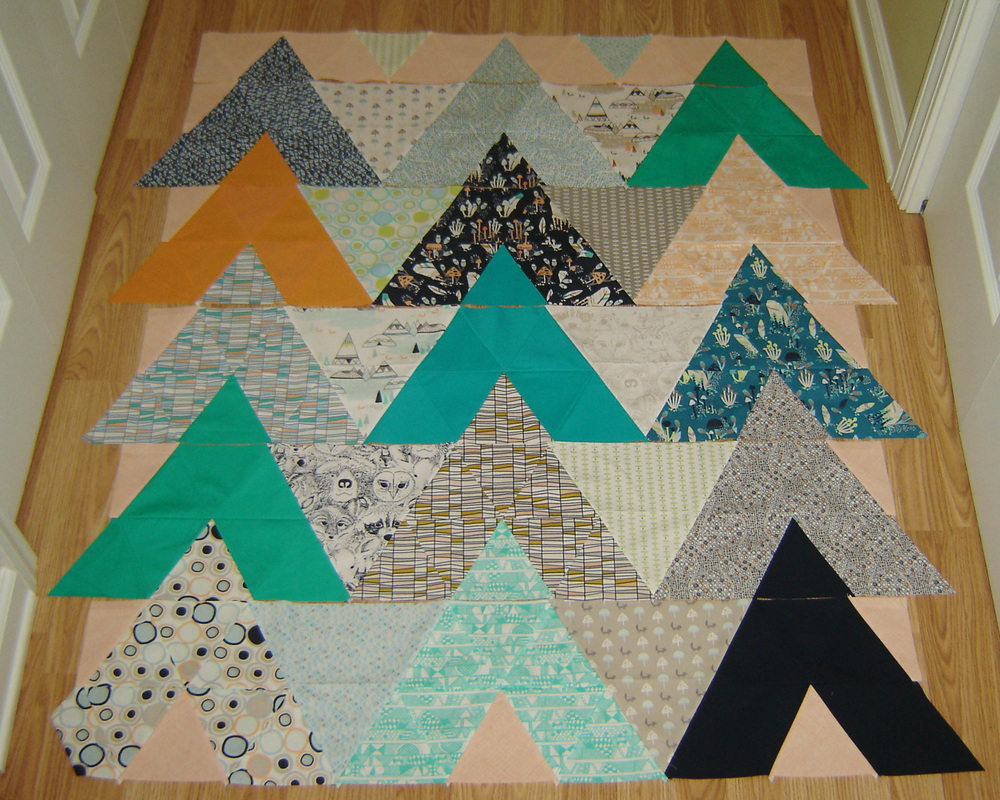
I'm actually keeping up with my Triangle Quilt as part of the Triangle Quilt Along hosted by The Sassy Quilter. Cutting was last week, (and designing my quilt) and this week is sewing together the rows! Excuse my back hallway photos, but I don't have a design wall, so I layout everything on the floor and hope my kids don't stomp all over it too much. Since I designed a non-traditional triangle layout, I really had to lay things out to get it all figured out properly, so I started with my triangle "arrows" I will call them. Then filled in the outside border, which is the light peach fabric from the line Architextures by Carolyn Friedlander. I can't really sew in direct lines for this quilt plan, so if you look above you can see how this thing was constructed. The first row is sewed completely straight across (the only one I can actually do this for.) Then starting with the second row, I sewed together 3 triangles (the middle of the arrow) Then with the third row, I sewed together five of the triangles (the bottom of the arrow plus the top of the next arrow.) I sewed like this all the way down the quilt until the last row, three times for a total of 15 arrows. Now that my arrows are sewn in short rows, I laid them out and added in the large 10" triangles and played with the layout for a while until I had them exactly how I wanted. I then pieced the arrows into almost complete arrows, by sewing the row of 3 triangles to the row of 5 triangles directly below it, sewing 2 rows together, making them the right size to sew onto the 10" triangles. The photo above is everything just laying on the floor, the top row, semi-complete arrows, edges and 10" triangles. The last step for this week was to sew the semi-complete arrows to the large 10" triangles. Once that was done, I now have the top row, which is a single row of triangles measuring roughly 5" and then five rows (2 - 5" rows sewn together) that measure roughly 10." So in total I have 6 rows that are ready to sew together, thus giving me a completed quilt top next week! On a completely different side note, this week is Kids Clothes Week, I haven't participated in quite a while, thus my kids have very little handmade clothes. Insert sad face here. So I wanted to give this a go this week and sew for one hour a day all this week, hoping to make at least a pair of pajamas for my oldest, be it that he is at the age that cute boys pajamas are nearly impossible to find. I have the fabric washed, pattern picked out and plan to use my hour today to get it cut out. Wish me luck, I'll need it this week!
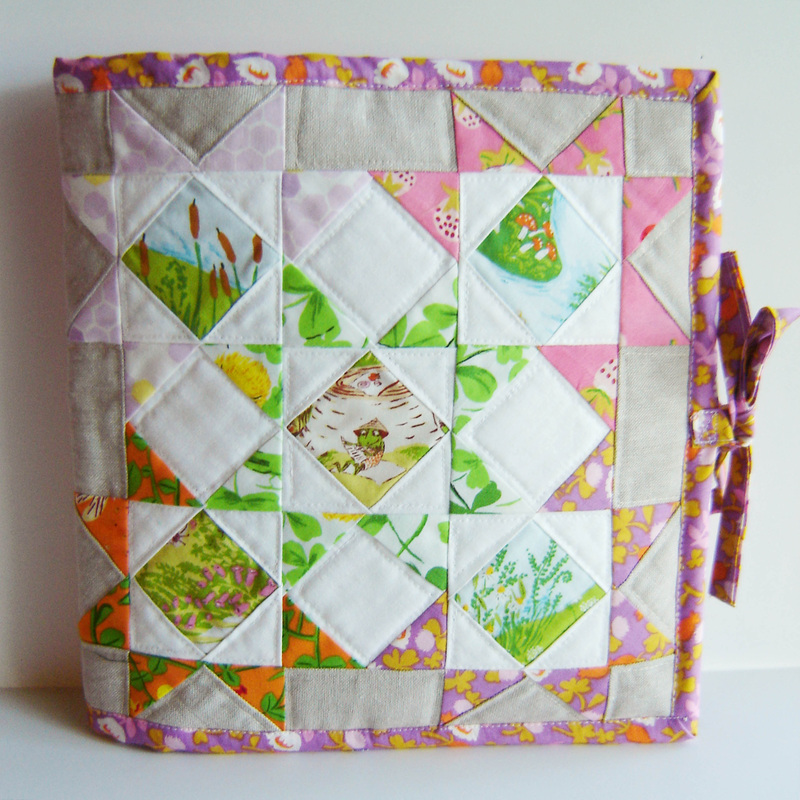
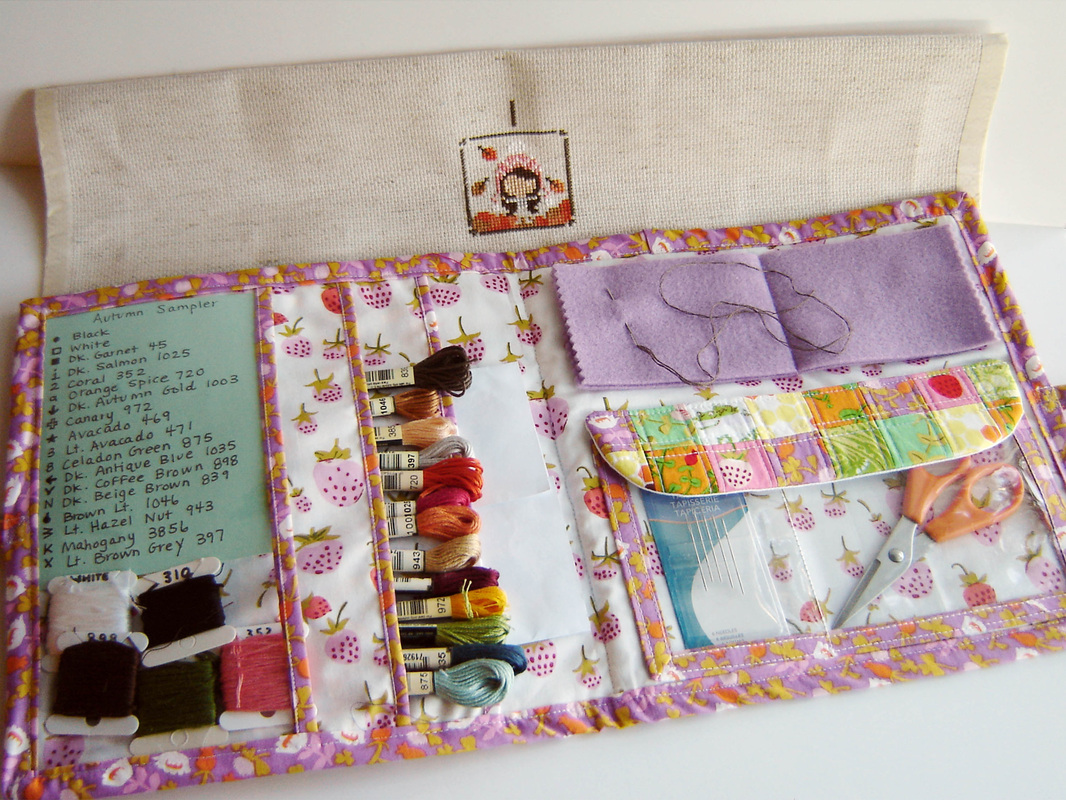
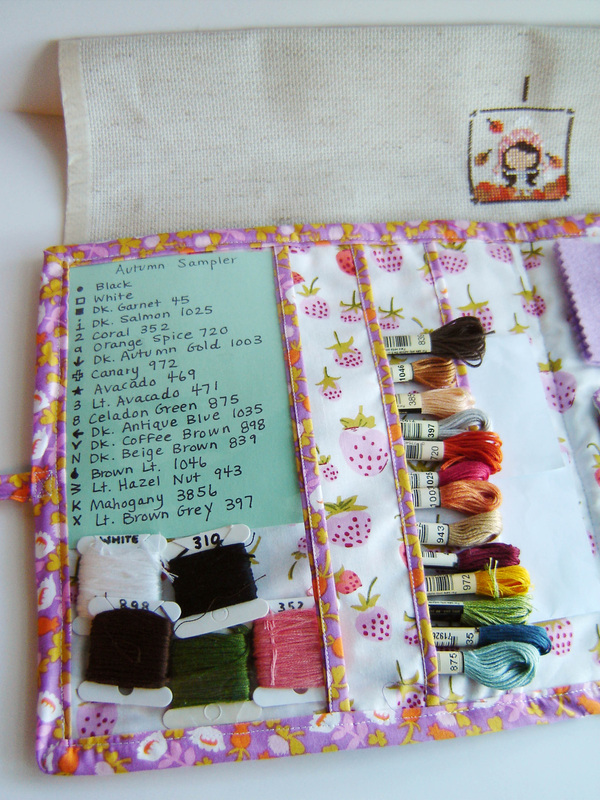
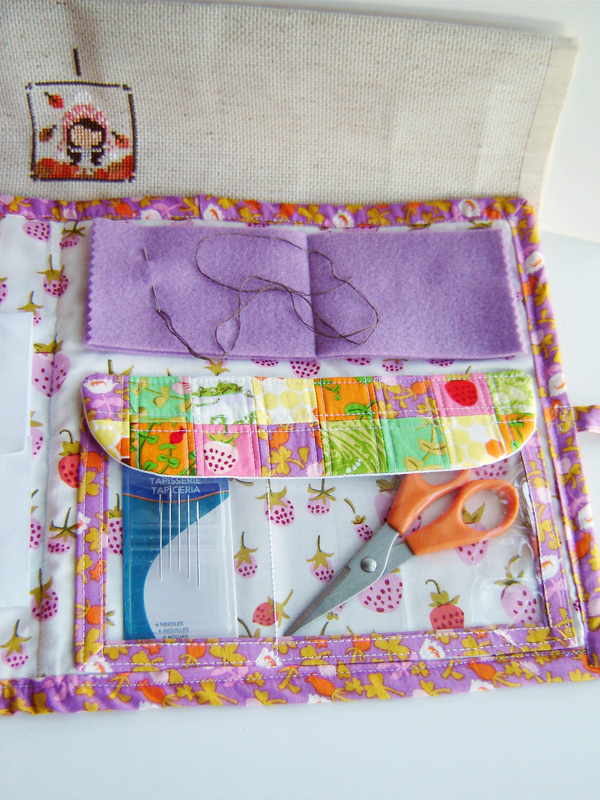
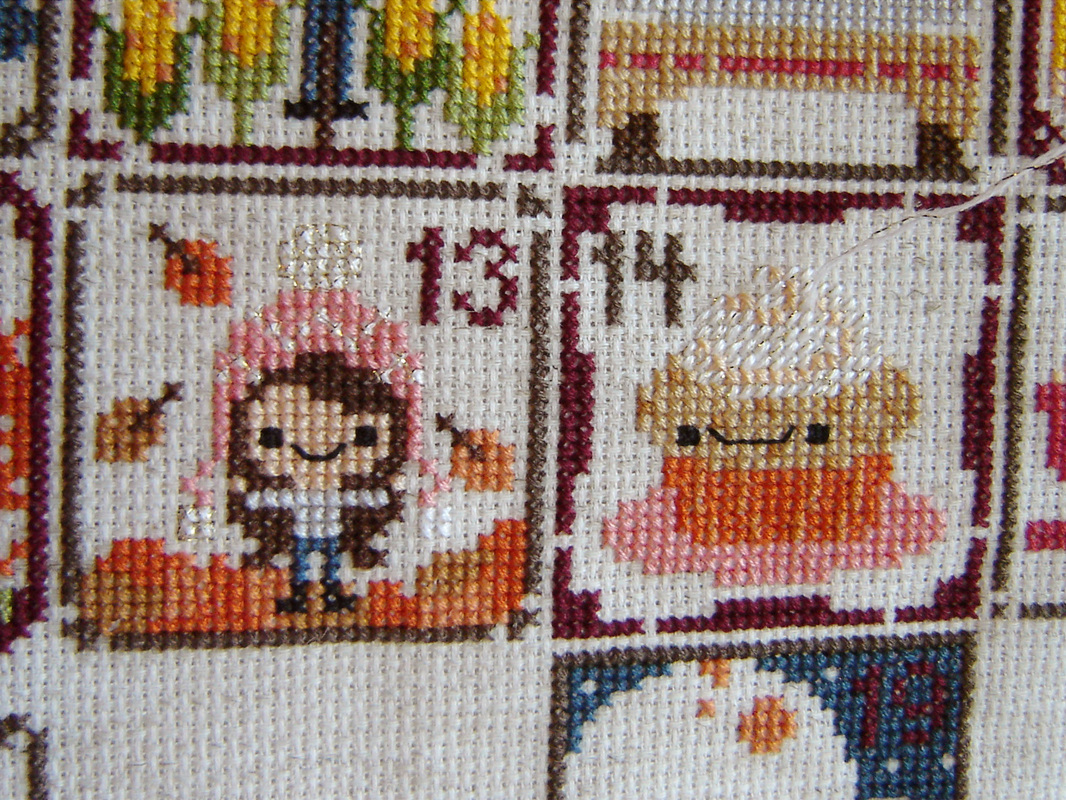
A few months ago I received the most lovely gift in the mail. Do you recognize it? Last year it was part of the Zakka Along 2.0 - Patchwork Please sew along. It is the Sweet Trips Embroidery Pouch (week 18) and this one was made by my friend Debbie over at A Quilter's Table. Isn't it the sweetest! Debbie made it for me as a "just because" and boy did she nail it! It is so perfect, adorable and oh so handy. You see right at the time I received this lovely gift, I had just started the Autumn Sampler by The Frosted Pumpkin Stitchery, and was using a gallon size Ziplock bag. So sad. So I threw that sad Ziplock bag away and immediately stuffed my new pouch full of all my cross stitch goodies! You can see my pouch filled to the brim below. It had a space for everything and holds it all so well. You can see back in the day when I took these photos just how far along I was with that cross stitch project (not very far!) On the left side it holds my floss, the actual cross stitch piece (folded) and my chart of colors and symbols. On the right side it holds my needles, and the current thread I am using, plus my scissors tucked away in a pocket that keeps my boys from getting their precious hands on them! I have been using this embroidery pouch every single day, traveling in my purse, car and by hand for months now, it is the perfect size and perfect thoughtful gift for me! Below is where I am currently on the sampler. My background fabric wasn't quite dark enough, so the white kinda disappeared. To solve this issue, I am adding in a gold thread with the white to make it pop, and hopefully stand out a bit. If you look hard at block number 13 you can see the gold on her hat. I have been steadily working on this one, enjoying every minute and enjoying my little gift even more. Thank you Debbie! While we are on the topic of Debbie, I was thrilled to find out yesterday that she won 2nd place in the Tula Pink City Sampler Quilt Along, hosted by Sew Sweetness. Tula Pink herself picked the winners and I couldn't be more thrilled for Debbie, she completely deserved it and if you want to check out her awesome winning quilt, "Unlocked" then click HERE to see what a beauty this quilt really is!
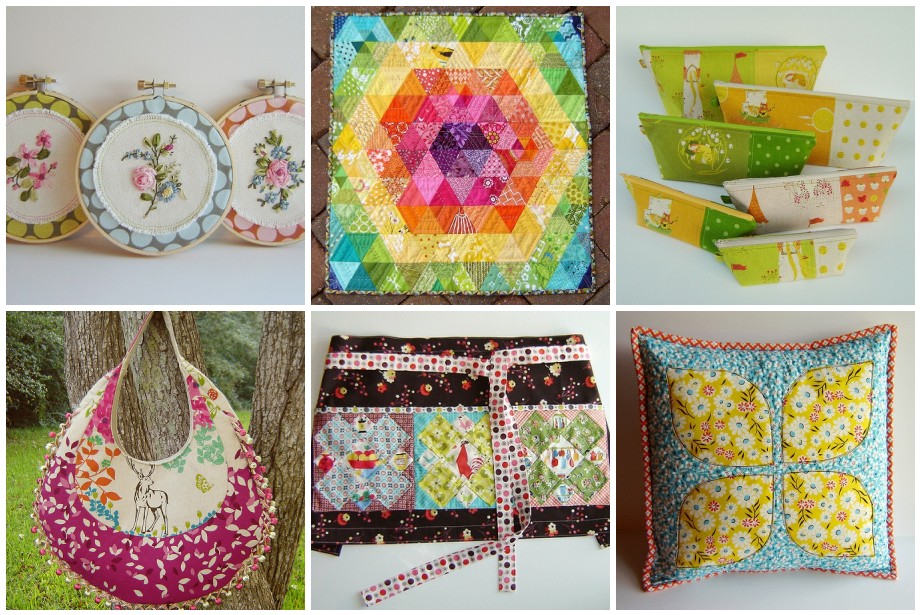
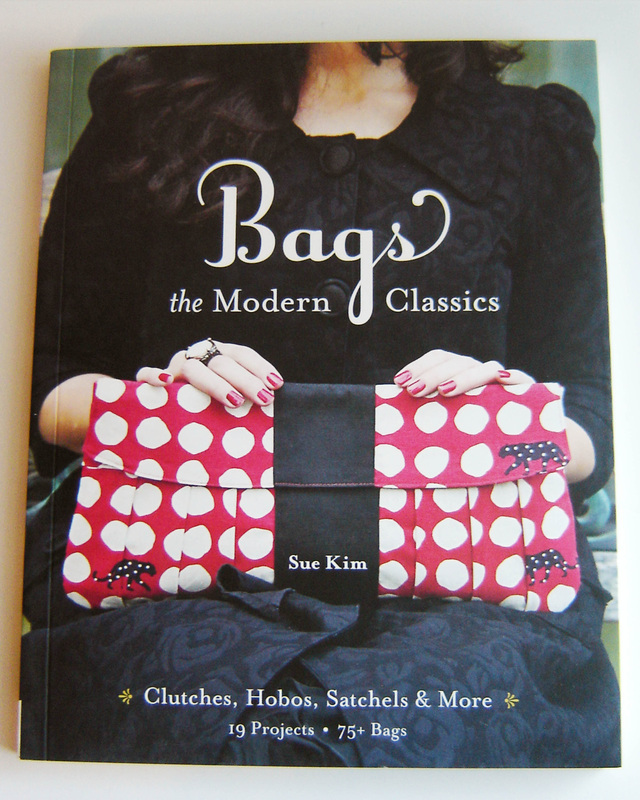
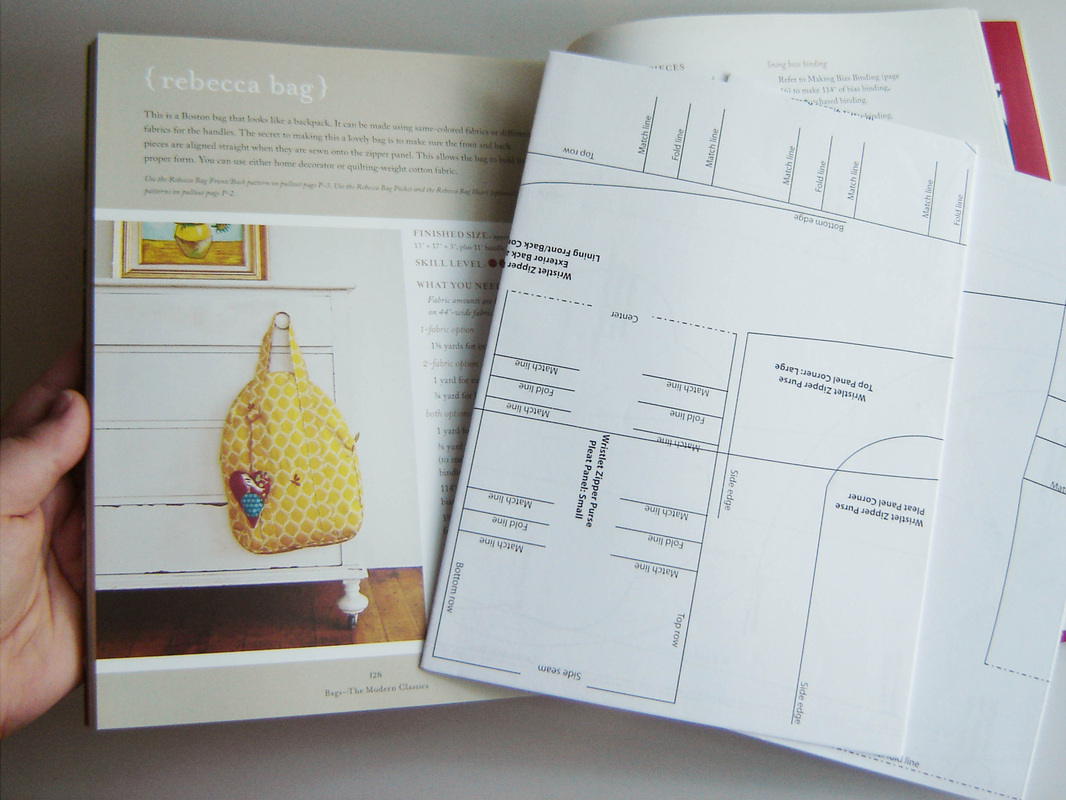
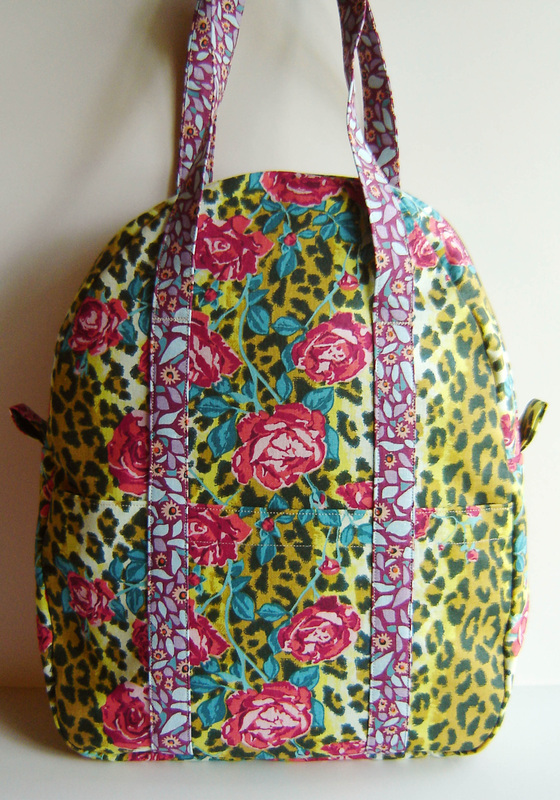
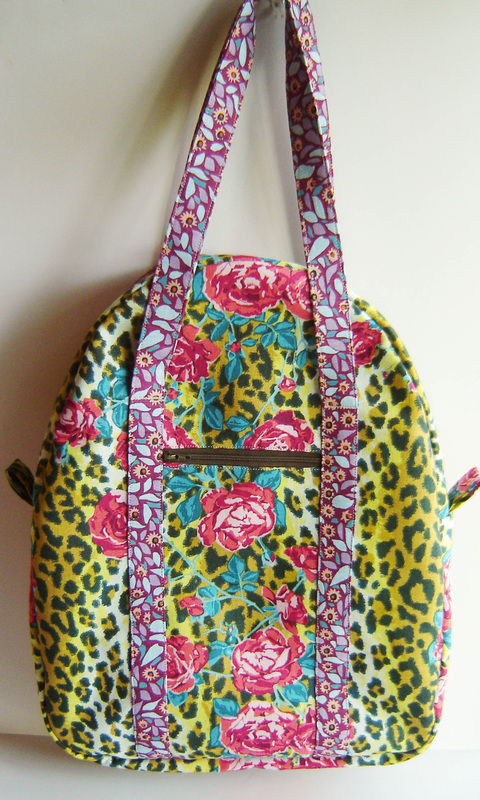
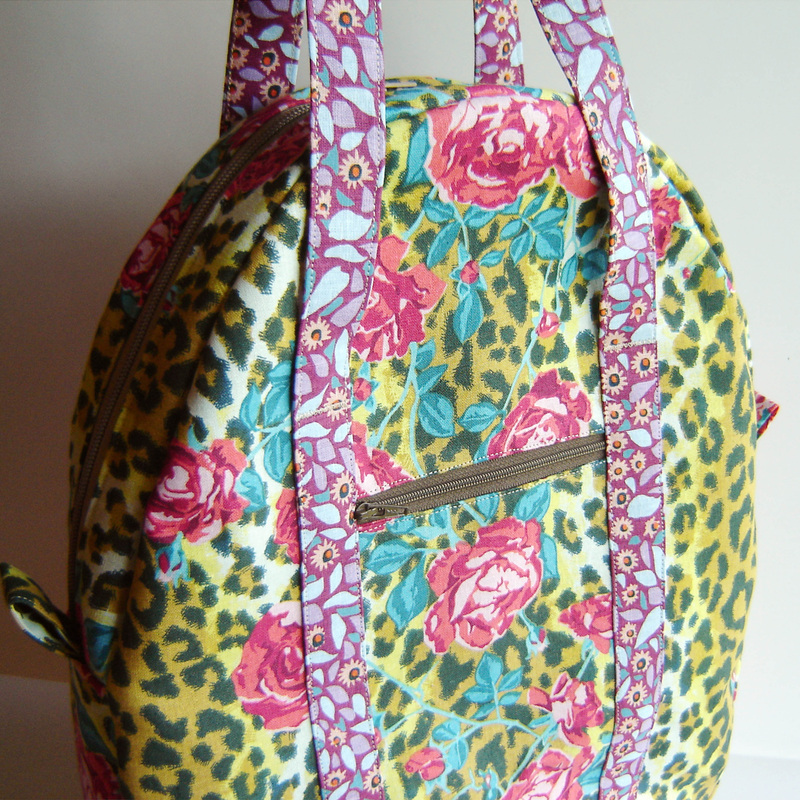
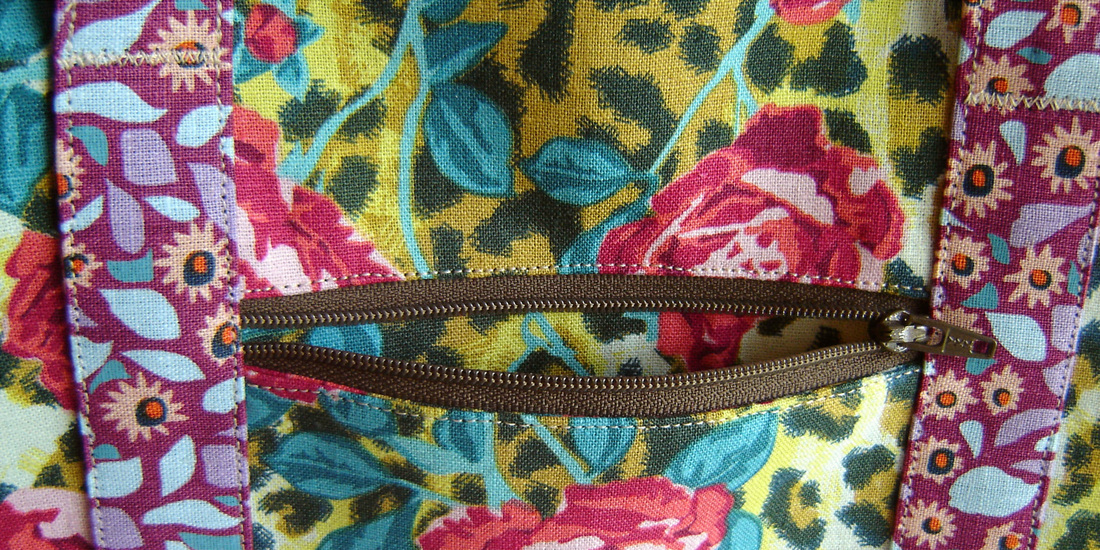
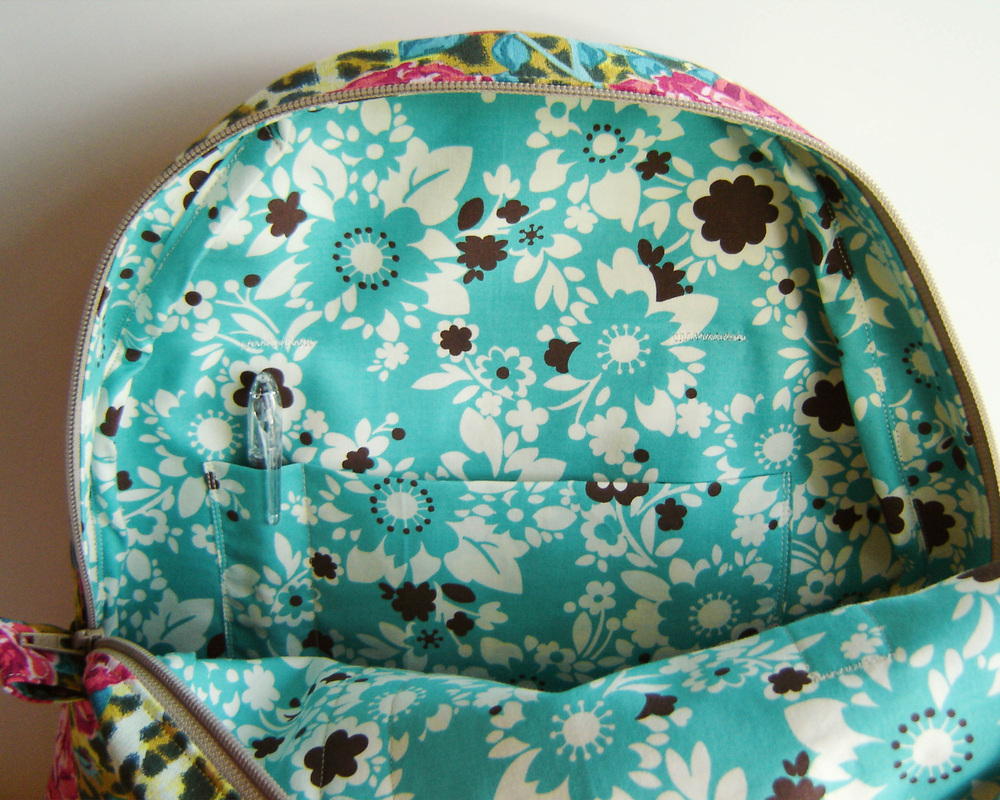
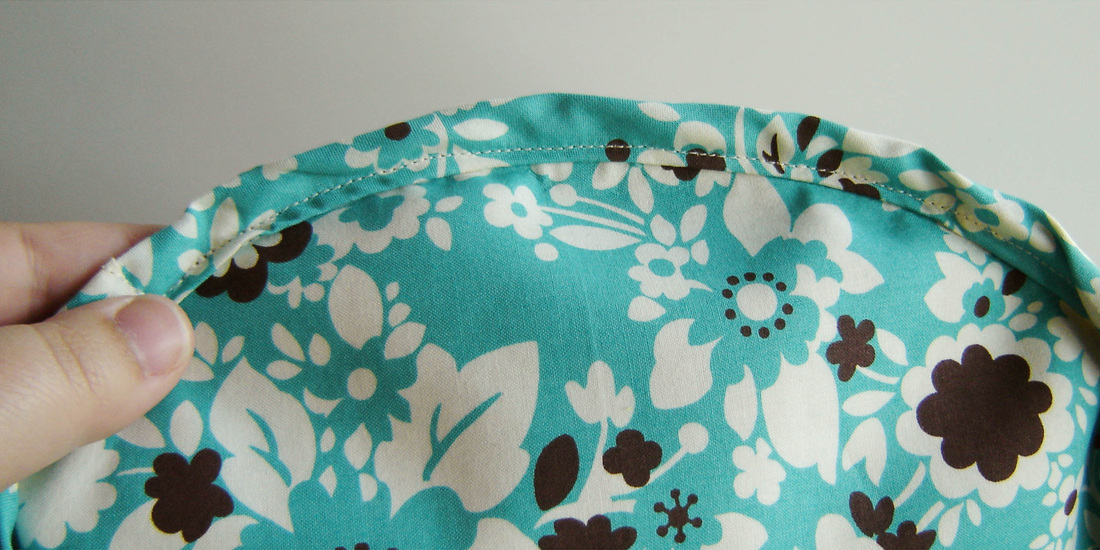
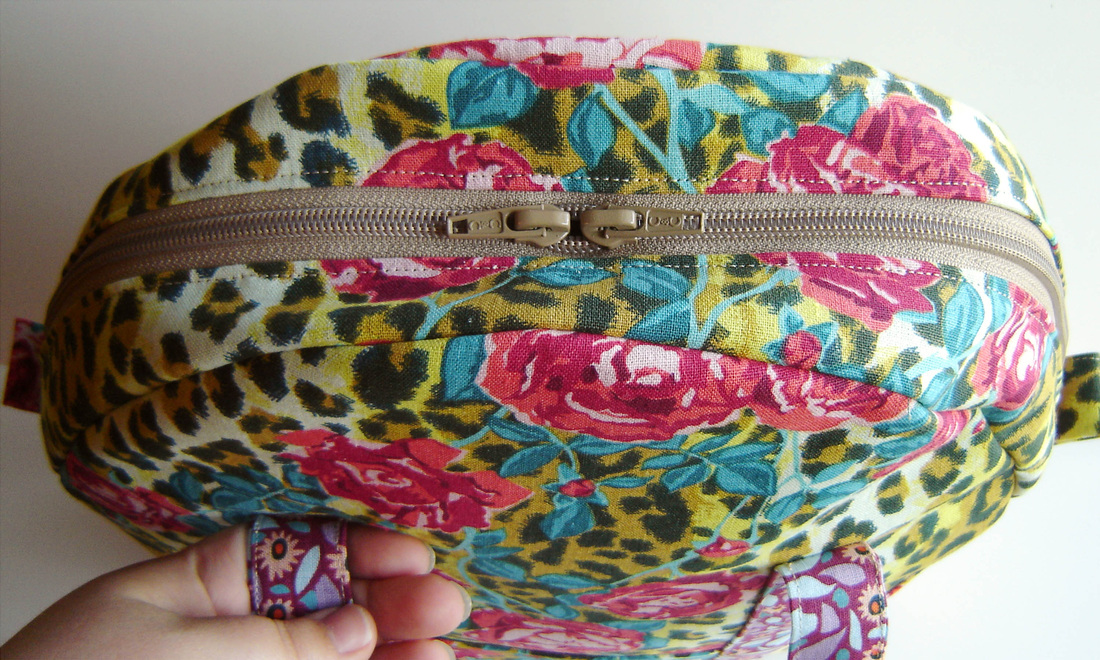
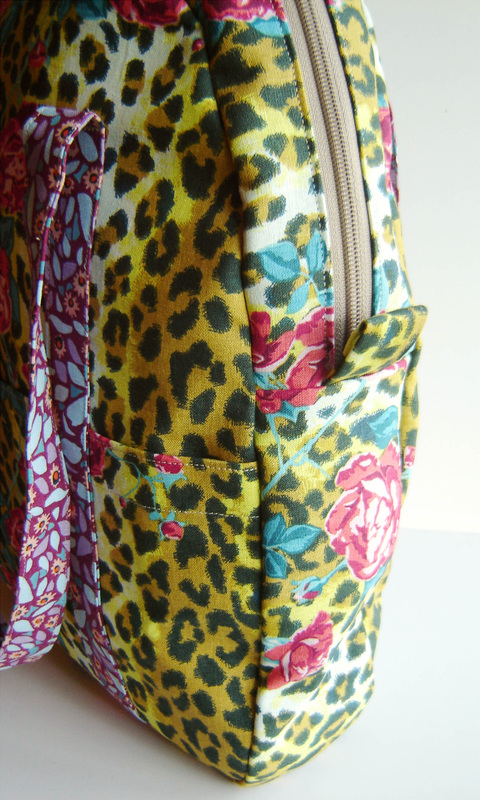
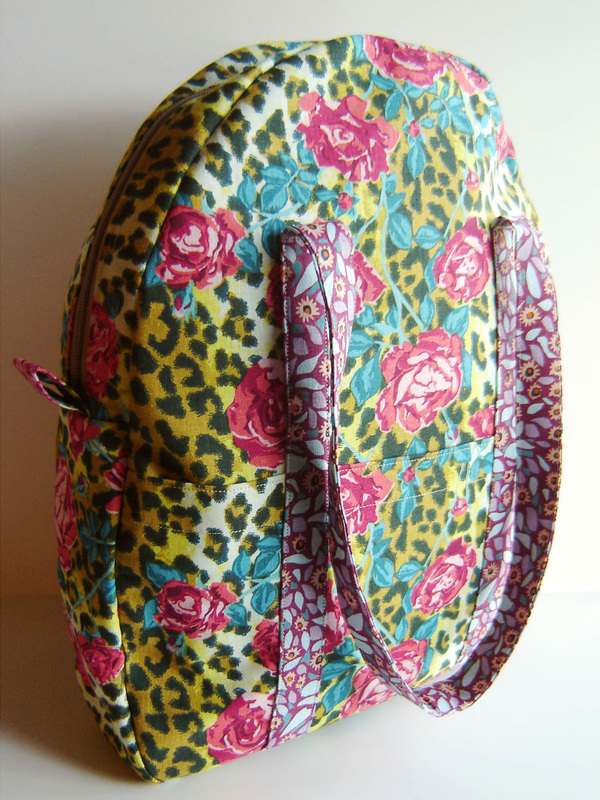
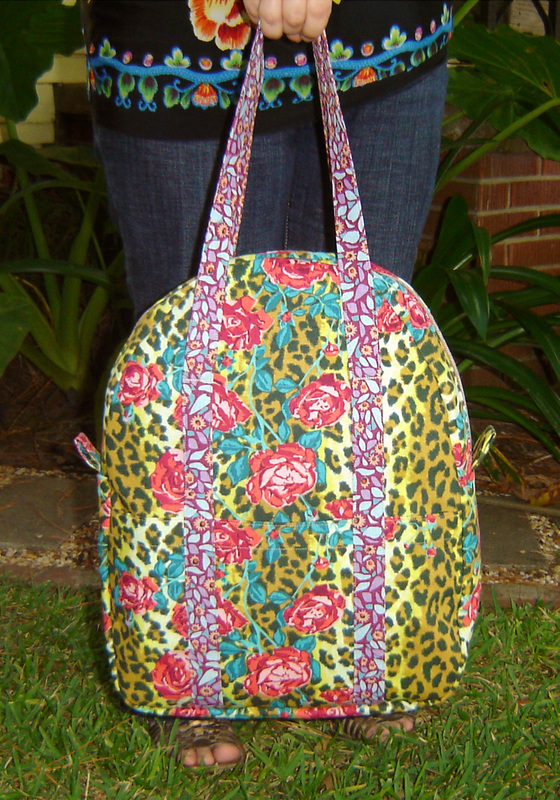
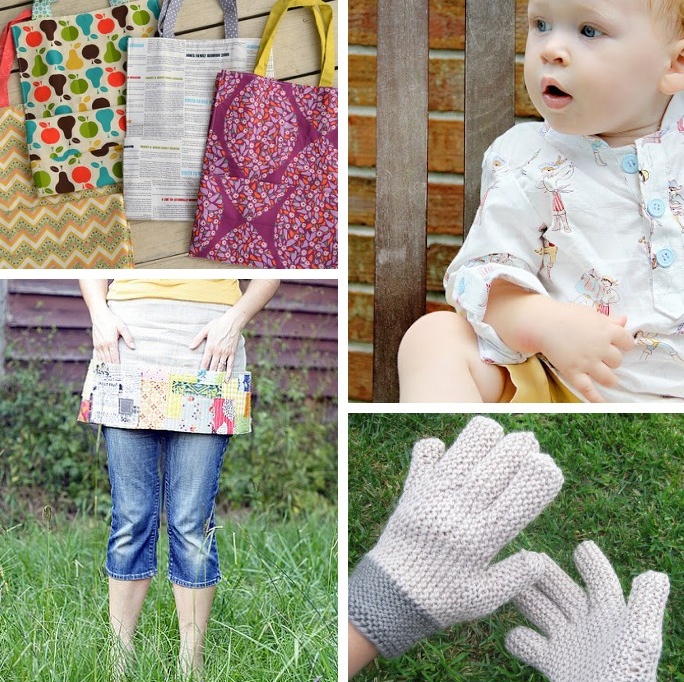
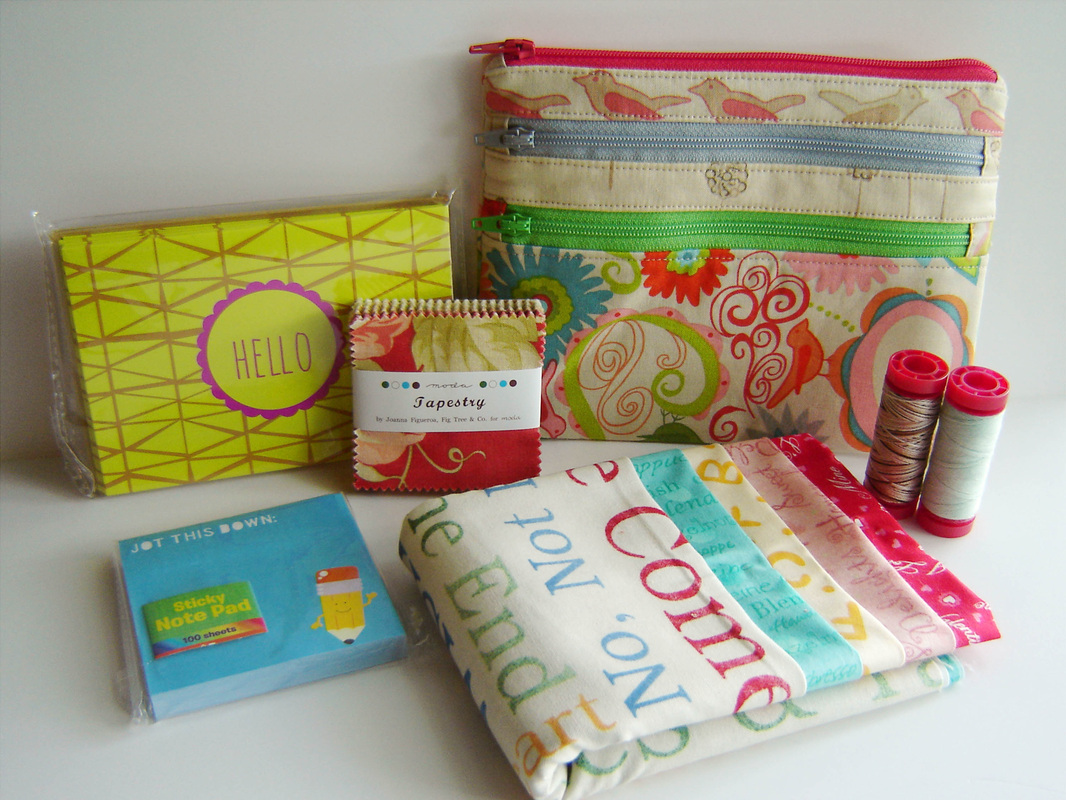
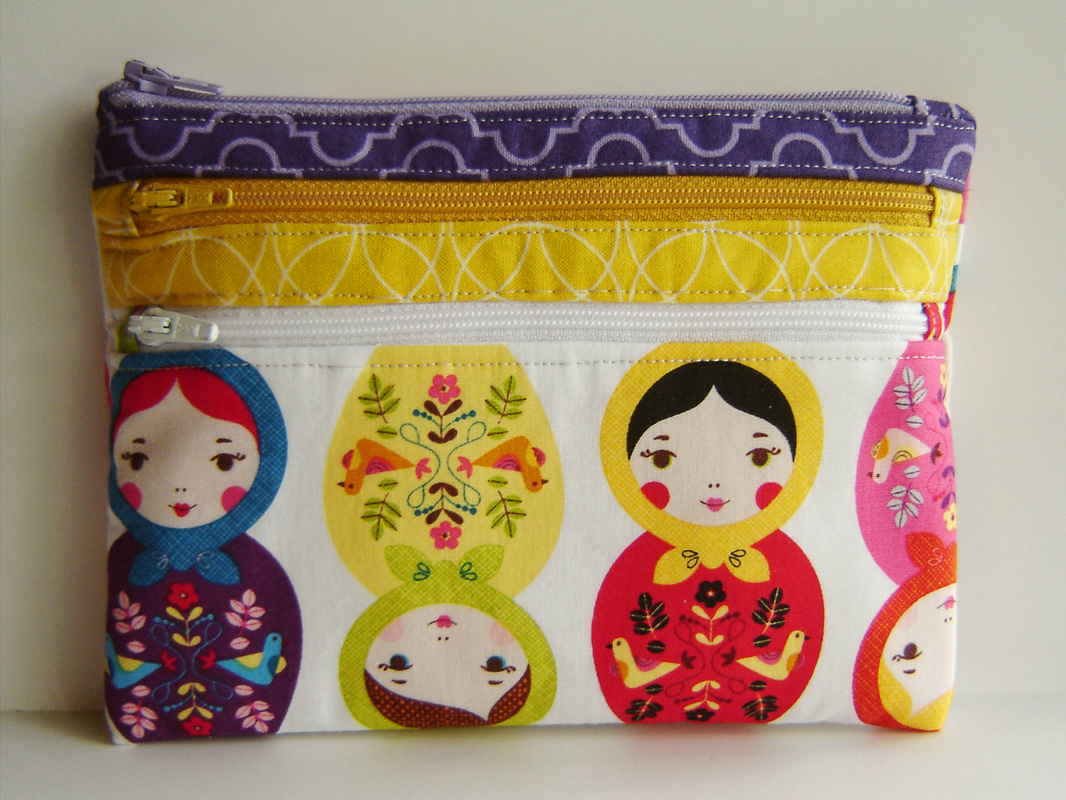
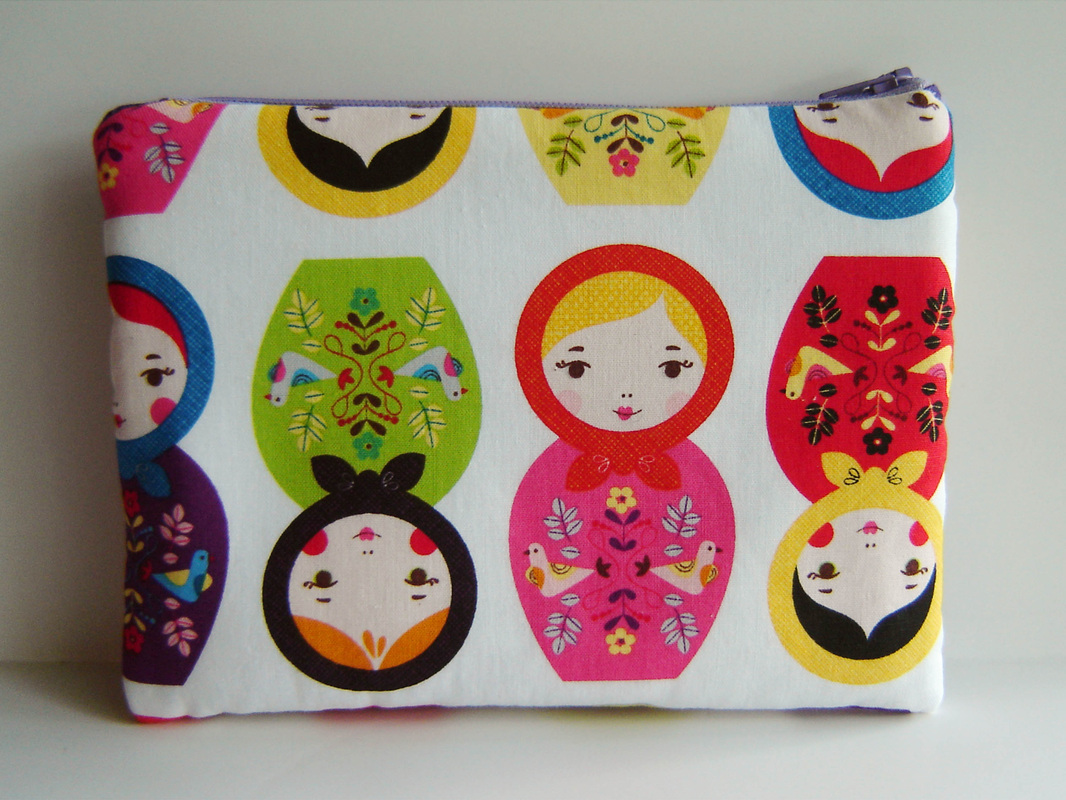
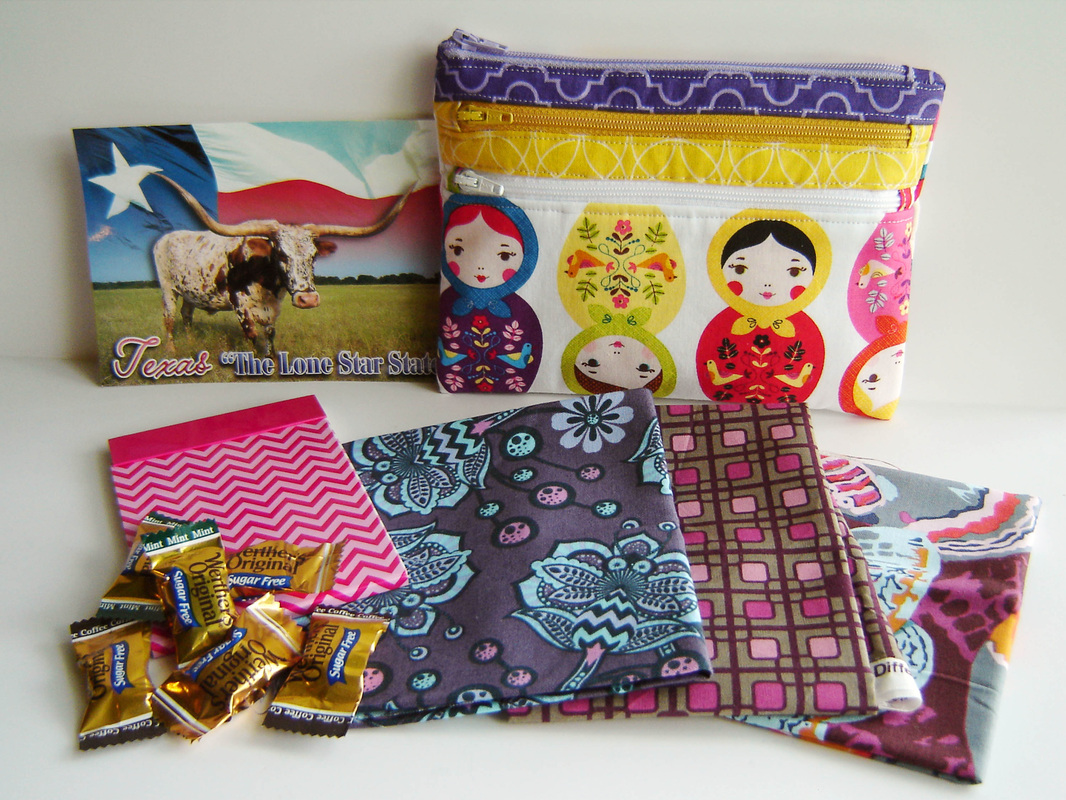
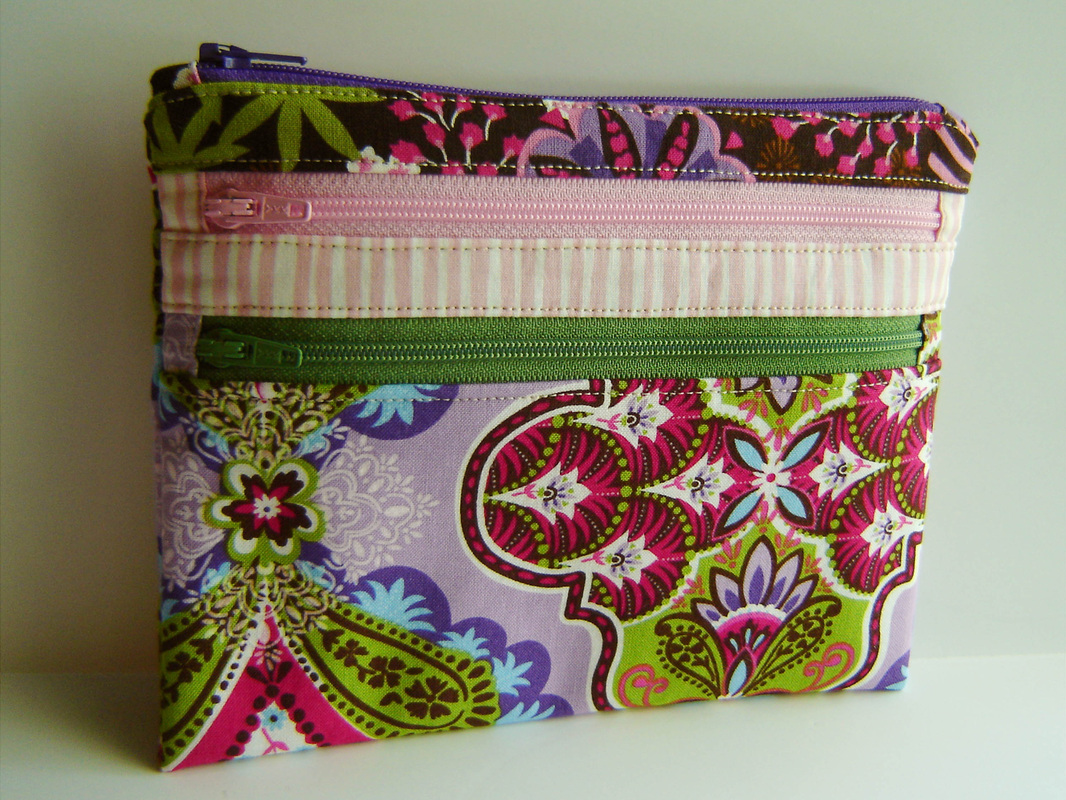
Ironically, after publishing this post, I was browsing through my old blog posts and discovered that today, exactly four years ago is when I started blogging! Wow, time flies and it is so hard to believe that it has already been four years Thanks so much to all of you for joining me on my journey and for all the friendships that I have formed in these years through this little blog! Hello and welcome to my little blog! I am thrilled to be participating in the 3rd annual Craft Book Month hosted by Craft Buds. If this is your first time visiting my blog I would love to have you stick around and discover all the cool things going on in my little world. Below is a mosaic featuring just some of the projects I have made in the past few years, just to give you a little taste of what I am all about! Today I will be showing off a project and reviewing the book, Bags the Modern Classics - Clutches, Hobos, Satchels & More by Sue Kim. When I was first asked to participate in this blog hop I knew instantly that I wanted to make a bag, the problem was, which book??? I own A LOT of handbag sewing books. I pulled them all out, picked out my favorite bags and in the end decided on the Rebecca Bag from Bags the Modern Classics book. I was just so drawn to the shape of this bag, so cute and large, and one that has been on my to do list for quite some time! This book is laid out in a really nice format. The first part of the book explains basic terminology when bag making (types of stitching and how to clip curves.) The next section breaks down different parts of bag making in easy step by step directions and photos (how to install a zipper, how to install an interior pocket, how to make piping.) This makes it really easy to customize each pattern in the book, which is really nice. If you want to add a pocket that isn't called for in the pattern, you just look it up in the front of the book and you can easily figure out how to incorporate it into your bag. After the basics, the book is broken into three sections (small bags, clutches and large bags) and in each section are several patterns to chose from. For example the large bags section includes the patterns and directions to make 12 different bags. Most of the bags in the book offer several different size options, which makes for limitless varieties. This book comes with two double sided full size pattern sheets. The bag patterns are layered on top of one another, so in order to use one you will need to trace the pattern onto something else. I just use wax paper, which works great, is cheap and see through, so it works great for fussy cutting the pattern pieces onto the fabric. This book includes step by step photos (which I love) and written directions and is very easy to follow along and understand exactly what you are supposed to be doing. The projects are not labeled by easy or hard, but I think there are enough directions that even a beginner could tackle the majority of the projects in this book. The Rebecca bag called for minimal supplies, basically fabric, interfacing, thread and a zipper. Simple enough! Once I had chosen this pattern, I then had to dig through my stash to see what would work for this pattern. I actually had quite a few choices in my stash that would have worked perfectly, but in the end I settled for two lovely prints from Anna Maria Horner's Field Study linen/cotton blend of fabrics. The author suggested using either quilting-weight cotton or home decorator fabric for this bag, and since the linen/cotton blend was somewhere in between the two, I figured it would work perfectly (and it did!) The cutting directions were based on 44" wide fabric, but since my fabric was 56" wide I was easily able to cut the main body and pockets out of 1 yard, and I used 1/2 yard for the handles (with plenty of leftover.) I then used 1 yard of quilting-weight cotton for the lining and bias binding on the inside of the bag. The pattern called for a heavy weight fusible interfacing. I chose to use Pellon Shapeflex 101, which is a mid-weight interfacing, and I interfaced EVERYTHING. All of the exterior pieces, the exterior pocket, the handles, and the lining. This was a smart move and made the bag just sturdy enough, but not too bulky to sew. Though I will say that this bag does not support itself, it is a wee bit floppy. If you want to make the bag stand by itself, you just need to use a heavier duty interfacing, but honestly I think my bag is perfect. I followed most of the directions exactly with the exception of a few additions or small changes. The first change that I made to the pattern was to add extra length to the handles. I added around 4" extra to each side, which was a good idea, but honestly I could have added more because it barely fits on my shoulder. Next time I will add between 6" - 8" to each handle. If you make the pattern "as is" then you will have a carry only bag that doesn't fit on your shoulder comfortably. Which is fine, it just depends on what you plan to use your bag for! The next addition that I made was to add an exterior zip pocket to the back of the bag. I use this pocket for my keys and sometimes my phone. This book does not include directions on how to install a pocket like this, I just knew how already (sorry folks) but I am sure you can find directions online how to install this sort of zipper. I purposely made it fit in between the two handles, and this worked out so nicely to hide those zipper ends that sometimes don't come out exactly perfect. You can also see in the photo below the extra small zig-zag stitching that I did to reinforce the handles on the bag. The author's directions were to just stitch straight across, but I wanted a little more strength at the point in which the handles become "free" from the bag itself. The last addition that I made to this bag was to add an interior pocket to the inside. Directions for this type of pocket are included in the book, and this type of pocket is super easy. I divided the pocket to include a spot specifically for my ink pen, which is something that I do every time I make a bag for myself. No searching around for that pen at the bottom of the bag! You can see the Momo quilting-weight fabric that I chose for the interior, which I think only "slightly" matches the exterior, but I am a bit wild and crazy and this is just perfect for me! This is the very first pattern that I have ever made that uses the technique of sewing the exterior and lining pieces together and having raw seams on the interior of the bag that have to be covered with bias binding. At first I thought about altering the pattern to have enclosed seams so that I could skip the binding step, but decided against it because I thought there had to be a reason as to why the author would construct the bag in this manner. After it was all said and done, I realized she did have a very good reason. The bias binding on the inside actually gives the bag more structure and holds the shape much better than if the seams weren't encased. I thought I wouldn't like this step, but honestly I used Clover Wonder Clips to hold all the layers together, used a heavy-duty sewing machine needle and plowed through, and it worked perfectly with no problems. You can see my bias binding above. It isn't beautiful or perfect, but it is inside the bag and you don't really notice it when you are using the bag, it just blends into the corners and curves. I opted to buy a 22" Coats and Clark Purse Zipper that features two sliders and closed bottoms on each side. It is a touch heavier duty than a regular zipper and the double sliders make it feel like a real handbag and not a handmade one. I was really happy with this decision and I love the look of it. This bag pattern has a large front pocket that runs the entire length of the front of the purse. It is divided into three sections once you sew on the handles and each pocket is a great size for your phone, sunglasses, keys or whatever you want to just drop in. I took special care to line up the floral pattern when cutting out this pocket so that it just blended into the front of the bag. I love how the roses run up the center in between the handles. The author also added the little tab details on either side of the zipper ends, which I think was just the perfect touch, it adds a little something "extra!" The photo above shows the bag stuffed with an over-sized plush blanket that I had laying around. This bag is BIG! It could easily hold two over-sized beach towels, maybe even three. I plan to use this bag when traveling, it will work great for holding all those overnight essentials, change of clothes, normal purse stuff, you know when you need to carry all those extras when traveling. In the picture below I am holding the bag and I hope it gives you a good example of just how large this bag really is. It measures 17" from bottom to top, not including the handles. Overall I love the finished product and have plans for another in the immediate future. I really enjoy this book and love the majority of the projects in it, I can definitely see making more bags from it, and would especially love to try one of the clutches. If you are thinking about getting into handbag making, this book would be a great starter for learning all the basics and in the process of learning you will end up with a really great handbag yourself! Blog HopWeek OneMonday 9/2: Fabric Mutt / LRstitched Tuesday 9/3: Stitch This! The Martingale Blog / Stitched in Color Wednesday 9/4: Fabric Seeds / Pile O Fabric Thursday 9/5: The Feisty Redhead / Rae Gun Ramblings Friday 9/6: Sew-Fantastic / Clover + Violet Saturday 9/7: A Prairie Sunrise / Small Town Stitcher Week Two Monday 9/9: Hopeful Threads / Go To Sew Tuesday 9/10: The Sewing Rabbit / Sewing Mama RaeAnna Wednesday 9/11: Marci Girl Designs / imagine gnats Thursday 9/12: Sew Sweetness / amylouwhosews Friday 9/13: Lindsay Sews / 13 Spools Saturday 9/14: Inspire Me Grey / Angela Yosten Week Three Monday 9/16: Sew Very / Craftside Tuesday 9/17: The Littlest Thistle / CraftFoxes How to Enter: 9/1 - 9/30: Link up your craft book project at Craft Buds from your blog or Flickr account, and enter to win prizes. Winners will be announced on Tuesday, October 1! To participate in the month-long contest, just link up any project you've made from a pattern in a craft book. That easy! You'll tell us a little about the book, the project, how you personalized it, etc. Full rules and details can be found at Craft Buds or right HERE! I wanted to pop in today to let you all know that Craft Book Month is here! This great event is hosted by Craft Buds, basically you pick out one of your craft books (and you know you already own a ton) and make something! Super simple, great fun, and you finally get to use that book that is gathering dust on your shelf. I started making a simple list in my head and figured that I have made five projects from craft books this year and I'll be back on September 11th to share my latest creation on my stop of the blog hop! All details of this event can be found below, I do hope you decide to join in! It's time for the 3rd Annual Craft Book Month at Craft Buds! This year, we're excited to celebrate all month log with a blog hop of your inspirational craft book projects, a crafty contest, free patterns and prizes! Don't let those craft books sit on your shelf and collect dust! We want to see what you've been making. That's why I've teamed up with some fabulous bloggers who will be showing off their projects made from craft books, all month long! Blog HopWeek OneMonday 9/2: Fabric Mutt / LRstitched Tuesday 9/3: Stitch This! The Martingale Blog / Stitched in Color Wednesday 9/4: Fabric Seeds / Pile O Fabric Thursday 9/5: The Feisty Redhead / Rae Gun Ramblings Friday 9/6: Sew-Fantastic / Clover + Violet Saturday 9/7: A Prairie Sunrise / Small Town Stitcher Week Two Monday 9/9: Hopeful Threads / Go To Sew Tuesday 9/10: The Sewing Rabbit / Sewing Mama RaeAnna Wednesday 9/11: Marci Girl Designs / imagine gnats Thursday 9/12: Sew Sweetness / amylouwhosews Friday 9/13: Lindsay Sews / 13 Spools Saturday 9/14: Inspire Me Grey / Angela Yosten Week Three Monday 9/16: Sew Very / Craftside 9/1-9/30: Link up your craft book project at Craft Buds from your blog or Flickr account, and enter to win prizes. Winners will be announced on Tuesday, October, 1! 2012 Craft Book Month Projects (L to R): Sew Crafty Jess, Sewing Rabbit, Stitched in Color, MissKnitta's Studio To participate in the month-long contest, just link up any project you've made from a pattern in a craft book. That easy! You'll tell us a little about the book, the project, how you personalized it, etc. Rules1) One entry per person.2) Your craft book project must have been completed in 2013. 3) Create a new blog post or Flickr photo (dated September 1, 2013 or later) and link back to Craft Buds/Craft Book Month in your post or photo description. In your post or photo description, make sure to list the craft book you used and provide a link if possible. 4) All winners chosen via Random.org. Some prizes available to international winners, so please join us! PrizesVisit Craft Buds and link up your craft book project during the window of Sept 1-30 and you'll automatically be entered to win some fantastic prizes from the Craft Book Month sponsors!No time to make a project? You can also follow Craft Buds all month long for your chance to comment and win some new sewing and quilting books for your library. The Triple-Zip Pouch Swap is officially over, for me anyway, and I have to say that this swap was so much fun. Swaps on Flickr are always fun, speculating which pouch will end up as yours. I tried really hard for this swap to comment on all pouches posted, and am happy to say that I did comment on the one that I received. Awesome! Before I show off my goodies that I received, I want to show you guys what I sent to my secret partner. The photo above is what I sent to Tracy Hudson (Cece sews) and no worries, she has received her package so I'm not spoiling anything. The package I sent included the triple zip pouch, note cards, post it notes, Aurifil thread samples, five text print fat eighths and a Moda mini charm pack of the fabric line Tapestry. I tried to stick to a color theme with the fabric and thread, and I felt that it matched the pouch quite nicely. I think she was happy with her package, so I am thrilled about that! Now it is time to show off my goodies! I honestly couldn't be more thrilled with my pouch! It is so much my style and taste, honestly like I would make for myself! This lovely pouch was made by the uber talented Alyce Rodriguez (wonderlandbyalyce) and she blogs HERE. She totally stalked me, found out my favorites and totally rocked it! I mean seriously, look how cute this pouch is! Here is the back of the pouch, equally cute, and she was so smart to use a print that was multi-directional, so it worked for the front and back. Here is the photo of my entire package! How lucky am I? I said that my favorite color was purple, so Alyce sent me some beautiful purple fabrics, none of which I had in my stash, and I love them all! Such a cute notebook and candy that I scarfed down the first day! Sad but true! My pouch was stuffed full. Thank you Alyce, such a nice present and a great end to such a fun swap! Huge thanks to Stephanie at Quarter Incher for putting this whole swap together and doing so much hard work to make it successful!
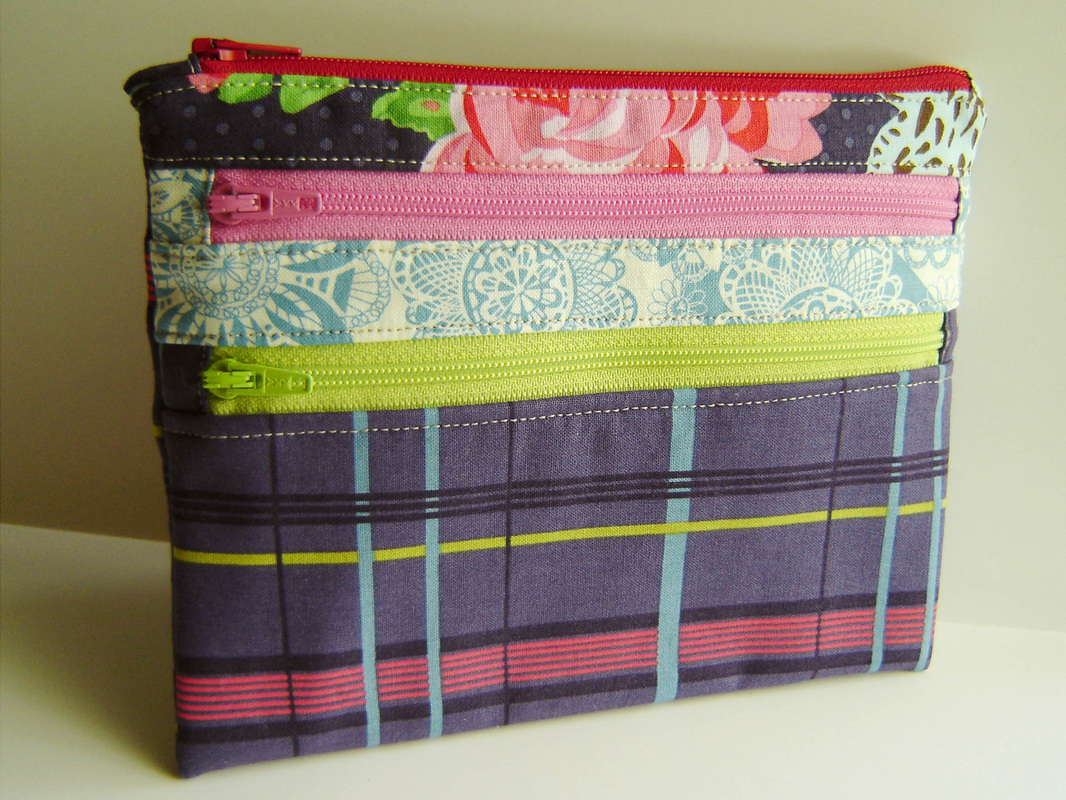
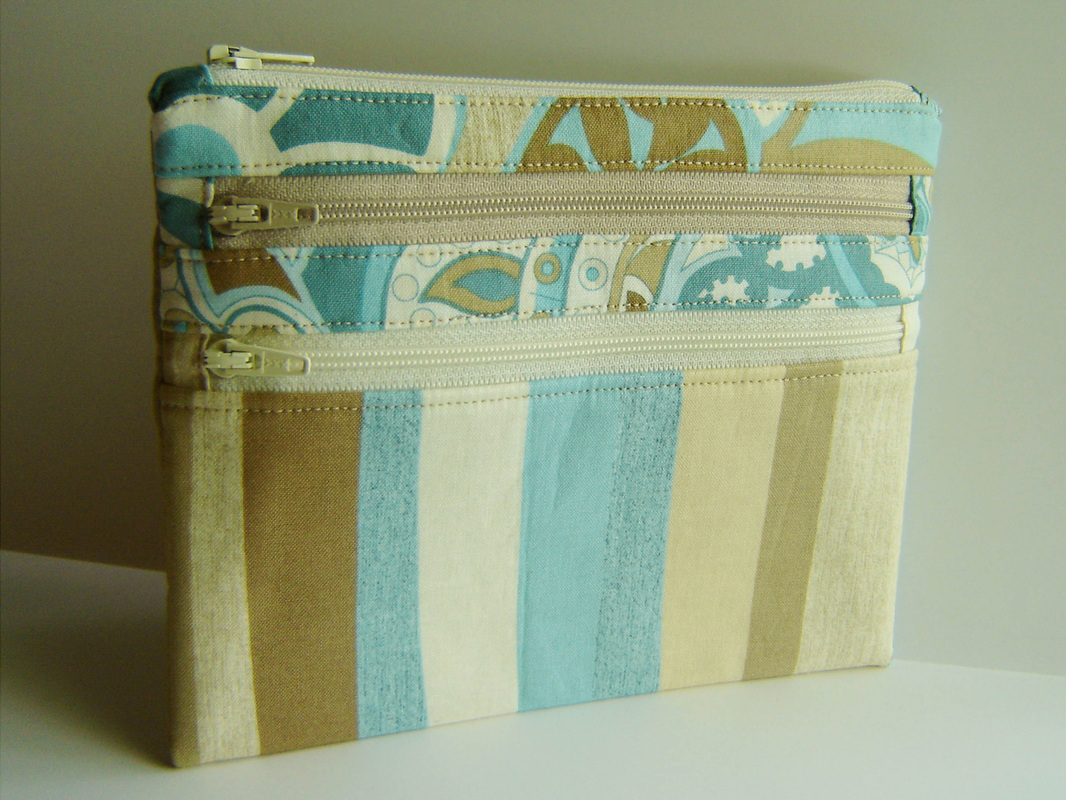
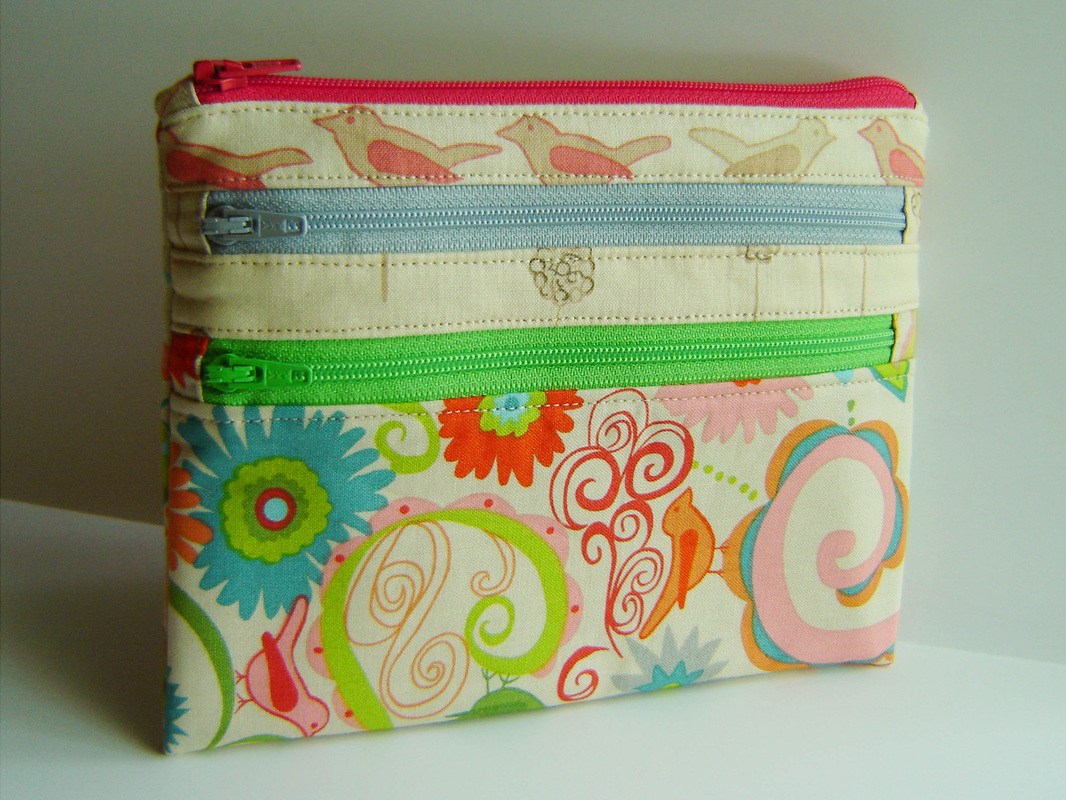
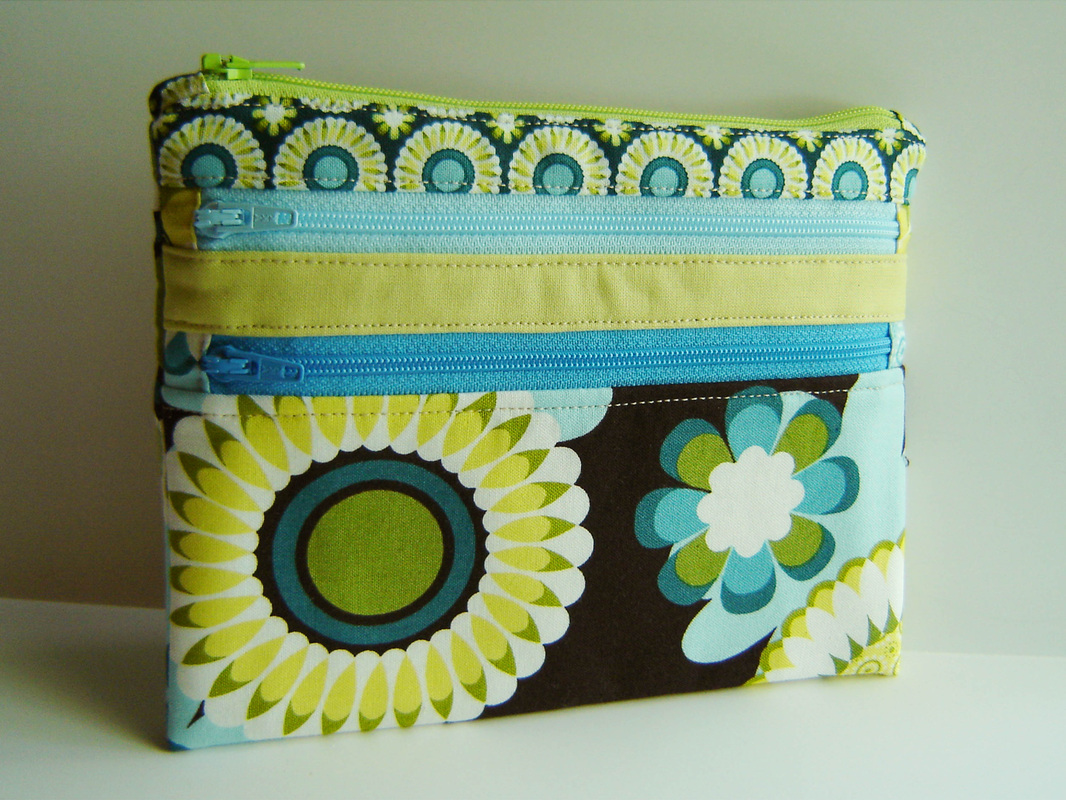
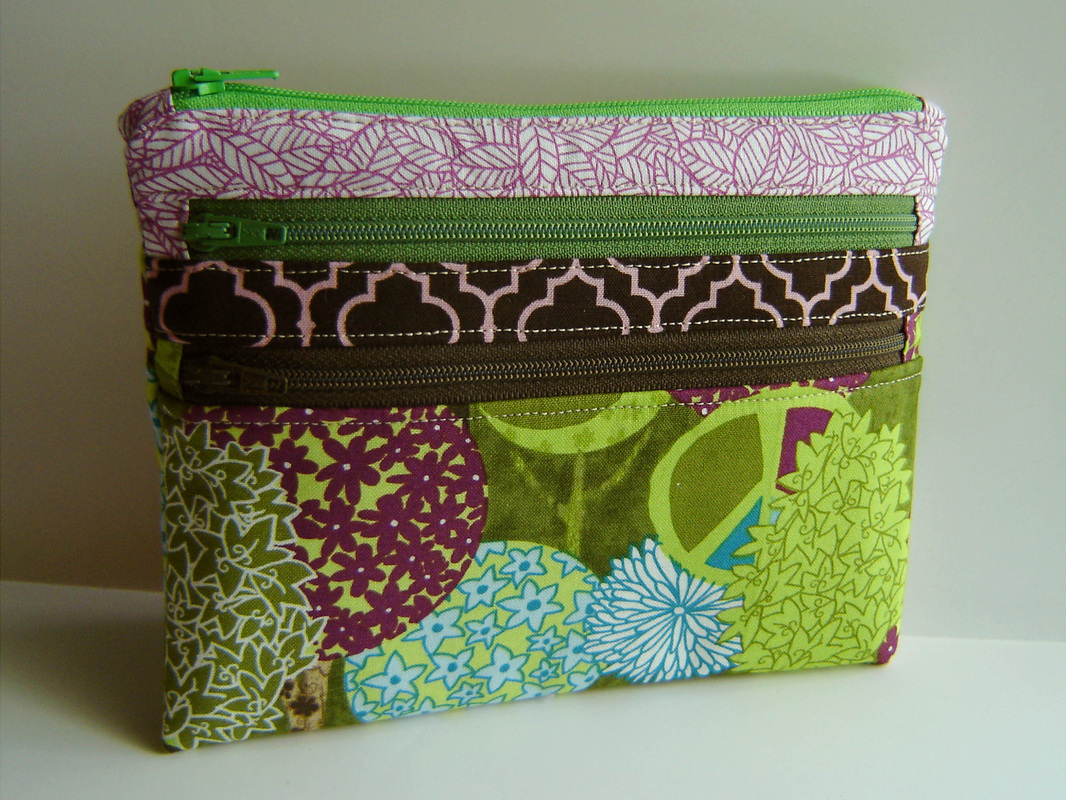
Hello! I feel like it has been ages since I have blogged, and I guess it has. I've been busy stitching up a storm, plus the kids and I seem to live with a summer cold lately....yuck. Anyways, earlier this year I participated in the Triple-Zip Pouch Sew Along hosted by A Quilter's Table, and the tutorial for the pouch can be found HERE. At the time, I stitched up five finished pouches and cut out six more. You can see and read about my first five HERE. Well the extra six I cut out sat around for a while, but I grew tired of looking at the unfinished stack so I went ahead and finished them up. Not long after finishing the final six I stumbled across Stephanie at Quarter Incher who decided to host a Triple-Zip Swap. Well I just knew I had to sign up, how fun! The basic premise for this blind swap (we have no idea who has our name) was that we were to make them a triple zip pouch and fill it with some goodies like notions, fabrics, you know that sort of thing. Well since I have quite a few pouches already made, I knew that one was bound to be the perfect fit for my partner, because honestly I made eleven pouches that were pretty diversified, one had to be her tastes, or at least I was hoping so. The swap is nearing its deadline to ship and I haven't posted anything for my partner yet, so I wanted to make sure and add an assortment to the Flickr group and hopes she responds as to which one she likes the best. If not, then I'll make the ultimate decision, fill it with the goodies I have assembled and ship it off, hopefully later this week, or the beginning of next! My partner was a bit vague, but I do have a pretty good idea of what she likes just by looking at her Flickr stream, I have my fingers crossed that I am on the right track. Not all of these pouches shown here are up for grabs, some have been gifted to family members already, I pulled four pouches for her to choose from (or the Flickr group members to choose from!) I just wanted to make sure I showed off all of the Triple-Zip Pouches that I made this year! Such a fun tutorial and great gift, I know there will be more of these pouches in my future for sure! Now that the summer is rapidly drawing to an end and my oldest starts Kindergarten soon, I am hoping to share some of my finished projects in the coming weeks with you guys, I have so much to blog about and oh so little time! I do hope that once we get a good routine established again I'll be able to blog more frequently, fingers crossed! Until next time, do enjoy your last bits of summer!
|
Marci GirlA feisty mom designing, sewing and blogging her way through everyday life!
|





 RSS Feed
