• Home
  • Blog
  • 2020 Finish - A - Long
  • 2019 Finish - A - Long
  • 2018 Finish - A - Long
  • Contact
  • 2017 Finish - A - Long
  • Shop
Marci Girl Designs

My First Podcast Interview

3/20/2019

3 Comments

 
I posted last week that I was scheduled to be on Pat Sloan's American Patchwork & Quilting Podcast on Monday, March 18, 2019 and I was!  Pat contacted me a few months ago and I'll honestly say I thought it was a mistake.  Who me?  Apparently it wasn't a mistake and yes indeed she did want to have a chat with me.  I filled out a "questionnaire" of sorts and then Pat turned that into a basic script for the show.  The segment was going to last 15 minutes and I knew basically what we would be discussing.

The afternoon of the interview I was extremely nervous as the show is live.  I wasn't worried about what I would say or what we would talk about but rather that my phone would drop the call or have cell phone issues.  Thankfully all the worrying was for nothing as my phone behaved itself.  A few minutes before the show Pat's producer called and informed me of what was happening.  Pat hoped on and we chatted briefly and then the music started playing.

I can truly say that it was the fastest 15 minutes of my life!  If you have ever met me in person then you know I can be quite the talker especially when it comes to quilting/sewing.  Mrs. Sloan is such a professional, she kept the conversation flowing and reined me in when I was blabbing too much.  We spent some time at the beginning talking about how I got into quilting, this transitioned into talking about the Finish-A-Long that I've been managing for the last two years and participating in since 2012.

I was thrilled to be able to talk about the FInish-A-Long and give it even more exposure.  We truly want you all to play along with us!  So I was just a chatting away and then Mrs. Sloan gives me the "we only have one minute left" and I'm thinking, "Are you kidding?  Where did the time go?" We didn't even get to chat about half of the stuff on the script!  Oh well, maybe next time, right? LOL
Picture
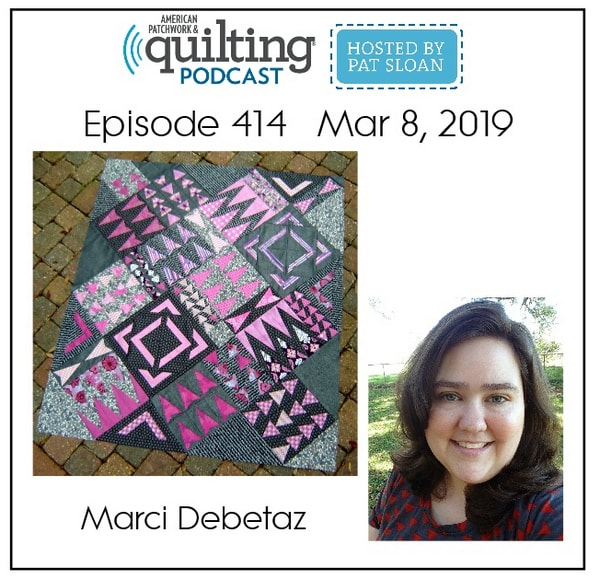
 That just about sums up the experience, it was really fun, just like having a chat with an old friend about a subject you could talk about forever.  No reason to be nervous and the best part is that I have this image (above) for forever proof that I was on a HUGE radio show and had my 15 minutes of fame.

Truly the best part is that it is recorded and you can listen to it now or later!  So if you have some time and fancy to listen to the show you can find my Episode 414 HERE.  If you take the time to listen, thank you and let me know what you think!
3 Comments

Tooth Fairy Pillows

6/27/2017

0 Comments

 
Picture
It's the last week to finish up items on the Finish Along list and I'm in a mad dash to knock a few more off the list.  These are two tooth fairy pillows I made for my two boys, they are based on the tooth pillow that my mom made me when I was little.  I took her pattern and made my own funny faces and now they are all set.  My oldest has already lost a few teeth, but he wore out the first pillow I made him so he needed a new one.  My middle child is on the cusp of his first ones being loose so he will get his once he loses one.
Picture
The front is just white Kona quilting cotton with the eyes, mouth and tooth from scraps, sewn down with a satin stitch.  The back is a small wale corduroy I had scraps of and it worked perfect for these.  The pocket on the back is plenty big enough for dollar bills or coins and could hold all their baby teeth at once, but let's pray that doesn't happen.  I embroidered their names to the left of the pocket so they would know which one was theirs.  I blurred part of their names, so no you aren't crazy, it does look weird.

The first one I stuffed I used Polyfil that I had on hand and I used it all up on one (thank goodness I was so tired of storing that.)  Not wanting to buy more I used my cotton batting scraps to stuff the second one.  I tore up the batting and in essence made fiberfill.  It is definitely more dense and a little more lumpy but my kids don't care and recycling for the win.
Picture
This is my third finish this quarter and was number two on my second quarter list found HERE.  You still have time to finish up your projects and link up so get cracking!

Picture
0 Comments

Baby Gifts for Little Girls

2/17/2017

4 Comments

 
Picture
Popping in to share one of my most recent finishes, these adorable baby girl rattles.  The pattern for these precious little gifts are from the book, "Sweetly Stitched Handmades" by Amy Sinibaldi otherwise known as Nana Company.  I just love the book, filled with the sweetest projects.  These go together really quickly especially once you pull together all the supplies and pick out the fabrics.  I originally planned to make this for my little girl, but she is a bit too old now, so I whipped up two of them to put up for baby gifts in the future.  Does anyone else do that?  Make several at once because it is just as quick to make several than to make just one.  Or is it just me?
Picture
These are rattles, so they need to rattle, right?  Well I don't want to go buy that, so I make my own.  Any time I need a rattle I use a plastic Easter egg, either the small ones or normal sized.  These use the small ones and I fill them with dry rice and dry beans.  A little of each, just until you get the right sound, then I tape those eggs shut so they don't bust open.  They are then placed in the heads and then I stuff the rattles and sew them shut.  It works really well and makes a nice rattle sound, never too loud which is important for babies and their mothers.

I embroidered the little details like the eyes and nose and did a simple little running stitch around the nose and the ears, so cute, right?  I seriously love these little guys.
Picture
These rattles are made entirely out of my scrap bins and the best part is that they use small scraps, really small scraps.  The largest piece you need is around 4" x 4" and everything else is really small.  Small bits of lace and trim are used too, so that is really nice.  This being said, I'm linking up with Scraptastic Tuesday hosted by She Can Quilt and Mrs. Sew and Sow.  There is still time to link up your own project or just hop on over and check out the other link ups, lots of pretty projects.
Picture
4 Comments

Sewvivor - Challenge No. 1 - Nautical

8/11/2014

17 Comments

 
Picture
Hi, Marci from Marci Girl Designs here and I want to start by saying, yes, I know that the second challenge is the bag challenge, not the first, but I couldn't help myself and Rach said we could make anything.  When it was time to decide what I was making, I just couldn't move past "bag" so in the end I went with it.  Simply put, I thought a Nautical bag would be so cool.
Picture
The bag idea really started to take shape when I was looking through old pins on Pinterest and was inspired by this bag found HERE.  If you click through, there is a tutorial on how to make that bag, but I didn't use that tutorial at all and just did my own thing based solely on the simple design.  I dug through my amazingly large collection of nautical prints and chose a simple blue with white rope, Windham Fabrics, "Catch of the Day" by Pela Studio.  I then added a coordinating blue Kona solid and a 100% linen that I had in my stash.
Picture
I cut random sized strips for each colorway, and serged the edges of the linen to prevent fraying in the future.  I sewed together long strips of each print and in essence created a new "fabric" piece.  I drafted my own purse shape, roughly 13" x 17" with rounded bottom corners.  I decided on the angle I wanted, and then cut out my pieces based on my drafted pattern. This was actually really difficult for me, and involved a lot more time than I was originally hoping.  Those angles get me every time!
Picture
Once the front and back chevron pieces were sewn together, I then fused Pellon SF-101 to the backs of each piece for added stability.  I then added a 100% cotton batting to the back (creating three layers) and pin basted it.  I sewed around the edges, a scant 1/8" to hold all the layers together, which was especially helpful when it came time to construct the bag.
Picture
I decided to hand quilt with a lovely dark blue pearl cotton in large chunky stitches on the linen only, 1/4" away from the edges.  All of the hand quilting was done while my family was on vacation for a week (ironically at the beach) smack in the middle of this challenge.  I then used the rest of our vacation to stress about where this project was headed.
Picture
Upon getting home, I quickly went back to work.  At first I thought I would raw edge applique something nautical on the bag, but I couldn't figure out what and felt stuck.  I'm not sure how the idea came to me, but I remembered I had a book, Scandinavian Stitches by Kajsa Wikman, and in it was this darling project quilt that incorporated a "nautical" poem that was free motion quilted onto the quilt.  That project in the book was called the "Once I Caught a Fish Quilt."  Hmm, I wondered if there was any way this would work with my design?  Well amazingly, it did!  It fit just perfectly, so I used a black thread and free motion quilted the poem on the front and back.
Picture
One, two, three, four, five,
Once I caught a fish alive,
Six, seven, eight, nine, ten,
Then I let go again.

Why did you let it go?
Because it bit my finger so.
Which finger did it bite?
This little finger on the right.
Picture
I was pleasantly pleased how well it turned out and honestly much easier than I expected.  I did all of the quilting on my old Project Runway Brother, with a generic free motion quilting foot and regular old Coats and Clark thread.  I brought all the thread tails to the back of the "quilt" and tied them all off and trimmed all the threads. Now that the quilting was finished it was time to turn it into a bag!
Picture
I made my own (kinda large) piping with the linen fabric, basted it onto the front, and then sewed the front and back together along the sides and bottom.  I found a really neat cotton webbing (that I felt looked really nautical and matched amazingly well) and decided for short handles after debating between short and long for quite some time.  I basted them to the bag and slipped on one D-ring on each handle before doing so.  I used the same blue with white rope fabric print for the lining and finished up the bag.  The top of the bag, which looks like I used bias tape to finish, is actually the lining made a tad bit longer than the bag, wrapped around the front creating that look.  I top stitched in the ditch around the whole bag, thus holding the lining on the inside and then stitched the handles down to the very top of the bag, creating a nice little channel that the d-rings were seated into.
Picture
I knew at this point that the bag needed a little something else, to make it just "pop," but I wasn't sure what.  Then i randomly remembered this little kit that came with one of my old issues of Mollie Makes.  I pulled out the kit, which I had not made yet, and realized it would be perfect for this bag, though the fabric that came with the kit wasn't perfect for this particular project.  So I dug through some red 5" charms that I had, picked 3 that I really liked and used the instructions and some of the kit materials to make this three little fish key-chain.  The kit and instructions were included in Mollie Makes Issue 29, and the project was named "Sardine Keyring" by Zoe Patching.  Isn't it the cutest!  I just love it, and so do my kids, who have now requested I make them a ton of fish (without the strings!)  I clipped the key-chain onto the front side d-ring and called the bag complete!  What do you think?  I just adore it!
Picture
Now that my first challenge project was complete, I had the task of photographing it!  You see, I live in South Louisiana and honestly there aren't a ton of beaches (or at least pretty ones) anywhere near me.  More like swamps and bayous, so I went with it!  I loaded up the family, drove to a nearby canoe launch that is adjacent to the Vermillion River and took a ton of photos.  Not feeling 100% about the first round, we went exploring and ended up in a State Park in Abbeville, Louisiana, the Palmetto Island State Park.  We had never been to this State Park, and were pleasantly surprised by what we found.  I finished taking my photos at the boat launch and later at the pond, and then the rest of the day was spent playing with the family.  We hiked, played on the playground and the best part, the splash pad, which was awesome and huge by the way.
Picture
The day ended at the pond, where I finished my final pictures and right as we were about to leave (the kids had been throwing rocks into the pond,) guess who showed up?  A five foot alligator!  Yikes, time to go! So I included this final shot to show "proof" of our alligator.  If you look to the right of the bag, there is a "line" in the water, there it is, head just out of the water swimming by!  No sir, I did not like that, and neither did my kids who were now freaked out!  I guess that is just some of the hazards to living in South Louisiana!
Picture
It was so fun and challenging participating in the first round of Sewvivor.  I really felt like I stretched myself with this project, trying new techniques and trying to think out of the box.  I traveled to new places, created a project I was really proud of and am just so honored to have been chosen as a participant in this really cool contest.  Now I need your help, 50% of the voting process is done by you guys!  So I would really appreciate it if you would click through HERE and vote for my project, which is PROJECT #8.  I really want to keep playing and if you liked what I created, please take a moment to go vote for me!  Thank you guys for supporting me so much and especially to my blog followers throughout the years, I truly appreciate you all!
Picture
17 Comments

Sewvivor!

8/10/2014

8 Comments

 
Quickly popping in today, on a Sunday to let you know my amazing news (if you haven't already heard!)  I made it into the Sewvivor Top 16, you can see my audition piece HERE!  Woo hoo!  I am beyond thrilled ya'll, like crazy excited!  I wanted to blog earlier, but was on vacation for a week smack in the middle of the first challenge, so all of my time has been seriously devoted to vacation, crazy mad sewing and getting ready for school to start next week!  Can I say BUSY BUSY!  Whew deep breath!
Picture
Rach at Family Ever After (the host of Sewvivor,) featured a Getting to Know the 16 Sewvivor Contestants blog post last week and if you get a chance, hop over there and you can read a short biography of yours truly along with the other 15 contestants.  Tomorrow is the first challenge reveal, the theme was Nautical, so I'll be back tomorrow with a really long blog post about my first project!  I will need all of your help to continue on in this sewing competition, so join me tomorrow for all the details on how to vote and to see my first project!  Wish me luck!

Picture
8 Comments

Briar Rose Challenge

7/14/2014

4 Comments

 
Picture
A few months ago, I (finally) got a new phone (it had been like 5 years) and with a new phone came the ability to actively participate on Instagram!  One of the first things I discovered on Instagram was the fabric shop Quilt Sandwich Fabrics, and they just so happened to be holding a fabric challenge.  I was lucky enough to grab a spot and participate!  They sent me two fat eighths of Heather Ross's Briar Rose Fabric and I could create anything I wanted just so long as it used both fabrics.  I received the two prints that you can plainly see above, so pretty!  I just love the grasshoppers hidden amongst the clover!
Picture
I knew all along that I wanted to make a pouch, but I stalled on the type of pouch for a while, and then in the end I decided to make one of my own designs.  It is a gusset bottomed pouch with a curved top that measures 8" wide x 7" tall x 2.5" wide.  It has a pretty little front detail, and is the perfect size to hold a little sewing project or throw in your purse to keep things nice and organized.  For the exterior I used only the two prints of Briar Rose that I was sent and decided to add the pretty little lace details to the sides of the front panel detail.  After I was finished I decided to add the three buttons, as just a final little fun detail, which also worked really well for holding down the lining on the inside of the pouch.  For the interior I used some larger scraps from a Denyse Schmidt print from JoAnn Fabrics.
Picture
I have a TON of zippers in my collection, so it wasn't hard to find the perfect fit, a great matching green.  I tried a different technique for installing the zipper, and was really pleased with the results.  On the right side or end of the zipper I sewed on a tab to cover the end, but on the left side, I chose to sharply fold the zipper into the seam, and I really was pleased with the clean finish of it, no bunching and really smooth, which worked well with my curved top.  You can see both ends, above and below.
Picture
Below is the back of the pouch, you can see I carried the front details over to the back, but just omitted the buttons.  I used Pellon 50, which is a stiffer sew in interfacing for the pouch, which gives it just enough stiffness to totally stand on its own, but keeps it thin and not puffy at all.  I love that!
Picture
Now comes the part where I need your help.  The Briar Rose Challenge features two winners, one will be chosen by the staff at Quilt Sandwich Fabrics, and the other is a people's choice award.  So if you have a minute, hop over HERE to vote for your favorite project, it doesn't have to be mine, because honestly there are so many fabulous projects, it is hard to choose which one is the best!  But if you want to vote for me, I won't mind!  All you have to do is leave a comment on the blog post for your favorite.  Hurry though, because voting ends tomorrow!

Thank you Quilt Sandwich Fabrics for the fabric and the challenge it was really fun and I forgot just how much I like making my own designs!
Picture
4 Comments

Briar Rose Quilt Design Contest

5/8/2013

4 Comments

 
A while ago, maybe a month or so, Threadbias announced a contest designing a quilt pattern using Heather Ross' newest fabric line Briar Rose.  I was interested, but then I read that you would have full access to their Quilt Design Tool in order to design the quilt.  What?  I'm so in!  I had been dying to try out the full version, so this was the perfect opportunity.

I played around quite a bit, the program is really easy to use, I read no directions, watched no tutorials, just dove right in.  So fun.  If I ever get extra funds, I will so subscribe to this tool, it makes designing quilts so easy.  After playing around for quite a while, I decided on my final design and you can see it here, below.  I titled it Modern Portal and my description of it is as follows, "A simple geometric pattern that showcases the lovely feminine prints in this collection. Each "portal" focuses on the fabric design and can be appreciated on its own accord."  I am quite happy with the final design, and truly hope to make this quilt on my own, maybe once I get a little more caught up on those Wips!

Oh and before I forget, the Quilt Design Tool calculates the amount of fabric that it will take to make the quilt that you design.  This quilt which measures 60" x 75" will take roughly 4 yards of the white and 1/4 yard of all the other prints.  How cool is that?
Picture
Modern Portal
This is a contest, and voting is open now through Friday.  If you are a member of Threadbias, you can vote.  I would love for you to vote on mine, but even if you don't, please take a moment to check out the other entries.  So many beautiful designs, so hard to pick one favorite for sure!  You can go vote HERE, and remember, you have to be logged on, in order to vote.

Thank you to all the sponsors of this contest, it really was fun to play around with great digital prints from Heather Ross and to use the Quilt Design Tool at Threadbias.
Picture
4 Comments

Bye Bye Google Reader

3/26/2013

0 Comments

 
By now I'm sure you have heard, but Google Reader will be a thing of the past soon.  Major bummer.  So, if I was fortunate enough to have you as a follower using Google Reader to read my blog posts, I would love for you to continue following me!  You can either follow me via RSS (see the side bar of my blog) or if you are hoping over to Bloglovin, I would love for you to follow me there!  Click below to do so!  Thank you!

Follow my blog with Bloglovin
Follow on Bloglovin
0 Comments

May Giveaway Day!

5/22/2011

604 Comments


Giveaway is closed!  Feel free to comment, but everything after #604 will not be included in the drawing.  Thanks to everyone who entered.

It is giveaway time here at Marci Girl Designs!  I decided to play along with Sew, Mama, Sew! and host a giveaway in conjunction with their May Giveaway Day!  If you are a first time visitor, thanks for stopping by!  More importantly though, thanks to my blog followers and regular readers, your daily encouragement, ideas and comments mean so much to me! Awww...enough of the mushy stuff!
Picture
Five fat quarters from Denyse Schmidt's DS Quilts line of fabrics.
On to the giveaway!  Here is what is up for grabs:
5 fat quarters of Denyse Schmidt's latest line of fabrics available at JoAnn's Fabric Stores.
1 Louise Pleated Wristlet PDF Pattern by Marci Girl Designs, emailed directly to you.
2 fat quarters of Heather Ross's latest Out of Print line from Spoonflower.

Awesome right?  You can't even get those Heather Ross prints anymore, and the Denyse Schmidt prints are rapidly getting very hard to find!  Even better, you get an awesome pattern (from my shop) that you can use all these great fabrics to create a super cute clutch for yourself, or an awesome lady in your life!
Picture
PDF Pattern by Marci Girl Designs
Picture
Two fat quarters from Heather Ross's latest out of print fabrics from Spoonflower.
The Details (How to Enter!) And yes, I will ship internationally!
1.  Leave a comment, and in that comment answer this question, "What is your absolute favorite movie of all time?"  (1 Entry)
2.  If you are currently a blog follower, and have added your little photo to the Google Friend Connect widget to the right, you get an extra entry.  If you are a follower through Google Reader (and I know there are quite a few of you out there) just add your photo to the widget and leave a comment that you did so. And if you want to become a brand new follower, just add your photo to that same little widget, and leave me a comment that you are a new follower! (1 Entry for Either of These 3 Options)

You have a total of 2 chances to win!  Just leave a separate comment for each.  Make sure you fill in the Email spot, so that I have a way to contact you if you win!  If I am unable to contact you, I will pick another winner.  The giveaway closes on Wednesday, May 25, 2011 at midnight.  Thursday morning, I will pick a winner via a Random Number Generator, and will send you an email letting you know that you won, and requesting your mailing address!  Good luck and thanks so much for visiting!
Picture
604 Comments

One Thing, One Week Challenge - My Minions

1/24/2011

11 Comments

 
Picture
Picture
Once again I decided to participate in Amy's One Thing, One Week Challenge.  Well lucky for me, I finished this one up early in the week, and even got the pictures done early!  Woo-Hoo!  My goal this past week was to finish up the two dozen tooth fairy pillows that were a custom order for a boutique in South Carolina.  It is so nice to send these little guys off to other parts of the country for someone else to love!  I think their little pink and blue smiles are pretty darn cute, don't you?  Thanks again Amy, for this little challenge that gives so many people that little kick in the butt to get stuff done!  Now off I go to that next project...

Amy's Creative Side

P.S. In response to one of the comments left on this post asking if the pillows have a pocket on the back for a reward for the children, the answer is Yes!  All of these pillows have a pocket on the back to safely tuck the little tooth and then the tooth fairy can leave her reward!
Picture
Picture
11 Comments
<<Previous

    Marci Girl

    A feisty mom designing, sewing and blogging her way through everyday life!

    Subscribe
    Follow on Bloglovin
    Picture
    Follow on Bloglovin


    Categories

    All
    2017 Finish A Long
    2018 Finish A Long
    2019 Finish A Long
    Bee Sewcial
    Book Reviews
    Clothing
    Everyday Life
    Giveaways
    Handbags
    Handstitched Class
    Inspirational Projects
    Marci Girl Designs
    Projects
    Quilt Along
    Quilting Bees
    Quilts
    Random Thoughts
    Recipes
    Sew Along
    Sewvivor
    Style Stitches
    Swaps
    The Penny Sampler Class
    Tutorials
    Wip Wednesday


    Happily
    Participating In:

    Picture
    Picture
    Picture
    Picture
    Picture
    Picture

    Picture


    Archives

    January 2020
    November 2019
    October 2019
    July 2019
    April 2019
    March 2019
    February 2019
    January 2019
    December 2018
    October 2018
    August 2018
    July 2018
    June 2018
    May 2018
    April 2018
    March 2018
    February 2018
    January 2018
    December 2017
    November 2017
    October 2017
    September 2017
    August 2017
    July 2017
    June 2017
    May 2017
    April 2017
    March 2017
    February 2017
    January 2017
    April 2016
    March 2016
    February 2016
    January 2016
    September 2015
    July 2015
    October 2014
    September 2014
    August 2014
    July 2014
    June 2014
    May 2014
    April 2014
    March 2014
    February 2014
    January 2014
    November 2013
    October 2013
    September 2013
    August 2013
    July 2013
    June 2013
    May 2013
    April 2013
    March 2013
    February 2013
    January 2013
    November 2012
    October 2012
    September 2012
    August 2012
    July 2012
    June 2012
    May 2012
    April 2012
    March 2012
    January 2012
    December 2011
    November 2011
    October 2011
    September 2011
    August 2011
    July 2011
    June 2011
    May 2011
    April 2011
    March 2011
    February 2011
    January 2011
    December 2010
    November 2010
    September 2010
    August 2010
    July 2010
    June 2010
    May 2010
    April 2010
    March 2010
    February 2010

    Picture

    RSS Feed

Powered by Create your own unique website with customizable templates.