• Home
  • Blog
  • 2020 Finish - A - Long
  • 2019 Finish - A - Long
  • 2018 Finish - A - Long
  • Contact
  • 2017 Finish - A - Long
  • Shop
Marci Girl Designs

Zakka 2.0 - Diamond Patchwork Placemat

7/3/2013

7 Comments

 
Picture
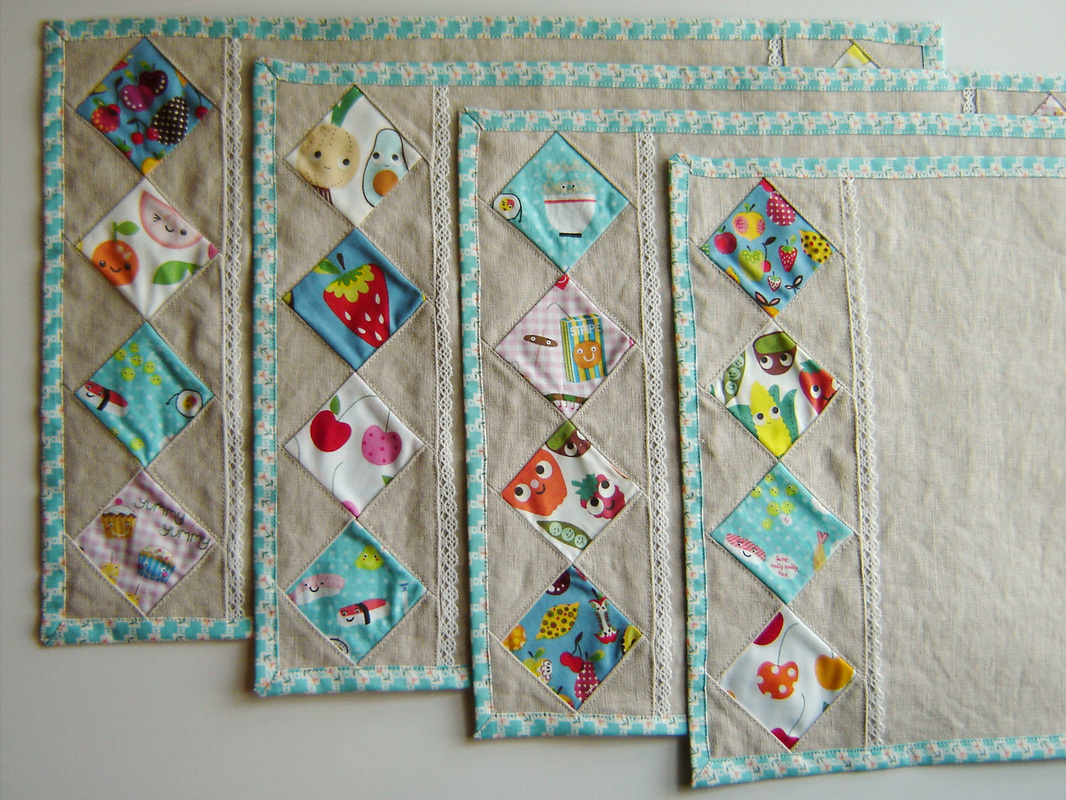
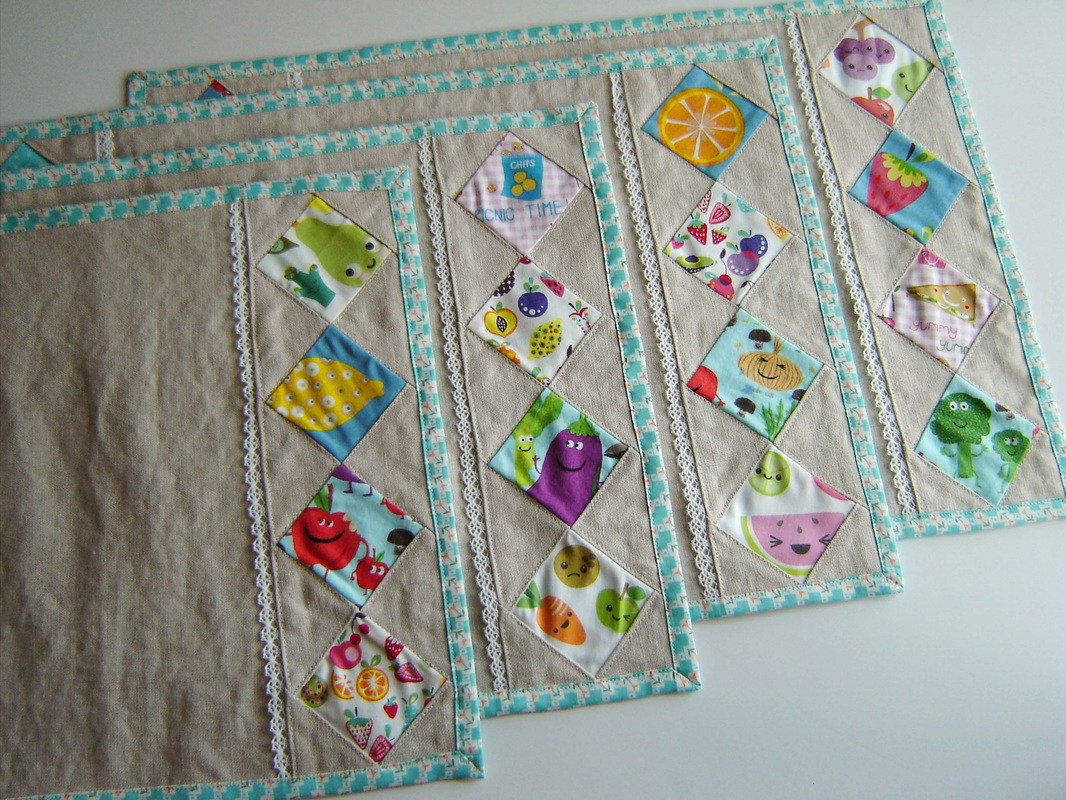
Here we are at Week Five in the Zakka 2.0 Sew Along!  This week, the Diamond Patchwork Placemat, from the book Patchwork, Please! by Ayumi Takahashi.  I knew all along that I would be making four placemats and not just one, and boy am I glad that I did, they turned out so cute and really didn't take that long to make all four.
Picture
I used fabric from my stash with the exception of the 100% linen, which I bought from JoAnn's Fabrics.  I pre-washed the linen because I know that it tends to shrink a lot in the wash, but washed nothing else.  Hopefully that doesn't come back to haunt me one day.  The backing and binding is a Darlene Zimmerman 30's reproduction print that I have been holding on to for quite some time, I felt the scale and coloring was perfect for these placemats, especially since the backing wraps around to the front to create the binding.  I like that method, so quick and easy!

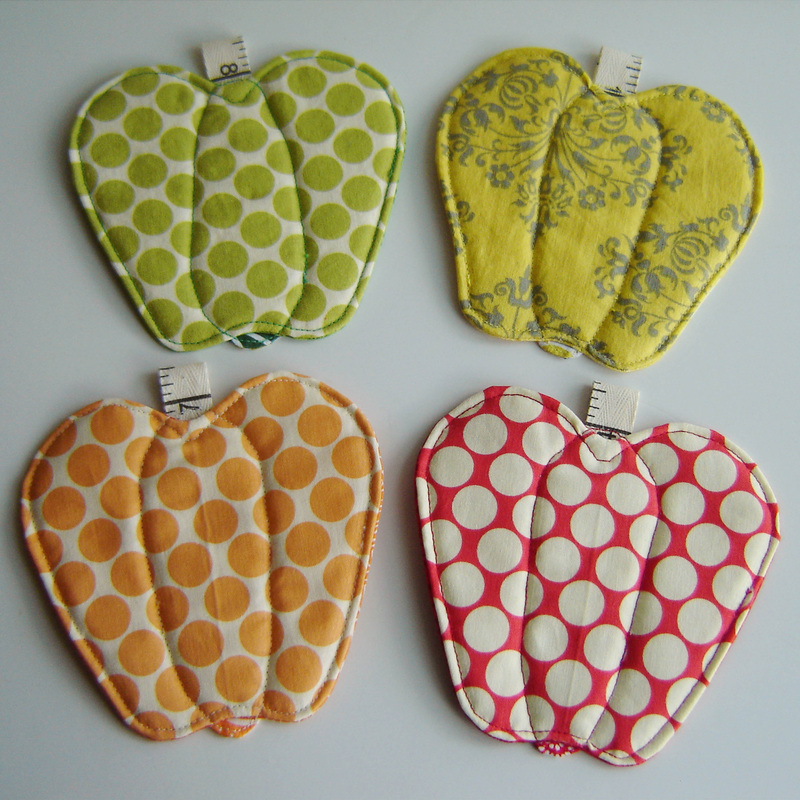
For some strange reason I have an insanely huge stash of kitchen and food prints.  I started pulling them for this project and after digging just a short time pulled out 25 prints.  I know I have more than that, that is just what I pulled out from light digging!  In the end I narrowed it down to just fruit, vegetable and Kawaii prints like the picnic and sushi themed ones.  I even used two of my HOARDED Spoonflower sample prints and cut them up!  It was the right decision, I just love them mixed in!
Picture
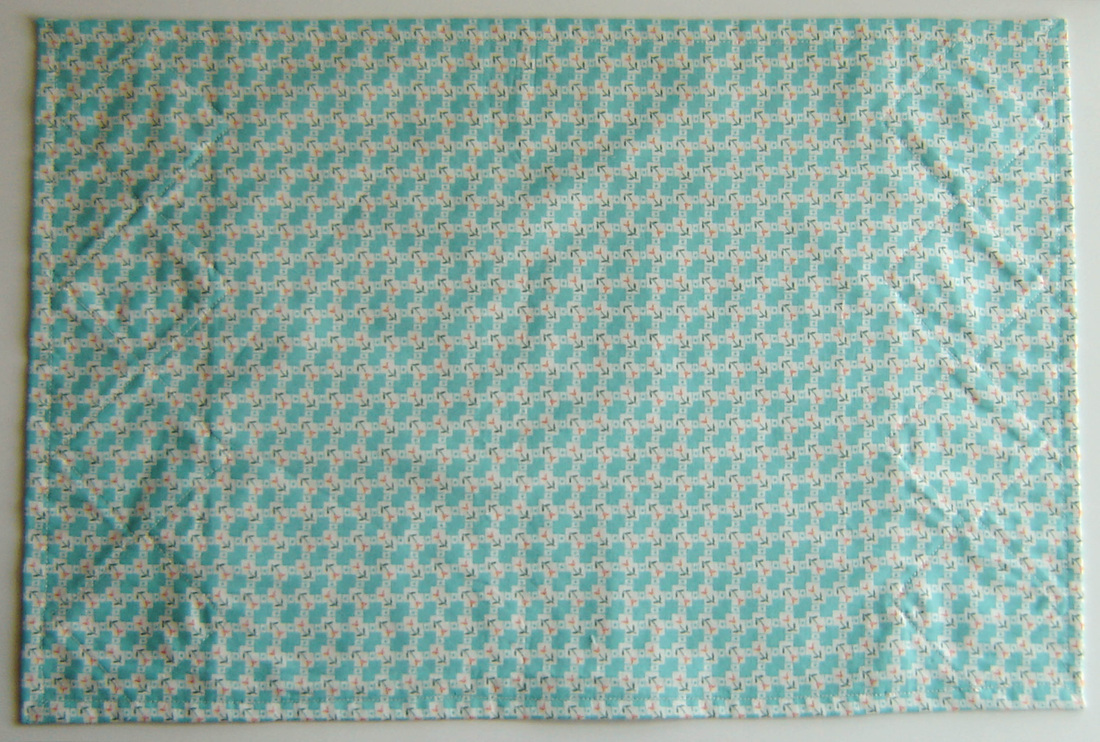
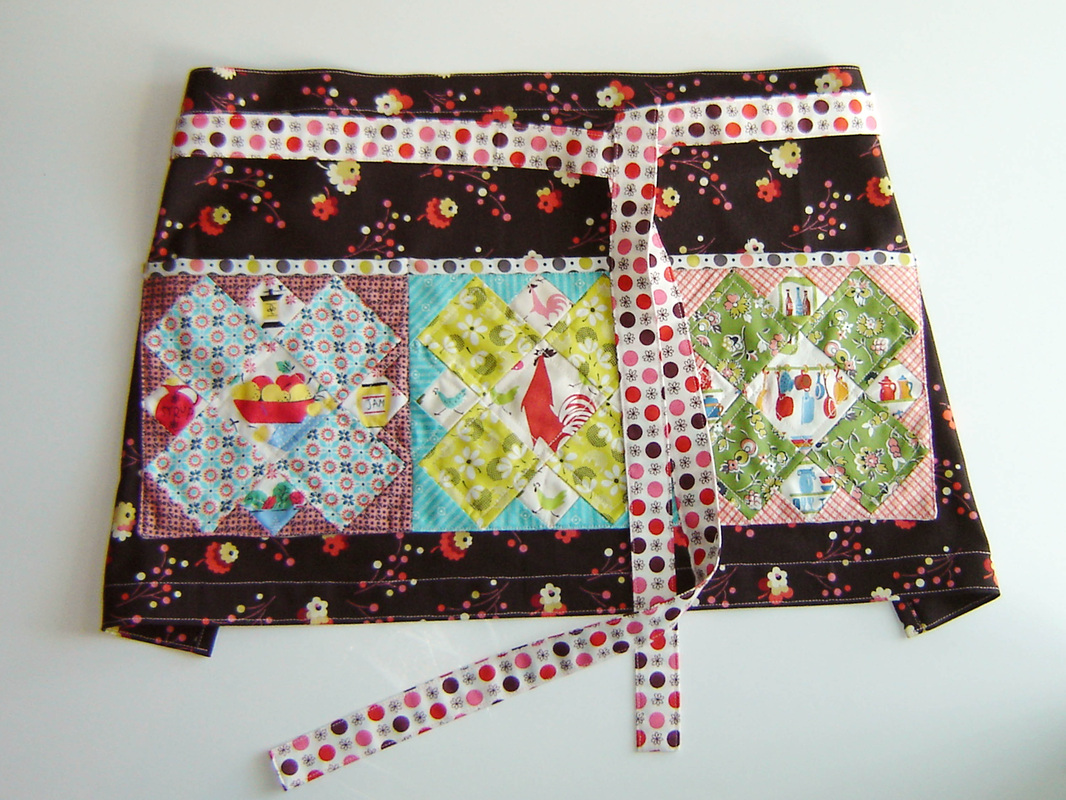
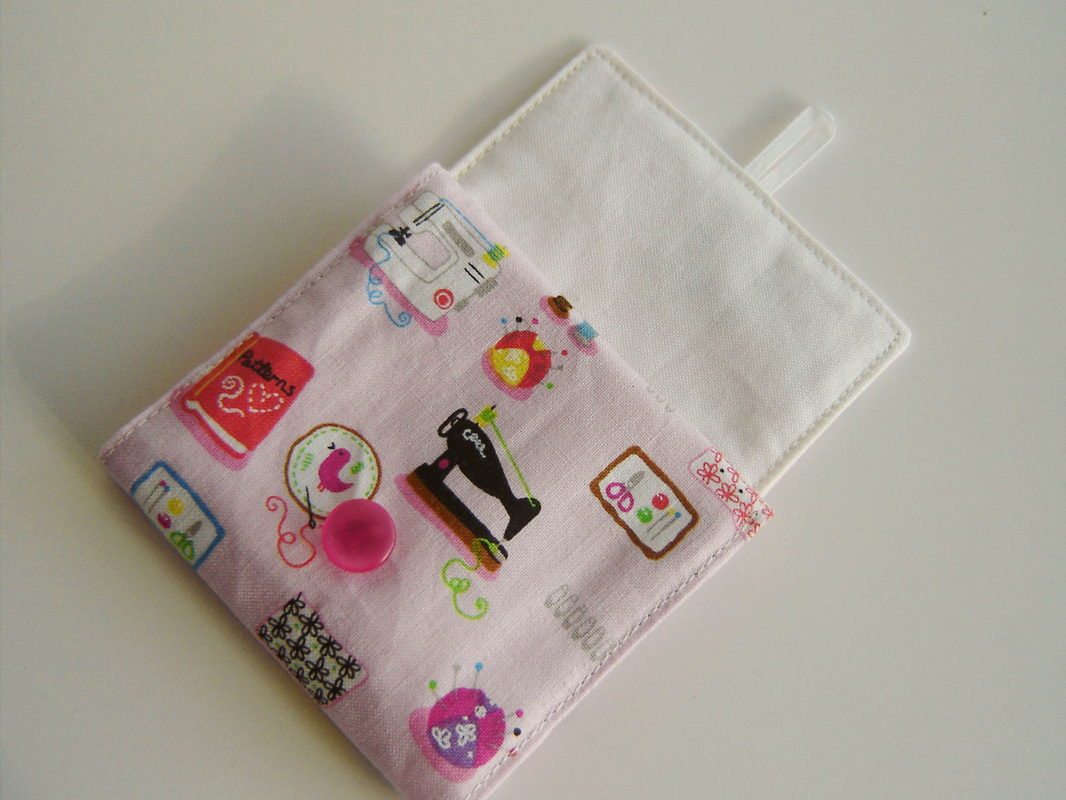
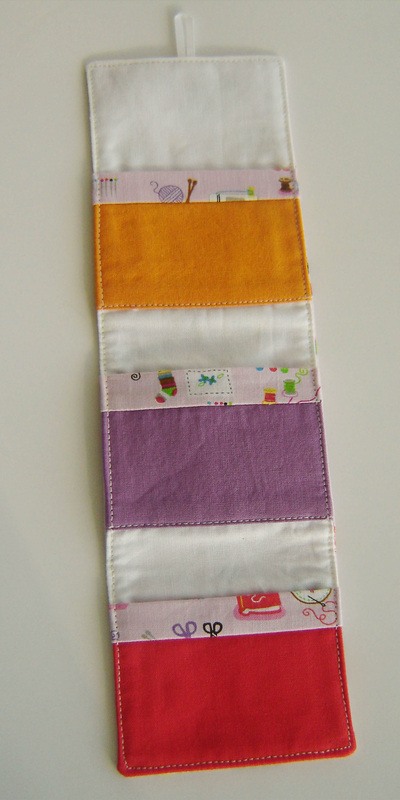
Back view of the place mats.
Picture
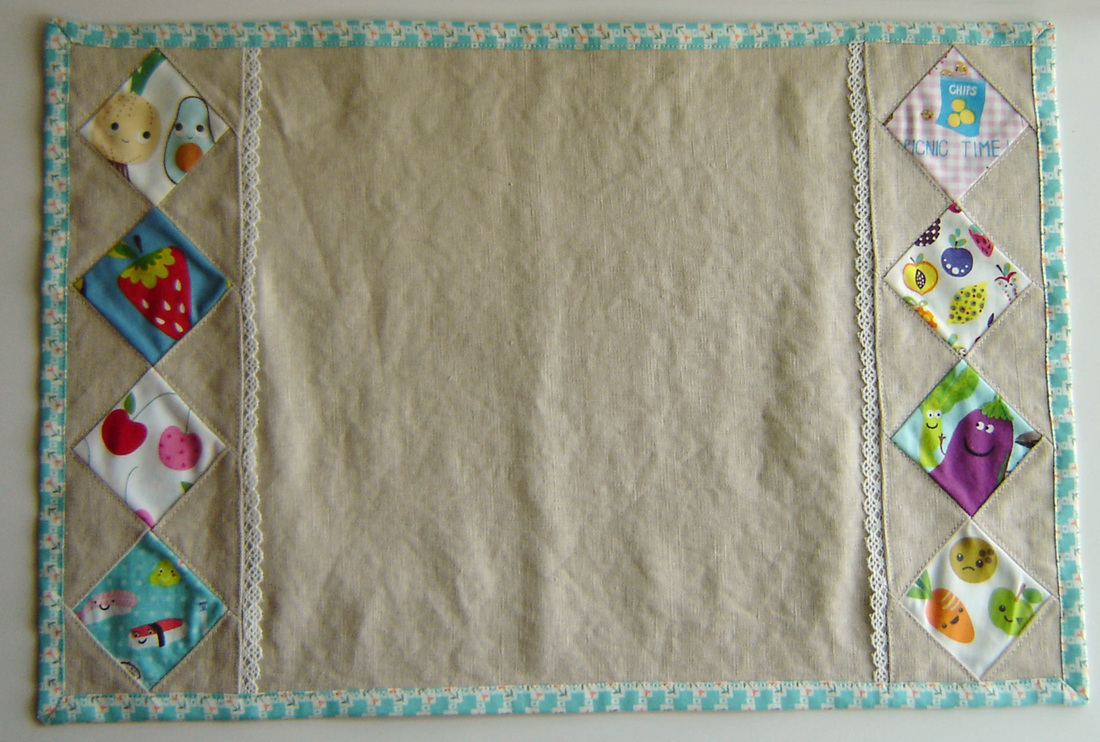
I didn't change much from the printed directions, just three little things.  First, I did not paper piece the diamond patchwork panels on either side, but rather just pieced them normally.  I can see why she recommended paper piecing, especially with the shiftiness of linen, but otherwise it worked out just fine.  Second, I used a pretty little lace on the side of my panels instead of the ric rac the author called for.  I wanted to use from my stash and this was the only suitable thing I had enough yardage of.  I rather like the look of lace, linen and a bunch of silly Kawaii prints.  Lastly, I did not spray baste as she suggested.  I didn't have any, so I just pinned, pinned, pinned!  You can obviously see that the front and back are not glued together simply by noticing the MILLION wrinkles all over.  Honestly the pictures make it look worse than it is, but they are there.

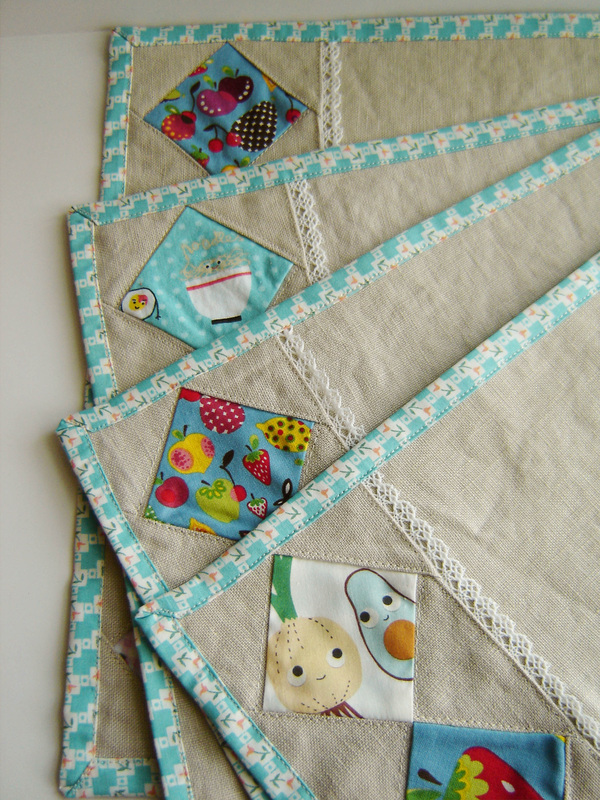
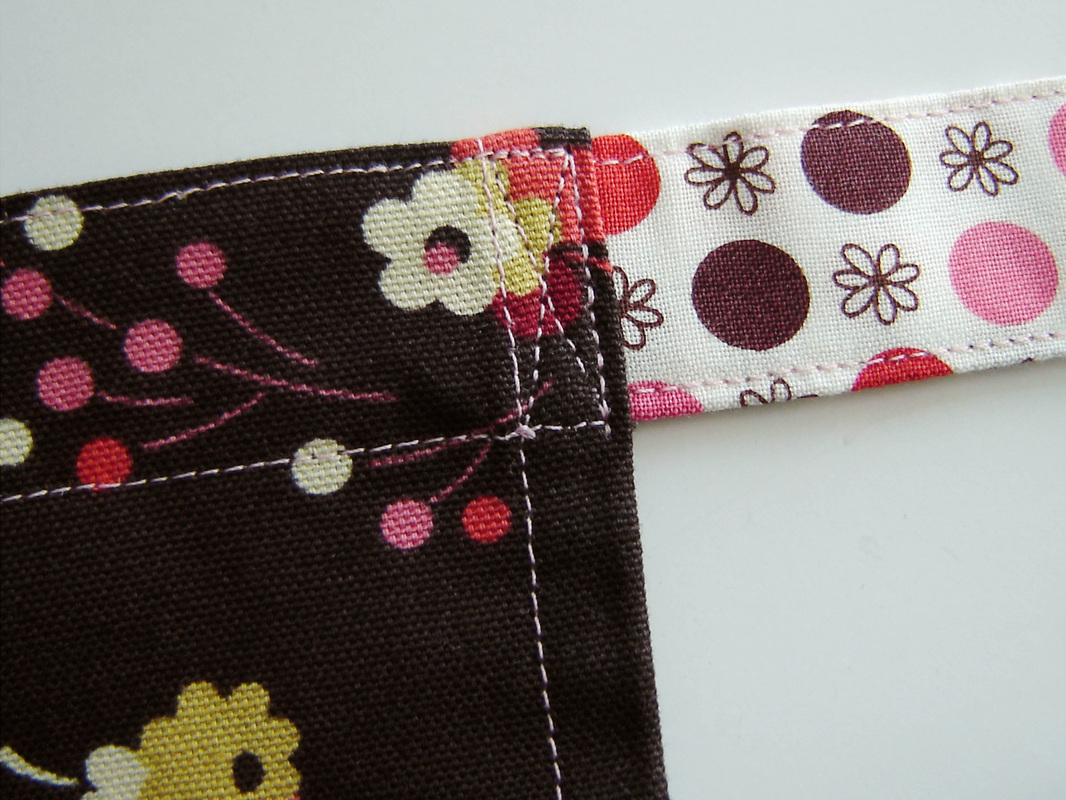
I quilted exactly as she suggested and I really like it, I used the binding directions that was suggested also.  I mentioned earlier, this is such a great method for this project.  In the detail shots below you can see a better example of my mitered corners, good and bad, which I machine stitched instead of stitching by hand.  They aren't perfect, but heck, they won't be perfect once food and drink gets spilled on them either!
Picture
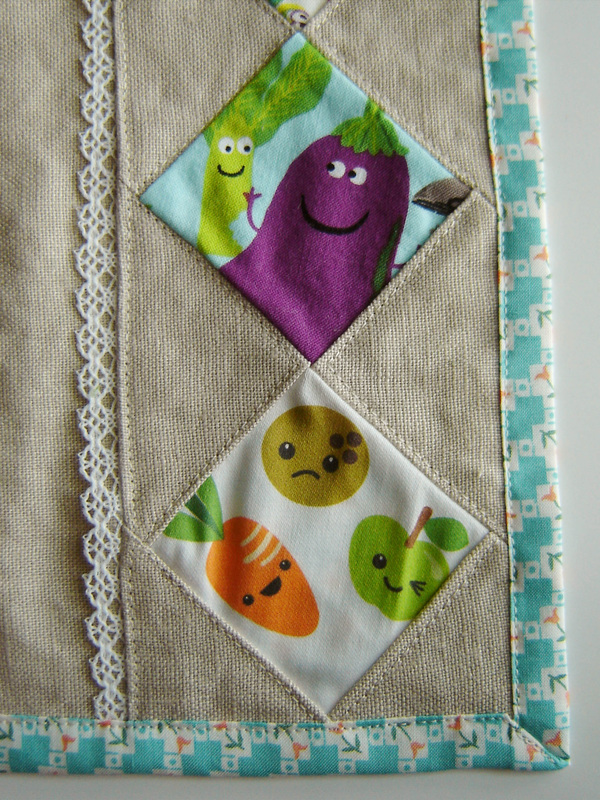
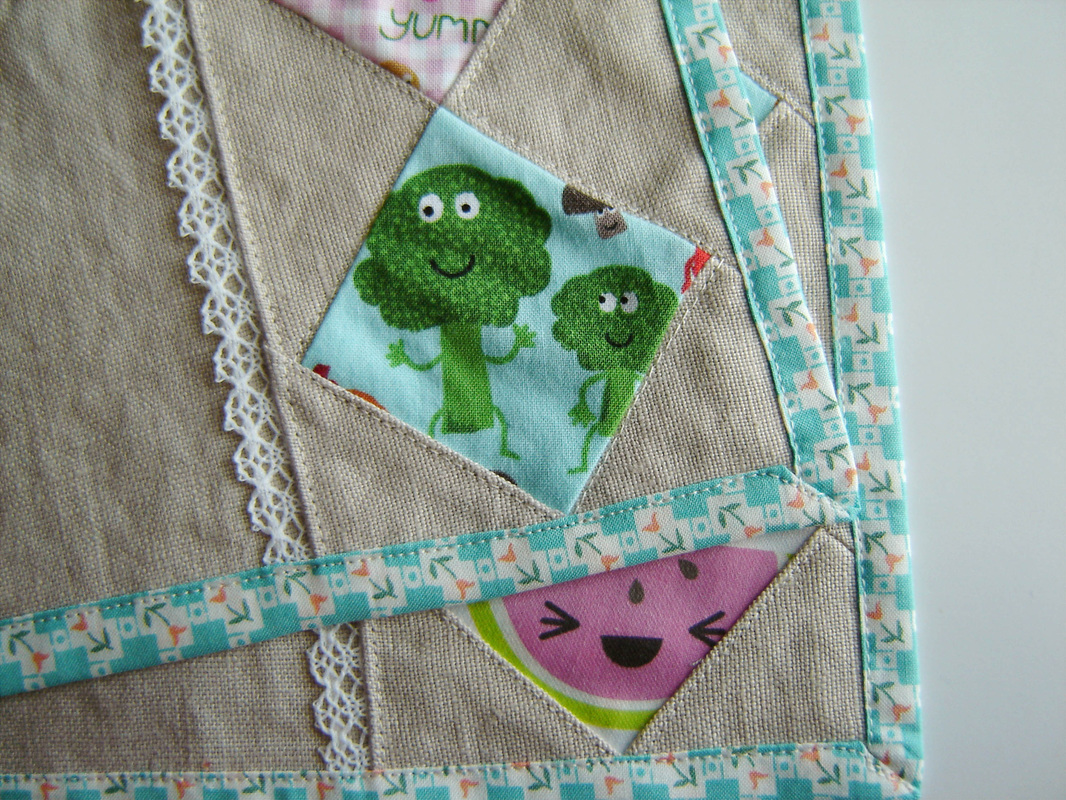
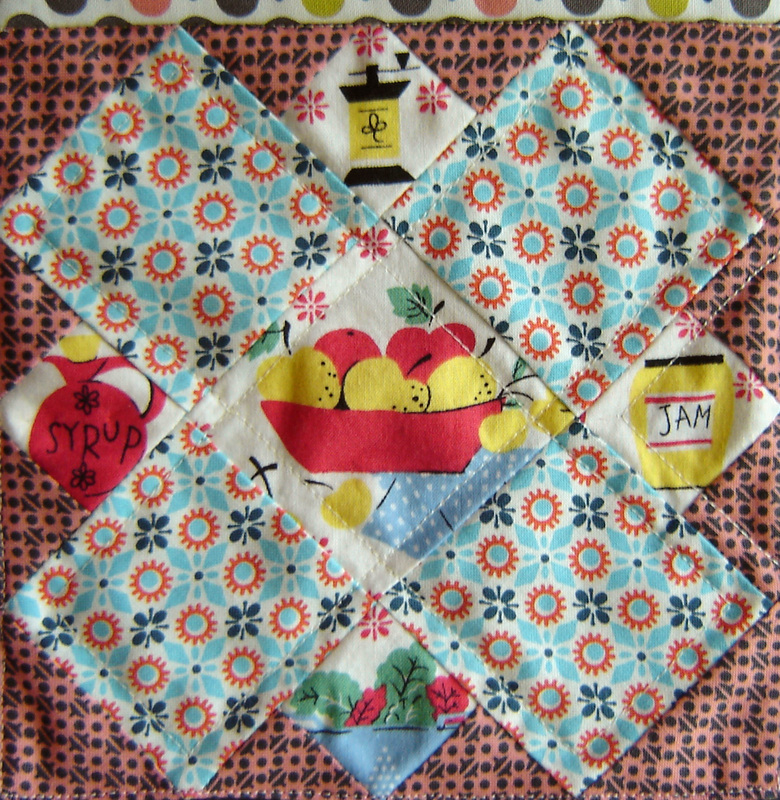
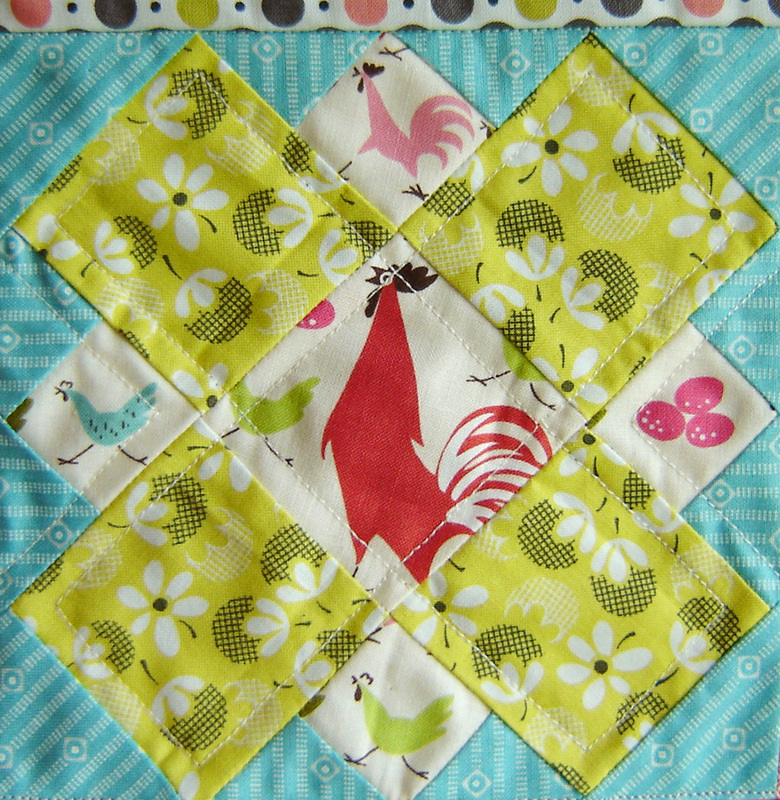
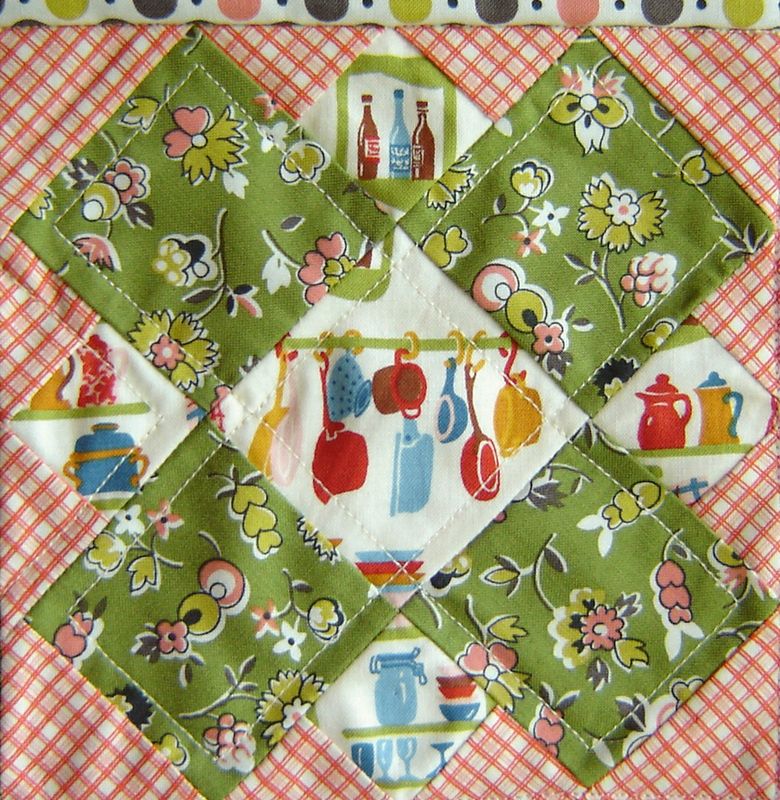
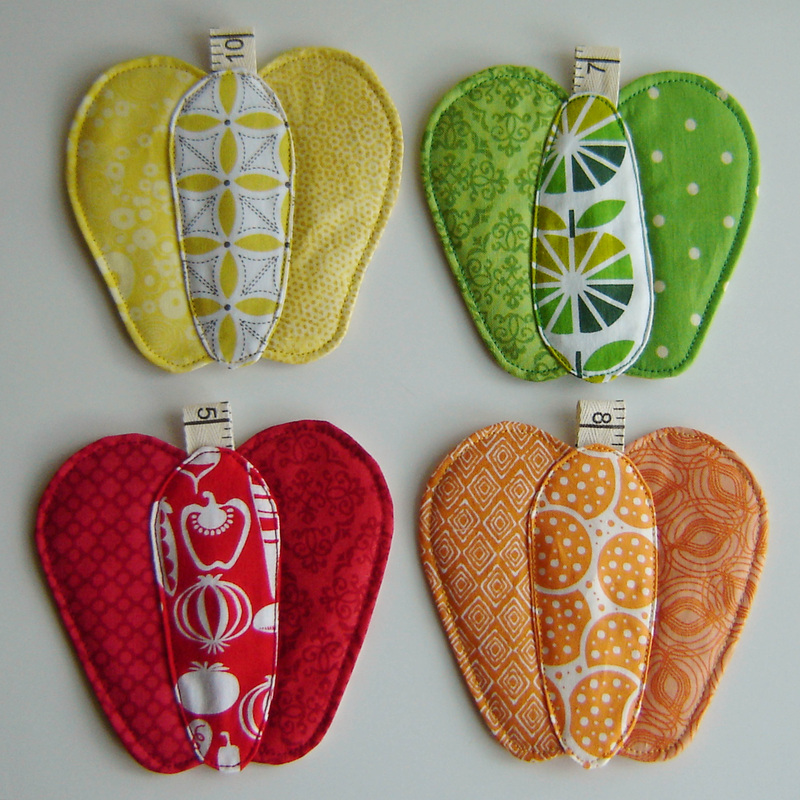
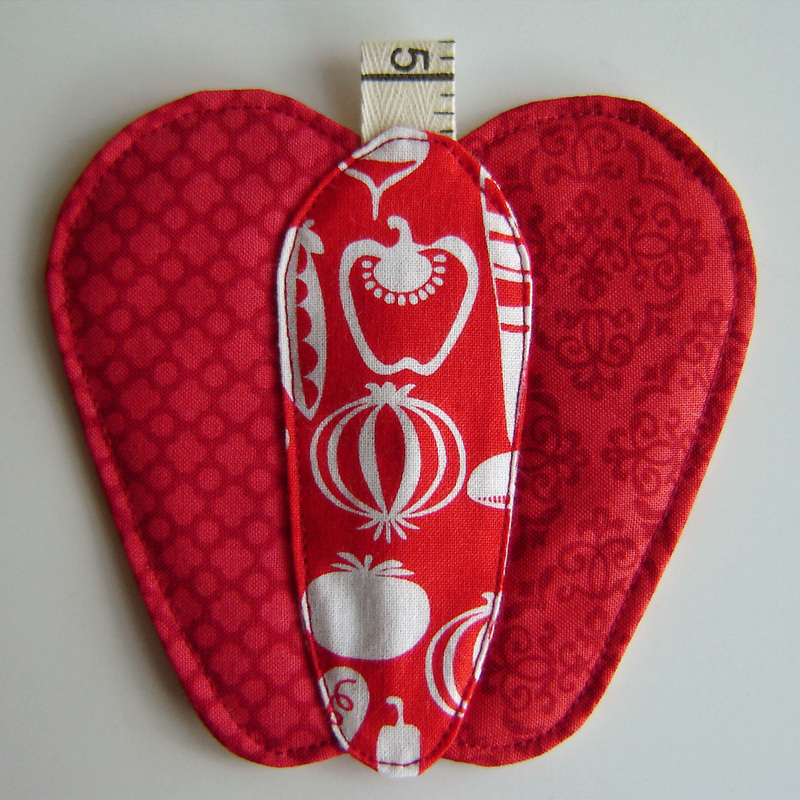
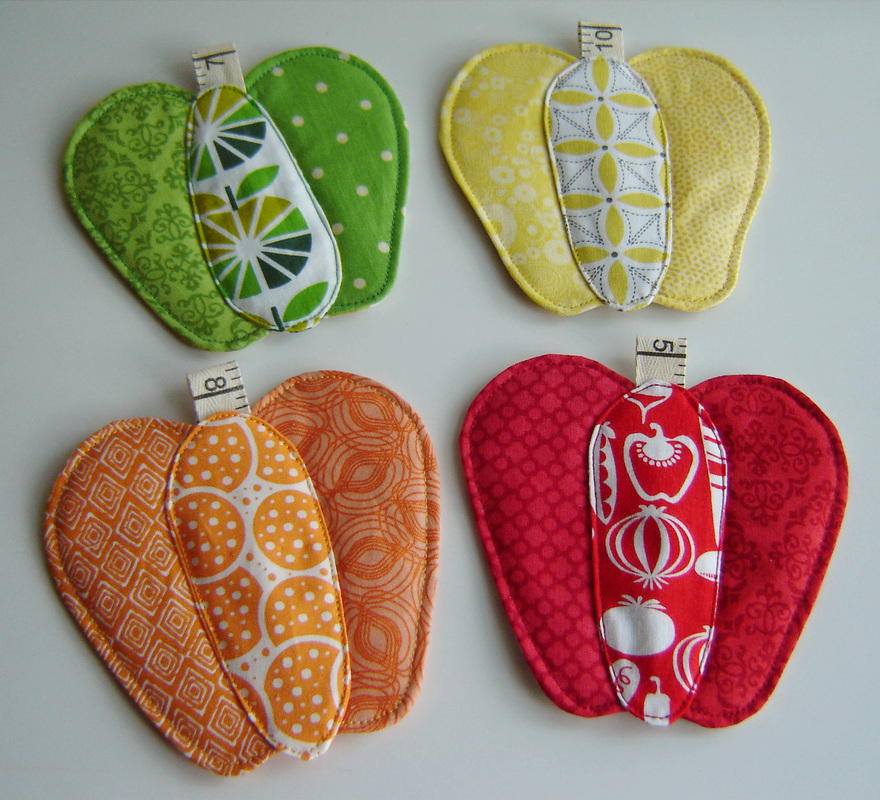
Closing with a few detail shots of my favorite fussy cut blocks.  Love these little vegetable and fruit people, especially broccoli guy!  These are going to look so nice on my dining room table.
Picture
Not a good mitered corner.
Picture
Details of the Sew Along:
Book:  Patchwork, Please! by Ayumi Takahashi
Sew Along: Hosted by LRstitched and A Quilter's Table
Project: Polka Dot Cafe Apron
Flickr Group: http://www.flickr.com/groups/patchworkplease/
Picture
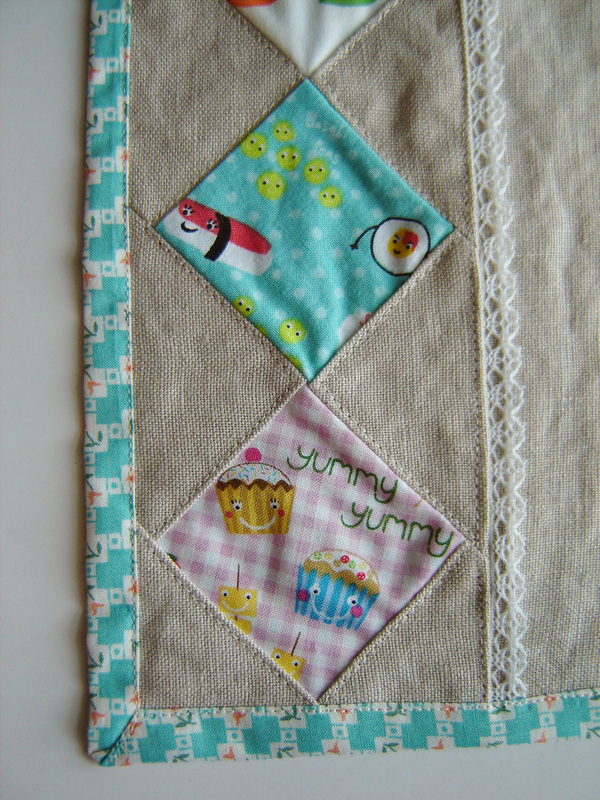
Good mitered corner!
Picture
7 Comments

Zakka 2.0 - Polka Dot Cafe Apron

6/28/2013

6 Comments

 
Picture
Here we are at Week Four of the Zakka 2.0 Sew Along.  This week my project is an ode to Denyse Schmidt, the fabric designer.  The majority of the prints in this jazzy little apron are by Denyse Schmidt, I used three of her fabric lines, and I think they blend so well.  The little bits of "kitchen scenes and chickens" featured in the pocket quilt blocks are various designers, but everything else is by her.  The quilt blocks feature fabric from the Quilter's Quarters sold at JoAnn Fabrics, this fabric was also used as the binding on top of the pocket.  The body of the apron is a home dec/canvas print from the Country Fair line, I've been hoarding this fabric for quite a while.  The straps are from her Flea Market Fancy Legacy line.  See, I told you it was an ode to her!
Picture
I actually made the quilt blocks last week, and instead of using the templates that were in the book, I just measured and used my clear quilter's ruler.  This method worked out great, especially for fussy cutting since I could see through the ruler.  I sewed them all together and then they just sat there staring at me for the majority of the week.  I couldn't decide whether I wanted to make the apron or something else.  Well obviously the apron won out, and I am so glad that I went that route in the end.
Picture
I used a cheapo muslin for the back of the blocks/pocket lining, and did a simple straight line quilting on the pocket.  I did change the way the author suggested finishing up the top binding on the pocket.  I sewed it on the way she suggested, but then she suggested hand stitching it down on the backside (inside of the pocket.)  Well I was way to lazy for that and just stitched in the ditch right at the top of the pocket/binding, thus sealing it on the backside.  If you look closely at the block above you can see my stitching right on the line, or below it.  That was a huge time and sanity saver.
Picture
The book suggested using a twill fabric for the body of the apron, but I wanted to use stash and after a bit of digging, unearthed this home dec fabric and decided to go for it.  Wild and crazy?  Yes, a bit, but I love it, and I feel that the pocket stands out on the dark background fabric.

I am a petite gal, so I chopped off 1" on the bottom of the apron, just to shorten it a bit, which was perfect, thus instead of placing the pocket 2.75" from the bottom edge, I placed it 2" from the bottom edge.  I also created two pockets instead of one, simply by stitching in between two of the blocks.  So the first quilt block is one pocket, and the last two combined are the second pocket.  This way pencils and such won't get lost in a huge open pocket.  You can also see in the photo below the reinforcement stitching that I did on the spot where the ties meet the apron body.  This way I know they won't be coming off.  The book called for you to cut the ties at 34" long, but since I cut them with the width of the fabric, which was around 42", I just left them at that length.  A little extra length never hurt anybody, right?  I don't think so.

I am pleased as punch with this little apron and look forward to using it in the kitchen and if I ever tackle any other craft fairs, I can use it there too!
Picture
Details of the Sew Along:
Book:  Patchwork, Please! by Ayumi Takahashi
Sew Along: Hosted by LRstitched and A Quilter's Table
Project: Polka Dot Cafe Apron
Flickr Group: http://www.flickr.com/groups/patchworkplease/
Picture
6 Comments

Zakka 2.0 - Teabag Pouch

6/21/2013

6 Comments

 
Picture
Week Three of the Zakka Along 2.0!  This week features both a Lettered Tea Cozy and a Teabag Pouch.  I didn't make the tea cozy, but I did take the time to make the teabag pouch, except not.  We do drink tea, both hot and cold, but it isn't a ritual, but rather teabags thrown in a glass jar, so I knew that I didn't want to use the pouch to hold tea, so i decided to use it for sewing supplies!  Originally I thought I would use it to hold my hand sewing needles, but after seeing this version HERE I knew that I would use it for machine needles instead!  I thought it was such a great idea!
Picture
Once I had decided it would be a sewing pouch, I figured, why not use up some of my sewing themed fabric!  I dug through my stash and found a print that featured small sewing items, gathered up a few solid scraps, a scrap of ribbon, a random button, and I was good to go!  This was a quick and super easy project, simple directions and straight forward.  I added the stitching around the outside just to "finish it off" and I like that look, it looks polished and neat.  Now it holds my little cases of sewing machine needles, all organized and tidy in my sewing box.  No more digging around for the different sizes, they are all in one place now.
Picture
Details of the Sew Along:
Book:  Patchwork, Please! by Ayumi Takahashi
Sew Along: Hosted by LRstitched and A Quilter's Table
Project: Teabag Pouch
Flickr Group: http://www.flickr.com/groups/patchworkplease/
Picture
Picture
6 Comments

Zakka 2.0 - Bell Pepper Coasters

6/8/2013

6 Comments

 
Picture
I decided to join in the super fun sew along, Zakka 2.0 that is currently being run by Debbie over at A Quilter's Table and Lindsey over at LRstitched.  The sew along is working through all of the projects in the book, Patchwork, Please! by Ayumi Takahashi.  It started up this week, and is going through each project in the book, in order, one project per week.  Before I start talking about this project, I just want to mention that I love this book.  It is the first in a while that I literally love all the projects and honestly do want to make them all, OK, maybe with the exception of one or two, but even those are super cute, just not very functional for me personally.  So needless to say, I am excited to get started with these projects!
Picture
This week, or first up are the Bell Pepper Coasters.  I think they turned out precious, cute idea, great construction method, super easy and pretty quick.  I turned these four out in an afternoon and honestly the hardest part was choosing the fabric.  Ayumi's instructions called for 5.5" fabric scraps, but I easily fit these onto charm squares, which was great because I have a LOT of charm squares.  I followed all of the instructions with the exception of one, the stem called for a piece of brown felt, which I had, but I wasn't in love with the color, so I opted for a stem of twill tape measure.  I thought it was fitting, especially since they are fabric bell peppers.
Picture
I accidentally cut out one of the centers upside down, thus having to sew it on upside down also, but I think it looks just fine and you probably wouldn't have noticed if I hadn't said anything.  Would you?
Picture
I don't think I will be making every project in the book, at least not in keeping with the sew along, the week for each project deadline is just too stressful for me, but I do plan to make a good bit of the projects and look forward to it.  If you want to follow along, just click on the button below and it will bring you to the Flickr group where you can find so many awesome projects from the book made by others and you can find more information there too!
Picture
6 Comments

Triple Zip - The Fun Continues

2/14/2013

13 Comments

 
Picture
Determined to have a bunch of Birthday and Christmas gifts made and set aside for the following year (to reduce the holiday sewing stress,) I decided to make a lot of Triple Zip Pouches to give this year. Featured here today are the first five I have finished.  I have another six cut out, interfaced and ready to sew.   They won't be finished in time for the Triple Zip Along hosted by A Quilter's Table, but at least they are ready to go!  I think the hard part is going to be deciding who will get what pouch.  They are all so pretty, in my opinion at least!
Picture
Picture
These five went together so quickly, especially when sewing assembly line style.  Once you have made one and understand the process, it really is so easy to construct the rest.  I just love them and am seriously considering keeping one for myself!  I will be adding these to the Triple Zip Along Flickr Pool and if you get a chance, head over and be prepared to be awed by the sheer amount of people who have made the same pouch, but yet they all look so different.  So impressive!  Thanks Debbie for such a great tutorial and such a fun sew along!
Picture
I also wanted to briefly mention that all my zippers were purchased from Zipit, a wonderful etsy shop with great prices and fast shipping, I can not recommend them enough.  Also, all of these pouches were constructed using Pellon interfacing.  Both of these businesses are sponsors of the sew along!
Picture
A Quilter’s Table
13 Comments

In A Few Short Days...

1/25/2013

6 Comments

 
Picture
It begins!  What, you ask?  The Triple Zip Along hosted by Debbie over at A Quilter's Table.  Debbie designed and created this great tutorial for a super cute triple zippered pouch.  I made two pouches right before the Christmas holidays for my son's two teachers Christmas gifts.  I think they turned out too cute. I plan to participate with everyone who has signed up for this fun sew along, I need to make more!  Debbie has created a Flickr group for you to join and follow along.  It will be so neat to see so many variations of this great little pouch.  It really is easy and totally doable, uses scraps of fabric and is so rewarding in the end - you have a great pouch that is the perfect size to tuck right into your purse.  The event runs from January 28, 2013 to February 15, 2013, so gather up your supplies and get ready to sew!  Hope to see you there!
Picture
Picture
Picture
A Quilter’s Table
6 Comments
Forward>>

    Marci Girl

    A feisty mom designing, sewing and blogging her way through everyday life!

    Subscribe
    Follow on Bloglovin
    Picture
    Follow on Bloglovin


    Categories

    All
    2017 Finish A Long
    2018 Finish A Long
    2019 Finish A Long
    Bee Sewcial
    Book Reviews
    Clothing
    Everyday Life
    Giveaways
    Handbags
    Handstitched Class
    Inspirational Projects
    Marci Girl Designs
    Projects
    Quilt Along
    Quilting Bees
    Quilts
    Random Thoughts
    Recipes
    Sew Along
    Sewvivor
    Style Stitches
    Swaps
    The Penny Sampler Class
    Tutorials
    Wip Wednesday


    Happily
    Participating In:

    Picture
    Picture
    Picture
    Picture
    Picture
    Picture

    Picture


    Archives

    January 2020
    November 2019
    October 2019
    July 2019
    April 2019
    March 2019
    February 2019
    January 2019
    December 2018
    October 2018
    August 2018
    July 2018
    June 2018
    May 2018
    April 2018
    March 2018
    February 2018
    January 2018
    December 2017
    November 2017
    October 2017
    September 2017
    August 2017
    July 2017
    June 2017
    May 2017
    April 2017
    March 2017
    February 2017
    January 2017
    April 2016
    March 2016
    February 2016
    January 2016
    September 2015
    July 2015
    October 2014
    September 2014
    August 2014
    July 2014
    June 2014
    May 2014
    April 2014
    March 2014
    February 2014
    January 2014
    November 2013
    October 2013
    September 2013
    August 2013
    July 2013
    June 2013
    May 2013
    April 2013
    March 2013
    February 2013
    January 2013
    November 2012
    October 2012
    September 2012
    August 2012
    July 2012
    June 2012
    May 2012
    April 2012
    March 2012
    January 2012
    December 2011
    November 2011
    October 2011
    September 2011
    August 2011
    July 2011
    June 2011
    May 2011
    April 2011
    March 2011
    February 2011
    January 2011
    December 2010
    November 2010
    September 2010
    August 2010
    July 2010
    June 2010
    May 2010
    April 2010
    March 2010
    February 2010

    Picture

    RSS Feed

Powered by Create your own unique website with customizable templates.