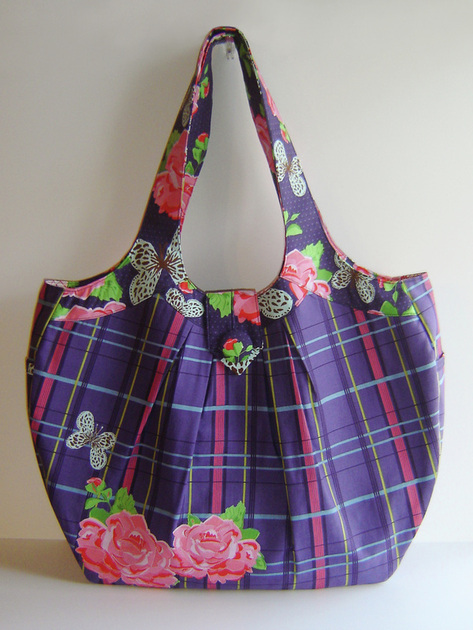
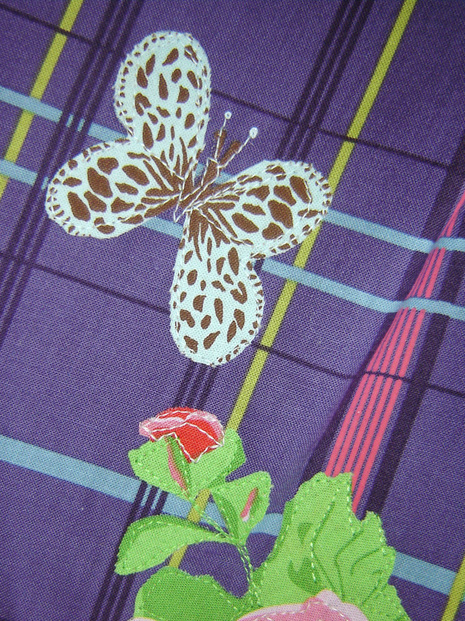
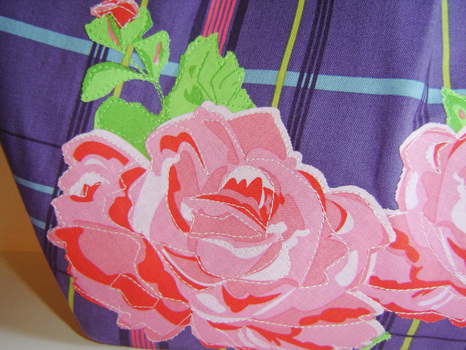
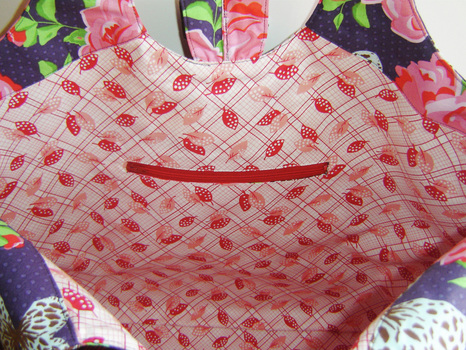
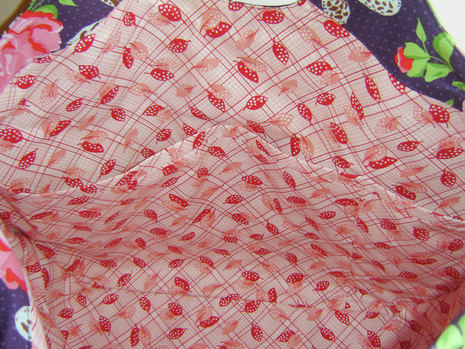
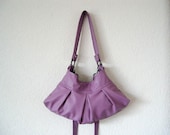
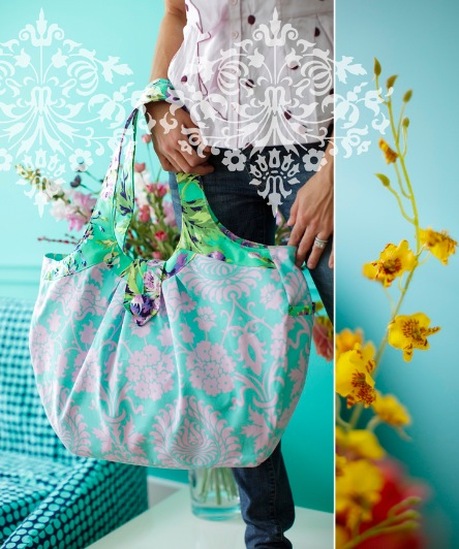
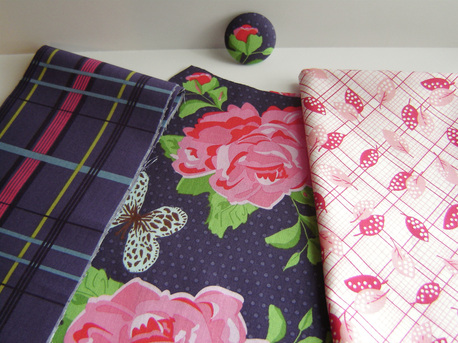
Here it is, my finished Cosmo Bag for January's Style Stitches challenge. Honestly, I finished this baby about a week ago, but rain and gloom kept me from taking photos of it. I am really pleased with the finished results, and think she really turned out quite pretty. I made a few changes to this bag, one being the flower and butterfly applique in the left bottom corner of the bag. Bari J Ackerman is the designer of the fabric, and I also was inspired by Bari J to create the applique with free form stitching all over the flowers and enhancing the butterfly details. I think the applique really enhanced this bag and gave it a little something extra! I had never done anything like this before, and it was hard to "let go" and do something free form, but I think I accomplished the task without being too structured.
What else did I change on this pattern, you ask? Well, I didn't want all those floppy interior pockets, so on one side I put in a zippered pocket, and on the other interior side with the pockets, I created three pocket spaces instead of two. I also changed the side dimensions on this pattern. It seemed like everyone's complaint was that the bag was too large, so instead of changing the whole bag size, I simply took off some of the width of this bag. The sides and bottom at the widest point measure (on the pattern) about 6", I knocked off a few inches, so the finished sides and bottom are only about 4" wide. This decreased the space in the interior of the bag a lot, which is what I wanted. I also added one layer of plastic canvas to the bottom of the bag for added structure, I slipped it in between the outside and interior of the bag before the two were sewn together. This gave the bag a little more structure, and it is able to stand on its own, with the exception of the handles!
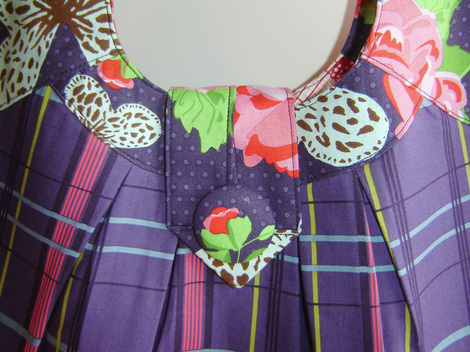
Amy Butler labeled this project as "easy" in her book, well this wasn't my definition of "easy" at all. It wasn't hard, but it should have been an intermediate project, I hate to think about a brand new sewer trying a project like this for the first time - scary! The handles were down right aggravating, and the lack of photos in this book (or diagrams) made it harder than it needs to be. Now that I have finished one, the second would be easy, I am just not sure if I need to make a second one! Oh, and next time I would definitely interface the fabric that is used to make the button, so that the "silver" button doesn't show through the fabric, like it does now. All of that being said, I did enjoy constructing it, and look forward to making the rest of the items in her book!
What else did I change on this pattern, you ask? Well, I didn't want all those floppy interior pockets, so on one side I put in a zippered pocket, and on the other interior side with the pockets, I created three pocket spaces instead of two. I also changed the side dimensions on this pattern. It seemed like everyone's complaint was that the bag was too large, so instead of changing the whole bag size, I simply took off some of the width of this bag. The sides and bottom at the widest point measure (on the pattern) about 6", I knocked off a few inches, so the finished sides and bottom are only about 4" wide. This decreased the space in the interior of the bag a lot, which is what I wanted. I also added one layer of plastic canvas to the bottom of the bag for added structure, I slipped it in between the outside and interior of the bag before the two were sewn together. This gave the bag a little more structure, and it is able to stand on its own, with the exception of the handles!
Amy Butler labeled this project as "easy" in her book, well this wasn't my definition of "easy" at all. It wasn't hard, but it should have been an intermediate project, I hate to think about a brand new sewer trying a project like this for the first time - scary! The handles were down right aggravating, and the lack of photos in this book (or diagrams) made it harder than it needs to be. Now that I have finished one, the second would be easy, I am just not sure if I need to make a second one! Oh, and next time I would definitely interface the fabric that is used to make the button, so that the "silver" button doesn't show through the fabric, like it does now. All of that being said, I did enjoy constructing it, and look forward to making the rest of the items in her book!


 RSS Feed
